Recover Photos from Recycle Bin in Windows
Deleted photos can often be restored from the Recycle Bin if it has not been emptied. If the Recycle Bin is empty, scan the original drive or memory card before saving new files.
Understand the problem
Photos may come from the Pictures folder, desktop, an SD card, phone import folder, or external drive. Recovery works best when the original storage is not overwritten.
- Confirm the exact disk, partition, drive letter, file system, and capacity before changing anything.
- Back up or recover important files before formatting, deleting, converting, resizing, or recreating partitions.
- For boot-related changes, check BIOS or UEFI mode, boot order, and system partition status before editing disk layout.
Use Windows built-in tools
Start with normal restore options before scanning the drive.
- Open the Recycle Bin and sort by deletion date or original location.
- Select the photos, right-click them, and choose Restore.
- If the Recycle Bin is empty, check File History, OneDrive, Google Drive, or camera backups.
- If photos were deleted from an SD card or external drive, stop using that device immediately.
Use Qiling tools for guided steps
 Deep Data Recovery
Scan the original photo location and recover pictures to a different drive.
Function. Recover lost files with Fast Scan
Step 1. Stop using the Pictures folder, SD card, external drive, or original photo location. Install Deep Data Recovery on another drive so new files do not overwrite deleted data.
Step 2. Launch Deep Data Recovery and choose Fast Scan first. This mode quickly checks recently deleted files and common file records.
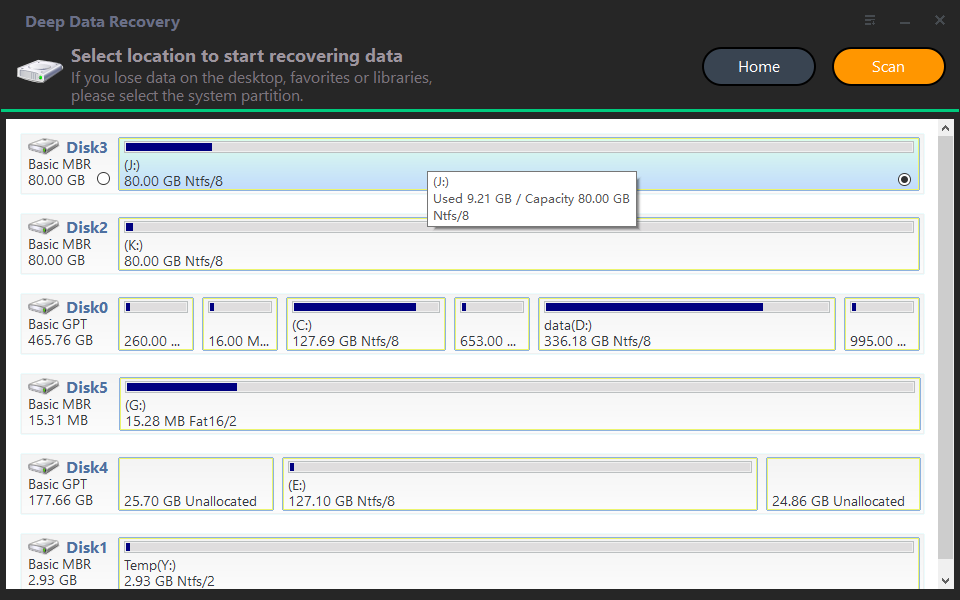
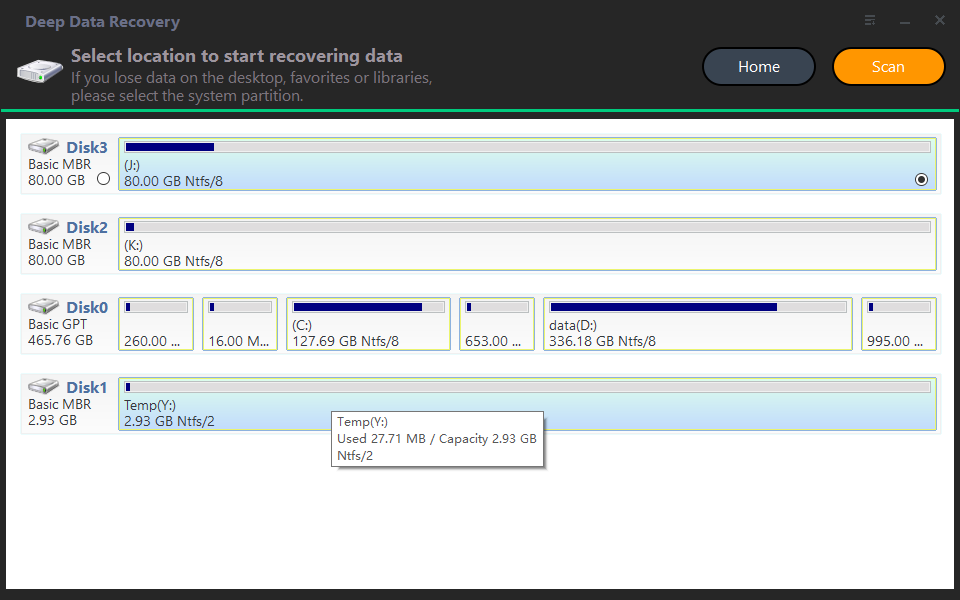
Step 3. Select the Pictures folder, SD card, external drive, or original photo location as the location to scan. If you are recovering from the Recycle Bin, scan the original drive where the files were stored.
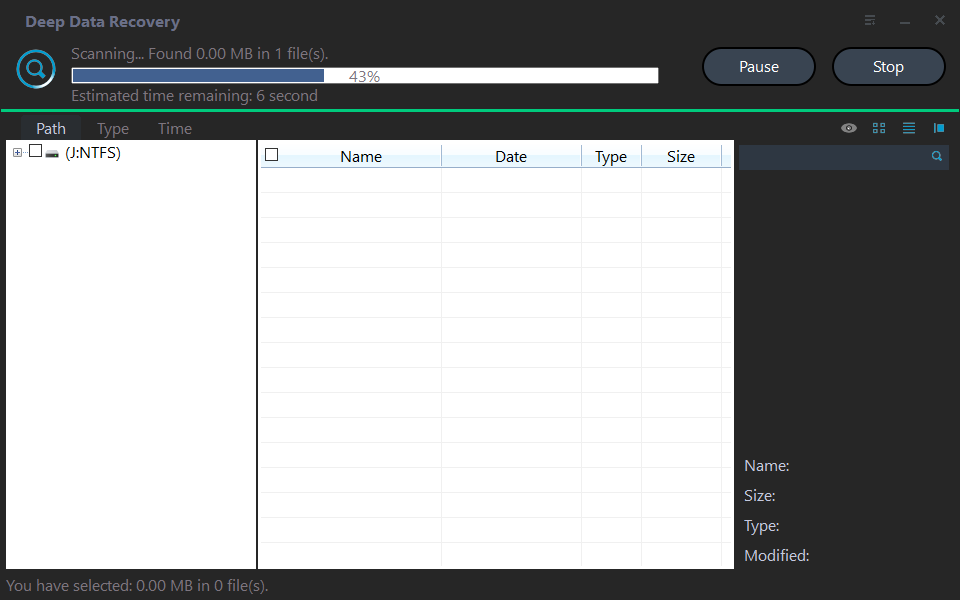
Step 4. Wait for the scan to finish. Use file type, name, path, and date filters to narrow the results.
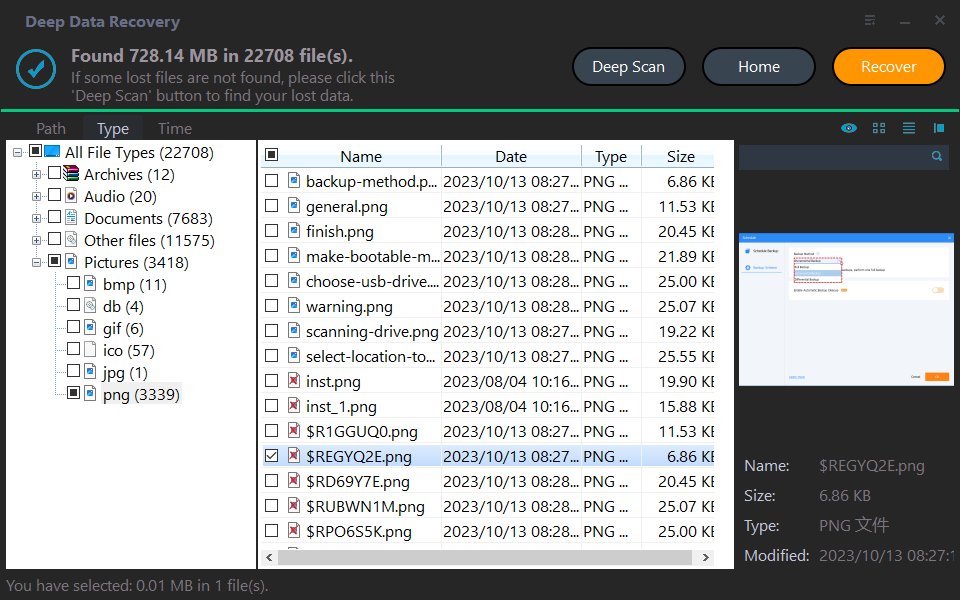
Step 5. Preview recoverable files, select the items you need, and recover them to another disk or external drive.
Step 6. Open several recovered files to confirm they are usable. If important files are missing, run a deeper scan before writing new data to the source drive.
Check the result
Open several recovered photos and check image size, preview quality, and folder names before deleting temporary recovery results.
Related Articles
-
Recover Deleted Photos from SD Card
Recover camera photos from memory cards after deletion or formatting. -
Recover Deleted Files
Recover deleted files from Windows drives and removable devices.
Products
Articles & Tutorials
- Data Recovery
- Data Backup
- File Recovery
- File Backup
- File synchronize
- System Backup and Restore
- Disk and Partition Clone
- Technical articles
- Disk Master Help
- Windows Deleted File and Disk Recovery Tutorials
- Windows File and Data Recovery Tutorials
- More Windows Tutorials for Install, Security, Files, and PC Tips
- Windows Boot, Repair, and Recovery Environment Tutorials
- Windows Backup Tutorials
- Windows Restore Tutorials
- Windows Clone and Migration Tutorials
- Windows Server Backup, Recovery, and Management Tutorials
- Windows Disk, Partition, and Storage Management Tutorials