What Is I/O Device Error and How to Fix It on Windows
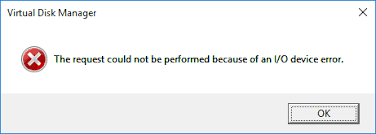
You may encounter the disconcerting message "The request could not be performed because of an I/O device error" while trying to access, initialize, or boot a drive, indicating that your computer is having trouble reading or writing to the drive. To rectify this issue and protect your data, our comprehensive guide is here to provide the answers you seek.
What Is I/O Device Error
When Windows has trouble reading a storage drive, it may display an I/O device error message, which can occur during disk initialization, system booting, or when creating a backup, and can affect USB drives, HDDs, or SSDs.
This error tends to occur when using third-party applications, such as photo editors or download managers, and is often accompanied by an error code, like "I/O Device Error 1117."
The root cause of the I/O device error is often a hardware malfunction, which can be due to damaged connector ports, cables, or even a faulty storage drive.
The input-output error is often caused by factors such as incorrect or incomplete data entry, software bugs, or hardware malfunctions. Additionally, user errors, such as misusing the system or entering invalid data, can also contribute to the issue.
- Improperly connected storage drive: Windows may struggle to interact with a storage drive that is poorly connected or physically damaged, even if it detects the drive, potentially due to issues such as physical hard drive damage.
- Damaged ports or cables: Damaged connector cables or ports can cause Windows to struggle with reading or writing to an external hard drive, even if it's detected, often due to the fragile nature of cables in external HDDs.
- Write-protected SD card: Low-level formatting a write-protected SD card can cause an I/O device error, as the card's protection mechanism prevents any writes to the card, making the formatting process fail.
- Incompatible, missing, or corrupted drivers: When a storage drive is connected to Windows, the operating system typically automatically detects and installs the necessary drivers. However, if the drivers are faulty or incompatible, Windows may struggle to communicate with the drive, resulting in an I/O device error.
- Physical damage: A physically damaged storage drive can cause problems for Windows in reading it, due to normal wear and tear, heat, water, or physical shock. In such cases, it's recommended to stop using the drive and seek professional data recovery assistance to recover any valuable data.
Resolve the I/O Device Error on Windows
To fix an I/O device error, first try running a disk check and a disk cleanup to identify and remove any corrupted files. If the issue persists, try running a System File Checker (SFC) scan to replace any corrupted system files. If the error is caused by a faulty driver, update your drivers or roll back to a previous version. If the issue is hardware-related, try running a disk diagnostic test or replacing the faulty component.
Fix 1: Restart the Computer
Often, a simple restart can resolve even the most stubborn errors, so try initiating a system restart before exploring other solutions.
After rebooting, attempt to access your drive and perform the same operation that initially triggered the I/O device error.
If the error persists, proceed with the subsequent fixes.
Fix 2: Verify Cables and Ports
Defective cables and ports are a common cause of I/O device errors, but they can be easily fixed by replacing the cable or using an alternative port on your PC.
Here are key checks to ensure the functionality of cables and ports: Inspect the cable for any visible damage, frays, or cuts. Verify that all connectors are securely attached and not loose.
📍 Inspect cables for any signs of damage, such as peeling, stretching, or unusual bends.
📍 Reconnect SATA or USB cables, making sure they fit snugly into their respective ports, and clean off any accumulated dust or debris from the cables and ports.
📍 When using an external hard drive or USB, connect it directly to the motherboard's USB ports instead of the ones located on the PC cabinet.
📍 Try swapping cables and connecting the drives to another working computer to see if the problem continues. If they work fine, the issue is probably with the original computer's software setup.
Fix 3: Update the Driver
Outdated drivers can cause connectivity issues between the storage drive and computer. Windows usually handles automatic updates, but sometimes manual intervention is needed to update specific drivers.
To update your storage drive's drivers, follow these steps:
1. To open the Device Manager, press the Windows Key + R, type "devmgmt.msc" in the Run text box, and press Enter.
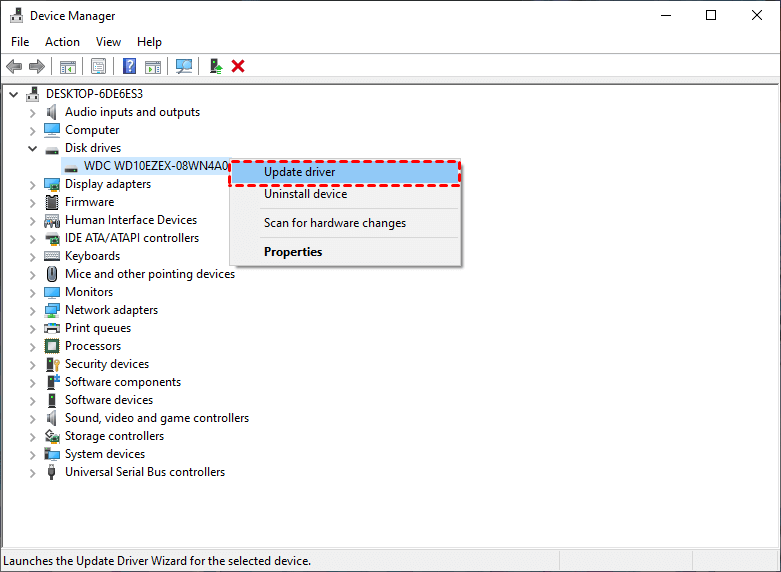
2. In the Device Manager, expand the Disk Drives menu.
3. Right-click on the storage device displaying the I/O Device Error and select "Update driver".
4. Choose "Search automatically for drivers."
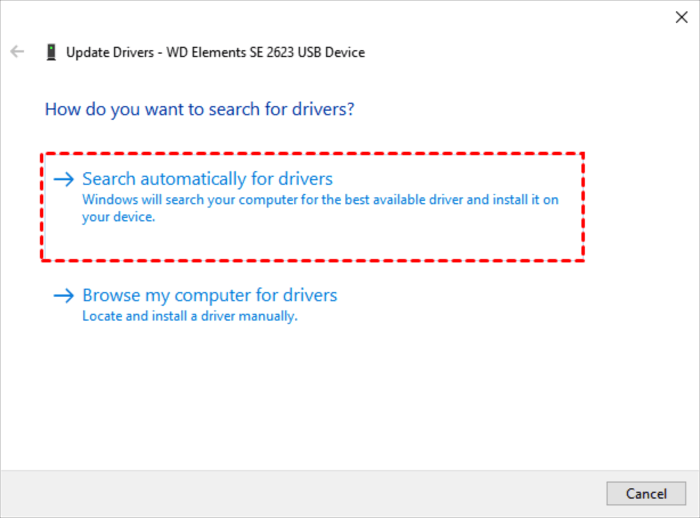
5. Windows will automatically download and install the latest drivers. Once the process is complete, you can reboot your PC.
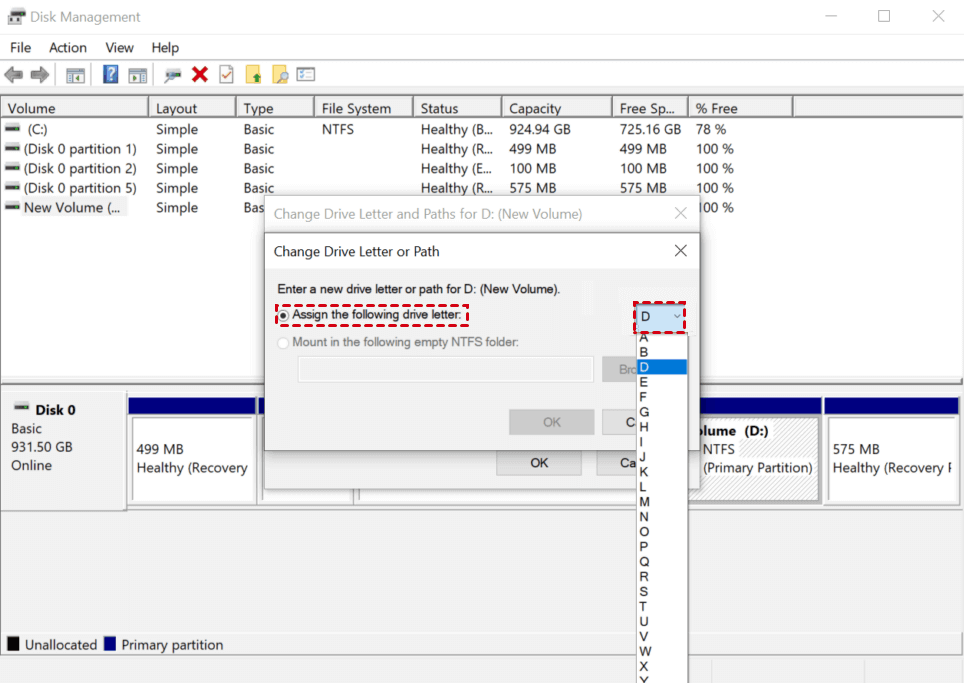
Fix 4: Alter the Drive Letter
If you're experiencing an I/O device error on your USB drive or external HDD, it may be due to missing or conflicting drive letters. To resolve this, you can use the Disk Management utility in Windows to assign or modify a drive letter, ensuring each drive connected to your PC has a unique letter. This can help resolve the I/O device error and get your USB drive or external HDD functioning properly again.
1. To access disk management, type "disk management" in Windows Search (Windows Key + S) and select "Create and manage hard disk partitions" from the results.
2. Right-click on the drive showing the I/O error and select "Change Drive Letter and Paths".
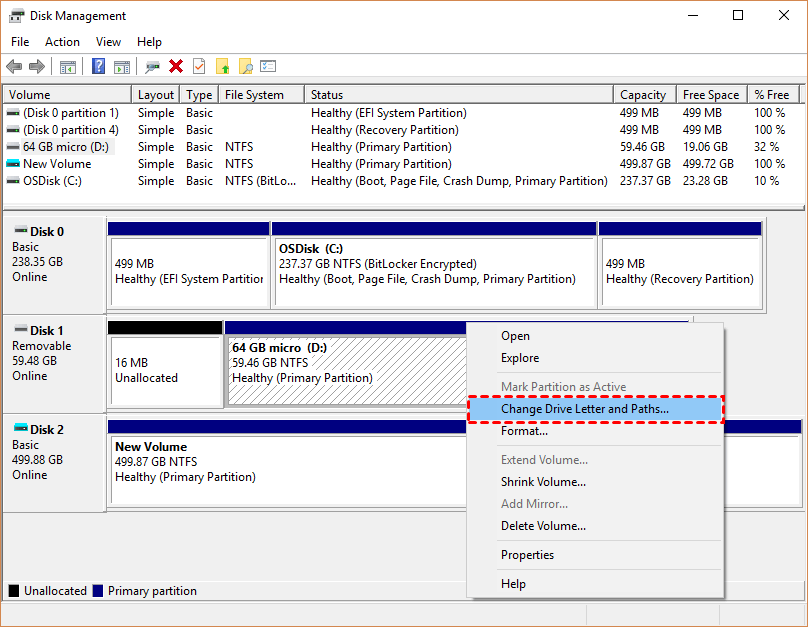
3. Click on "Change."
4. To assign a drive letter to a drive, click on the dropdown menu next to "Assign the following drive letter" and select the desired drive letter. Then, click on "OK" to confirm the assignment.
Fix 5: Execute CHKDSK
CHKDSK is a command-CHKDSK is a built-in diagnostic utility within Windows that identifies and fixes common problems on your storage drive, including bad sectors on an external hard drive, by scanning the drive for errors and repairing any issues it finds.
Here's the process for running CHKDSK:
1. In Windows, type "cmd" in the search bar, right-click on Command Prompt and select "Run as administrator".
2. To run the chkdsk command on a specific disk, open Command Prompt, type "chkdsk g: /f/r /x" (replace "g" with the drive letter of the disk you want to scan), and press Enter. This command will scan the disk for errors, fix any issues it finds, and display a report of the scan results.
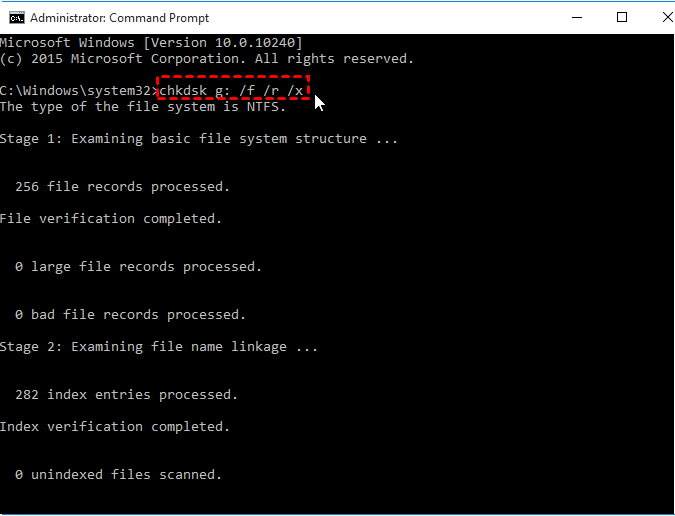
3. Let CHKDSK complete its scan, then restart your computer.
Recovering Data From a Storage Device with Device Error
When you encounter an SSD I/O device error, it's crucial to protect your data. If your drive is visible in Windows Disk Management with its correct storage capacity, there's still hope for data recovery.
We will use Deep Data Recovery, a user-friendly and advanced data recovery algorithm, for data recovery. It is compatible with various storage drives and common file systems, including RAW drives without a file system.
Key features of Deep Data Recovery include:
- Quick and deep scanning methods for comprehensive data retrieval.
- Recovery of diverse file types, such as Word documents, Excel spreadsheets,photo recovery, audio files, videos, emails, and more.
- Preservation of original file attributes, including path, filename, format, and quality.
- High success rate and rapid recovery, whether dealing with deleted, formatted, virus-infected, or other scenarios.
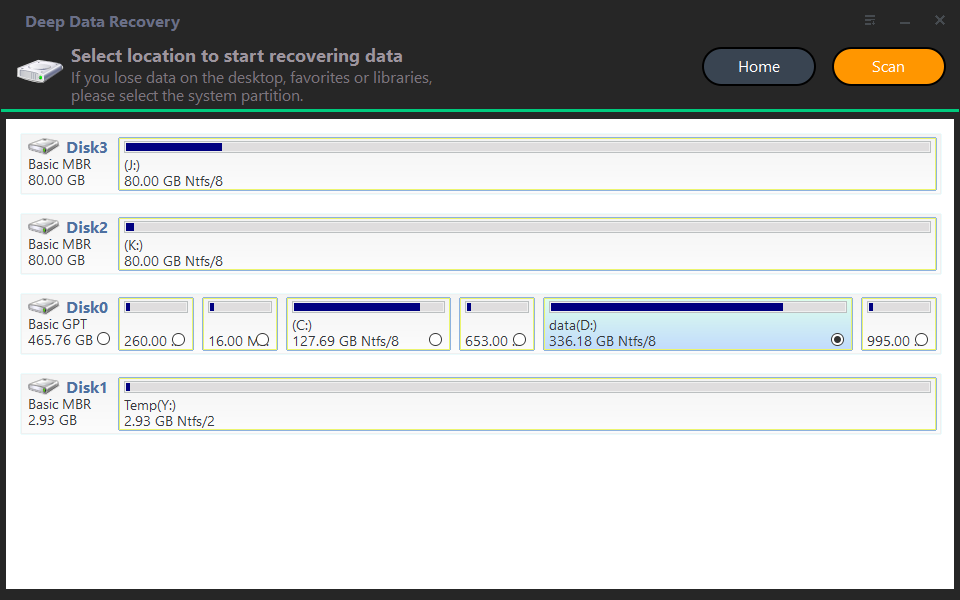
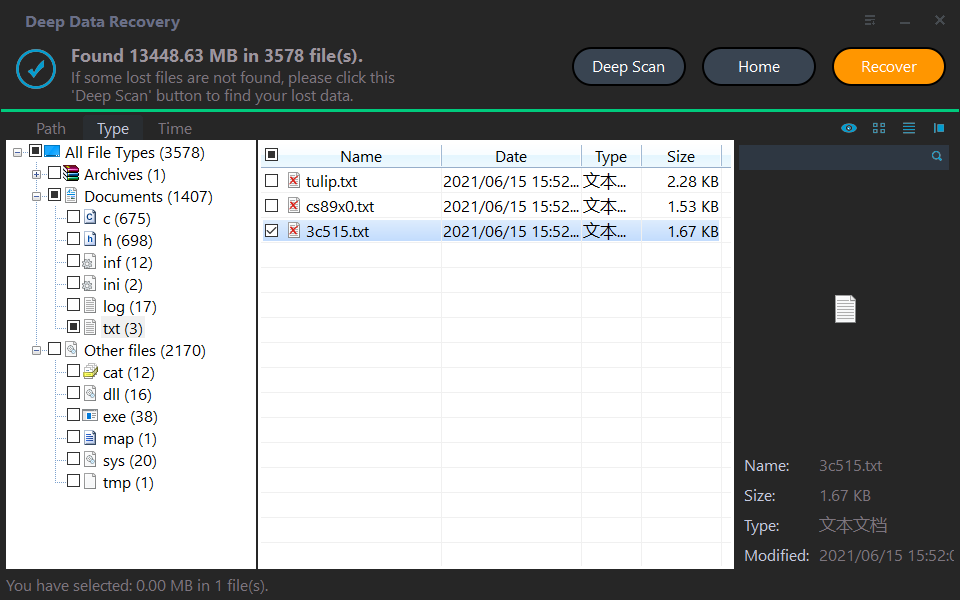
Step 1: Install and launch Deep Data Recovery on your Windows PC, then hover over the desired device and click Scan to initiate the scan.
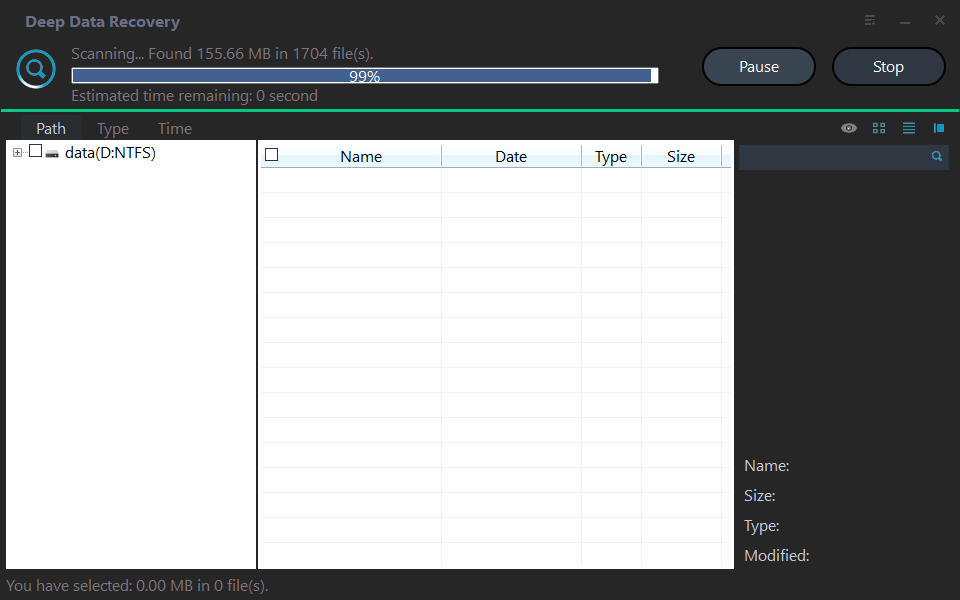
Step 2: The software will run both Quick Scan and Deep Scan methods, displaying all discovered files on the selected disk, allowing you to filter and preview them.
Step 3: Choose the deleted or lost files on the drive, click "Recover", and select a new location for the recovered files, avoiding the original location.
Conclusion
The I/O device error is usually a manageable issue, with various solutions available, including checking for loose connections, updating drivers, running a disk check, and using the built-in Windows troubleshooter, among others.
Regular data backups on both local drives and cloud storage provide comprehensive data protection, allowing for easy restoration of files in case of data loss.
Related Articles
- Fix External Hard Drive Not Formatted Error without Data Loss
Receive the "external hard drive not formatted" error when you try to access or open it? Don't worry about it. This article will tell you the possible reasons and how to fix it without losing data. - M.2 Drive Not Showing up in BIOS or Disk Management? Fixed!
M.2 drive not showing up in BIOS or Disk Management? Get corresponding fixes to fix them and get your data back from M.2 SSD quickly. - [2022 Tutorial] How to Recover Formatted SD Card on Windows & Mac
If you've accidentally formatted your SD card and lost all your saved files, don't panic! First, stop using the card to prevent any further data loss. Then, turn to a reliable formatted SD card recovery tool, such as Qiling SD card recovery software, to help you recover your files in just 3 easy steps. - Ultimate Guide on SD Card Recovery in 2022
SD cards are widely used because of their high data transmission speed and hot-swappable features, which are accompanied by many data loss problems. If you accidentally lose files on your SD card, do not worry; you can use several recovery methods and SD recovery software to help recover deleted files from your SD card. - How to Recover Deleted Sticky Notes Windows 10/7/8/Vista
If you're having trouble finding the Sticky Notes folder in Windows 10, or if you've accidentally deleted your Sticky Notes, don't worry - you can recover them! Even if you've reset your computer to factory settings, this guide will show you how to recover your deleted or lost Sticky Notes on your Windows PC. - How to Recover Deleted Videos from Webcam in Computer
If you've accidentally deleted webcam videos, are experiencing issues with your webcam not working, or need to reinstall it, don't worry - there are solutions available. To recover deleted webcam videos, you can try using data recovery software or checking your computer's event logs for any recorded footage.