Fix Windows File Recovery Failed to Create Destination Folder
Windows File Recovery may fail to create the destination folder when the path is invalid, the destination lacks permission, the drive is full, or the source and destination are the same location.
Understand the problem
The recovery destination must be different from the source drive. Saving recovered files back to the damaged or deleted-file drive can overwrite data you still need.
- Confirm the target disk, partition, drive letter, file system, and capacity before changing anything.
- Back up or recover important files before formatting, deleting, resizing, converting, or reinstalling Windows.
- For boot-related repairs, check BIOS or UEFI mode, boot order, and disk style before editing system partitions.
Use Windows built-in tools
Check the destination before rerunning recovery.
- Create a simple folder such as D:\RecoveredFiles on another drive.
- Run Command Prompt as administrator.
- Confirm the destination drive has enough free space.
- Avoid special characters, very long paths, or protected system folders.
- If the command remains unclear, use a visual recovery tool.
Use Qiling tools for guided steps
 Deep Data Recovery
Recover files to a safe destination with a visual drive picker instead of command-only paths.
Function. Recover files with Fast Scan
Step 1. Stop writing new data to the original drive that lost files. Install Deep Data Recovery on another drive if possible.
Step 2. Launch Deep Data Recovery and choose Fast Scan first. Fast Scan helps find recently deleted files before running deeper recovery.
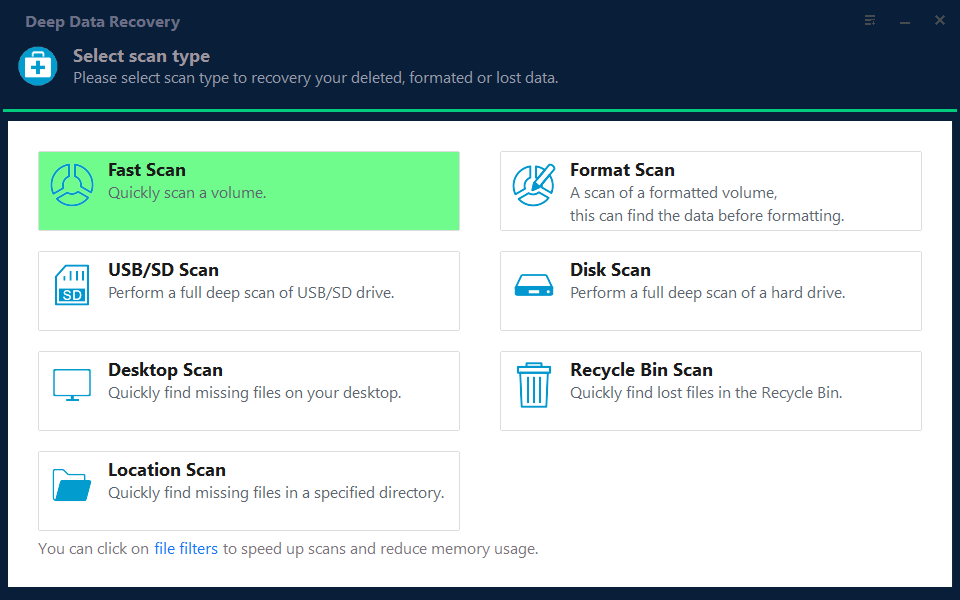
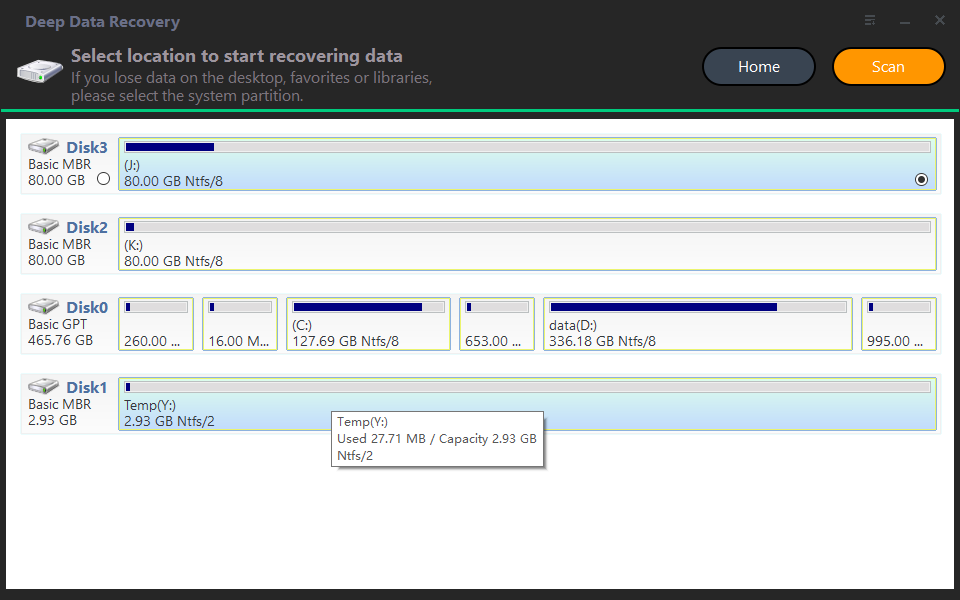
Step 3. Select the original drive that lost files as the scan location. If the original folder is missing, scan the whole partition where it was stored.
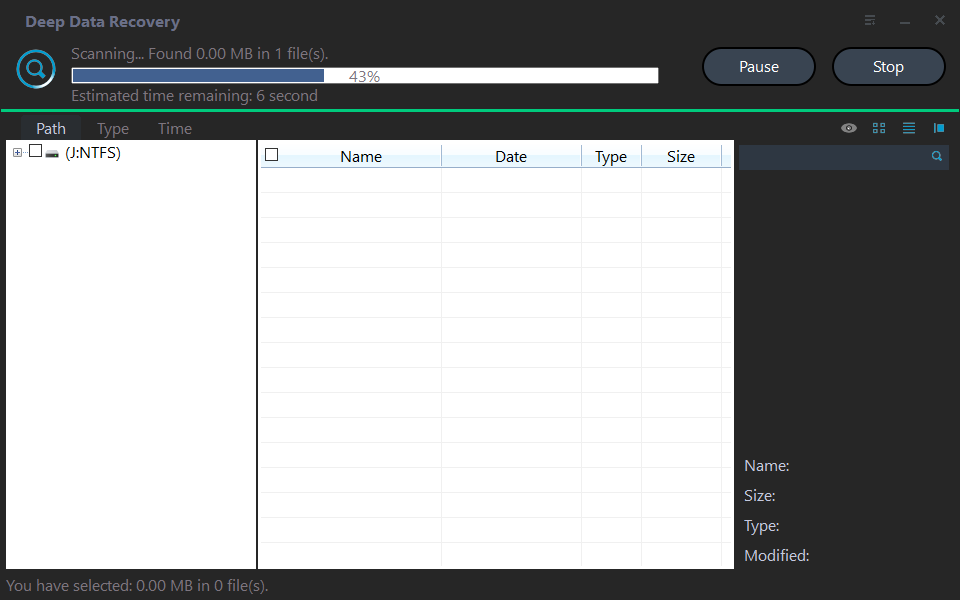
Step 4. Wait for the scan to complete. Use file type, name, date, and path filters to narrow the results.
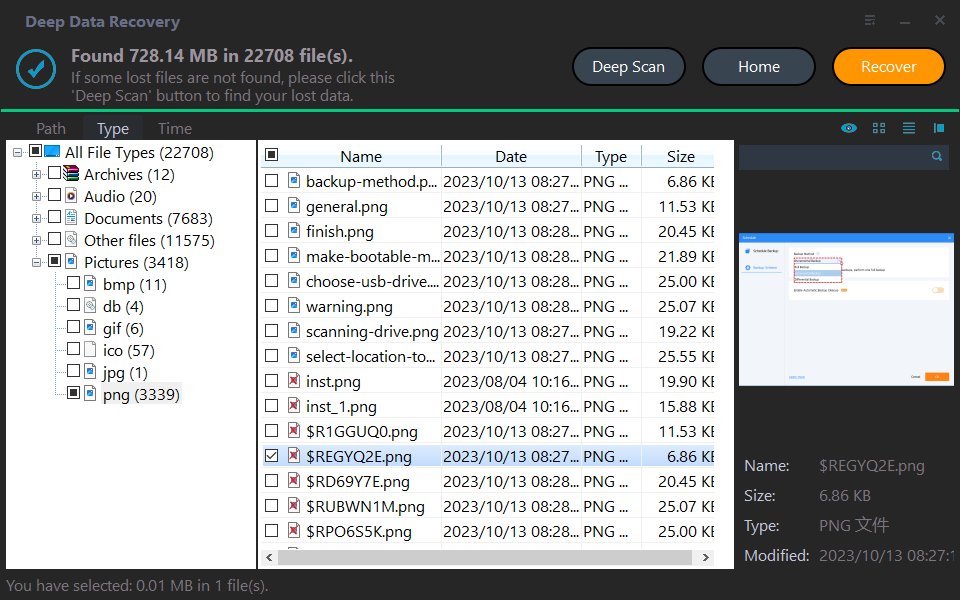
Step 5. Preview the files, select the items you need, and recover them to another disk or external drive.
Check the result
Open the destination folder and test several recovered files. Keep the recovered data on a different drive until the source disk is repaired or replaced.
Related Articles
- Recover Deleted Files
Recover deleted files from a Windows drive using safer destination choices. - Convert RAW to NTFS Without Losing Data
Recover files first when a drive becomes RAW or inaccessible. - How to Use Windows File Recovery
Use Windows File Recovery by choosing source, destination, mode, filters, and safer recovery alternatives.
Products
Articles & Tutorials
- Data Recovery
- Data Backup
- File Recovery
- File Backup
- File synchronize
- System Backup and Restore
- Disk and Partition Clone
- Technical articles
- Disk Master Help
- Windows Deleted File and Disk Recovery Tutorials
- Windows File and Data Recovery Tutorials
- More Windows Tutorials for Install, Security, Files, and PC Tips
- Windows Boot, Repair, and Recovery Environment Tutorials
- Windows Backup Tutorials
- Windows Restore Tutorials
- Windows Clone and Migration Tutorials
- Windows Server Backup, Recovery, and Management Tutorials
- Windows Disk, Partition, and Storage Management Tutorials