Convert FAT32 to NTFS with Disk Management
FAT32 or NTFS: which one should you use?
FAT32 is compatible with many devices, but it cannot store a single file larger than 4GB. NTFS supports large files, permissions, compression, and better Windows reliability. If the drive is mainly used on Windows, NTFS is usually better.
Method 1. Format FAT32 to NTFS in Disk Management
Disk Management changes FAT32 to NTFS by formatting, so back up files first.
Step 1. Open Disk Management.
Step 2. Right-click the FAT32 partition and choose Format.
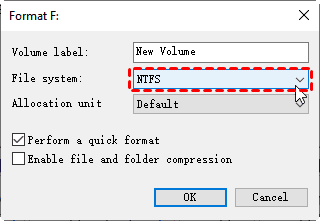
Step 3. Select NTFS, enter a volume label, and keep quick format checked if the disk is healthy.
Step 4. Click OK and wait until formatting finishes.
Method 2. Convert FAT32 to NTFS with CMD
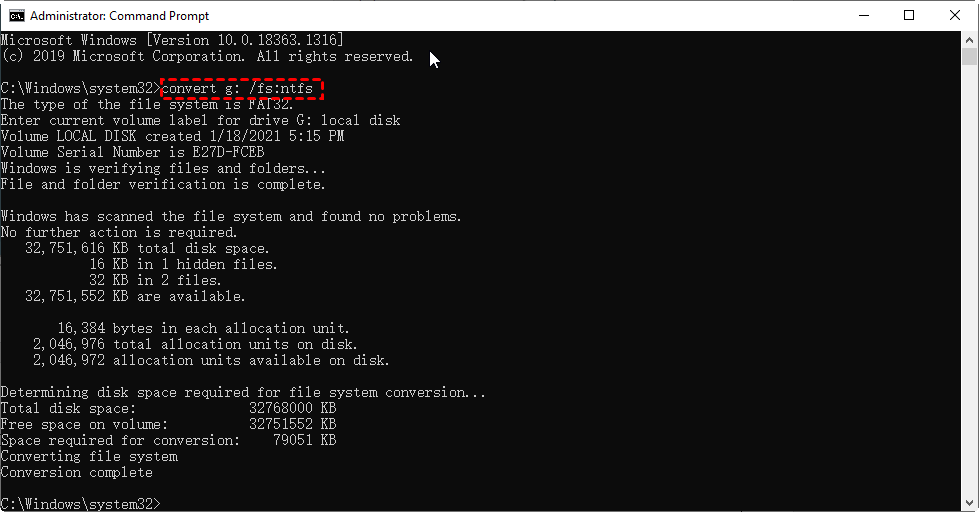
The Windows convert command can change FAT32 to NTFS without formatting in many cases, but a backup is still recommended.
Step 1. Open Command Prompt as administrator.
Step 2. Run chkdsk X: /f to repair file system errors.
Step 3. Run convert X: /fs:ntfs. Replace X with the correct drive letter.
Method 3. Back up before file system conversion
 Qiling Disk Master
Qiling Disk Master can back up important files or the whole partition before you format or convert the file system.
Step 1. Connect another internal drive, external drive, or network location with enough free space. The backup destination must be different from the FAT32 partition you plan to convert or format.
Step 2. Open Qiling Disk Master, select Backup, and choose File Backup for selected folders or Partition Backup for the entire FAT32 volume.

Step 3. Select the folders or partition to protect, then choose the separate drive as the destination. Include hidden working folders if they contain application data you need.
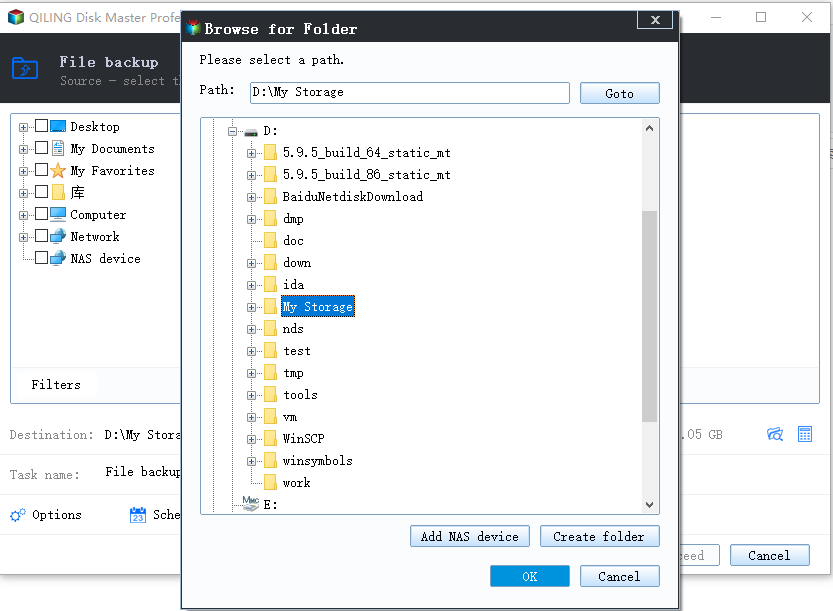
Step 4. Review the source and destination, then click Proceed to start the backup. Wait for the completion message before converting the file system.
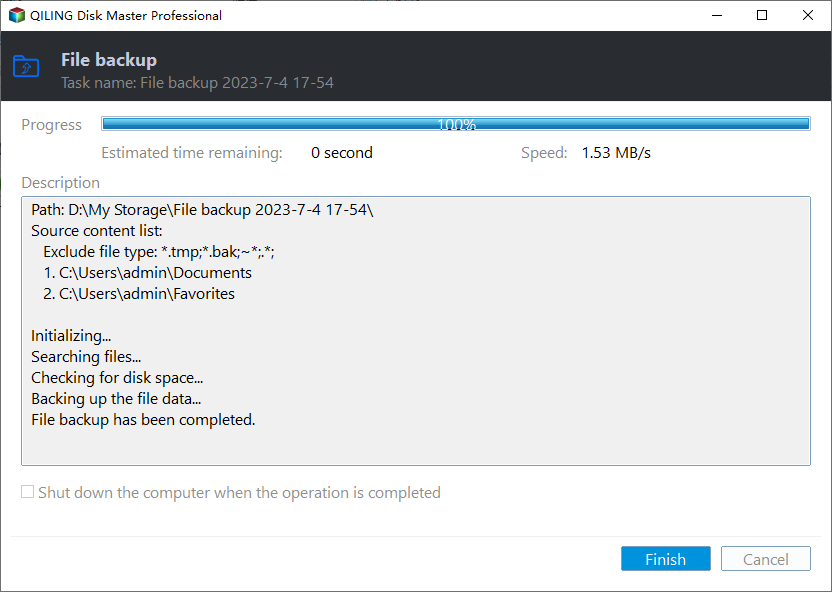
Step 5. Open a few files from the backup to confirm that they are usable. You can then convert FAT32 to NTFS or format the partition with a recoverable copy of the data available.
Common problems after conversion
If a device no longer recognizes the drive, it may require FAT32 or exFAT. If Windows asks to scan the drive, run a file system check before storing new data.
Conclusion
Disk Management can convert FAT32 to NTFS only by formatting. Use CMD if you want to avoid formatting, and always keep a backup before changing file systems.
Related Articles
-
How to Convert FAT32 to NTFS Windows 10 without Data Loss?
Compare safer FAT32 to NTFS conversion methods in Windows. -
Conversion from FAT32 to NTFS Is Not Available
Fix unavailable conversion options and file system errors. -
Best USB Formatter to Format 64GB Flash Drive to FAT32 in Windows
Format USB drives when FAT32 compatibility is required. -
Convert USB to FAT32 or NTFS in Windows
Choose FAT32 or NTFS for a USB drive based on file size, compatibility, and usage.
Products
Articles & Tutorials
- Data Recovery
- Data Backup
- File Recovery
- File Backup
- File synchronize
- System Backup and Restore
- Disk and Partition Clone
- Technical articles
- Disk Master Help
- Windows Deleted File and Disk Recovery Tutorials
- Windows File and Data Recovery Tutorials
- More Windows Tutorials for Install, Security, Files, and PC Tips
- Windows Boot, Repair, and Recovery Environment Tutorials
- Windows Backup Tutorials
- Windows Restore Tutorials
- Windows Clone and Migration Tutorials
- Windows Server Backup, Recovery, and Management Tutorials
- Windows Disk, Partition, and Storage Management Tutorials