Windows Black Screen on Boot: Find the Cause and Recover Safely
A black screen can come from the display connection, firmware, a failed update, graphics software, or a damaged Windows installation. The point at which it appears determines what to test. Do not rebuild boot records or restore an image merely because the monitor is dark.
Locate the failure stage
Step 1. Power on the PC and note the last thing you can see: no manufacturer logo, a logo or spinning Windows indicator, or a sign-in screen followed by black. This tells you which steps below apply; a dark screen alone does not prove Windows is damaged.
Step 2. If there is no logo, check monitor power, the selected input, and the display cable. On a laptop, try its display-switch key and disconnect an external monitor; on a desktop, test another display port or monitor if available. If the firmware setup screen is also invisible, investigate the display, hardware, or firmware before trying Windows repair.
Step 3. If the logo appears but Windows never reaches sign-in, disconnect nonessential USB devices and try one normal restart. If it still stops at the same point, continue with Startup Repair in Section 2.
Step 4. If sign-in appears before the screen goes black, press Win + Ctrl + Shift + B once to reset the graphics driver. If you can see a cursor, press Ctrl + Shift + Esc. When Task Manager opens, choose Run new task, enter explorer.exe, and confirm. If the desktop returns, save your work and investigate the display driver or recent software change rather than restoring a disk image.
Run Windows startup repair
Step 1. Use this method only if the logo appears but Windows cannot reach sign-in. Start the PC from trusted Windows installation media or its built-in recovery environment. If the Windows Setup screen appears, choose the language if asked, click Next, then choose Repair your computer instead of Install now.
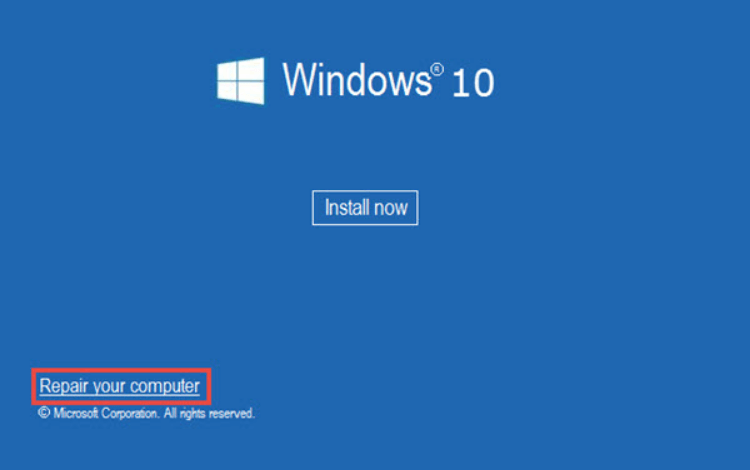
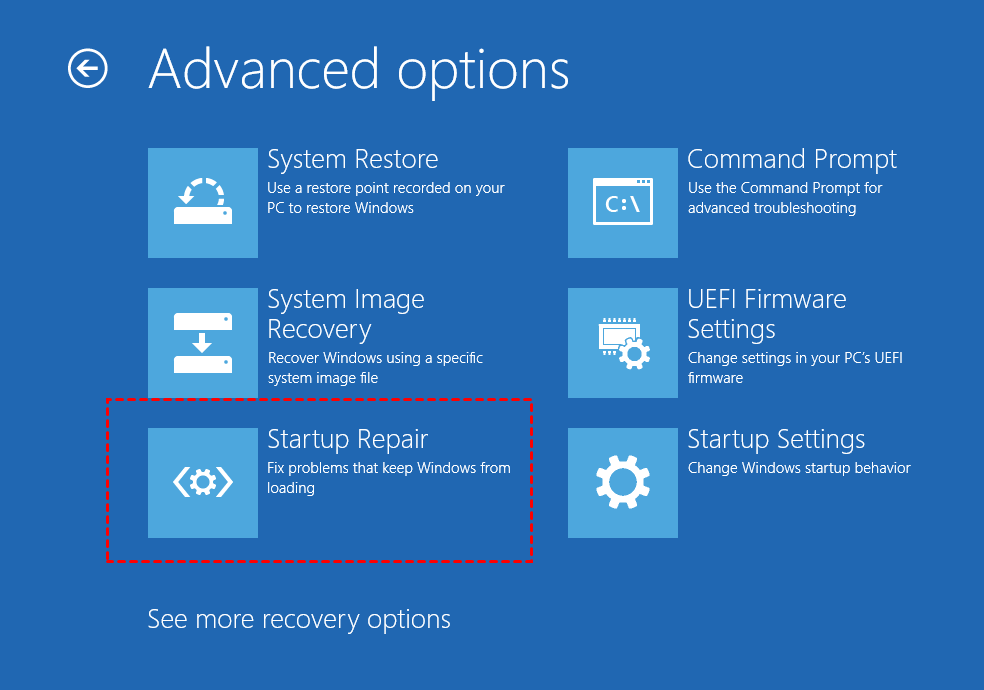
Step 2. Select Troubleshoot > Advanced options > Startup Repair. Choose the Windows installation if a list appears, enter the account password if requested, and let the repair attempt finish without turning off the PC.
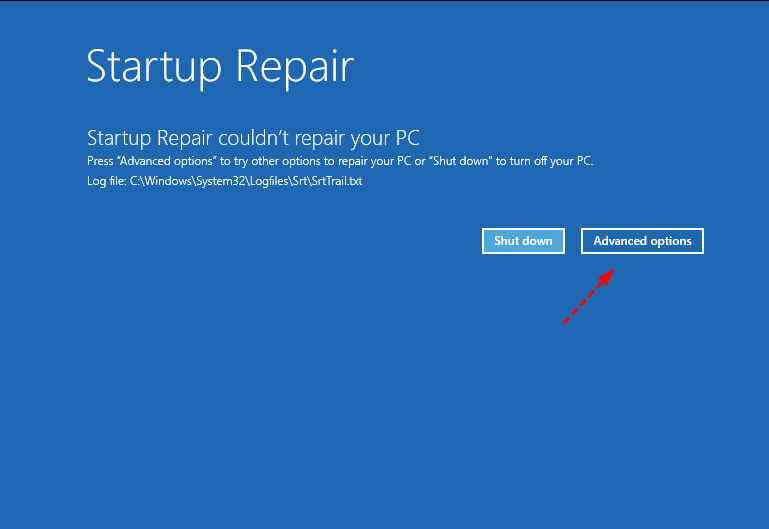
Step 3. When Startup Repair finishes, remove the installation USB and try a normal boot. If it says it could not repair the PC, note the message or log path and return to Advanced options; do not repeat the same repair indefinitely.
Step 4. If the failure began after an update, consider Uninstall Updates from Advanced options. If it followed a graphics-driver change, use Startup Settings > Restart to try Safe Mode and inspect that driver. Run bootrec or bcdboot only after identifying the boot mode and partitions; guessing at boot commands can create a different startup problem.
Restore an earlier image only if needed
Use an image only if Startup Repair or the relevant update/driver fix did not work and you already have a known-good Qiling system or disk backup. Restoring an older image removes changes made after its backup date, so preserve newer files separately if possible.
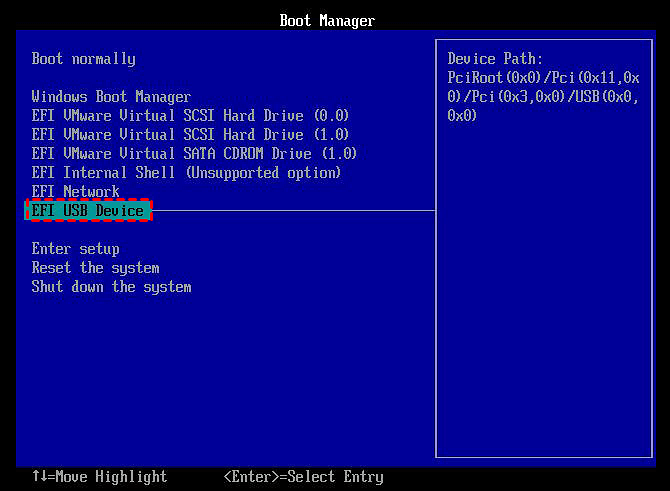
Step 1. Connect the external drive containing the image and a previously created Qiling rescue USB. Start the PC from that USB through the one-time boot menu. If you do not have usable rescue media or an image, do not attempt a restore from a picture of the software; get a safe way to access and back up the disk first.
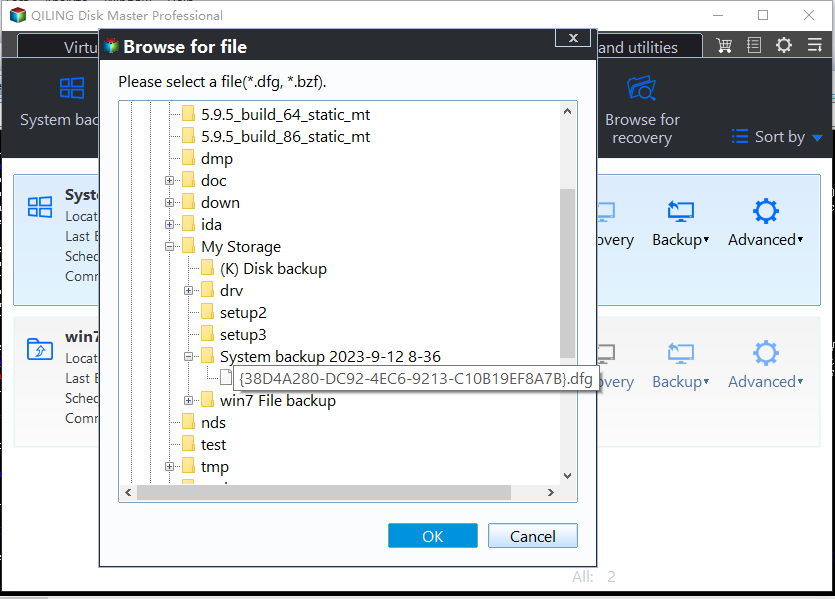
Step 2. In Qiling's recovery environment, locate the existing backup task or browse the external drive for its image file. Check the image date and source disk. Choose a backup made before the black-screen problem, not simply the newest file.
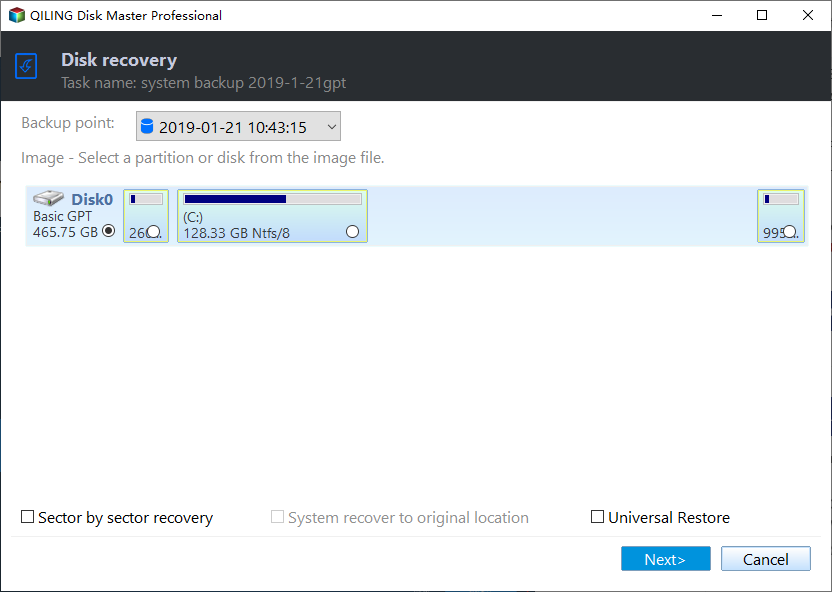
Step 3. Select the entire disk from the image, including Windows and its boot or recovery partitions, if you intend to restore the whole system. Do not select only C: and expect it to repair missing boot partitions.
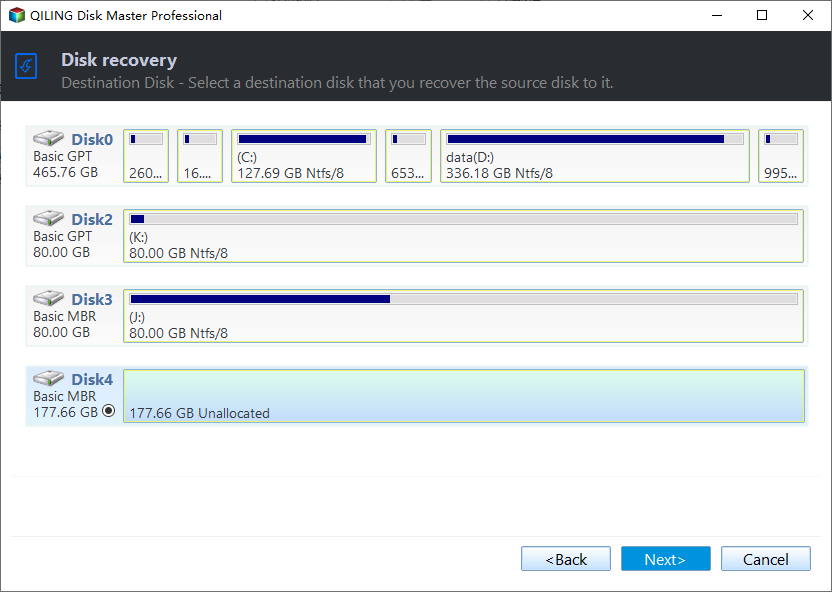
Step 4. Select the laptop's or desktop's internal destination disk by its model and capacity. Check that the external drive holding the image is not selected. The screenshot uses sample disk numbers; your internal disk may have a different number. Restoring a whole-disk image overwrites the current partitions and files on the selected destination.
Step 5. Review the final source-to-destination preview and any overwrite warning. Click Proceed only when the image and target disk are correct, then wait for completion without disconnecting the drives. Shut down, remove the rescue USB and external image drive, and test startup from the restored internal disk.
If the screen remains black
Check firmware diagnostics, memory, and disk health. A failing drive, damaged panel, or GPU problem will not be cured by repeating a software restore. Preserve important files before hardware repair or reinstalling Windows.
Related Articles
- Repair a Windows Boot Sector
Use boot repair only after identifying the disk and firmware mode. - Fix a BCDBoot Copy Failure
Check the Windows and EFI partitions when startup files cannot be copied.
Products
Articles & Tutorials
- Data Recovery
- Data Backup
- File Recovery
- File Backup
- File synchronize
- System Backup and Restore
- Disk and Partition Clone
- Technical articles
- Disk Master Help
- Windows Deleted File and Disk Recovery Tutorials
- Windows File and Data Recovery Tutorials
- More Windows Tutorials for Install, Security, Files, and PC Tips
- Windows Boot, Repair, and Recovery Environment Tutorials
- Windows Backup Tutorials
- Windows Restore Tutorials
- Windows Clone and Migration Tutorials
- Windows Server Backup, Recovery, and Management Tutorials
- Windows Disk, Partition, and Storage Management Tutorials