Create Multiple Partitions on a USB Drive in Windows
Creating multiple partitions on a USB drive can separate boot files, installers, documents, and portable tools. It is useful, but the partition layout must match the computers and devices that will read the USB drive.
Understand the problem
Modern Windows versions can display multiple partitions on many removable drives, while older systems or special devices may read only the first partition. Plan the partition order, file system, and size before you begin.
- Confirm the target disk, partition, drive letter, file system, and capacity before changing anything.
- Back up or recover important files before formatting, deleting, resizing, converting, or reinstalling Windows.
- For boot-related repairs, check BIOS or UEFI mode, boot order, and disk style before editing system partitions.
Use Windows built-in tools
You can use Disk Management when the USB drive already has unallocated space.
- Back up the USB drive.
- Open Disk Management and locate the USB by capacity.
- Shrink an existing partition if needed.
- Right-click unallocated space and create a new simple volume.
- Assign a drive letter and choose a file system for the new partition.
Use Qiling tools for guided steps
 Qiling Disk Master
Create USB partitions with a visible disk map and pending-operation preview.
Function. Create a new partition on the USB drive
Step 1. Connect the USB drive and back up important files. If the device has no unallocated space, shrink an existing partition first.
Step 2. Open Qiling Disk Master. Right-click the unallocated space on the USB drive and choose Create Partition.
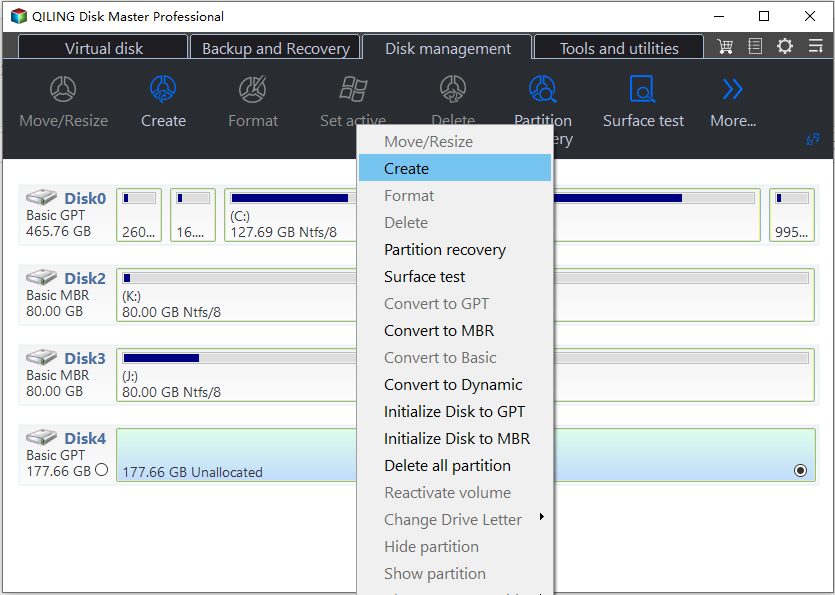
Step 3. Set the partition size, drive letter, file system, and label according to boot files, portable apps, or separated data folders. Use clear labels so each partition is easy to recognize later.
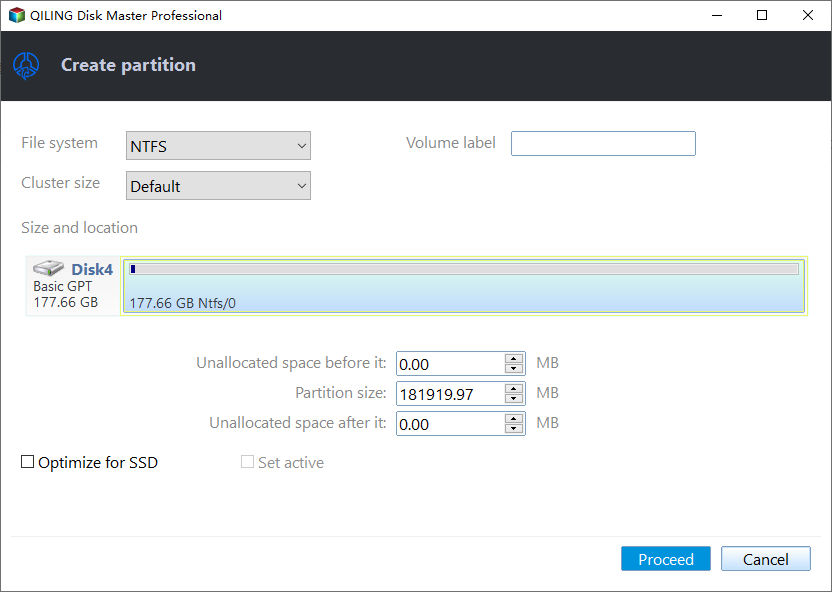
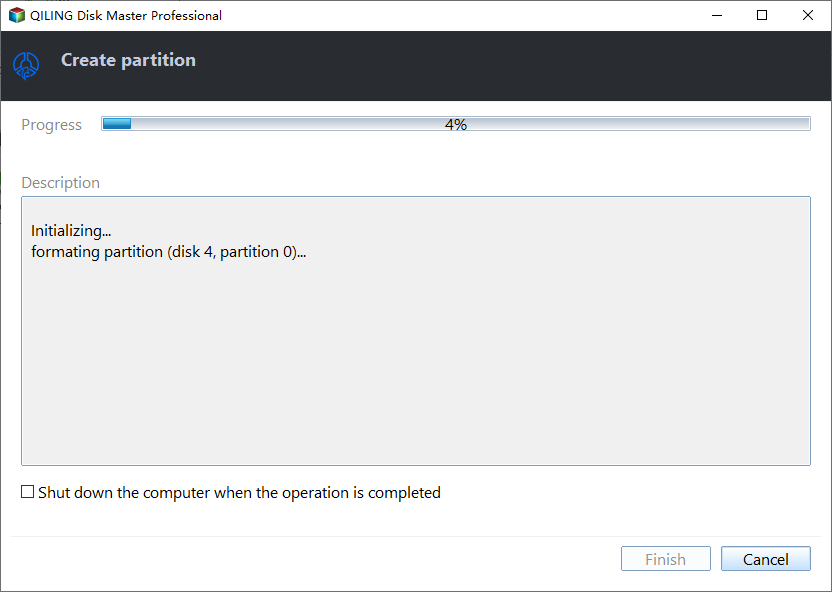
Step 4. Check the preview and click Proceed. After the operation finishes, open File Explorer and confirm that the new partition appears.
Check the result
Reconnect the USB drive and confirm that each partition receives the expected drive letter. Test the USB on the target computer or device before storing important files.
Related Articles
-
Partition USB Drive
Learn how to divide a USB drive into practical storage sections. -
Restore USB Partition
Recover or rebuild a USB partition when it disappears or becomes unusable.
Products
Articles & Tutorials
- Data Recovery
- Data Backup
- File Recovery
- File Backup
- File synchronize
- System Backup and Restore
- Disk and Partition Clone
- Technical articles
- Disk Master Help
- Windows Deleted File and Disk Recovery Tutorials
- Windows File and Data Recovery Tutorials
- More Windows Tutorials for Install, Security, Files, and PC Tips
- Windows Boot, Repair, and Recovery Environment Tutorials
- Windows Backup Tutorials
- Windows Restore Tutorials
- Windows Clone and Migration Tutorials
- Windows Server Backup, Recovery, and Management Tutorials
- Windows Disk, Partition, and Storage Management Tutorials