Can You Convert exFAT to NTFS Using CMD Without Data Loss?
Windows' convert X: /fs:ntfs works for FAT32, not exFAT. There is no built-in in-place exFAT-to-NTFS conversion that preserves the files. To keep the data, copy or back it up to another physical drive, format the original volume as NTFS, and copy it back.
Check compatibility and back up files
NTFS is useful for a Windows-only drive, but some cameras, TVs, game consoles, and non-Windows systems expect exFAT. Confirm the intended device supports NTFS before proceeding.
Step 1. Open Disk Management, identify the exFAT volume by disk number, letter, and capacity, and connect a separate destination with enough space.
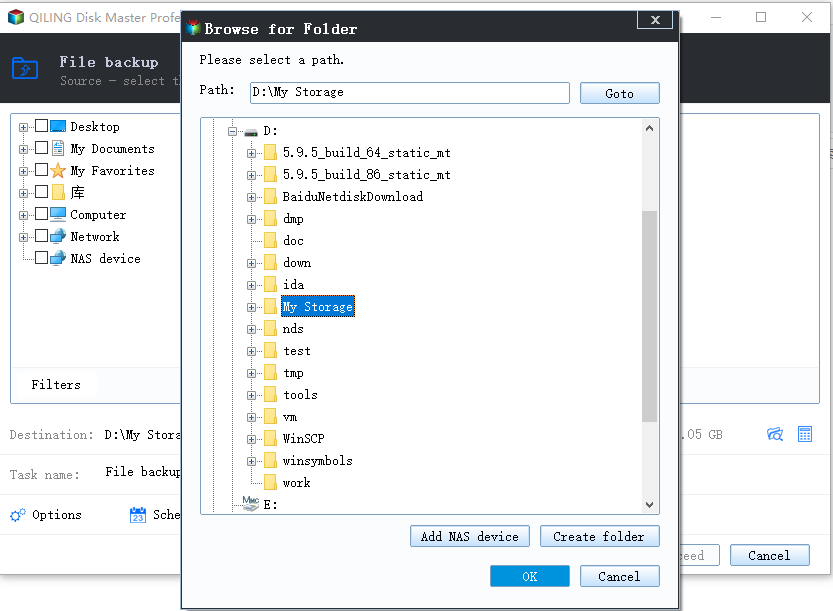
Step 2. In Qiling Disk Master choose File Backup. Select folders and files directly in the tree; there is no Add File or Add Folder button in this workflow.


Step 3. Choose the separate destination and click Proceed. After the backup completes, use its Recovery option to restore a sample file to a different folder and open it. Keep the backup drive disconnected while formatting the exFAT volume.
Format exFAT as NTFS in Command Prompt
Step 1. Reconnect the exFAT drive and confirm its letter in Disk Management. Open Command Prompt as administrator. Run dir X:\ with the actual drive letter to check that it is the intended volume.
Step 2. Run format X: /FS:NTFS /Q /V:Data, replacing X with the confirmed letter and Data with a suitable label. Read the prompt and confirm only when the drive is correct. Formatting erases the exFAT directory and its files.
Step 3. Wait for completion. Do not unplug the drive or close the command window during formatting. Disk Management or File Explorer should now show NTFS.
Format exFAT as NTFS in Qiling Disk Master
This is a graphical alternative to the Command Prompt format above. Use one formatting method, not both. Formatting still erases the exFAT volume, so finish and verify the backup in Section 1 first. Windows Disk Management also offers Format > NTFS for the same data volume.
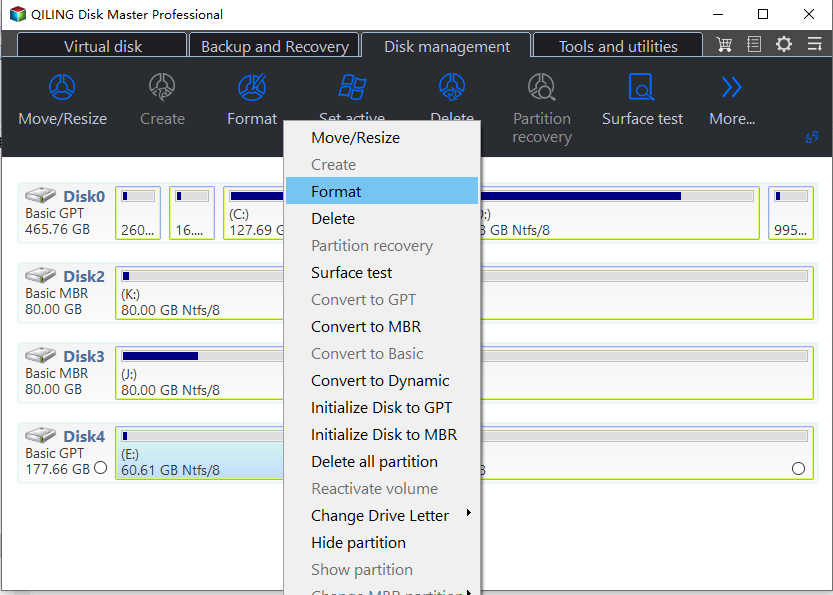
Step 1. Leave the separate backup drive disconnected. In Qiling Disk Master, open Disk management and identify the exFAT volume by its disk number, letter, and capacity. Right-click that data volume and choose Format; do not choose the Windows C: partition or the backup drive.
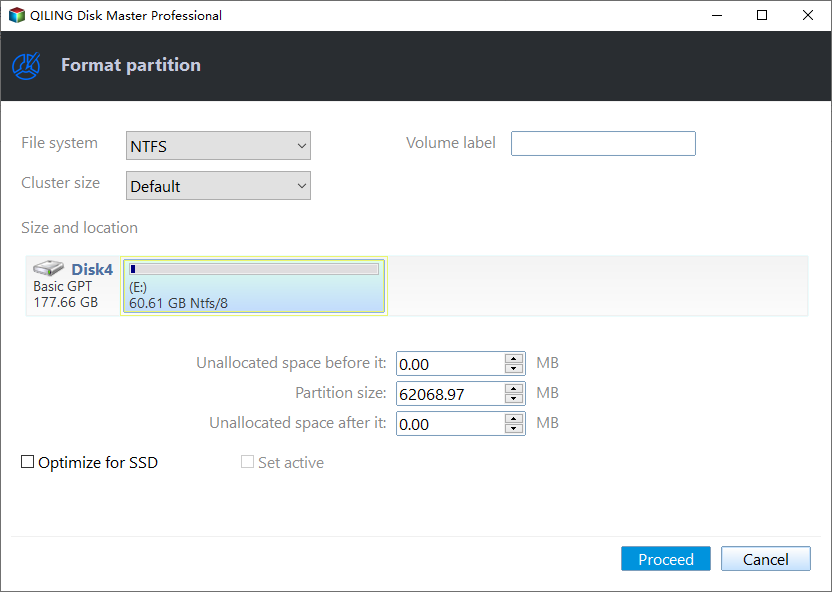
Step 2. In Format partition, choose NTFS under File system. Leave Cluster size at Default unless you have a specific requirement, and enter a recognizable volume label. Recheck the displayed disk and partition before continuing.
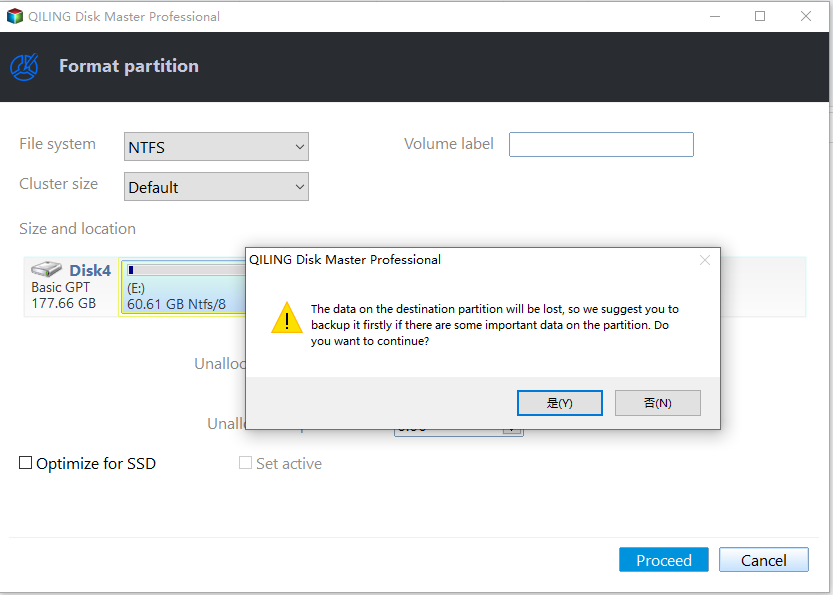
Step 3. Click Proceed. Read the data-loss warning and confirm only after checking the selected volume in the format dialog and verifying your backup. Wait for formatting to finish without unplugging the drive.
Step 4. Open the formatted volume in File Explorer or Disk Management and confirm that its file system is now NTFS. If formatting fails with I/O errors, investigate the drive rather than repeating the operation.
Recover files from the backup
Restore your files only after the original volume shows NTFS. The backup image remains on the separate drive; formatting does not automatically put the files back.
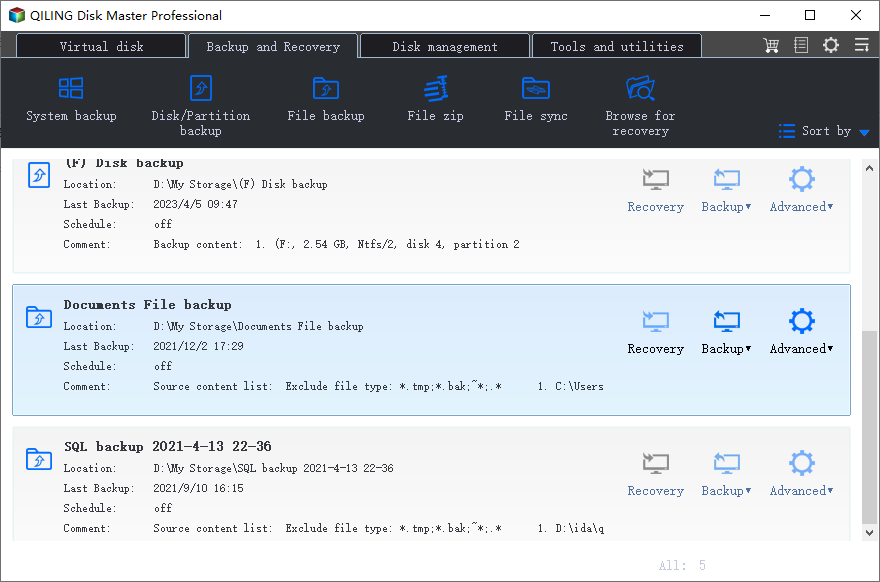
Step 1. Reconnect the backup drive. In Qiling Disk Master, open Backup and Recovery, find the completed File Backup task by its name and date, and click its Recovery button.
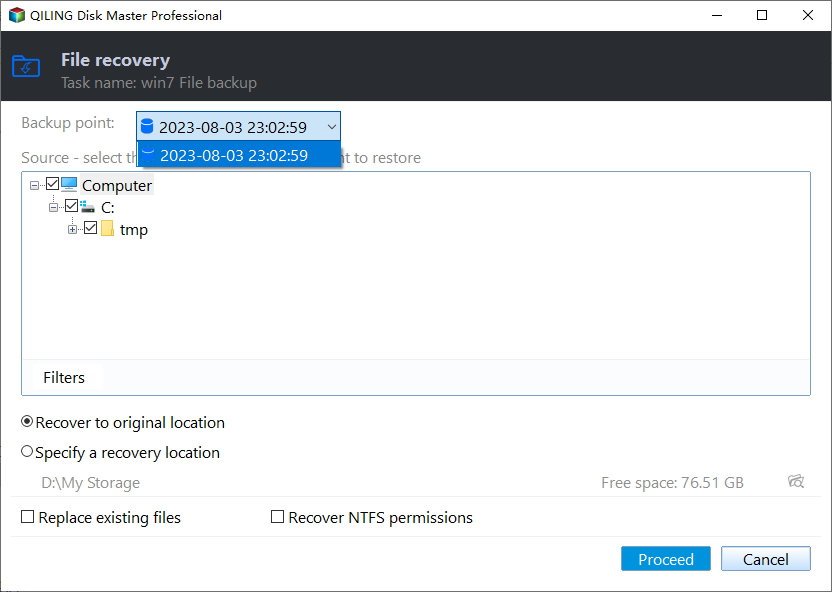
Step 2. Select the backup point created before formatting. Expand the source tree and check the files and folders to restore. Verify that the expected folders are listed before selecting a destination.
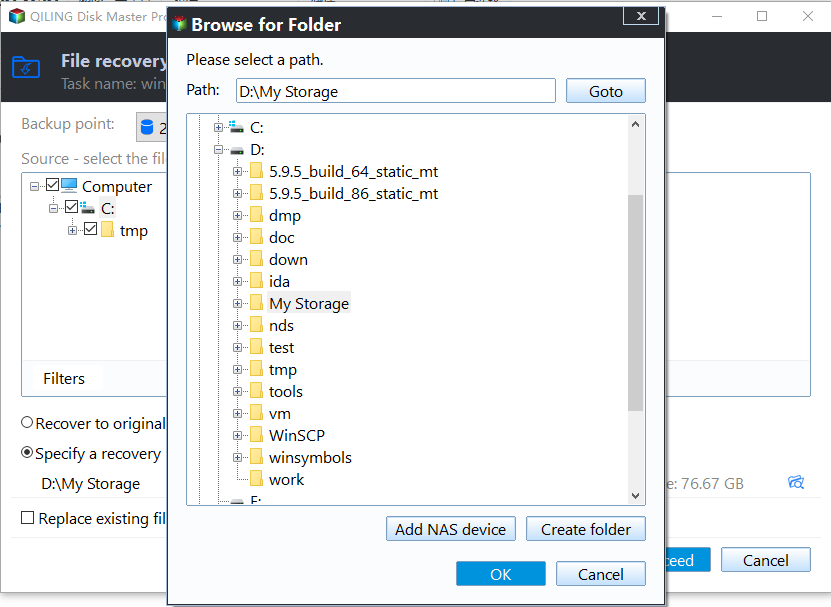
Step 3. Choose Specify a recovery location, click the folder icon, and select a folder on the now-NTFS volume. Confirm the drive letter and path in the recovery window. Leave Replace existing files unchecked unless you intentionally want to overwrite newer files. The screenshot shows a sample path; use your own formatted volume.
Step 4. Click Proceed in the File recovery window and wait for completion. Compare representative folders, then open several small and large files. Keep the external backup until the restored files work on every device that must read the drive.
Related Articles
- Change exFAT to NTFS in Windows 10
Compare supported Windows methods and data-loss precautions. - exFAT Option Missing in Windows 10
Check available file systems when formatting a removable drive.
Products
Articles & Tutorials
- Data Recovery
- Data Backup
- File Recovery
- File Backup
- File synchronize
- System Backup and Restore
- Disk and Partition Clone
- Technical articles
- Disk Master Help
- Windows Deleted File and Disk Recovery Tutorials
- Windows File and Data Recovery Tutorials
- More Windows Tutorials for Install, Security, Files, and PC Tips
- Windows Boot, Repair, and Recovery Environment Tutorials
- Windows Backup Tutorials
- Windows Restore Tutorials
- Windows Clone and Migration Tutorials
- Windows Server Backup, Recovery, and Management Tutorials
- Windows Disk, Partition, and Storage Management Tutorials