What Is the SYSTEM_DRV Partition on a Lenovo PC? Keep or Recover It Safely
SYSTEM_DRV is a Lenovo partition name, not a standard Windows drive letter. Its contents vary by model and installation: it may hold startup files, vendor recovery components, or both. Seeing it in Disk Management does not mean it is unused. Deleting or formatting it without identifying its role can prevent Windows or Lenovo recovery from starting.
Identify the partition before touching it
Step 1. Press Win + X and open Disk Management. Locate SYSTEM_DRV and write down its disk number, size, file system, drive letter, and any labels such as System, EFI System Partition, or Recovery Partition. These labels matter more than its name.
Step 2. Check whether the PC boots in UEFI or Legacy mode: press Win + R, run msinfo32, and read BIOS Mode. Do not assume the boot partition is C:. If SYSTEM_DRV is marked System or EFI, leave it intact.
Step 3. If its only problem is an unwanted letter in File Explorer, first confirm its purpose and data. Removing a letter is less intrusive than deleting a partition, but even then avoid changes to managed or recovery volumes until you have a complete backup.
Back up the disk before partition changes
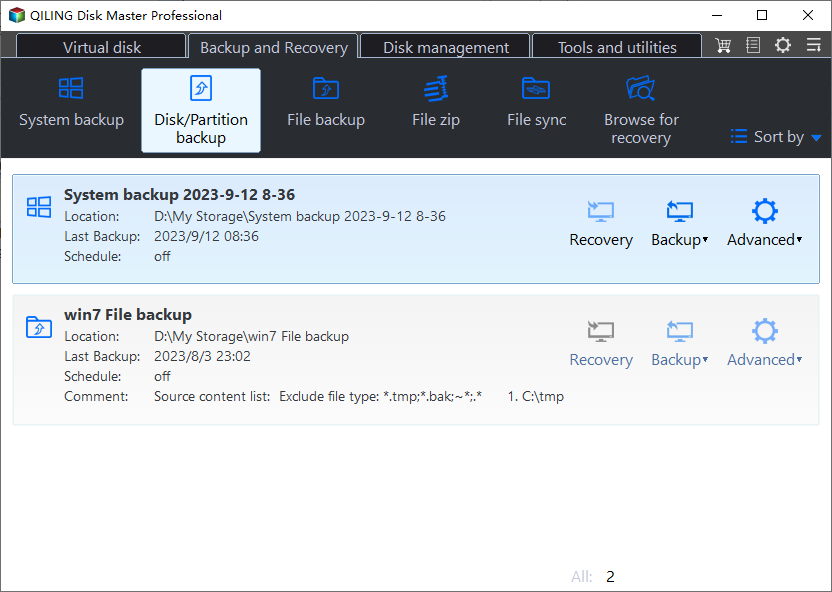
Step 1. Connect an external disk with enough free space. In Qiling Disk Master, choose Disk Backup so the image contains the Windows, boot, and recovery partitions together.
Step 2. Select the entire Lenovo system disk, not only C:. Check that SYSTEM_DRV and other small partitions are included. Set a destination on the external disk, not on the disk being changed.
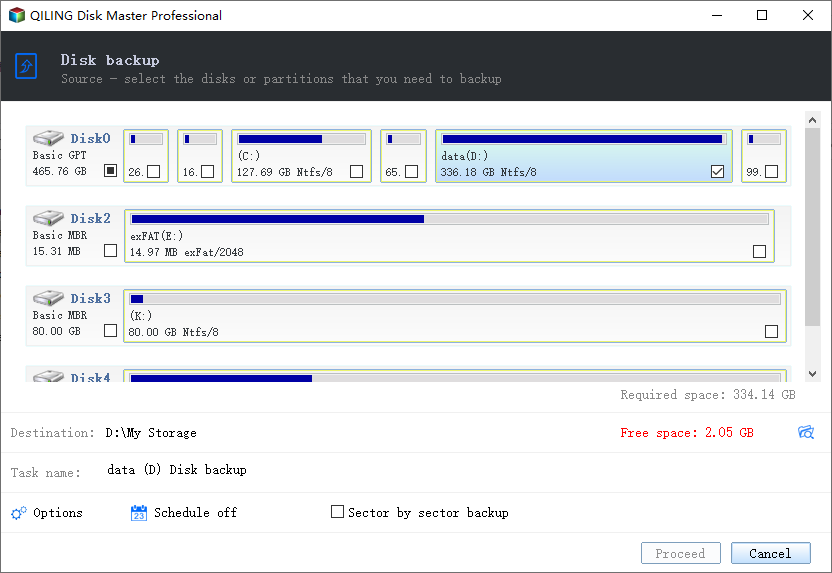
Step 3. Click Proceed, let the job finish, and verify that the image can be browsed or validated. Create recovery media before making any destructive partition change.
If SYSTEM_DRV is missing or was deleted
If the partition was only given an unwanted drive letter, do not restore or recreate anything: in Disk Management, right-click that verified volume, choose Change Drive Letter and Paths, select the letter, and click Remove. If the partition itself was deleted, stop using the disk and check whether a full-disk image contains the original layout. Restore only to the verified disk after copying newer files elsewhere; creating a new partition with the same label does not recreate its boot or Lenovo recovery contents.
Stop writing to the disk if the partition disappeared unexpectedly. If Windows still boots, save current user files to another disk first. A file-recovery scan may retrieve personal files, but recovered files alone do not rebuild boot configuration or Lenovo recovery features.
If you have a known-good full-disk image, boot trusted recovery media and restore the whole disk to the correct target. This overwrites the target's current partitions and data, so confirm its disk number and preserve newer files first. If no image exists, seek model-specific Lenovo recovery media or Windows startup repair; do not restore an arbitrary SYSTEM_DRV image from a different machine.
After recovery
Confirm Windows starts without the external recovery media. Check Disk Management for the expected small partitions and test Lenovo recovery only using the procedure documented for your exact model. Keep the verified backup until both normal boot and recovery options work.
Related Articles
- What Is Lenovo OneKey Recovery?
Understand the role of Lenovo recovery features before changing partitions. - Cannot Restore the System Partition
Check restore prerequisites and destination selection when a system image fails.
Products
Articles & Tutorials
- Data Recovery
- Data Backup
- File Recovery
- File Backup
- File synchronize
- System Backup and Restore
- Disk and Partition Clone
- Technical articles
- Disk Master Help
- Windows Deleted File and Disk Recovery Tutorials
- Windows File and Data Recovery Tutorials
- More Windows Tutorials for Install, Security, Files, and PC Tips
- Windows Boot, Repair, and Recovery Environment Tutorials
- Windows Backup Tutorials
- Windows Restore Tutorials
- Windows Clone and Migration Tutorials
- Windows Server Backup, Recovery, and Management Tutorials
- Windows Disk, Partition, and Storage Management Tutorials