Fix We Couldn't Create a New Partition Error
During Windows installation, you may see the message "We couldn't create a new partition or locate an existing one." The error usually appears when Setup cannot write boot files to the selected disk, the USB boot mode does not match the disk style, or another disk is confusing the installer.
Why the error appears
- The computer starts the USB drive in Legacy mode while the target disk uses GPT.
- The target disk contains old installation, recovery, or OEM partitions.
- Multiple internal or external disks are connected during installation.
- The selected partition is not suitable for Windows system files.
- The USB installer was created incorrectly or is unstable.
Method 1. Disconnect other drives
Step 1. Shut down the computer and disconnect external hard drives, SD cards, and extra USB storage.
Step 2. If the computer has more than one internal disk, keep only the target system disk connected when possible.
Step 3. Start Windows Setup again and select the intended disk.
Method 2. Match boot mode and disk style
Step 1. Enter BIOS or UEFI settings.
Step 2. If the disk is GPT, boot the installation USB in UEFI mode. If the disk is MBR, boot in Legacy mode.
Step 3. In the boot menu, choose the entry that clearly starts with UEFI when installing to a GPT disk.
Method 3. Prepare the target disk carefully
Step 1. When Setup shows the disk list, delete only the partitions on the target disk if you no longer need their data.
Step 2. Select the unallocated space and click Next. Windows will create the required system partitions automatically.
Step 3. If you must keep files, stop the installation and back up or clone the disk before deleting any partition.
Method 4. Use DiskPart only after backup
Step 1. Press Shift + F10 in Windows Setup to open Command Prompt.
Step 2. Run diskpart, then list disk, and identify the target disk by size.
Step 3. Use select disk N, replacing N with the correct disk number.
Step 4. If all data on that disk can be erased, run clean. Then close Command Prompt and refresh the disk list.
Back up or clone the target disk before deleting partitions
 Qiling Disk Master
Back up or clone the Windows installation target disk before deleting partitions during setup troubleshooting.
Step 1. Connect another disk with enough free space to store the backup image or cloned copy.
Step 2. Open Qiling Disk Master and select the Windows installation target disk in the disk map.
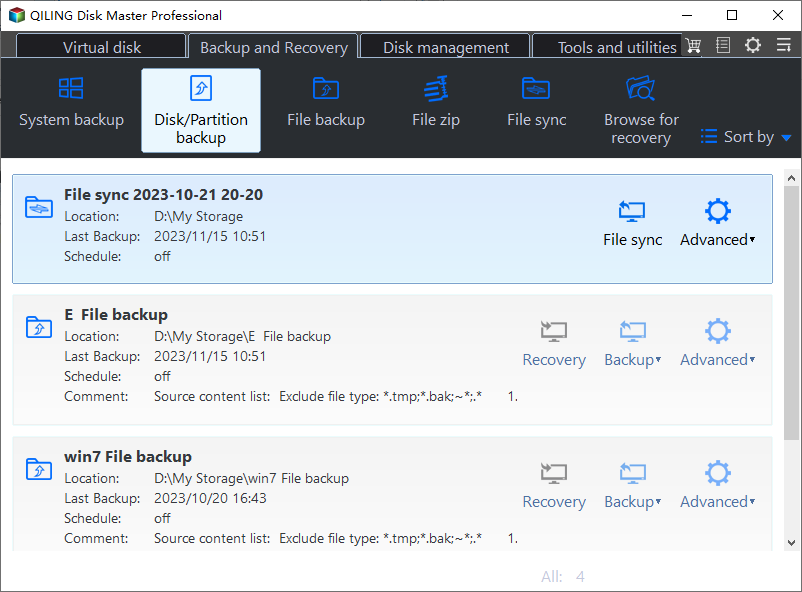
Step 3. Choose Disk Backup if you want an image file, or choose a disk clone feature if you need a directly usable copy.
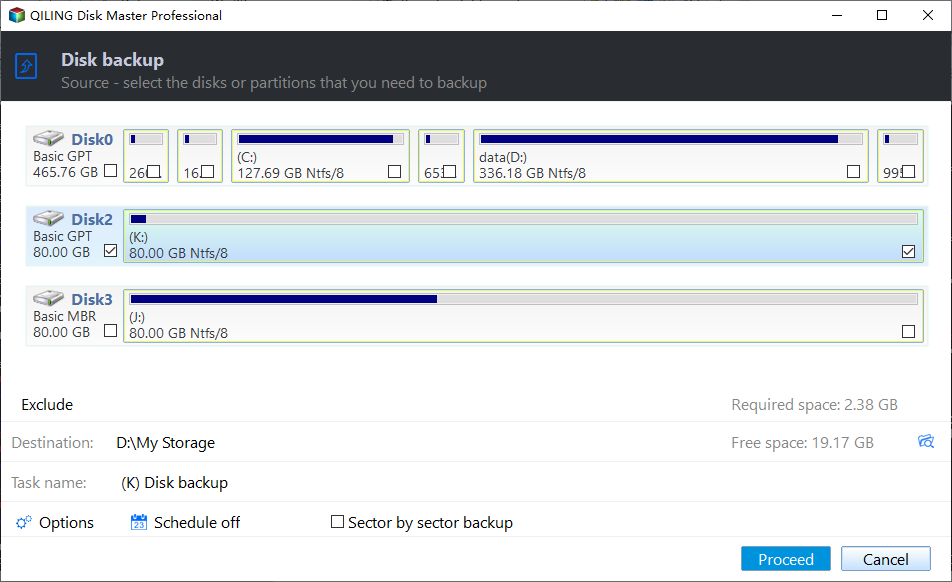
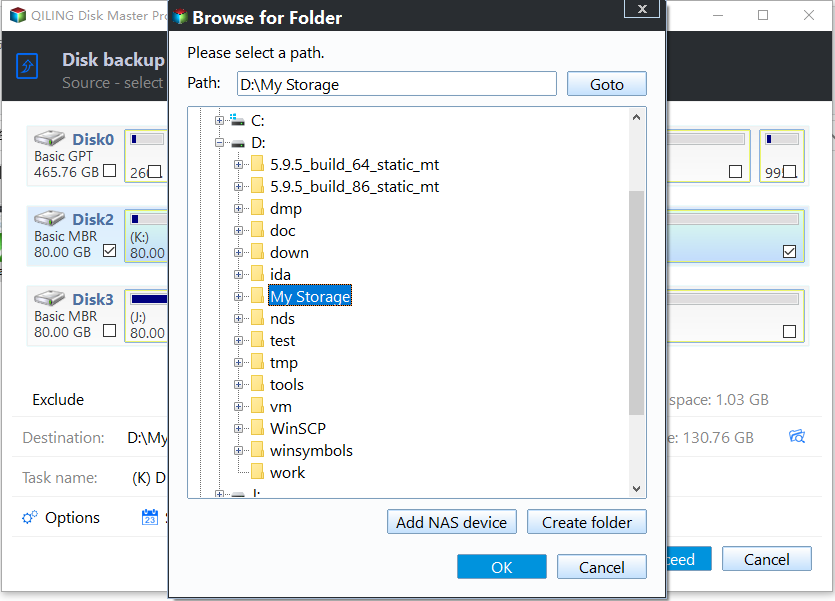
Step 4. Select the destination disk or storage path, then review the source and destination carefully.
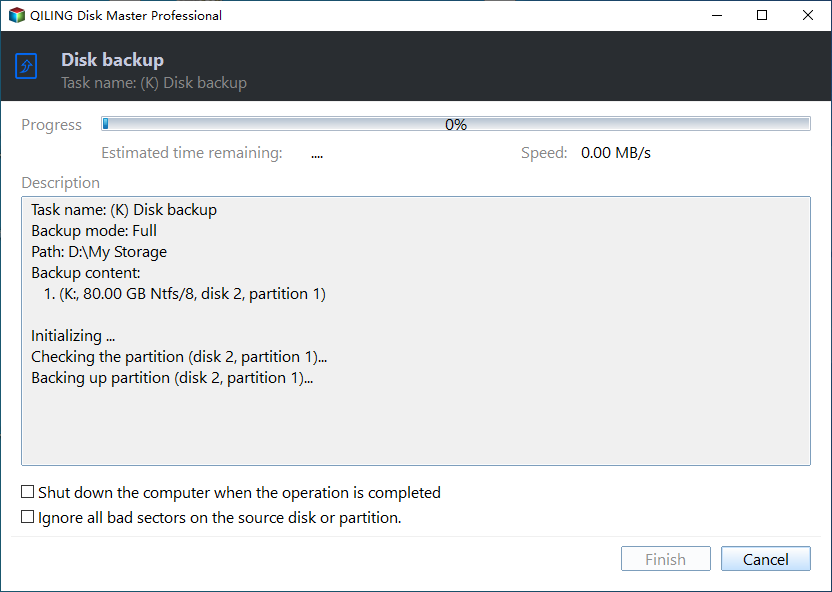
Step 5. Click Proceed. After the backup or clone is complete, return to Windows Setup and delete partitions only on the confirmed target disk.
Conclusion
The safest fix is to remove extra drives, use the correct boot mode, and let Windows create its own setup partitions from unallocated space. Use destructive commands only after you have confirmed the target disk and protected your data.
Related Articles
-
Partition a Dell Hard Drive Safely
Create or resize partitions while protecting EFI, Recovery, and OEM partitions. -
Restore Lost Partition on USB Drive
Recover files first when a USB partition becomes unallocated, RAW, or invisible.
Products
Articles & Tutorials
- Data Recovery
- Data Backup
- File Recovery
- File Backup
- File synchronize
- System Backup and Restore
- Disk and Partition Clone
- Technical articles
- Disk Master Help
- Windows Deleted File and Disk Recovery Tutorials
- Windows File and Data Recovery Tutorials
- More Windows Tutorials for Install, Security, Files, and PC Tips
- Windows Boot, Repair, and Recovery Environment Tutorials
- Windows Backup Tutorials
- Windows Restore Tutorials
- Windows Clone and Migration Tutorials
- Windows Server Backup, Recovery, and Management Tutorials
- Windows Disk, Partition, and Storage Management Tutorials