2 Common Ways | Backup Outlook Emails to USB
Why Backup Outlook Emails to USB?
Backing up your Outlook emails is crucial to prevent data loss due to system crashes, hacking, or switching to a new device. Your emails contain valuable information like contacts, attachments, and messages, which can be lost if not backed up. This ensures that your important data remains safe and secure, and you can access it whenever needed.
Using a USB drive is a practical way to back up Outlook emails. It stores your email data on an external device, helps transfer messages to another computer, and keeps a copy available if your system fails.
- Data protection: You can protect your Outlook emails by backing them up to a USB flash drive, which helps safeguard your data in case of computer crashes, viruses, or other issues.
- Data transfer: To move your Office 365 Outlook data to another computer, you can back up your emails to a USB flash drive, making the transfer process faster and more convenient.
- Archiving: To keep a record of emails for legal or regulatory purposes, you can back them up to a USB flash drive as a digital archive for future reference.
- Offline access: Storing Outlook emails on a USB flash drive allows you to access them even without an internet connection, making it a useful option for those with limited or unreliable internet access.
How to Backup Outlook Emails to USB Flash Drive
To transfer Outlook emails to a USB flash drive, first create a backup copy of your Outlook data. You can export Outlook data to a PST file with the Import/Export Wizard, or use Qiling Disk Master to create an automatic email backup to the USB drive.
Way 1. Export Outlook to USB with Import/Export Wizard
To backup Outlook 2016 emails to a flash drive, use the inbuilt import/export wizard in Outlook to export your data in PST format. This will allow you to restore your emails and other data when needed. Simply follow the steps to backup your Outlook data to a USB drive, which will then be saved in PST format. This makes it easy to transfer your Outlook data to a new computer or restore it if needed.
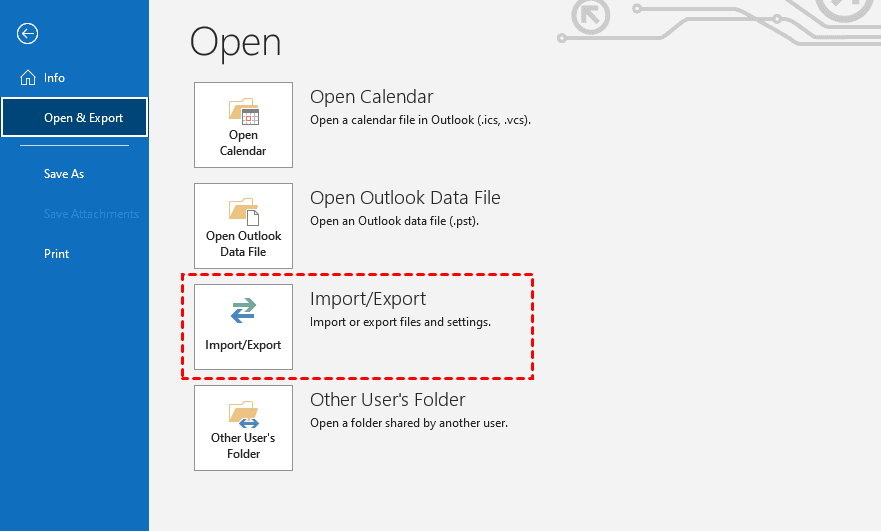
- Open your Outlook 2016, go to the File tab, click on Open & Export, and then select Import/Export.
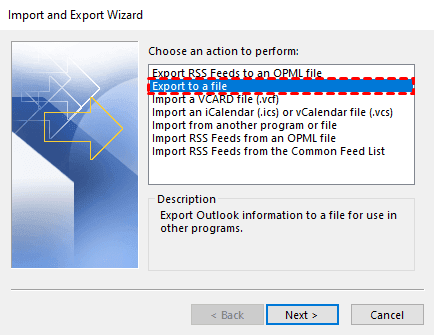
- The Import and Export Wizard will open, where you'll select "Export to a file" and click "Next."
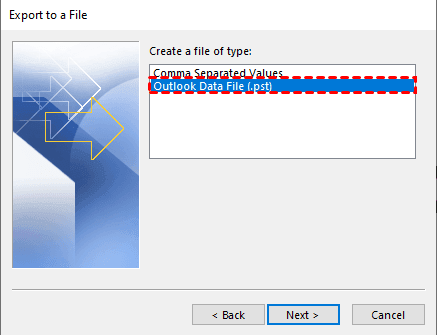
- Then select Outlook Data File (. pst) and select the folder you want to export.
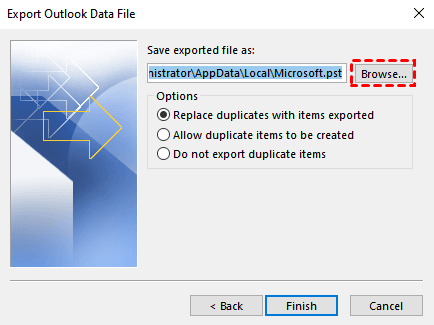
- Select the folders to export, click Next, then browse and select the USB drive location to save the PST file, and click Finish.
- To add a password to your PST file, go to File > Options > Account Settings > Account Settings. In the Account Settings window, select the account you want to add a password to and click on the "Change" button. Then, select the "More Settings" button and check the box next to "Encrypt account settings with a password".
Way 2. Auto Backup Outlook Emails to USB with Qiling Disk Master (Full-featured)
If you use Outlook's built-in Import/Export feature to back up Outlook emails to a USB drive, you need to repeat the export manually whenever new messages arrive. It is also less convenient when you need scheduled backups or want to protect multiple Outlook data folders regularly.
- The software only allows for a single backup of email data as a .pst file, which means subsequent changes to the data require an additional backup to ensure those changes are saved.
- Exporting emails to a .pst file can be a lengthy process, especially when dealing with a large volume of emails or multiple email accounts, making it a time-consuming task.
To auto backup Outlook emails to a USB flash drive, you can also consider using a reliable third-party software like Qiling Disk Master Professional, which offers full Outlook backup solutions.
- Microsoft Outlook Backup enables you to back up all data in Outlook, including emails, contacts, notes, calendars, and tasks, in one go.
- Various backup devices are supported, including external hard drives, local disks, USB flash drives, and NAS devices, among others, for backing up data such as Outlook emails.
- You can automatically backup your email data using the "Schedule Backup" feature.
- You can run incremental or differential backups to minimize backup time and image size.
After learning the basic features of Qiling Disk Master, you can follow these steps to learn how to backup Outlook emails to a flash drive using this tool.
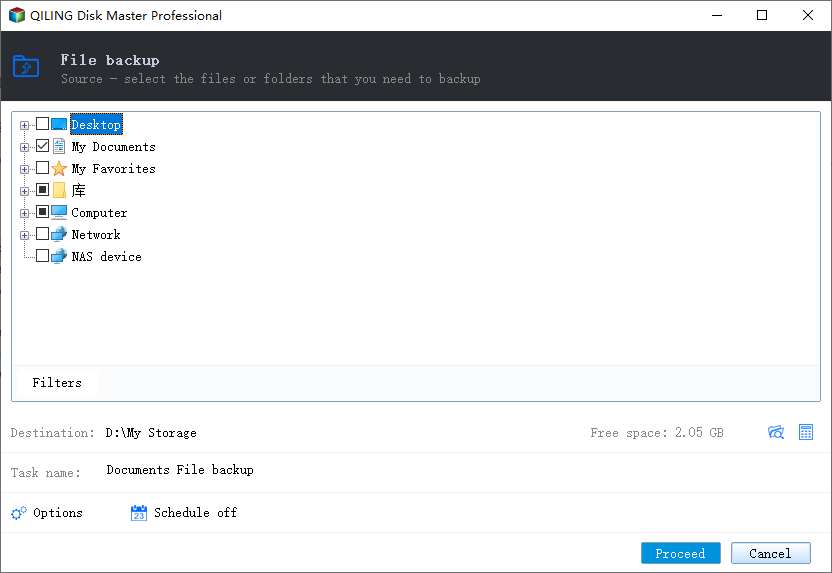
- Download and install Qiling Disk Master on your PC, then launch the program and click Backup, and finally select File Backup.

- Click "Add Outlook Data" and choose the Outlook account or folder you want to back up.
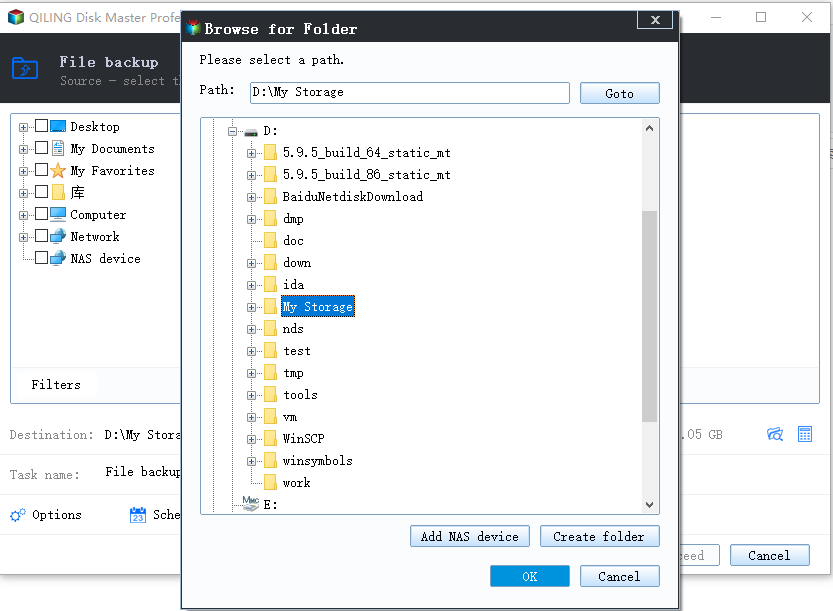
- To save Outlook emails or other items, click the second box to select the USB flash drive.
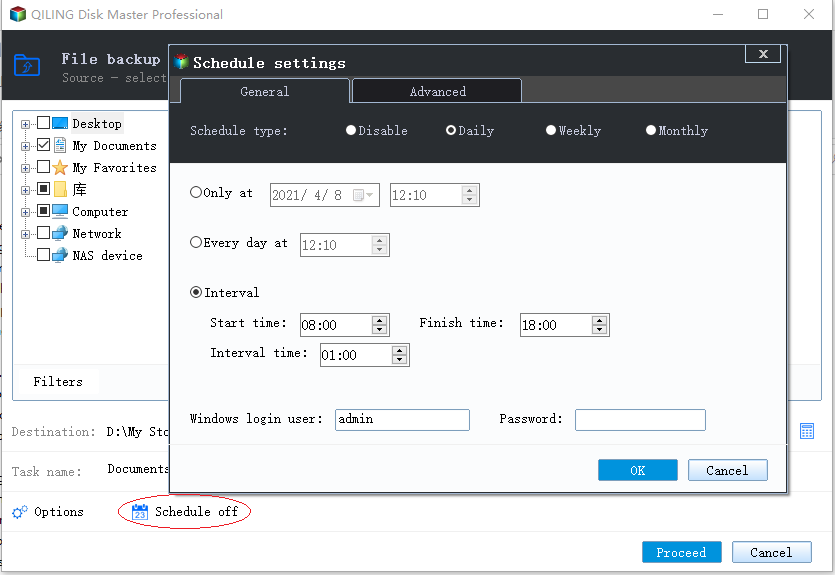
- Enable daily, weekly, or monthly schedule backup and make sure the option to wake the computer to run scheduled tasks is selected.
- Once all settings are confirmed, click "Proceed" to back up Outlook emails to a USB drive.
Summary
You can back up Outlook emails to a USB drive with Outlook's Import/Export Wizard or Qiling Disk Master. The built-in export method is useful for a one-time PST copy, while Qiling Disk Master is better for scheduled backups and multiple Outlook folders.
Qiling Disk Master can back up Outlook data to USB drives, external hard drives, NAS devices, and other storage locations, helping protect emails from accidental loss.
Related Articles
- Backup Outlook Emails to Gmail 2 Ways + 1 Email Protection Tool
This article tells you how to backup Outlook emails to Gmail. Creating data backups always provides data security in the event you experience catastrophic data loss. - How to Backup Outlook Emails before Deleting Account (2 Ways)
This tutorial will show you how to backup Outlook emails before deleting account to have peace of mind knowing that you are in control of your data. - How to Auto Backup Outlook 365 Emails and Other Items
In this article, you will the best solution for auto backup of Outlook 365. The solutions provided in this article are available for all versions such as 2019, 2016, 2013, 2010, etc. - Convert Primary to Logical Windows 10 without Data Loss
How to convert primary to logical Windows 10 when there're already 4 primary partitions on a disk. This time, the most useful tool will be introduced.