Fix VMware Stuck on the Windows Logo
A VMware virtual machine can hang on the Windows logo because of a bad update, driver conflict, boot configuration error, corrupted virtual disk, or host resource problem.
Understand the problem
Do not repeatedly force power off the virtual machine without protecting the VM folder. The .vmx configuration file and virtual disk files are important for rollback and later recovery.
- Confirm the target disk, partition, drive letter, file system, and capacity before changing anything.
- Back up or recover important files before formatting, deleting, resizing, converting, or reinstalling Windows.
- For boot-related repairs, check BIOS or UEFI mode, boot order, and disk style before editing system partitions.
Use Windows built-in tools
Check VMware and Windows causes in a controlled order.
- Shut down the VM and take a VMware snapshot if possible.
- Check host CPU, memory, and disk space.
- Disconnect recently added virtual hardware.
- Boot into Safe Mode and remove problematic updates or drivers.
- Use Windows recovery commands only after backing up the VM folder.
Use Qiling tools for guided steps
 Qiling Disk Master
Back up VMware virtual machine files before boot repair or configuration changes.
Function. Back up important files before making changes
Step 1. Connect an external drive or choose another safe location with enough free space for the files on the VMware virtual machine folder.
Step 2. Open Qiling Disk Master and choose File Backup. This protects documents, photos, downloads, and project files before you change Windows settings or disk layout.

Step 3. In the tree control, select the files and folders related to the VMware virtual machine folder. Include the .vmx file, virtual disks, snapshots, and related configuration files.

Step 4. Select the external drive, another internal disk, or a network folder as the destination. Avoid saving the backup on the same partition that will be changed.
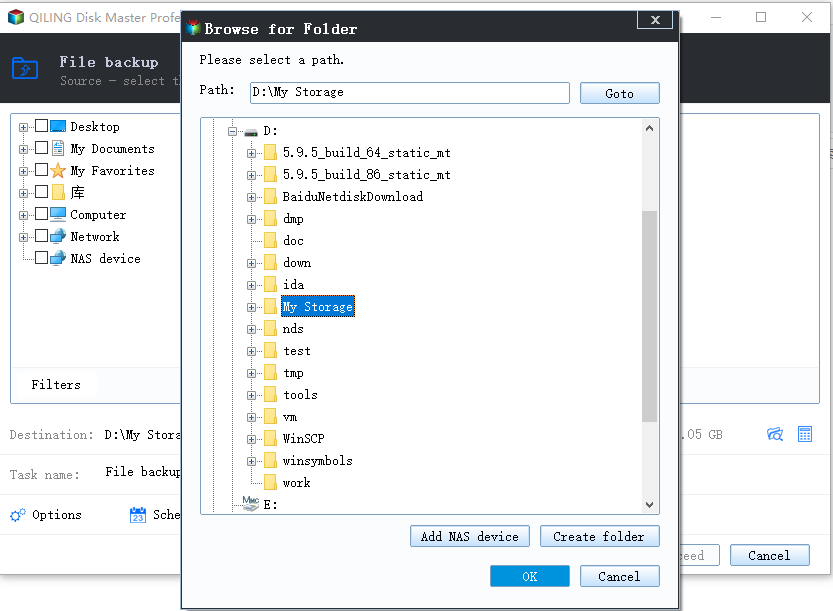
Step 5. Review the task name, source, and destination. Click Proceed and wait until the backup finishes.
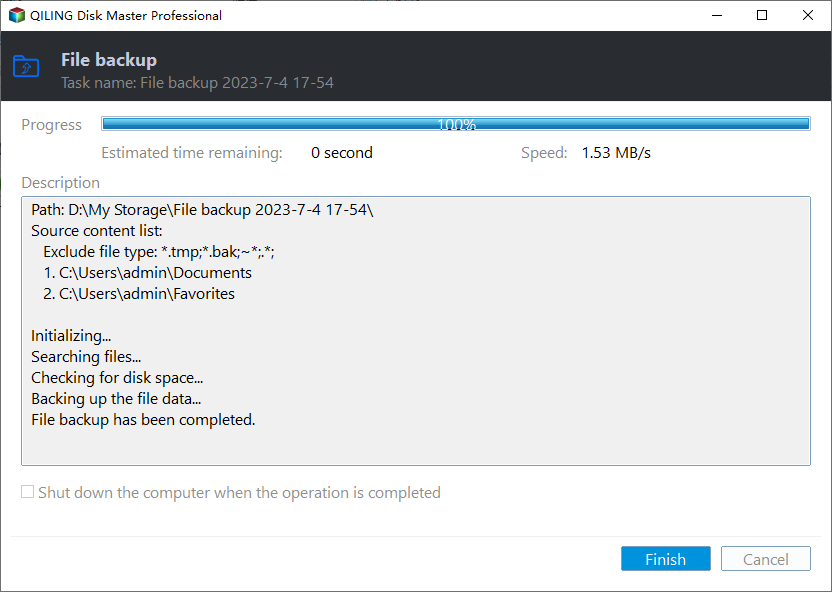
Check the result
Start the VM after each repair step. If it reaches the sign-in screen, update VMware Tools and create a fresh restore point or VM backup.
Related Articles
-
Back Up VMware Workstation
Protect VMware virtual machines before repair, migration, or risky updates. -
Back Up VMware Virtual Machine
Create a backup copy of VM files and configuration for easier rollback.
Products
Articles & Tutorials
- Data Recovery
- Data Backup
- File Recovery
- File Backup
- File synchronize
- System Backup and Restore
- Disk and Partition Clone
- Technical articles
- Disk Master Help
- Windows Deleted File and Disk Recovery Tutorials
- Windows File and Data Recovery Tutorials
- More Windows Tutorials for Install, Security, Files, and PC Tips
- Windows Boot, Repair, and Recovery Environment Tutorials
- Windows Backup Tutorials
- Windows Restore Tutorials
- Windows Clone and Migration Tutorials
- Windows Server Backup, Recovery, and Management Tutorials
- Windows Disk, Partition, and Storage Management Tutorials