What Are the Best Windows 10 Deployment Tools?
Why do you need Windows 10 deployment tools?
The Windows 10 deployment toolkit is software designed to deploy Windows 10 to other computers, allowing you to image the OS onto machines with the same or different hardware. The tool boots the target PCs from the network, which is set in the BIOS, making it suitable for deploying Windows 7, 8, or XP systems as well.
Reinstalling OS and applications on each computer is not the most efficient approach when planning a large-scale Windows 10 business deployment. This method can be particularly cumbersome for new or dead computers, adding extra work to the process. To streamline deployments, using Windows deployment and imaging tools is a more effective approach, allowing for the completion of multiple deployments in a short amount of time.
- Windows OS deployment tools: which is your best choice?
- Deploy Windows 10 to multiple computers via Qiling Image Deploy
Windows OS deployment tools: which is your best choice?
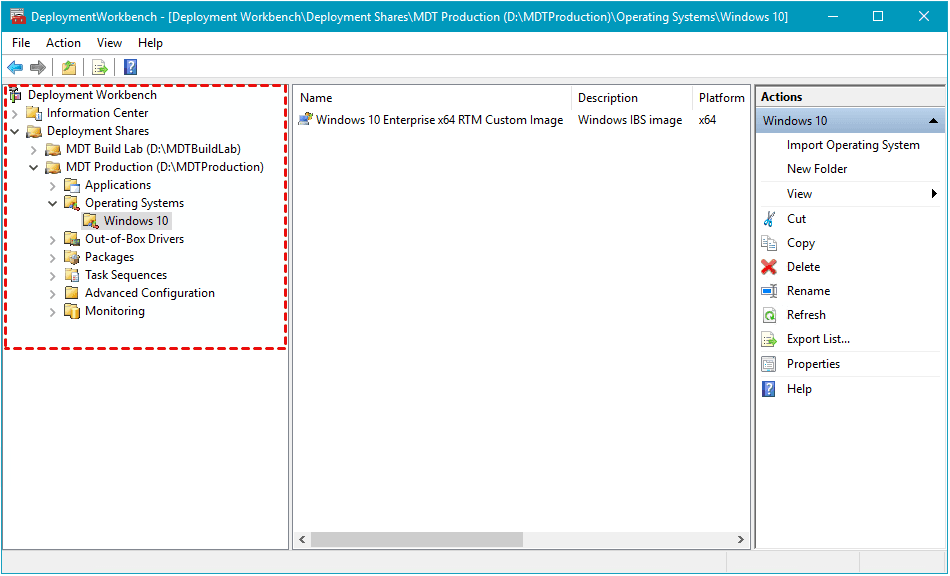
Microsoft offers three built-in deployment toolkits: the Windows Assessment and Deployment Kit (ADK), the Microsoft Deployment Toolkit (MDT), and System Center Configuration Manager (SCCM). These tools, along with several third-party Windows imaging tools, cater to large-scale deployment environments. Users familiar with machine restores may have encountered these products, which are designed to streamline the deployment process.
The Windows ADK is a collection of tools that includes Windows Imaging and Configuration Designer, Windows Assessment Toolkit, Windows Performance Toolkit, and other deployment tools. These tools allow administrators to view image settings, policies, and add third-party drivers that they may need.

These three toolkits, i.e., Windows ADK, MDT, and SCCM, are used for image-based operations.
Windows 10 OS deployment tools are powerful strategies, but they require IT professionals to fully utilize them due to their complex preparations and parameter settings.
Fortunately, Qiling Image Deploy is a third-party Windows deployment software that simplifies the installation process by using a user-friendly interface and wizards, making large-scale Windows deployments efficient and flexible.
- Image deployment and network cloning software allows for the deployment or restoration of an image to multiple computers over a network, streamlining the process of setting up or recovering multiple devices simultaneously.
- It would save you time and effort by provisioning hundreds of PCs and Servers simultaneously.
- The two editions of AID, Free and Technician, both support all Windows-based computers.
To compare the two editions, you can refer to the table provided, which gives a quick overview of the differences between them.
| Free Edition | Technician Edition | |
| Number limit of client computers | unlimited PCs and up to 20 servers | unlimited PCs and servers |
| Real-time process monitor | monitor IP address, restore status and progress, and final result. | monitor IP address, restore status and progress, and final result. |
| Batch preset name of client computers | Yes | Yes |
| Batch preset IP address of client computers | No | Yes |
| Dissimilar hardware restore | No | Yes |
| Business use | No | Yes |
With AID Technician, you can preset client computer IP address and deploy the same operating system to multiple computers with different hardware in the same LAN, which is not possible with the free edition. This allows for more flexibility and efficiency in deploying operating systems.
Deploy Windows 10 to multiple computers via Qiling Image Deploy
Before you start, please make sure:
- All computers are on the same LAN.
- The computer used as a Server/Host is fully functional with a complete Windows Recovery Environment. If it's incomplete or older than Windows 7, download Windows AIK/ADK.
- All the client computers support network boot (PXE boot).
Create a system image without SID
To deploy Windows 10, you'll need a system image without SID, which can be created using Qiling Disk Master. This image should be created before the deployment process.
1. Download Qiling Disk Master Standard on the server computer and create a bootable media with it, allowing you to boot from a bootable disk and create a system image without a unique SID.

2. To find and run Sysprep.exe, press the "Win + R" keys on your keyboard, type "sysprep" in the Run dialog box, and press Enter. Then, run Sysprep.exe, select the "Enter System Out-of-Box Experience (OOBE)" option, check the box next to "Generalize", and choose "Shutdown". This process removes the Security Identifier (SID) on the server computer, preventing compatibility issues after deployment.

3. Boot the server computer from the bootable USB created and create a full system image with Qiling Disk Master. Save the image on a NAS or network share folder, which is on the same network segment as the server and client computers.

Run Windows 10 deployment to multiple computers
1. Download and install AID on the server computer. Start Qiling Image Deploy to create a bootable WinPE ISO file for client computers, choosing "Create Windows PE automatically" to create the ISO image automatically in the installation directory, or "Create bootable WinPE ISO manually" to add third-party drivers to the ISO image.
2. Check the box to enable DHCP based on your network conditions, as there should only be one DHCP server in a typical deployment. If there is no DHCP server in your LAN, check this box. After entering the second interface, you will receive a prompt indicating that the service has started and is waiting for connections.
3. To start client computers, all devices must boot from the network, requiring a manual change in the BIOS settings for each client computer.

4. After all client computers have successfully booted, their status in the display list in Qiling Image Deploy will show as "Client computers connected". Then, confirm that all necessary client computers are online by ticking the "I confirm all the client computers which need to be restored are online" option and proceed by clicking Next.
5. Configure your deployment as follows.
a. Select backup images from network or NAS by clicking Browse.
b. Select the client computers that you will deploy the image to from the list of available computers displayed.
c. In client computers with multiple hard drives, the disk number starts from 0 and is limited to 256. For example, if a computer has 3 hard drives, their disk numbers would be 0, 1, and 2, respectively. This means that the first hard drive is Disk 0, the second is Disk 1, and the third is Disk 2.
d. Set the number of computers to restore at a time, ideally between 1 and 33, to balance network transfer speed, considering deploying 5 computers at a time for optimal performance.
6. (Optional) Click Settings to set client computers' names.
Tip: If there are different drivers in client computers, please upgrade to Qiling Image Deploy Technician and check Universal Restore to ensure secure boot. Additionally, it allows you to preset IP addresses, but ensure the set IP addresses are not already in use in the LAN.
7. Click Start Deploy to execute the deployment, and you'll have the option to shut down or restart client PCs after deployment. After that, just sit back and wait for the process to be completed - you can even grab a cup of coffee while you wait.
More advanced way to deploy Windows to multiple PCs
To simplify the image deployment process, you can use Qiling Disk Master Technician or Technician Plus, which include the Qiling Image Deploy tool and backup function. In contrast, the standalone Qiling Image Deploy only supports BIOS boot, but the integrated version in Qiling Disk Master Technician/Technician Plus supports both BIOS and UEFI boot.
Summary
Follow the Windows 10 deployment guide step by step, and it is quite easy to accomplish those so-called difficult businesses. Qiling Image Deploy has a clearer and simpler operation wizard compared to Microsoft's tools, making it a useful tool for Windows update deployment, regardless of the OS you're deploying.
If you have a Server 2012 system image, you can use it to deploy Server 2012 to multiple computers. This process involves downloading and learning more about the deployment process for multiple computers.
Related Articles
- Learn How to Deploy Windows 10 Image via WinPE USB Disks
Want to know how to deploy Windows 10 (Enterprise) image via WinPE USB disk? This article provides you with a reliable software to do this. Click for more details. - How to Deploy Windows 10 System Image to New Hardware
Deploying Windows 10 system image to computer with new hardware enables you to keep your Windows 10 but upgrade hardware. Qiling Disk Master could be a good Windows 10 deployment tool. - Data Backup and Partition Manager Tutorials
Data Backup and Partition Manager Tutorials - Migrating from Dropbox to Google Drive: A Step-By-Step Guide 2022
Learn how to switch from Dropbox to Google Drive with this step-by-step guide. Seamlessly move your files from one cloud service to another with third-party software. - Automatic Backup data to NAS device with QILING Disk Master
NAS technology is advanced for data safeguard. Using QILING Disk Master to create automatic NAS backup makes data storage and protection easier and safer. - Clone Hard Drive in Windows 10 to New HDD or SSD Easily?
Cloning Windows 10 hard drive has a variety of usages. QILING Disk Master can help you clone hard drive in Windows 10 with a few simple steps.