Creating Windows 10 System Image to an External HDD | 2 Ways
- Why create system image to external hard drives?
- How to create system image Windows 10 on external hard drive
- Method 1. Creating system image to an external drive with Windows built-in tool
- Method 2: Creating system image to an external HDD with third-party software
- Supplement: about external HDD
- Summary
Why create system image to external hard drives?
Many users want to create a system image to an external HDD to keep Windows recoverable. A system image contains the operating system, system settings, installed programs, and required system partitions, so you can restore the computer after a serious failure.
✩ Avoid data loss and reinstallation: System failures can be caused by crashes, virus attacks, laptop theft, or hard drive damage. A system image helps you avoid reinstalling Windows and programs from scratch.
✩ Fast disaster recovery: If you have created a system image on an external hard drive, you can restore Windows more quickly when the system becomes unbootable.
✩ Cost-effective: External HDDs are affordable and provide large capacity, making them suitable for storing system image backups.
How to create system image Windows 10 on external hard drive
Here I will show you two ways of creating system image to an external HDD. First, you need to prepare an external HDD, which is big enough to store your system files. You may choose WD HDD, Seagate HDD, Hitachi HDD, Samsung HDD, or Toshiba HDD as you like.
- Method 1. Creating system image to an external drive with Windows built-in tool
- Method 2: Creating system image to an external HDD with third-party software
Method 1. Creating system image to an external drive with Windows built-in tool
Windows 10 includes the Backup and Restore (Windows 7) tool, which can create a system image and save it to an external hard drive. This method is built in, but it offers limited scheduling and backup management options.
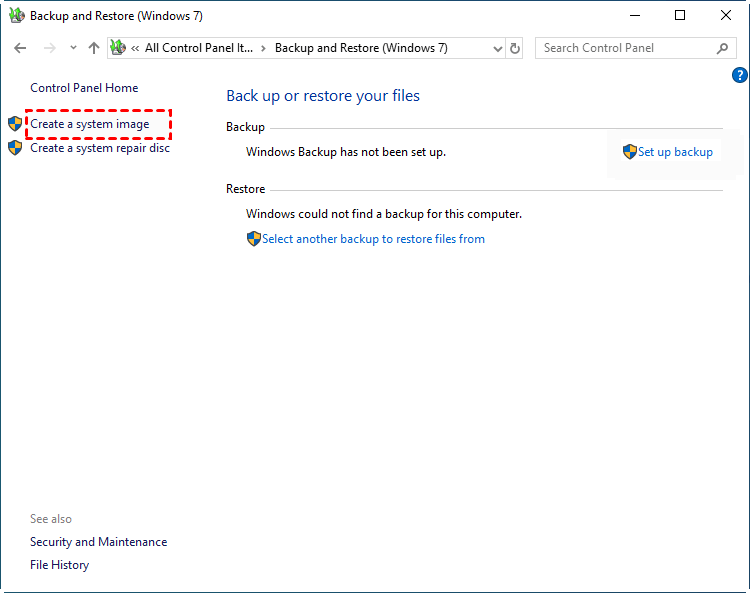
Step 1. Connect your external hard drive to your computer and ensure it can be detected. Open the Backup and Restore program by going to Start -> Control Panel -> System and Security -> Backup and Restore (Windows 7), then click on Create a system image at the left side.
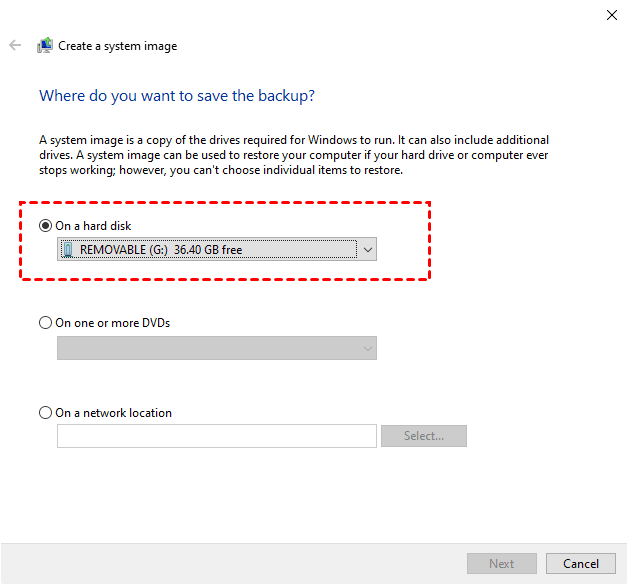
Step 2. To store the image backup, select the prepared external HDD as the destination place and click Next.
Step 3. Select the drive(s) you want to back up, with the system drive selected by default, and then click Next.
Step 4. Confirm your backup information, then click Start backup if there is no problem.
After the process finishes, keep the external hard drive connected only when needed and store it safely to protect the system image from accidental deletion or malware.
Method 2: Creating system image to an external HDD with third-party software
There are many utilities that make up for the limitations of the Windows built-in tool, such as Qiling Disk Master Standard. It can back up and restore a system in a few simple steps and is free for Windows XP/Vista/7/8/10/11.
- Keep system up-to-date: It allows you to schedule a backup system regularly, such as daily, weekly, or monthly, ensuring that all changes made later are included in the latest backup image.
- Save backup time and disk space: To reduce backup time and disk space, consider compressing backup images to smaller sizes, backing up only used sectors of the file system, or backing up only changed files.
- Support multiple storage devices: The software is capable of backing up Windows 11/10/8/7/XP/Vista operating systems to various storage devices, including external hard drives, USB drives, network drives, and NAS devices.
To create a system image to an external HDD with Qiling Disk Master, connect the external drive first, then create a System Backup task and choose the external HDD as the destination.
Step 1. Download Qiling Disk Master Standard, install and launch it, then click on Backup and select System Backup from the main interface.
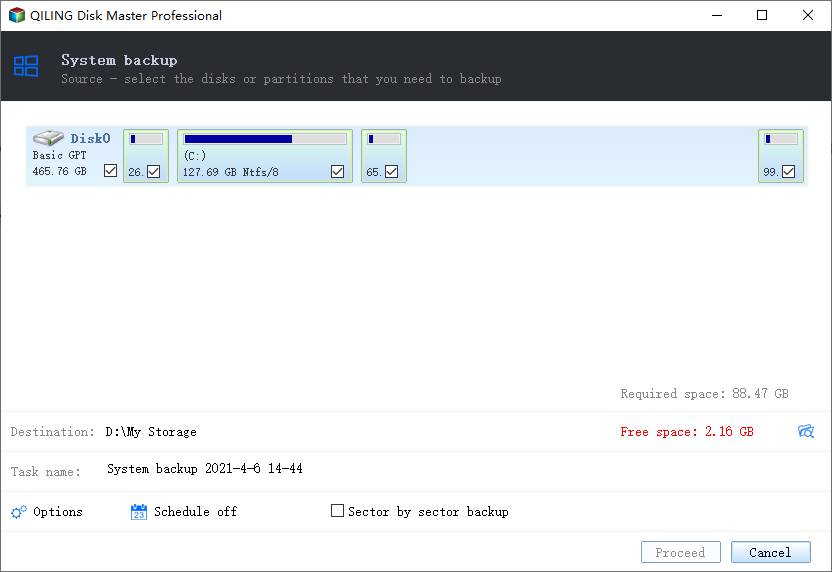
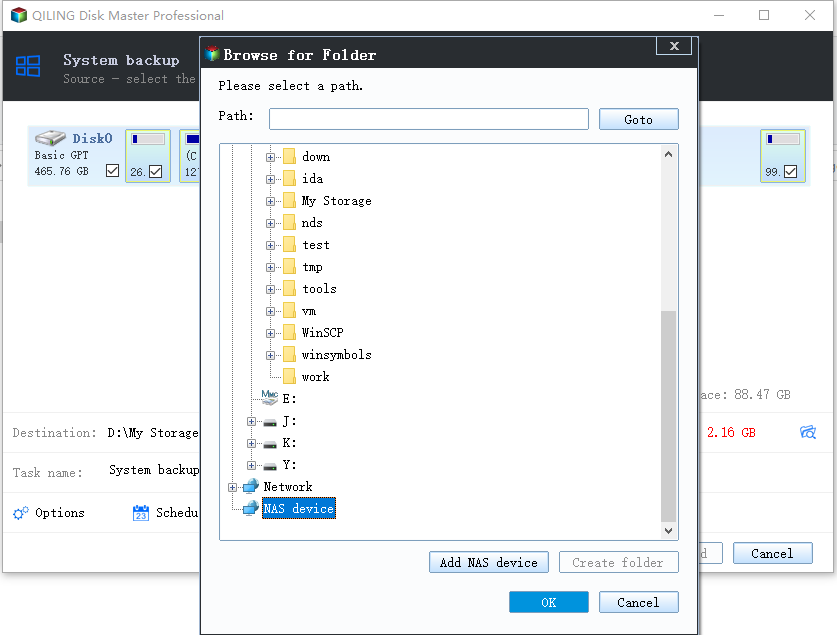
Step 2. The System Backup page will appear, with the system drive already selected. Simply choose the prepared external hard drive as the destination for the backup.
Step 3. You can add comments to the backup image for future reference. If you want to set up automatic backup, use the Schedule option. Then click Proceed to create the system image.
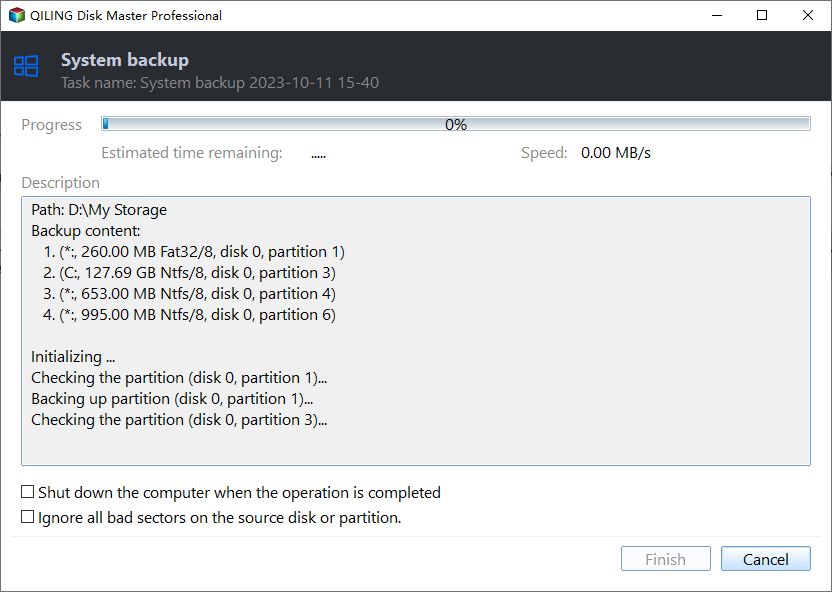
- Notes:✎...
- If your backup disk is not big enough, the most effective way to manage space is to regularly delete old backup images. To do this, you need to enable the cleanup methods in the Backup Scheme feature, which is a feature supported by the professional version.
- You can create a bootable disc with this software which is helpful when your system cannot boot.
- You can upgrade to Qiling Disk Master Professional to add the "Qiling Disk Master Recovery Environment" to the system boot menu, allowing you to start the system from the recovery environment to restore images created by Qiling Disk Master.
Supplement: about external HDD
A Hard Disk Drive (HDD) is a data storage device that uses one or more rapidly spinning platters coated with magnetic material to store and retrieve data. When data is written or read, the HDD spins and a moving actuator arm accesses the information.
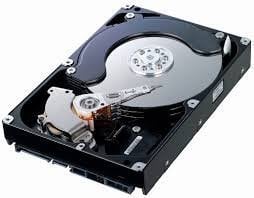
An external hard drive is used for extra storage or backup and usually connects through a USB port. After plugging it into your computer, make sure Windows recognizes it before starting the backup.
Summary
Creating a system image to an external HDD is relatively easy with a reliable backup software like Backup and Restore (Windows 7) or Qiling Disk Master Standard. However, the built-in tool can be unstable, leading to backup failures due to issues like insufficient space or VSS errors. For a more secure data backup, it's recommended to use Qiling Disk Master instead.
By upgrading to a higher edition of Qiling Disk Master, you can use advanced features such as backup scheme cleanup, compression, and intelligent sector backup. Higher editions can also restore a system image to another PC when needed.
Related Articles
- How to Create a System Image in Windows 10/8/7 Easily
- Restore Windows 10 System Image to New Hard Drive | 2 Ways
- 3 Ways to Transfer System Image to New Hard Drive
- How to Move CCleaner to New Computer?
This post will guide you on how to move CCleaner to a new computer. There are two ways, including automatic and manual to help you move CCleaner to a new computer. Click here to learn more. - Why can't you create an emergency disk in a domain environment computer?
This post tell you how to create an emergency disk in a domain environment computer. - How to Create A System Image Backup in Windows 10?
Making a complete system restore point is the best way to protect yourself from Windows 10 crashes. Please read this article for detail.
Products
Articles & Tutorials
- Data Recovery
- Data Backup
- File Recovery
- File Backup
- File synchronize
- System Backup and Restore
- Disk and Partition Clone
- Technical articles
- Disk Master Help
- Windows Deleted File and Disk Recovery Tutorials
- Windows File and Data Recovery Tutorials
- More Windows Tutorials for Install, Security, Files, and PC Tips
- Windows Boot, Repair, and Recovery Environment Tutorials
- Windows Backup Tutorials
- Windows Restore Tutorials
- Windows Clone and Migration Tutorials
- Windows Server Backup, Recovery, and Management Tutorials
- Windows Disk, Partition, and Storage Management Tutorials