How to Shrink Volume in Windows 7?
Why shrink volume in Windows 7?
When buying a new laptop or desktop, users may find that the hard drive layout is not practical. The manufacturer may create a small C: system partition with a large data partition, or leave the whole disk as one large C: drive. In both cases, shrinking a volume in Windows 7 can free up unallocated space, which can then be used to create a new partition or expand a smaller partition.
How to shrink volume in Windows 7 Disk Management?
Windows 7 Disk Management includes two useful features: "Extend Volume" and "Shrink Volume". Compared with Windows XP, these options make partition resizing easier. To shrink a volume in Windows 7, open Disk Management, right-click the target partition, choose "Shrink Volume", enter the amount of space to shrink, and confirm the operation.
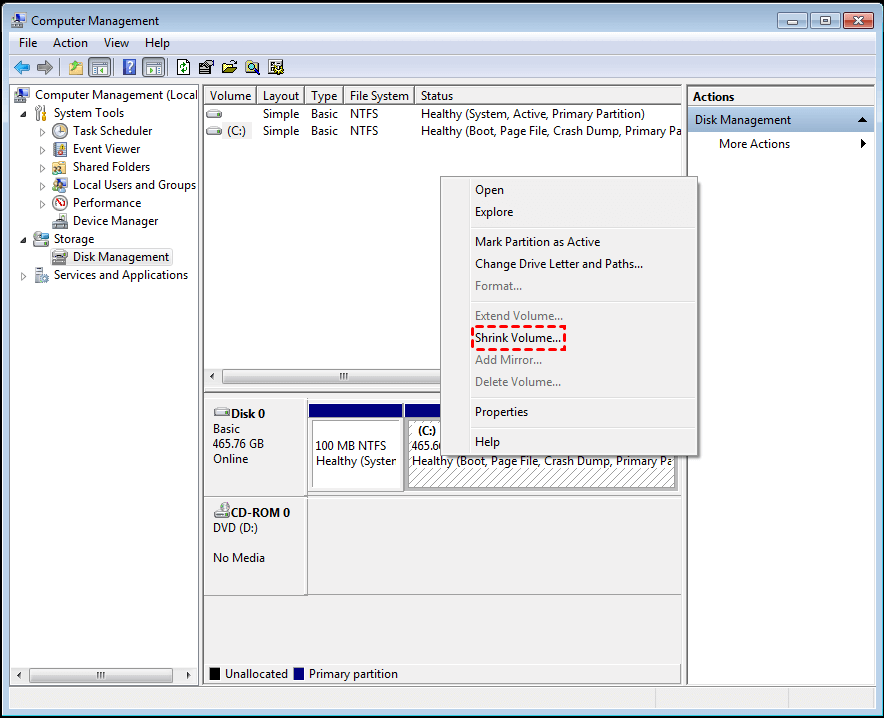
Step 1. Launch the Disk Management, right-click the partition you want to shrink, and select "shrink volume".
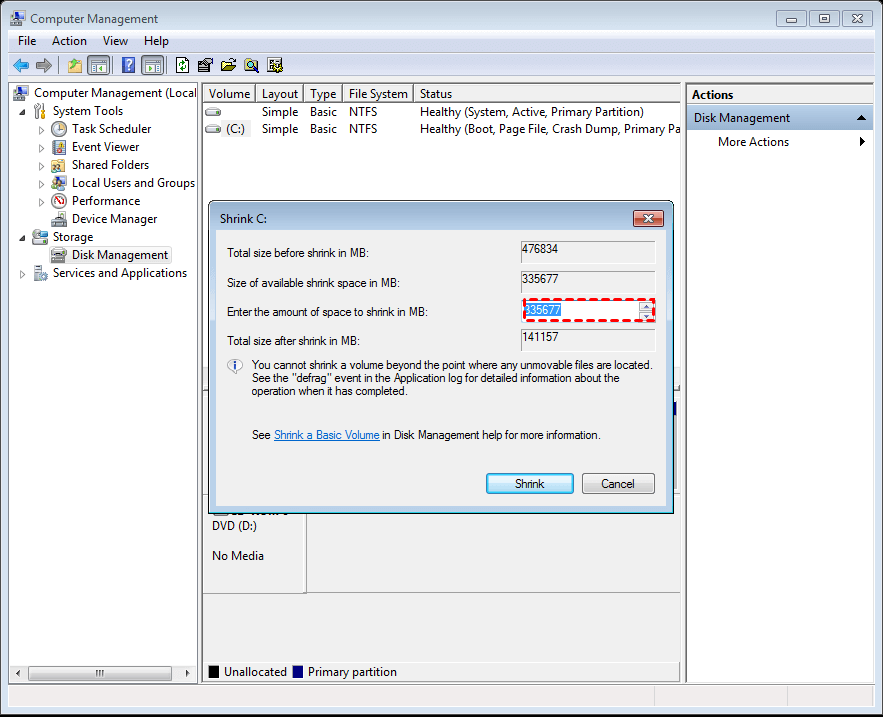
Step 2. In the pop-up window, you could shrink the size within the available shrinking space, then click the "shrink".
The new unallocated space may be located behind the partition after the operation is completed.
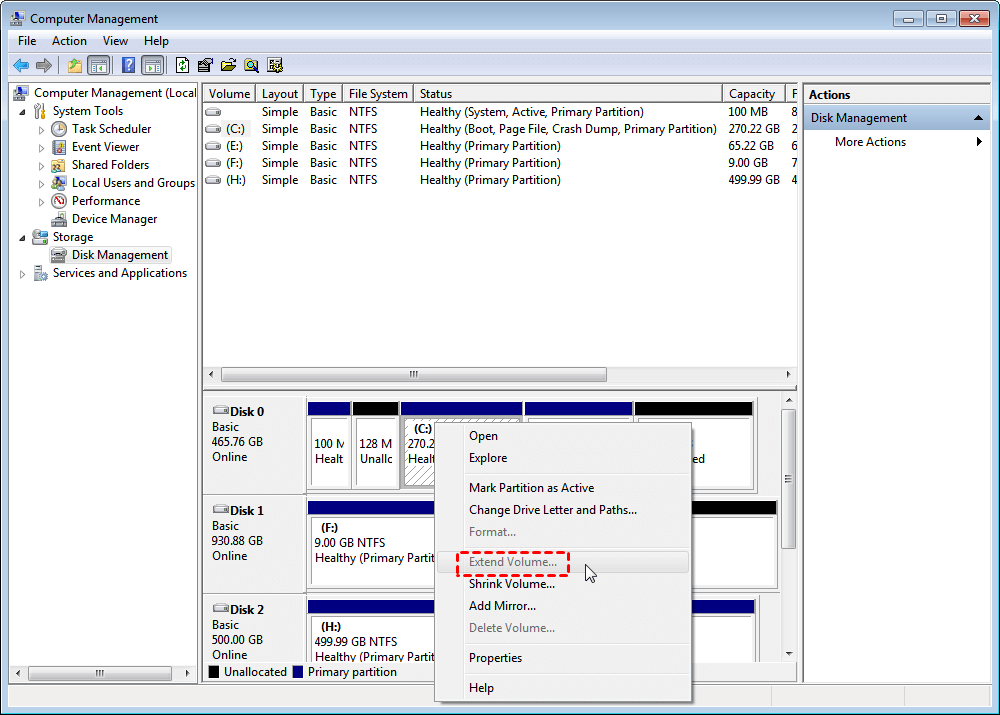
With the unallocated space, you can easily create a new partition, but it can only be used to extend the partition on its left side, such as adding it back into the D partition if you shrunk the D drive, making the "Extend Volume" option greyed out when trying to extend a volume with unallocated space.
Notice:
▸You can only shrink a partition with a RAW or NTFS file system, but not one with a FAT or FAT 32 file system.
▸In the Disk Management console, the largest available size to shrink a partition is half of the total size of the partition. (e.
▸There are chances that you encounter issues like "there is not enough space available on the disk(s) to complete this operation" while shrinking Windows 7 volume.
Easier to shrink volume Windows 7 with free partition manager
While the built-in Disk Management in Windows 7 allows for some flexibility in shrinking volume, it still has limitations and risks associated with it. To overcome these limitations, you can consider using a third-party partition software like Qiling Disk Master Standard, a free partition manager that offers more advanced features and capabilities.
▸You can resize both FAT32 and NTFS partitions, including those with normal or encrypted data, using a partition manager software. This allows you to shrink or extend the partition to a desired size, giving you more flexibility in managing your disk space.
▸Shrink partition beyond of the limit;
▸Extend partition with uncontiguous unallocated space;
▸ To extend a partition, you need to move the unallocated space next to the partition you want to extend. This is typically done by moving the unallocated space to the right of the partition, so that it becomes adjacent to the partition and can be easily extended.
To shrink a partition in Windows 7, you can download the partition software and follow these steps: click the button to download the software, then refer to the steps to shrink the partition. For example, to shrink the D drive and extend the C drive, follow the steps to shrink the D drive and then extend the C drive.
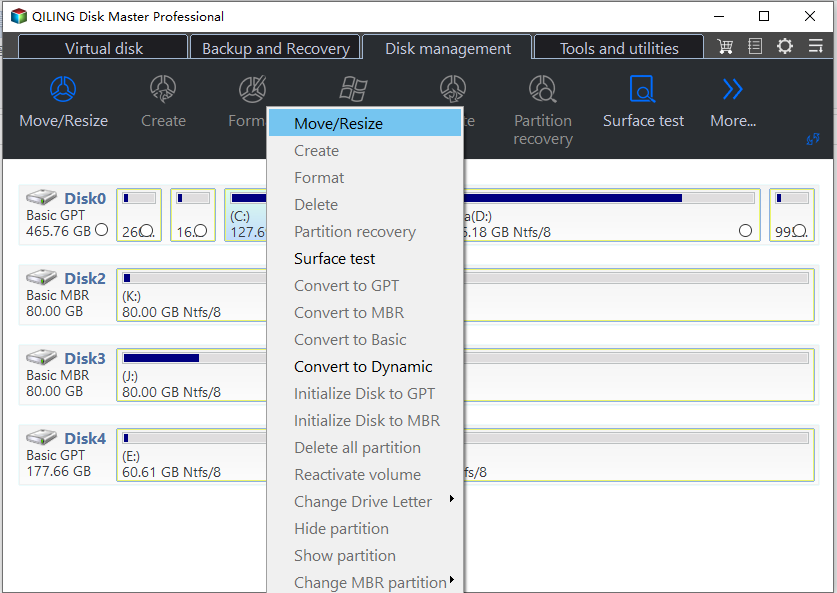
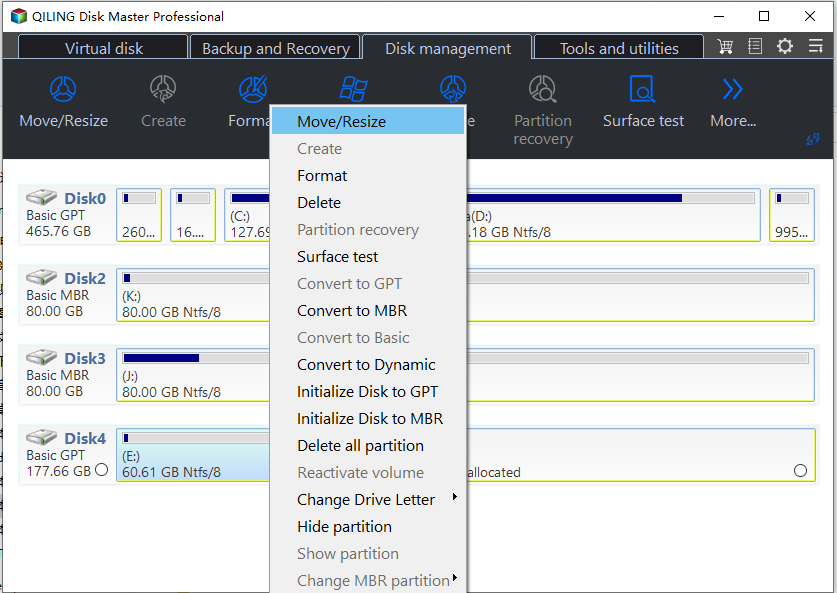
Step 1. Install and run Qiling Disk Master Standard. Right-click the D volume and select "Resize/Move Partition".
Step 2. Drag the partition to the leftward.
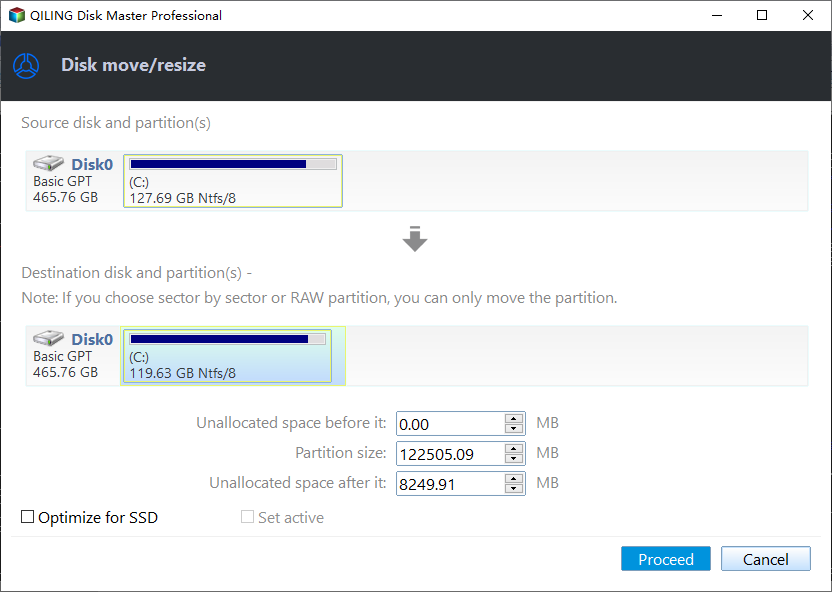
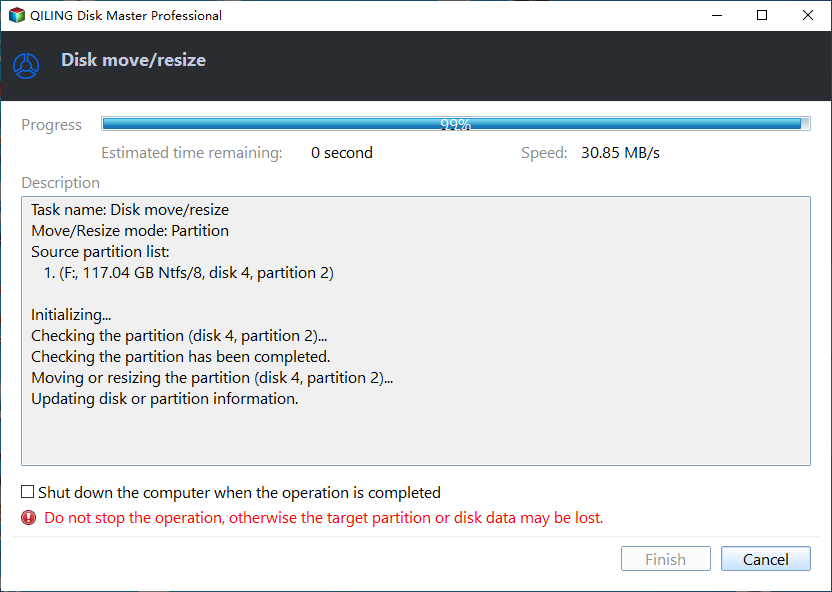
Step 3. Now, you can see there is unallocated space after the D drive. To make it take effect, you have to hit on "Proceed".
To shrink a volume in Windows 7 using Qiling Disk Master Standard, follow these steps. Once you've done that, you can use the "Merge Partitions" feature to extend the C drive or other partitions by merging uncontiguous unallocated space into another partition, or merging two adjacent partitions.
Step 1. Right-click the C drive and select "Merge Partitions".
Step 2. Drag the partition to the unallocated space.
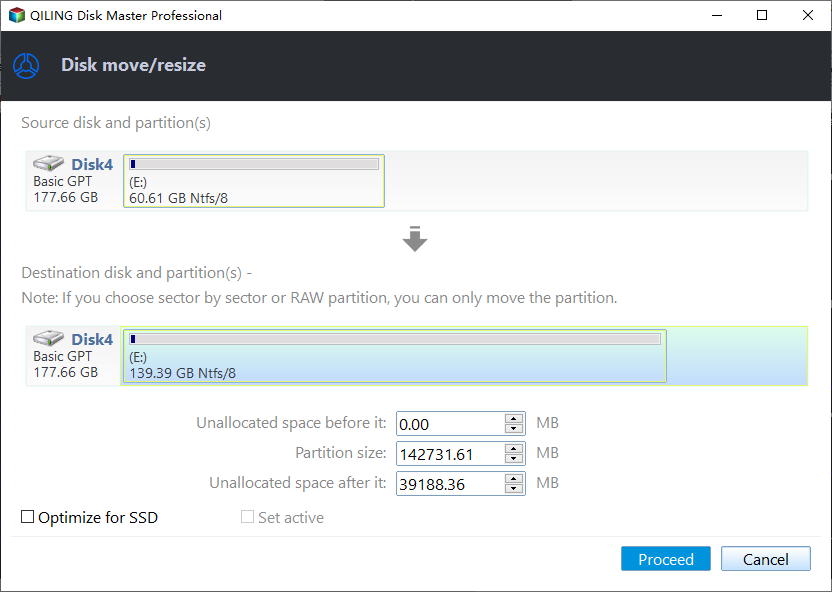
Step 3. Finally, click on "Proceed" to commit the pending operation.
With the help of a free partition manager, shrinking a volume in Windows 7 can be made easier, and the target volume can be extended. Upgrading to the professional edition allows for easily allocating free space from one drive to another via the "Allocate Free Space" feature, eliminating the need to first shrink one partition, get unallocated space, and then extend the partition.
Related Articles
- Windows 10/8/7: How to Shrink Volume Using Diskpart Command Line?
Learn how to use DiskPart to shrink volume from in command line prompt with the syntax in Windows 11/10/8/7. But sometimes, it may tell you there is an error. Fortunately, Qiling Disk Master can fix it. - What to Do When Shrink Volume Greyed Out in Windows 7/8/10?
When using Disk Management to shrink a volume in Windows 10/8/7, you may find shrink volume greyed out. In such case, what to do? This article provides different solutions. - [Fixed] Server 2012 Keeps Booting to the Blue Choose an Option Screen
If you have no idea how to solve Windows Server 2012 keeps booting to the blue choose an option screen, you can look through this page to get the exact fixes to tackle it. - Complete Guide to Upgrade Windows Server 2019 to 2022
You can learn to upgrade Windows Server 2019 to 2022 step by step as well as protect your Windows Server 2022 in the best way. Read on for details. - Fix The Request Failed Due to a Fatal Device Hardware Error
"The request failed due to a fatal device hardware error" occurs on external hard drive, SSD or SD card? Anyway, you can find the causes and matching solutions below. - How to Easily Format/Unlock Encrypted Hard Drive without Password?
Qiling Disk Master Standard will do you a big favor to format/unlock the encrypted drive, if you have a BitLocker encrypted hard drive and forget the password.