Clean Up a Windows Server 2008 or 2008 R2 Hard Drive Safely
A full server volume can stop backups, updates, logging, and applications. Cleanup should begin with identifying growth, not deleting the largest folders. A database log, a backup chain, and a temporary installer cache have different retention requirements.
Schedule the work with the service owner. Windows Server 2008 and 2008 R2 are legacy systems, so maintenance should be combined with a migration plan rather than treated as a permanent capacity solution.
Measure usage and identify files you can retire
- Open Computer and record each volume's total and free space. Confirm whether the warning concerns C: or an application-data volume.
- Inspect known application log directories and backup destinations. Compare dates and sizes with the application's retention policy.
- Ask the service owner whether logs are still required for recovery, auditing, or replication before deleting them.
- Check the backup console for expired recovery points. Remove them through the backup product's retention controls rather than deleting arbitrary members of a backup chain.
- Move approved archives to separate storage, open sample files there, and retain a verified backup before deleting the originals.
Do not manually remove files from Windows Installer, WinSxS, database transaction-log directories, or virtual-machine storage merely because they occupy space.
Use Disk Cleanup when it is available
Disk Cleanup may not be installed by default on these server versions. On applicable installations, Desktop Experience supplies the feature. Adding it can require a restart and should be planned rather than performed during an unannounced production maintenance task.
- Check whether
cleanmgris already available. If it is, run it with administrative rights and choose the intended volume. - If absent and approved for this server, open Server Manager > Features > Add Features and review Desktop Experience and its dependencies.
- Complete installation and the scheduled restart. Then reopen Disk Cleanup.
- Review each category, including temporary files and Recycle Bin. Remove only approved contents and allow the scan and cleanup to finish.
- Record the reclaimed space and check application operation afterward.
Microsoft notes this availability issue in its Disk Cleanup documentation. Do not substitute cleanup commands intended only for much newer server versions.
Remove applications through their supported maintenance tools
Open Control Panel > Programs and Features, review the program's purpose with the owner, and uninstall it only after its service dependencies and data requirements are understood. Moving Program Files folders by hand does not relocate a server application correctly.
For an application that must remain, use its documented data-directory relocation process. That normally involves a backup, a maintenance stop, a verified copy, configuration changes, and a service test. There is no single safe file-move procedure for all database and server products.
Expand C: when cleanup does not address the capacity problem
If C: is simply too small, consider resizing only after a verified server backup and a maintenance window. Use a compatible Qiling Disk Master Server edition. The following workflow assumes unallocated space is already adjacent to the right of C: on the same disk. It does not describe moving another partition.
Step 1. Open the partition-management view and confirm the server disk, C: capacity, and adjacent unallocated area.
Step 2. Select C: and click Resize/Move.
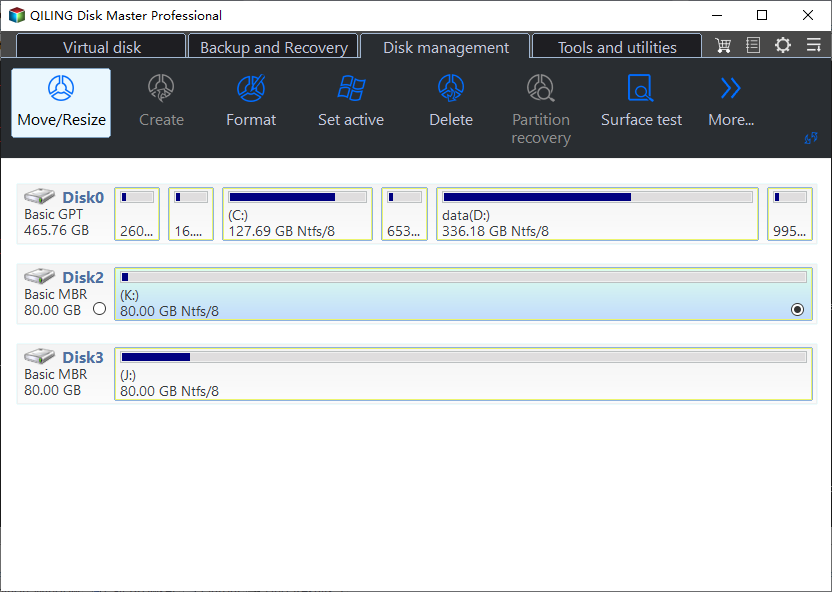
Step 3. Drag C:'s right boundary into the adjacent unallocated space, or enter the intended larger size. Leave the left boundary in place.
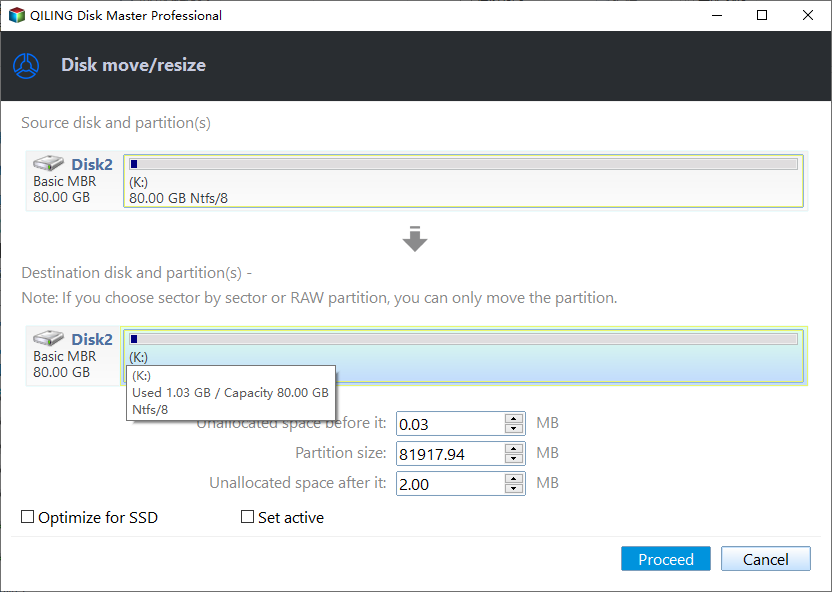
Step 4. Check the new size and target partition, then click Proceed. Follow any restart requirement and keep power stable.
If another partition lies between C: and the free area, stop and use a separate layout-specific plan. Do not delete a recovery or application partition just to enable extension.
After cleanup or resizing, restart affected services, test shares and applications, and confirm that the next scheduled backup completes. Monitor space growth to identify the cause of recurring pressure.
Related Articles
- Extend a Server 2008 R2 Partition
Review partition layout before adding capacity to a server volume. - Shrink a Server Logical Drive
Keep shrinking and extending as distinct partition operations.
Products
Articles & Tutorials
- Data Recovery
- Data Backup
- File Recovery
- File Backup
- File synchronize
- System Backup and Restore
- Disk and Partition Clone
- Technical articles
- Disk Master Help
- Windows Deleted File and Disk Recovery Tutorials
- Windows File and Data Recovery Tutorials
- More Windows Tutorials for Install, Security, Files, and PC Tips
- Windows Boot, Repair, and Recovery Environment Tutorials
- Windows Backup Tutorials
- Windows Restore Tutorials
- Windows Clone and Migration Tutorials
- Windows Server Backup, Recovery, and Management Tutorials
- Windows Disk, Partition, and Storage Management Tutorials