Extend Volume Greyed Out in Windows Server 2016: Fixes
Extend Volume is normally available only when unallocated space is immediately to the right of an NTFS volume on a supported disk. Check the disk layout before deleting or moving anything.
Why Extend Volume is greyed out
- Unallocated space is not adjacent to the target volume.
- The target volume uses a file system Windows cannot extend in Disk Management.
- A recovery or other partition sits between the volume and free space.
- The disk layout or volume type does not support the planned extension.
Method 1. Check the Disk Management layout
Step 1. Open Disk Management and identify the target volume and unallocated space.
Step 2. If unallocated space is directly to the right, right-click the target volume and choose Extend Volume.
Step 3. Follow the wizard, select the available space, and confirm the final size.
Method 2. Move space with a partition tool
 Qiling Disk Master Server
Move or resize partitions when unallocated space is not adjacent to the Server 2016 volume you need to extend.
Step 1. Back up the server volume first. If the disk hosts databases, shared folders, or application data, schedule downtime and pause related services before changing the partition layout.
Step 2. Open Qiling Disk Master Server and locate the target volume that you want to extend. Then find the unallocated space and check whether another partition sits between them.
Step 3. If a partition is between the target volume and the unallocated space, right-click that middle partition and choose Resize/Move Partition. This step is used to open the move/resize window for the blocking partition.
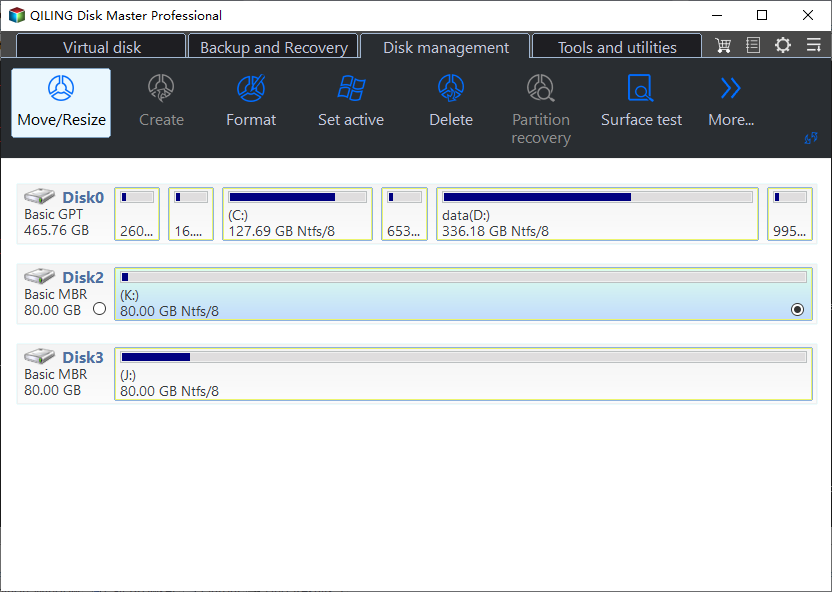
Step 4. Drag the middle partition to the right or left as needed, so the unallocated space becomes directly next to the target volume. Review the preview and confirm that no unrelated server partition is selected.
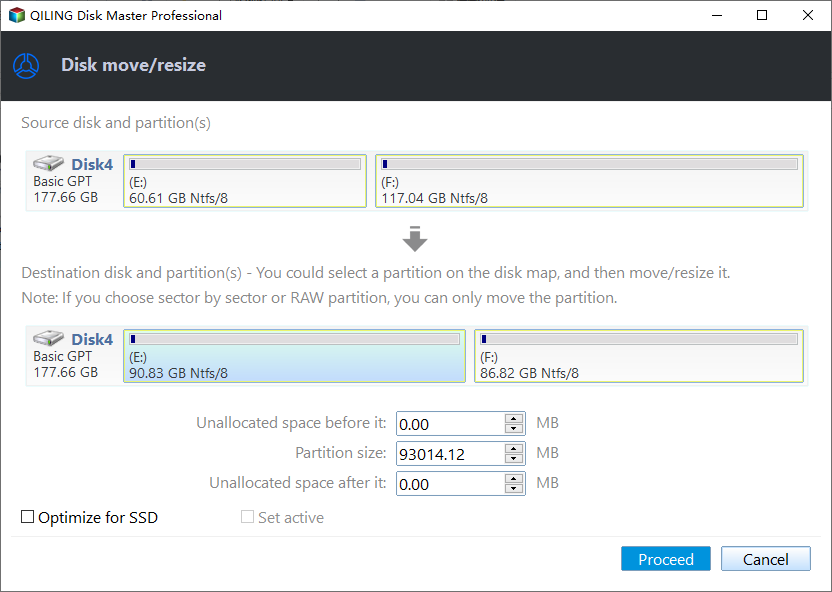
Step 5. Review the pending operation list. It should show the partition move and the target volume adjustment you intend to apply. Click Proceed only after confirming the final disk layout.
Step 6. After the operation finishes, open Disk Management and File Explorer to confirm the new volume size. Restart paused services and verify shared paths, application folders, and permissions.
Conclusion
Do not delete recovery or application partitions merely to enable Extend Volume. Create a backup and use a layout-aware tool when the free space is not adjacent.
Related Articles
-
Shrink Volume in Windows Server 2016
Shrink a server volume safely and create usable unallocated space after a backup. -
Extend Primary Partition in Windows Server 2008 R2
Learn when Disk Management works and when a partition tool is needed for server disks.
Products
Articles & Tutorials
- Data Recovery
- Data Backup
- File Recovery
- File Backup
- File synchronize
- System Backup and Restore
- Disk and Partition Clone
- Technical articles
- Disk Master Help
- Windows Deleted File and Disk Recovery Tutorials
- Windows File and Data Recovery Tutorials
- More Windows Tutorials for Install, Security, Files, and PC Tips
- Windows Boot, Repair, and Recovery Environment Tutorials
- Windows Backup Tutorials
- Windows Restore Tutorials
- Windows Clone and Migration Tutorials
- Windows Server Backup, Recovery, and Management Tutorials
- Windows Disk, Partition, and Storage Management Tutorials