Fix Windows Server 2012 R2 Boot Loop
A Windows Server 2012 R2 boot loop can happen after failed updates, damaged boot files, driver changes, storage controller changes, or disk errors. The server restarts repeatedly and may not reach the sign-in screen. Work carefully because production data and services may be involved.
Quick checks before repair
- Record the stop code or error text if one appears.
- Disconnect newly added USB devices or disks.
- Check RAID, storage controller, and disk status in firmware or management tools.
- If the server hosts critical data, create an image backup before destructive repair attempts.
Method 1. Start with Last Known Good options
Step 1. Restart the server and open Advanced Boot Options.
Step 2. Try Safe Mode. If it starts, remove recently installed drivers, updates, or software.
Step 3. Check Event Viewer and device drivers, then restart normally.
Method 2. Repair boot files from recovery media
Step 1. Boot from Windows Server installation or recovery media.
Step 2. Open Repair your computer and then Command Prompt.
Step 3. Run bootrec /fixmbr, bootrec /fixboot, and bootrec /rebuildbcd. If access is denied, confirm the system partition letter and boot mode.
Step 4. Run chkdsk C: /f only after confirming C: is the Windows volume in recovery mode.
Method 3. Restore from a working backup with Qiling Disk Master Server
 Qiling Disk Master Server
Boot the server into recovery media and restore a verified system image when startup repair cannot stop the boot loop.
Step 1. Prepare a bootable recovery USB on a working computer. Install and open Qiling Disk Master Server, connect an empty USB drive, and use Create Bootable Media to create the recovery media. The USB drive may be formatted during creation, so copy its files elsewhere first if needed.
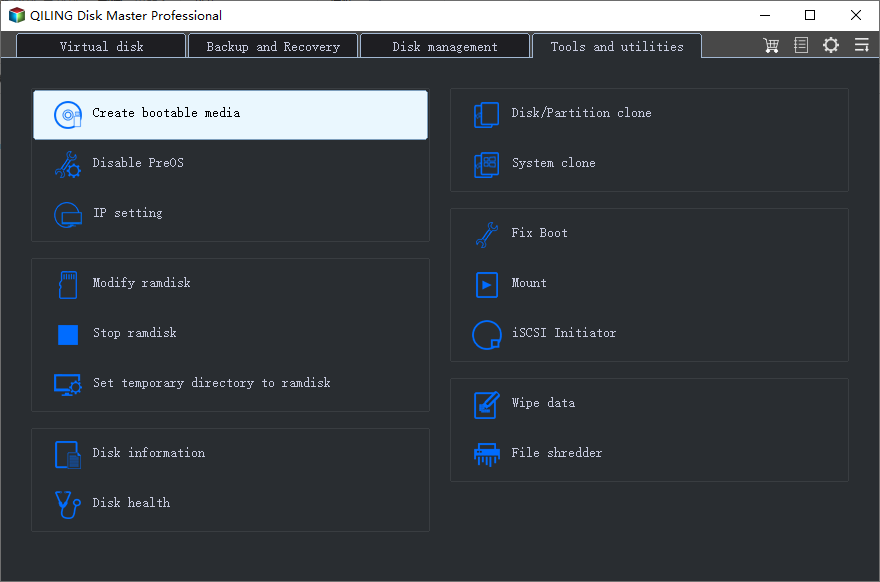
Step 2. Prepare the restore source and target server before starting recovery. Make sure the system image backup is available on an external disk, NAS, or network share; connect the recovery USB to the Server 2012 R2 machine; then enter BIOS or the boot menu and boot from the USB. If the server uses RAID or a special storage controller, keep the driver ready so the target disk can be detected in WinPE.
Step 3. In the WinPE environment, open Qiling Disk Master Server and choose the restore feature from the main interface.
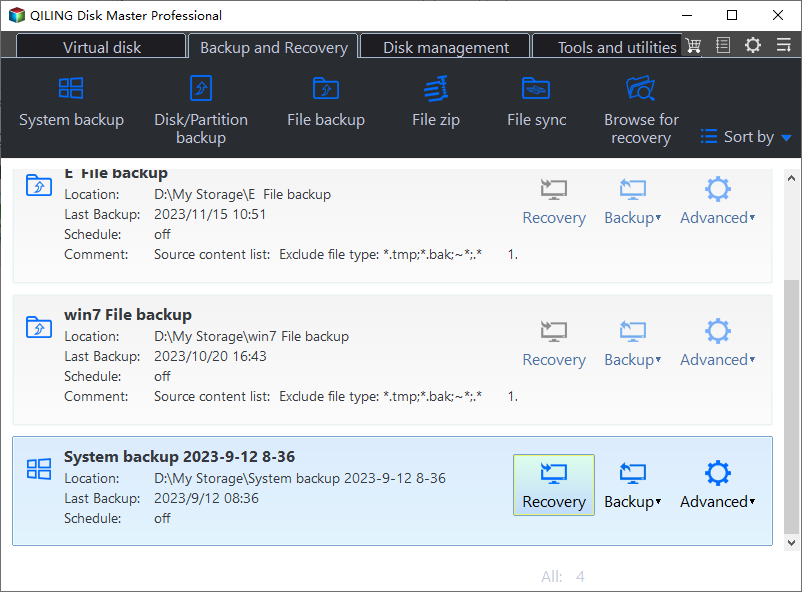
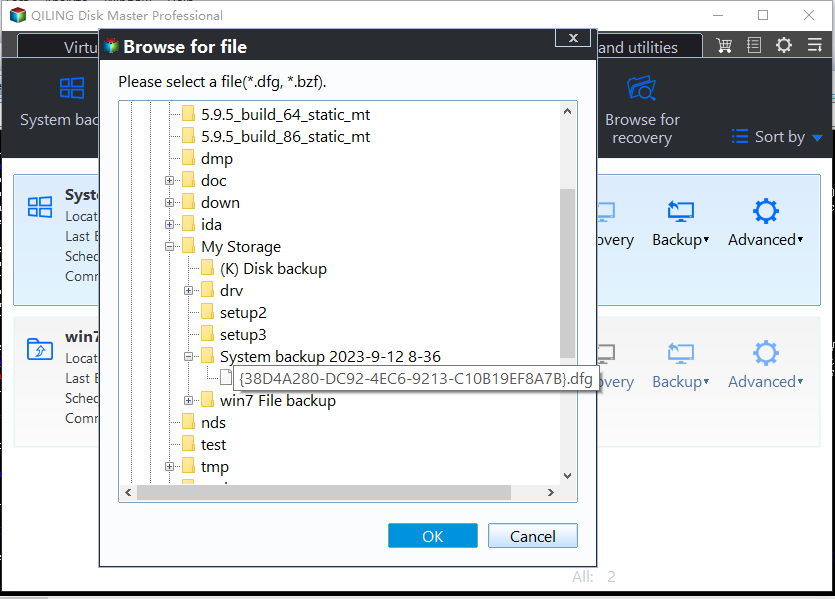
Step 4. Select the backup image created before the boot loop started. If the image is stored on a network path, enter the correct network location and credentials.
Step 5. Choose whether to restore the entire disk or only the system-related partitions. For a boot loop, restoring the entire system disk is usually safer when the backup and target disk are reliable.
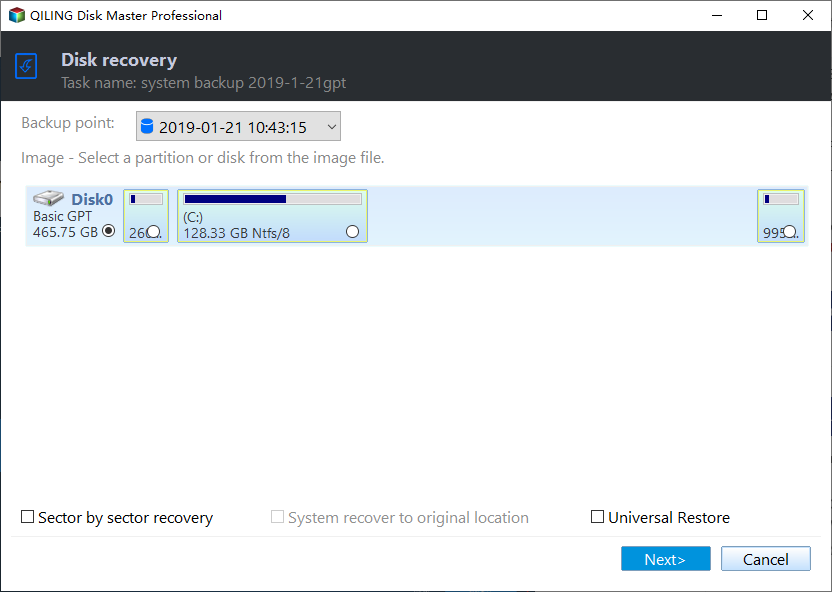
Step 6. Select the correct server disk as the restore destination. Confirm the disk by capacity, disk number, and existing layout before continuing, because the destination will be overwritten.
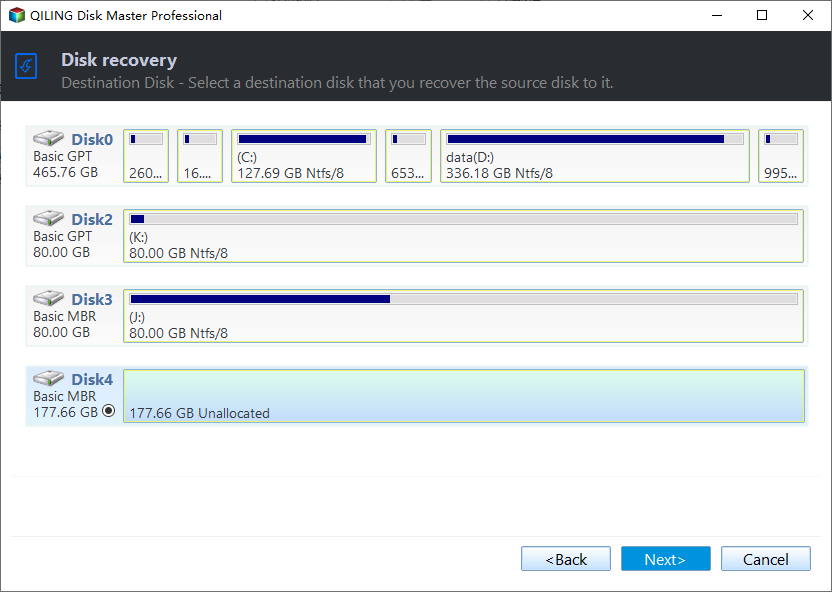
Step 7. Review the restore preview. Check the source image, destination disk, boot mode, and partition layout. If the server uses SSD storage, enable SSD alignment when available.
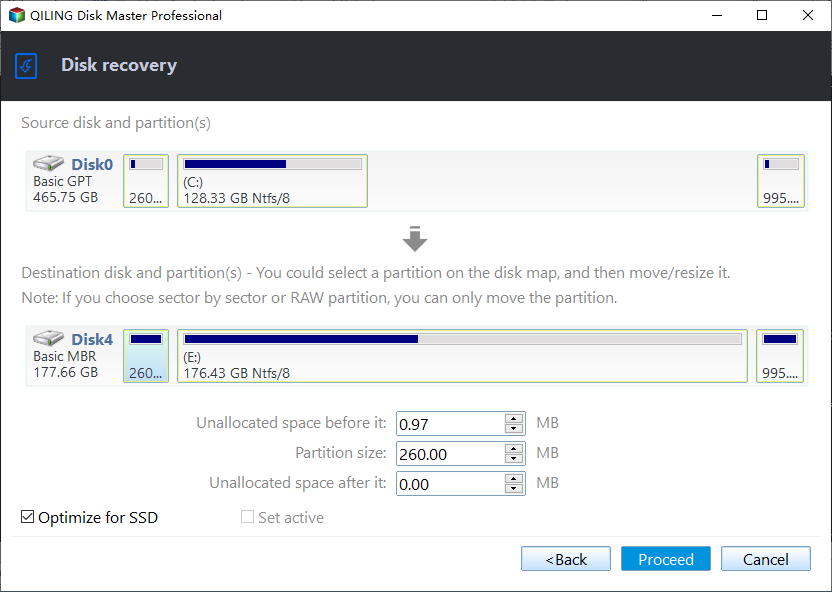
Step 8. Click Proceed to start the restore. Keep the server powered on and do not interrupt the operation.
Step 9. When the restore finishes, remove the recovery USB and restart the server from the restored disk. Confirm that Windows Server starts, then check Event Viewer, services, shared folders, and application paths.
Step 10. Before applying the same driver, update, or storage change again, confirm what triggered the boot loop and create a fresh backup of the working server state.
Conclusion
Start with non-destructive checks, then repair boot records or restore a known-good image. For servers, the most reliable way to reduce downtime is to keep tested recovery media and scheduled system backups.
Related Articles
-
Repair Windows Server 2019 UEFI Boot
Rebuild EFI boot files and create a recovery backup after the server starts. -
Windows Server 2012 Boot BCD Error
Repair BCD startup problems and use bootable media when Windows Server cannot start.
Products
Articles & Tutorials
- Data Recovery
- Data Backup
- File Recovery
- File Backup
- File synchronize
- System Backup and Restore
- Disk and Partition Clone
- Technical articles
- Disk Master Help
- Windows Deleted File and Disk Recovery Tutorials
- Windows File and Data Recovery Tutorials
- More Windows Tutorials for Install, Security, Files, and PC Tips
- Windows Boot, Repair, and Recovery Environment Tutorials
- Windows Backup Tutorials
- Windows Restore Tutorials
- Windows Clone and Migration Tutorials
- Windows Server Backup, Recovery, and Management Tutorials
- Windows Disk, Partition, and Storage Management Tutorials