How to Reset SSD to Factory Settings Completely without Hurting It?
- When do you need to reset SSD to factory default?
- What is SSD Secure Erase?
- Best tool for secure erasing SSD and restoring the factory settings
- Summary
When do you need to reset SSD to factory settings?
Many users install Windows on a solid-state drive (SSD) for faster speeds, but may want to factory reset it to default settings when it becomes slow or they want to start over.
SSDs, like USB flash drives, have a limited number of write cycles, making it impossible to reset them to factory default like hard disk drives. To remove all data without damaging the SSD, you can perform an SSD Secure Erase, which is a specific process designed to restore its factory setting.
What is SSD Secure Erase?
According to the ATA specification, Secure Erase completely erases all data on an SSD, restoring it to its original performance, and makes it impossible to recover data even with specialized software.
Secure Erase is a quick process that deletes all data from an SSD in just a few seconds. To securely erase an SSD, it should be connected to a SATA controller, such as a desktop or laptop's motherboard, to ensure reliability. Alternatively, SAS controllers or hardware RAID controllers can also work, but connecting it via USB is not an option for restoring the SSD to its factory settings.
Reset Samsung SSD via Samsung Magician software
You don't need to manually type the ATA Secure Erase command to securely erase an SSD, as many manufacturers provide a management tool, such as Samsung Magician, which allows you to reset your Samsung SSD to factory settings via the "secure erase" feature.
1. To erase the data on your Samsung SSD, install and run the Samsung Magician software, then click on the "Secure Erase" option located on the left side of the interface.
Step 2. Select the SSD drive you want to reset and choose a USB flash drive to create a bootable media for securely erasing the SSD in BIOS mode.
The process involves restarting the computer, pressing a specific key to enter BIOS, and performing a secure erase using Samsung's utility, which only works with Samsung SSDs and requires a bootable USB flash drive.
Best tool for secure erasing SSD and restoring the SSD factory settings
If your SSD doesn't come with a Secure Erase tool, or if you have multiple SSDs to reset, you can use Qiling Disk Master Professional to securely erase all types of SSDs.
PS.: You can download the demo version of Qiling Disk Master Professional to try it out first.
Reset any SSD to factory settings by "Secure Erase"
To erase an SSD, you can connect it to another computer running Windows 7 via a SATA port, as the feature is currently only workable in Windows 7. If the SSD is your current system disk where Windows is installed, you can use this method to erase it. This allows you to securely erase your SSD without affecting your current system. If your SSD is not your system disk, you can simply erase it using the built-in disk management tool in Windows.
Note: Be extremely cautious when using this method, as it permanently deletes data and makes it unrecoverable. It's essential to back up important files to the cloud or external storage before proceeding.
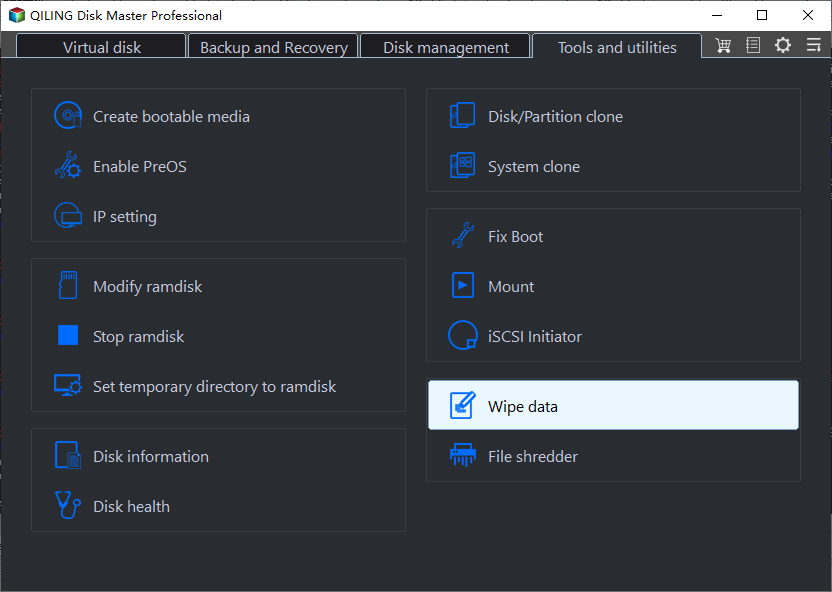
Step 1. In the left menu of Qiling Disk Master, click "Wipe" on the top toolbar and choose "SSD Secure Erase".
Step 2. Select the SSD that you want to reset to factory settings and click "Next".

Step 3. After reconnecting the SSD, click Proceed to start the Secure Erase for your SSD.

In a matter of seconds or milliseconds, the SSD will be reset to its factory settings, displaying a block of unallocated space. This process can be completed before installing Windows, allowing for the quick partitioning and formatting of the SSD as desired. Alternatively, if a factory reset from BIOS is required, a bootable media can be created, and the operation can be performed in WinPE mode.
Summary
The Qiling Disk Master Professional allows for easy SSD reset to factory settings, regardless of the brand, through secure erasing. Additionally, it offers features such as cloning SSDs, aligning partitions, recovering deleted files, and converting SSDs to GPT or MBR without deleting partitions. It also supports partition and disk management in Windows Server through its Server Edition.
Related Articles
- Reliable HDD to SSD Cloning Freeware for Windows 10/8/7
You may need HDD to SSD cloning freeware to migrate data when upgrading the disk. Luckily, Qiling Disk Master Standard can clone HDD to SSD on Windows 11, 10, 8, and 7 without losing data. - How to Securely Erase SSD Drive in Windows 7?
Before selling your SSD, you need to erase SSD drive securely to wipe data in Windows 10/8/7 so that your data on it won't be retrieved with despiteful purpose. - How to Wipe a USB Drive Completely | 3 Secure Methods
To safely wipe a USB drive and erase viruses or sensitive information, consider the following methods. If you want to discard an old USB or use a second-hand one, you can try formatting it, using a USB wiping tool, or physically destroying it. - Steps to Run DiskPart Clean All Command to Erase SSD Drive
In this post, you will learn how to use Diskpart "clean all" command to wipe SSD, as well as a better way to secure clean SSD drive in Windows 11/10/8/7. - Secure Methods to Erase SSD Disk on Windows and Mac
This article examine how to securely erase an SSD disk in Windows and Mac. - How Do I Completely Erase USB Drive in Windows 11/10
Do you want to make sure the USB drive is erased completely such that no data can be recovered? Then follow this detailed guide to complete erase USB drive to follow this page. Using efficient methods, you will learn how to safely and completely erase a USB drive in Windows computers.