5 Fixes: Automated Windows 10 Updates Deleted My Files
- Case: Windows 10 updates delete my files
- Solutions to automated Windows 10 update delete files
- Method 1: Log into your account to retrieve lost files
- Method 2: Search for missing files after Windows 10 update
- Method 3: Retrieve files from the Windows.old folder
- Method 4: Restore lost files from an earlier backup or previous versions
- Method 5: Uninstall the Windows 10 update to get your files back
- How to prevent files from being deleted after Windows Updates
- Best free backup & restore tool for Windows
- How to create complete PC backup easily
- How to recover missing files after Windows 10 updates
- Conclusion
Case: Windows 10 updates delete my files
"Hello, all, I'm facing the problem that the automated Windows 10 updates delete my files and documents. I was already using Windows 10 and last night automated updates started without allowing me to stop them. This morning my computer is cleaned out with all those very important documents deleted! Can I recover them all?"
Microsoft's automatic updates can sometimes cause issues with user files, leading to their deletion or erasure. This can occur when the update process overwrites or deletes files that are no longer needed by the operating system, but are still important to the user. The issue is often related to the way Windows handles file management and storage, which can sometimes result in unintended consequences. As a result, users may find that their personal files have been deleted or erased after an automatic update, leading to data loss and potential frustration.
Your files are likely not deleted, but moved elsewhere, possibly due to Windows 10 signing you into a different user profile after updating.
It's also possible that the files are lost, requiring more powerful measures to retrieve them. To address this, some effective solutions can be explored.

Solutions to automated Windows 10 update delete files
Files being lost after a Windows update may be caused by different reasons, such as changes to system settings, corrupted system files, or issues with the Windows Update process itself. In some cases, simply restarting the computer or running a system file checker may resolve the issue. However, if the problem persists, more advanced troubleshooting steps may be necessary, such as running a System Restore point to a previous version of Windows, or using a third-party tool to scan for and repair corrupted system files.
Tip: Before performing any operation, you can restart your computer multiple times. Each time, wait until the desktop appears, then click Start, Power, and restart. This will fully complete the update and restore user accounts.
👉 Method 1: Log into your account to retrieve lost files
👉 Method 2: Search for missing files after Windows 10 update
👉 Method 3: Retrieve files from the Windows.old folder
👉 To restore lost files from an earlier backup or previous versions, you can use the built-in Windows feature called Previous Versions. This feature allows you to restore files from a previous point in time, provided that the file system is set up to create snapshots of file changes.
👉 If Windows 10 won't boot after an update, you can try uninstalling the update to get your files back. To do this, you'll need to boot your computer in safe mode, which can be done by pressing the F8 key while booting up.
Method 1: Log into your account to retrieve lost files
If you're updating Windows, it may sign you in to a temporary account and fail to restore your user profile afterwards, making your personal files inaccessible due to privacy protection. To resolve this issue, you can take the necessary steps to fix it.
1. Go to Start > Settings > Accounts.
2. Click Sync your settings on the left pane.
3. If you see a message stating "You are logged on with a temporary profile. Roaming options are currently unavailable", restart your computer and then sign in again.
Notes:
◆ Save your work regularly to prevent loss due to account expiration.
◆ If you get the message "We can't sign into your account. This problem can often be fixed by signing out of your account and then signing back in", you can also try restarting your PC and signing in again to resolve the issue.

Method 2: Search for missing files after Windows 10 update
For files that were not deleted but moved elsewhere, try searching for them after the update to locate them.
Here are some things to be aware of when searching for a file on Windows:
1. To view hidden files, type "folder" in the search box, go to File Explorer Options, select "Show hidden files, folders, and drives" under Hidden files and folders, and then search for your files again.
2. To search for files of a specific type, use the asterisk (*) wildcard. For instance, to find all Word documents, search for "*.doc". Similarly, to search for music files, search for "*.mp3".
3. When searching for a file, you can right-click it and select "Open file location" to find it and potentially other missing files moved by Windows 10 updates.
4. If you can't find these files and you're not signed in with a temporary profile, you can try rebuilding the search index by following these steps: In the search box on the taskbar, type "indexing", select "Indexing Options", then select "Advanced" and click "Rebuild" beside "Troubleshooting".

Method 3: Retrieve files from the Windows.old folder
The Windows.old folder contains your previous Windows installation, including all files and data, and allows you to revert back to it within 30 days.
If you've just upgraded to Windows 10, you can retrieve files from Windows.old by opening File Explorer, clicking on "This PC," and then clicking on "Windows.old".
1. To access the old Windows installation, go to "This PC" and navigate to the "Local Disk C:" drive, where your Windows operating system is installed, and then select the "Windows.old" folder.
2. Go to the Users folder and then click on the folder with your user name.
3. Copy and paste the files that you want to retireve.

Method 4: Restore lost files from an earlier backup or previous versions
If you've created a backup before the Windows update, you can easily restore the deleted files by following a few simple steps.
1. Search for Backup settings and enter it.
2. Choose Go to Backup and Restore (Windows 7).
3. To restore files, click the "Restore my files" option and select either "Browse for files" or "Browse for folders" to add the files you want to recover.
4. To restore the system, click the "Next" button to choose where to restore the system, and then click the "Restore" button to initiate the restoration process.
If you haven't created a backup, but enabled File History or created Restore Point before the automated update, you can try retrieving deleted files with Shadow Copy.
1. Right-click the folder that contains the files you lost after Windows update, and choose Properties.
2. To revert to an earlier version of your Google Doc, switch to the Previous Versions tab, select an earlier version from the list, and click the Restore button.
3. If the list is empty, you won't be able to use this feature.

Method 5: Uninstall the Windows 10 update to get your files back
If Windows 10's automatic updates delete your personal files, such as after updating to 22H2, the problem is likely caused by the latest installation, and it may be feasible to fix it by uninstalling the problematic update.
1. Search for update history and select View your Update History.
2. Click Uninstall updates to open Installed Updates.
3. To remove the recently installed update, right-click on it and select the "Uninstall" option from the context menu.
4. restart your PC and sign-in your account normally.

While Windows 10 updates are designed to improve the operating system, they can sometimes cause issues, such as deleting files, which can be frustrating and time-consuming to resolve. Additionally, other problems may arise, including system crashes, software compatibility issues, and hardware conflicts, which can impact productivity and overall system performance.
- After the Windows 10 21H2/22H2 update, users have reported experiencing errors when connecting to printers shared via a print server. These errors can manifest as a failure to establish a connection or a printer not being recognized.
- After installing KB5021233, some Windows devices may experience a startup error (0xc000021a) with a blue screen.
- The Windows Mark of Web Security features bypass a public vulnerability, resulting in a limited loss of integration and availability of security features such as Protected View in Microsoft Office.
To prevent files from being deleted after Windows Updates, it's necessary to create a backup image. This will help prevent file loss or other computer failures.
How to prevent files from being deleted after Windows Updates
If none of the above methods can help you recover deleted files from automated Windows 10 updates, you may need to use a reliable data recovery software. However, keep in mind that even paid software may not be able to recover all deleted files.
To avoid missing files, create a backup in advance. This habit can help prevent similar situations in the future.
Windows 10's built-in backup utilities, such as File History and Backup and Restore, offer convenience but lack flexibility, with users having limited control over what and where to backup, and often resulting in slow backup speeds and large image sizes.
Best free backup & restore tool for Windows
A free backup & restore tool like Qiling Bakcupper Standard can be a big help in obtaining more practical features and options through a quick process.
✦ It allows you to backup files or folders, partitions, the system, or the entire disk to various destinations.
✦ To keep the backup up to date, you can set up a schedule for it to run automatically.
✦ The software is compatible with various versions of the Windows operating system, including Windows 10, 11, 8.1, 8, 7, Vista, and XP.
If you're experiencing issues with Windows updates deleting files, you can recover lost data from a previously backed up image with the help of Qiling Bakcupper. This tool allows you to restore your files from an earlier snapshot, making it easier to recover lost data.
How to create complete PC backup easily
Preparations:
◆ If you want to backup the data to a removable device, such as an external hard drive, make sure it's properly connected to your computer. This is the first step to ensure a successful backup process.
◆ Download and install Qiling Disk Master Standard.
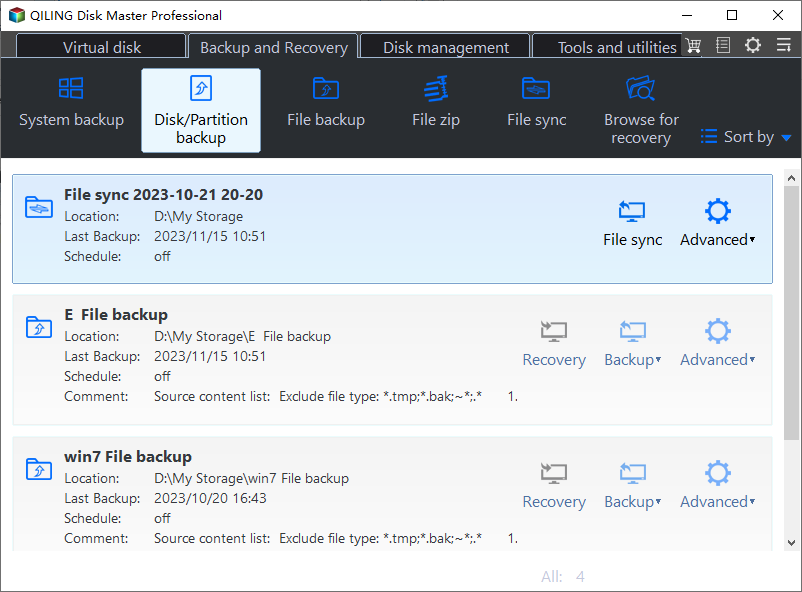
1. Launch the software, click Backup to select a backup type that best suits your need, such as Disk Backup, to do a complete PC backup.
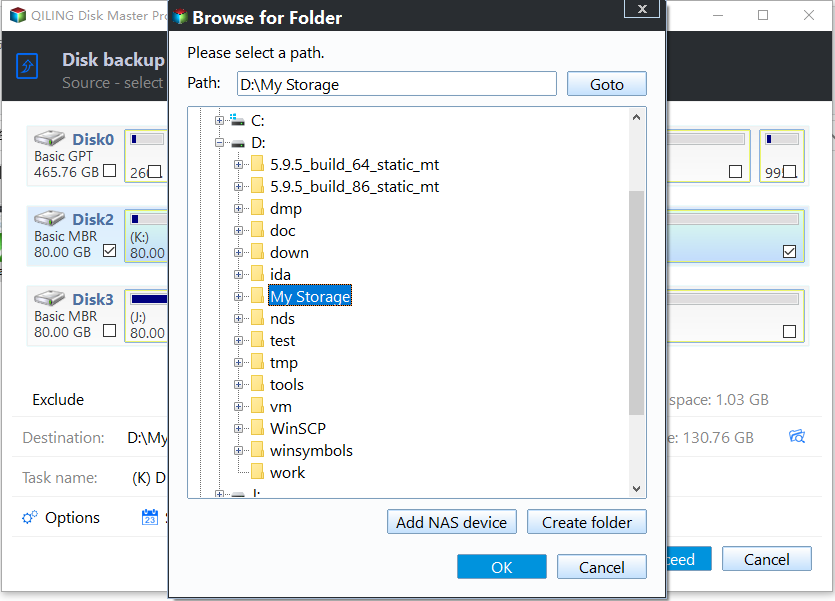
2. Select the source disk that you want to backup, and choose a safe destination, like external hard drive, USB, cloud drive, NAS, etc.
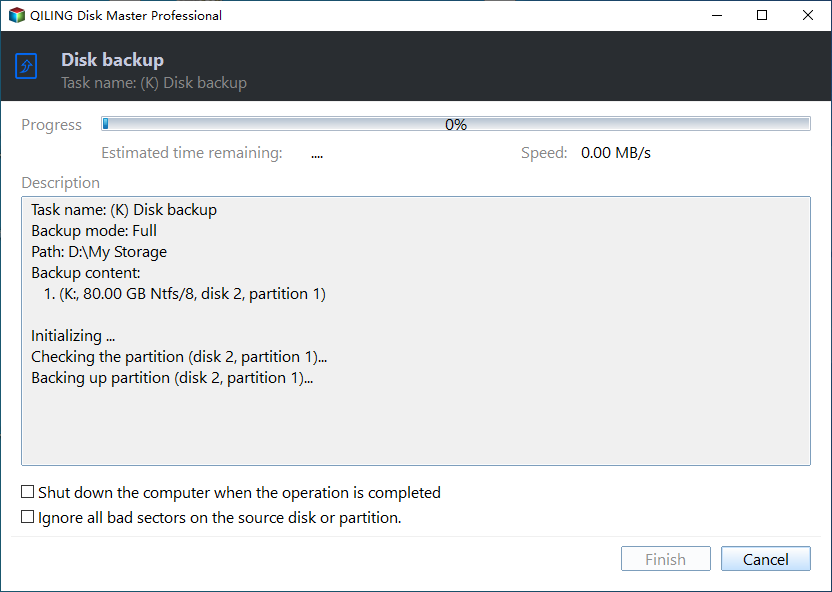
3. To set up an automatic backup, click on the "Schedule" option, followed by "Proceed" to initiate the task and wait for it to complete.
★ Options: You can manage various settings in the app, including comments, email notifications, backup mode, and splitting options. Additionally, you can choose the compression level for backup, with higher levels resulting in smaller image files but longer backup times.
★ Schedule: You can choose from daily, weekly, monthly triggers, or USB plug-in, with the last two options available in the Professional and higher editions.
★ Scheme: Another advanced feature is the ability to automatically delete older backups based on a customized rule, which is particularly useful for computers with limited storage capacity. This feature allows users to set a specific rule, such as deleting backups that are more than 30 days old, to ensure that their backup storage remains manageable and doesn't fill up with unnecessary files.
How to recover missing files after Windows 10 updates
Next time you encounter a similar problem, don't panic. Just restore the files from the backup. There are two ways you can choose from:
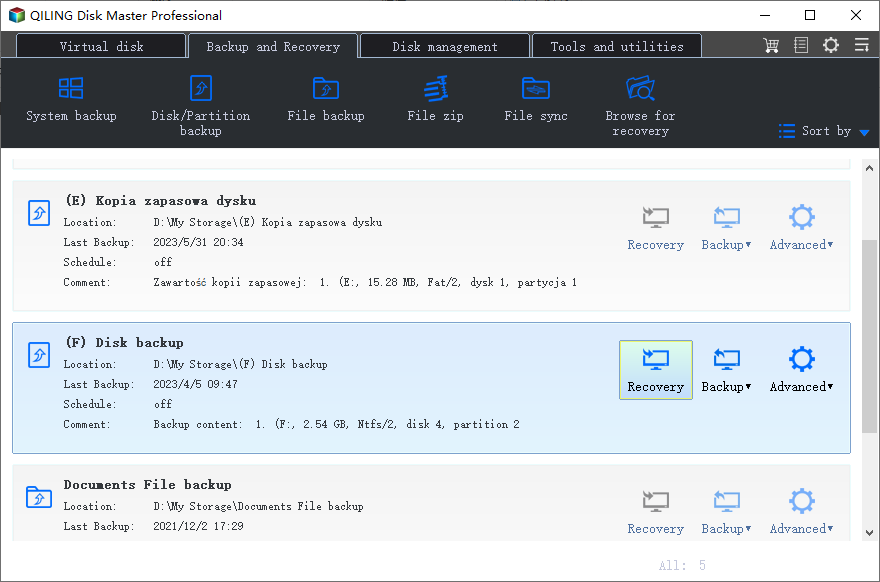
① To restore a disk backup, navigate to the Home page, locate the disk backup task, and click the Restore button.

② To restore a backup, go to the "Backup and recovery" tab, click on "Select Task" or "Browse for recovery", and follow the on-screen wizard to complete the restoration process.
Note: To restore individual files or folders from a disk image, go to Tools > Explore Image, allowing you to access and restore specific files or folders from the image instead of restoring the entire disk. This feature may require upgrading to a higher edition.
Conclusion
To prevent automatic updates from deleting files, it's best to create backups in advance. This method is more reliable than relying on other methods of recovering lost files, which may not work as expected, especially when updating to Windows 21H2/22H2, where unforeseen problems can occur.
With a reliable backup tool like Qiling Disk Master, you can rest assured that automated Windows 10 updates won't delete your personal files or cause data loss, giving you peace of mind in case of unexpected situations.
You can use Qiling Backup to backup the Windows OS, allowing you to restore the system to an earlier state if something goes wrong after an update, and there's also a Server edition available for Windows Server users.
Related Articles
- Solved: Windows 10 Update Missing Files (5 Ways + 1 Tip)
Suffering from Windows 10 update missing files? You can recover lost files with 5 given solutions. Don't forget to protect your data after recovering it. - Full Guide to Upgrade to Windows 10 without Losing Files
Are you in need of upgrading to Windows 10 and don't want to lose your personal files? Find a complete guide to achieve the goal from this page. You can keep reading to learn more details. - Windows 10 Upgrade Stuck at 0% or 99% – Fixed (7 Ways Included)
You can easily fix the "Window 10 upgrade stuck" error with given solutions below. And then don't forget to backup system to protect data. - How to Backup Windows 7 for Windows 10 Upgrade? [2 Ways]
How to backup Windows 7 for Windows 10 upgrade easily? This article introduce you 2 free ways to backup Windows 7 before upgrade to Windows 10 with simple steps. - How Do I Backup All My Programs in Windows?
If you want all the programs to be protected for security, you have to create a backup for all of them. This post will give you a simple answer and an easy-to-follow guide on how do I backup all my programs in Windows. Read on to learn more. - How Do I Backup My Mods Skyrim?
How do I backup my mods Skyrim? If you want to install Skyrim on another PC, what should you do to find and back up your Skyrim mods folder? Read the short content of this post, and we will give you the right tips.