Backup Windows 10 PC to QNAP NAS Step by Step
QNAP NAS is a great backup solution
Network Attached Storage (NAS) is a popular choice for saving backups, and QNAP NAS is a great option for those who don't want to DIY. QNAP NAS offers fast data transfer speeds, ensuring smooth backups and easy transfer to external storage devices when needed. To ensure data safety, consider backing up your Windows 10 PC to QNAP NAS, as it can protect against unexpected issues that might cause data loss.
NAS backup software
Qiling Disk Master in Windows 10/8/7 allows for backing up to a network location, offering various backup options such as System Backup, Disk Backup, Partition Backup, and File Backup. It also supports scheduled/automatic backup with incremental or differential backup, and enables backup scheme to automatically delete old backup versions. This ensures that in case of a computer crash, users can restore their system to an earlier date using a bootable media or Qiling PXE tool.
How to backup Windows 10 PC to QNAP NAS
To create a backup over a NAS network location with Qiling Disk Master, follow these simple steps. This software is also suitable for backup Windows 10 to NAS drive. You can easily set it up by referring to the steps below to see how it works.
To backup to NAS in Windows 10
To backup your entire PC, download, install, and launch Qiling Disk Master Standard. Under the "Backup" tab, select "System Backup" to backup the entire PC, or choose "Disk Backup" if you want to backup the entire disk.

To back up your system partition, you will need to select the NAS device as the destination location in "Step 2". In "Step 1", you will see that the system partition has been automatically included in the backup process, so you don't need to manually select it. Simply choose the NAS device as the destination for the backup to be stored.
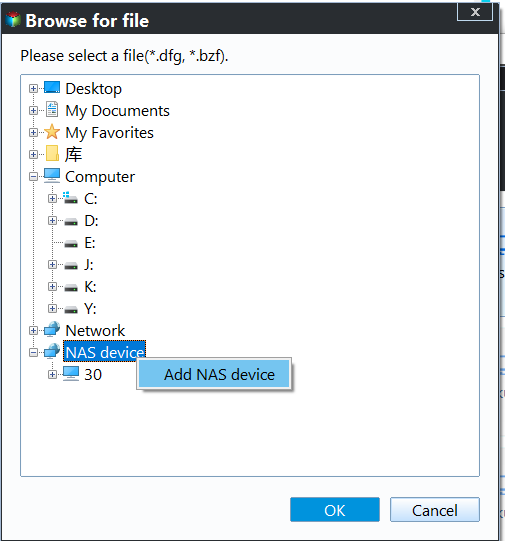
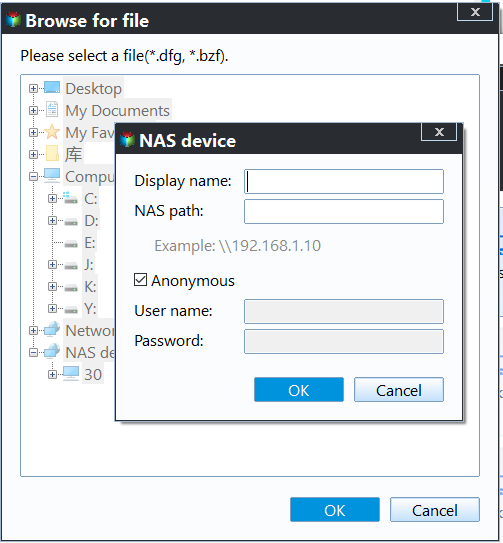
Step 3. On the next screen, click "Add Share or NAS device" and type the address of the NAS device.
After specifying the destination location, click "Schedule" to set a scheduled backup if needed, then click "Proceed" to run the backup.
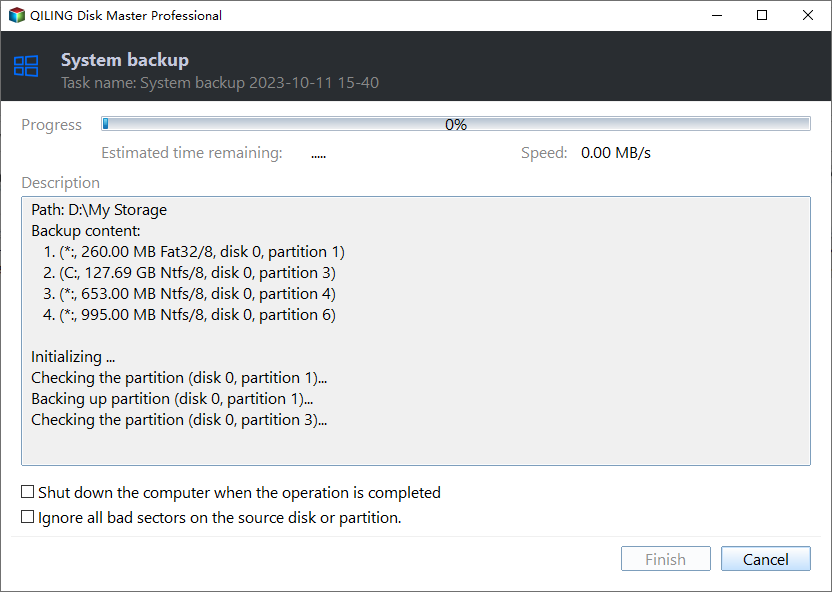
The backup will be complete soon, and then you can create a bootable rescue media in case of a system crash. Additionally, Qiling Disk Master allows you to clone a large hard drive to a smaller SSD without reinstalling Windows, making it a convenient option for upgrading your storage.
Related Articles
- Top Two Solutions to Backup Windows 10 to QNAP NAS
Here we will explain two great solutions to backup Windows 10 to QNAP NAS: the Windows 10 in-built backup tool and the specialist software Qiling Disk Master. - How to Backup Windows 10 to NAS of All Kinds (Synology/QNAP)
With the popularization of NAS device, plenty of people choose to backup Windows to NAS. Learn how to backup Windows 10 PC to Synology, QNAP and other popular NAS easily from this page. - Best Way to Backup QNAP/Synology NAS to PC
This tutorial will show you how to backup from Network-attached storage (NAS) like QNAP NAS and Synology NAS to PC step by step with the help of free backup software. - How to Recover Deleted Files in Windows Server 2012/2008 R2?
How to recover deleted files in Windows Server 2012 R2? In fact, you can restore files from backup or previous versions and it works even for permanently deleted files. - Complete Fix: Lenovo Stuck in Boot Loop Error in Windows 7/8/10
How to fix Lenovo stuck in boot loop problem in Windows 7/8/10/11? The step by step instructions will show you to repair Lenovo restart problem effectively. - How to Format Lexar USB Drive to Use Full Capacity Easily?
Learn how to format a Lexar USB JumpDrive from NFTS to FAT32 and use its full capacity with a free USB format tool in Windows 7, XP, 10, 8, or Vista.