Full Guide| How to Move Windows 10 to Another Hard Drive
- How to move Windows 10 to another hard drive
- Download a brilliant migration utility for Windows 10 & 11
- 3 steps to transfer Windows 10 from one drive to another
- ▶ Preparation work
- ▶ Step-by-step guide of how to move Windows 10 to another hard drive
- ▶ Boot Windows 10 from the new drive after OS migration
- Moving Windows 10 to another drive by creating system image
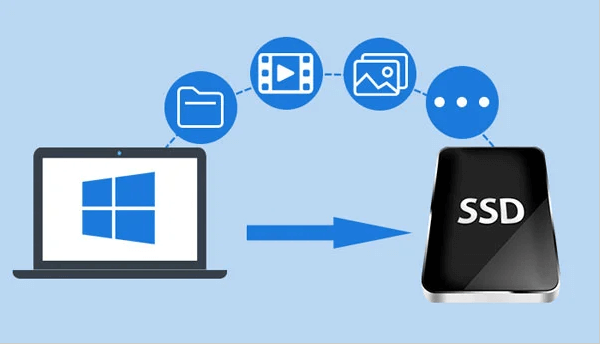
How to move Windows 10 to another hard drive
You can transfer Windows 10 from your original 256 GB HDD to the newly purchased SSD without reinstalling it. This process is called a "cloning" or "migration" and can be done using various tools such as Qiling Disk Master. These tools will copy the entire contents of your HDD, including Windows 10, to the SSD, allowing you to boot from the new drive successfully. Just make sure to back up any important data from the HDD before starting the migration process. Additionally, ensure that the SSD is properly recognized by your computer's BIOS or UEFI firmware. After the migration, you can then safely remove the original HDD and use the SSD as your primary drive.
Transferring an operating system like Windows 10 to a new hard drive can be a challenging task for ordinary users, requiring a good amount of computer-related knowledge. However, this tutorial aims to simplify the process by providing a step-by-step guide on how to move Windows 10 from one drive to another and successfully boot from it.
Download a brilliant migration utility for Windows 10 & 11
After using the computer for a long time, you may need to replace the hard drive due to low disk space or other performance issues.
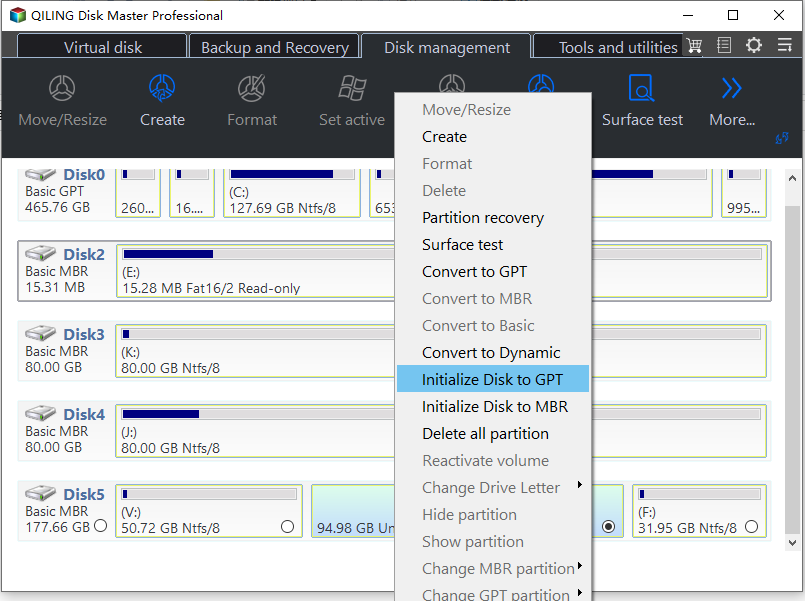
To avoid reinstallation of Windows, you can try using the OS migration tool Qiling Disk Master Professional, which has a feature called "Migrate OS to SSD" that allows you to migrate only OS-related partitions to a new HDD/SSD with secure boot.
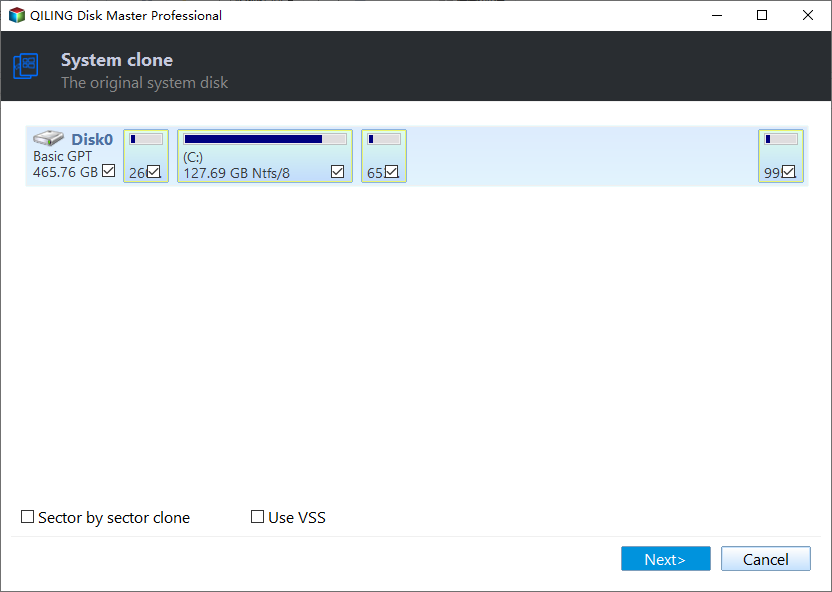
If you want to move your entire Windows operating system, installed apps, files, and folders from your current hard drive to a new one, you can use the Disk Clone Wizard feature. This will allow you to clone your entire disk, including your operating system, apps, and data, to the new drive. You can download a demo version to see how this process works.
3 steps to transfer Windows 10 from one drive to another
Here are the 3 important steps to move Windows to another drive successfully: First, prepare your system by creating a system image, disconnecting any unnecessary drives, and ensuring the target drive has enough free space. Next, clone the existing Windows drive to the new drive using a cloning software like Qiling Disk Master.
▶ Preparation work
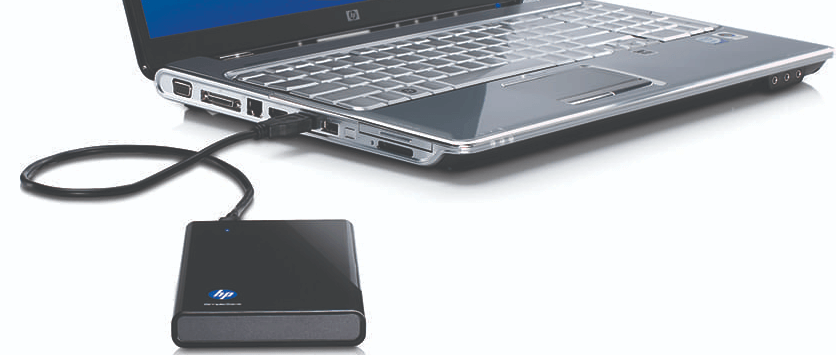
● To install a second hard drive in your Windows 10 PC, you will need to physically add the drive to your computer. If your PC has only one slot for a hard drive, you will need to use an adapter to connect the new drive to the USB port. Once connected, Windows 10 will automatically recognize the new drive and prompt you to format it.
● To avoid issues, ensure the unallocated space on the target disk is not smaller than the used space of the current OS partition. If necessary, create unallocated space on the target disk via partition shrink or deletion.
● If you're using a new hard drive, don't forget to initialize it. Also, make sure the partition style (MBR or GPT) is compatible with the boot mode (UEFI and Legacy BIOS) to avoid changing the boot mode after migration.
▶ Step-by-step guide of how to move Windows 10 to another hard drive
Step 1. Install and open Qiling Disk Master Professional. Click Migrate OS under Tools.
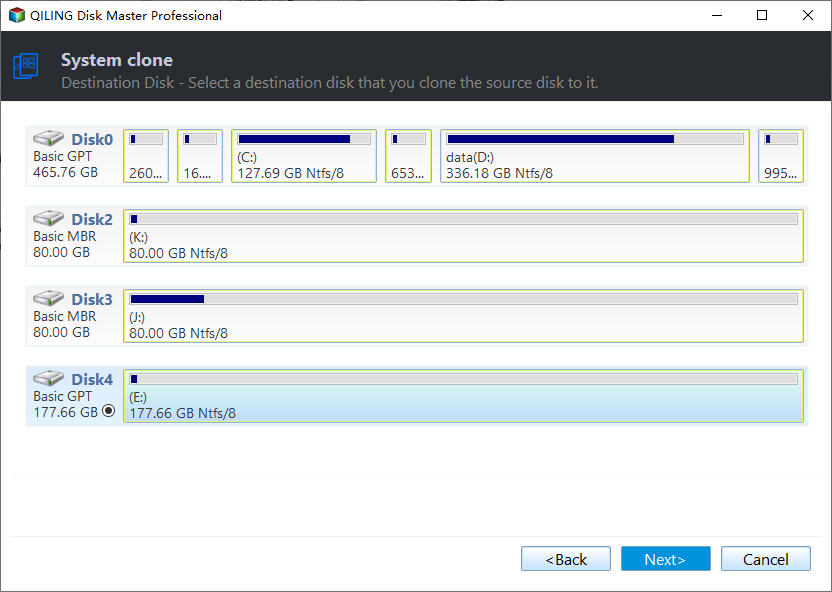
Step 2. Choose an unallocated space on the target hard drive and click Next.
Step 3. This window allows you to adjust the size of the system partition.
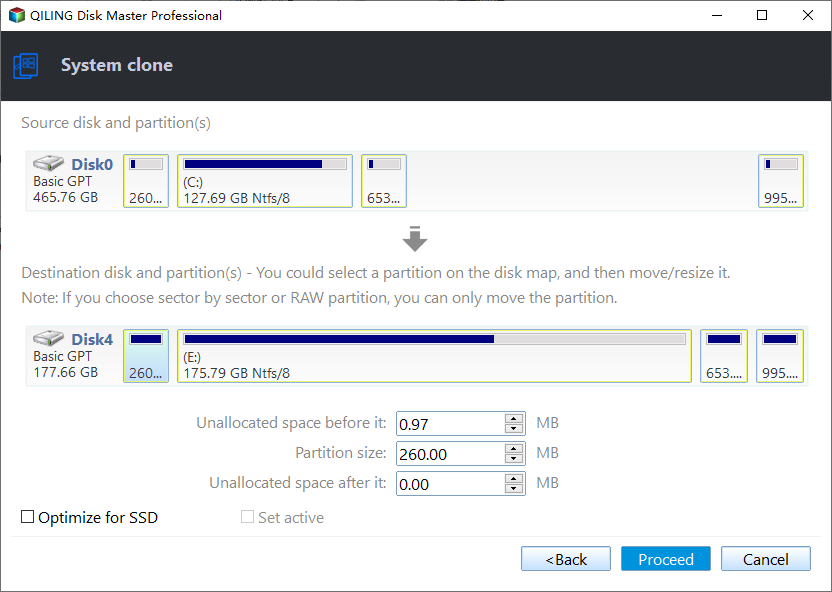
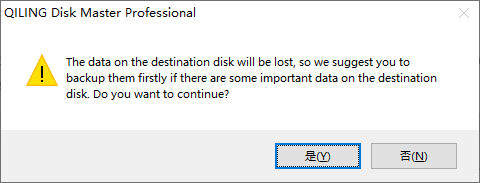
Step 4. Proceed after reviewing the result and confirming it is correct.
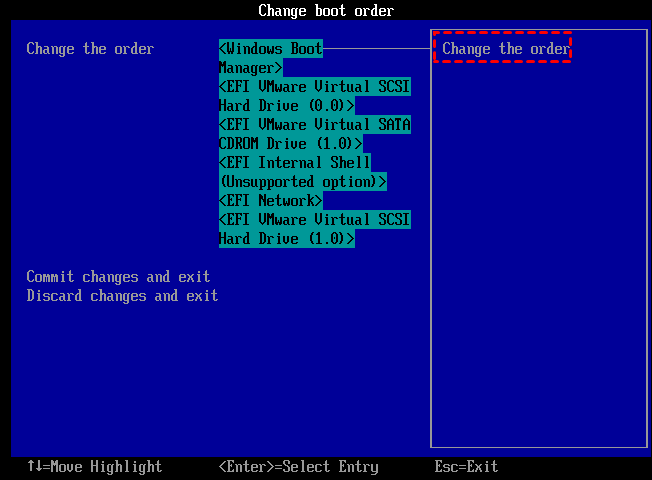
Step 5. Note: After migrating your operating system to a new drive, you may need to update the boot order in your computer's BIOS settings to ensure the system boots from the new drive instead of the old one. This can usually be done by entering the BIOS settings during boot-up, navigating to the boot order section, and selecting the new drive as the primary boot device.
- ★Tips:
- Before migrating Windows 10 to a GPT hard drive, ensure that the motherboard supports EFI/UEFI boot, as this will allow the computer to boot from the destination drive.
- The software is featured with various other useful functions, helping you to solve many issues. For instance, if you have accidentally deleted a partition on Windows, its Partition Recovery Wizard enables you to recover the deleted partition easily.
- This software can be used to migrate Windows 7, 8, or 11 to another drive, and can also clone Windows Server 2022, 2019, 2016, 2012, 2008 to another hard drive.
▶ Boot Windows 10 from the new drive after OS migration
After transferring Windows from the original hard drive to a new one, you can boot from the new drive while keeping both hard drives simultaneously.
Step 1. To start your PC, press the function key during the initial startup to enter BIOS settings.
Step 2. In the Boot option, select the new HDD or SSD as the primary boot drive and save all the changes.
Step 3. Restart the computer.
Moving Windows 10 to another drive by creating system image
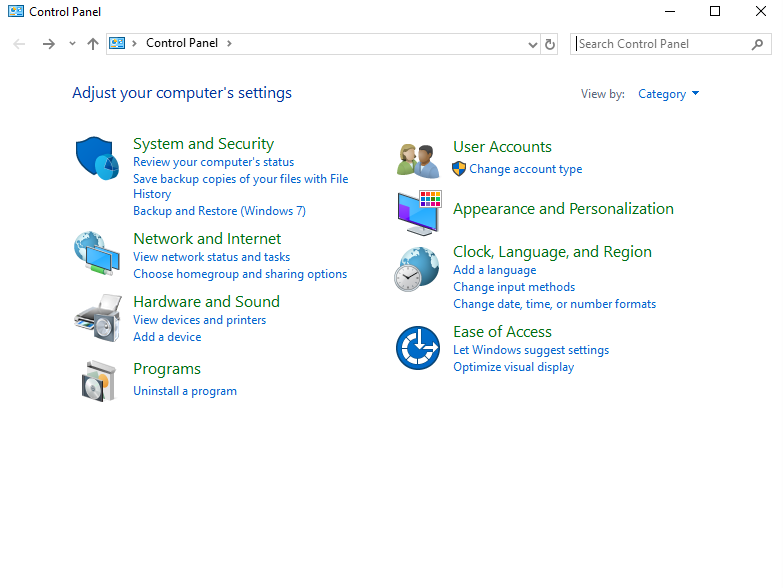
To migrate Windows 10 without using a third-party tool, create a system image of your current installation by going to Control Panel > System and Security > Backup and Restore (Windows 7) > Create a system image. Then, create bootable media using the same Backup and Restore tool. Once the media is created, go to the BIOS settings, set the boot order to prioritize the USB drive or CD/DVD, and save the changes.
▶ Part 1. Create system back up image
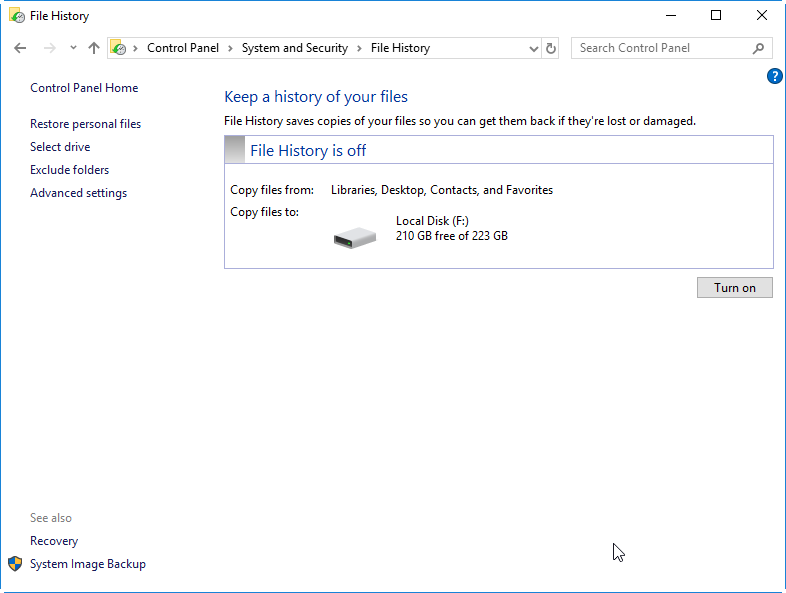
1. To access the Control Panel, click on the Start menu and select "Control Panel". Then, click on "Backup and Restore (Windows 7)" under the "System and Security" menu.
2. Click "Create System Image" in the left menu.
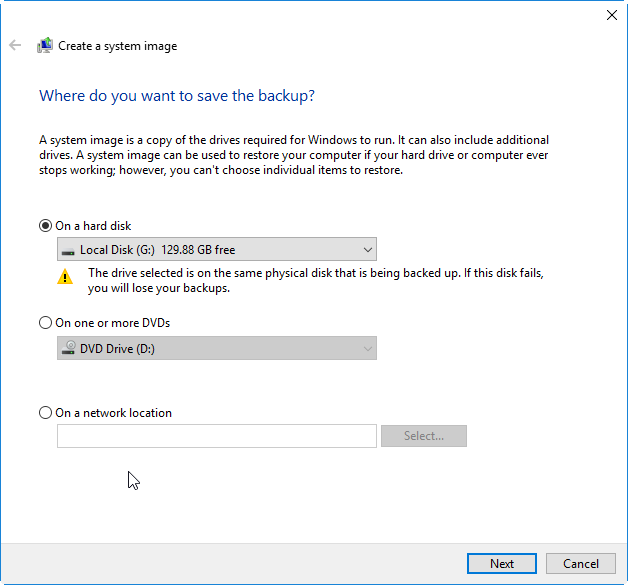
3. Save the system image to an external hard drive by selecting it in the "Save the system image to" dropdown menu. Click Next to proceed.
4. Select the system drive and the system reserved drive and click Next to proceed.

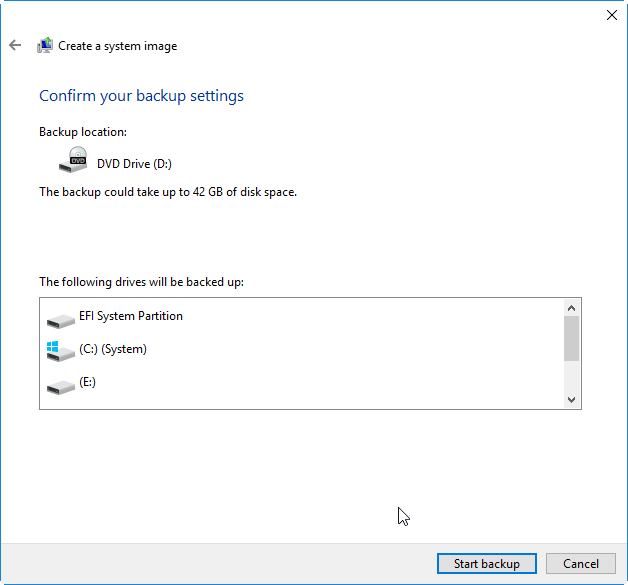
5. You can check the backup location and the size of the backup image. Confirm the settings by clicking "Start Backup".
▶ Part 2. Create a Windows 10 bootable media
To install Windows 10 on a computer, first prepare a USB drive with at least 4GB of free space. Next, download the Windows 10 ISO file and use it to install Windows 10 on the computer.
Step 1. Press Windows and R together, type diskpart, and click "Enter".
Step 2. In the CMD window, please type the following command step by step.
● diskpart
● lisk disk
● select disk X
● clean
● create partition primary
● select partition Y
● format fs=ntf quick To create a UEFI bootable USB, type 'format fs=fat32 quick' if needed.
● active
● exit

Step 3. Type "Exit" to finish the operation.
▶ Part 3. Restore the image to the new HDD/SSD
1. Connect the new hard drive or solid state drive to your computer, then restart your PC from a USB drive.
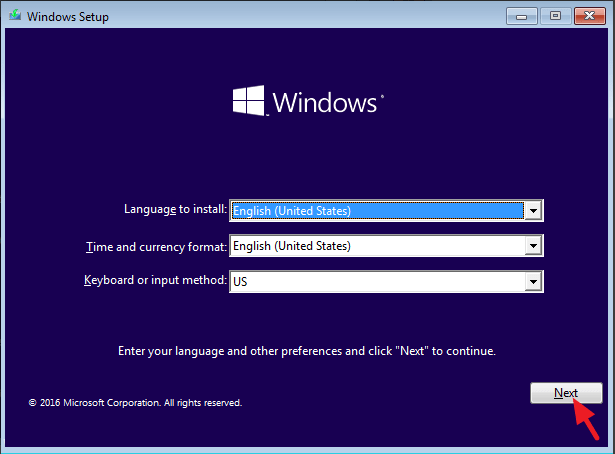
2. When you see this interface, please click "Next".
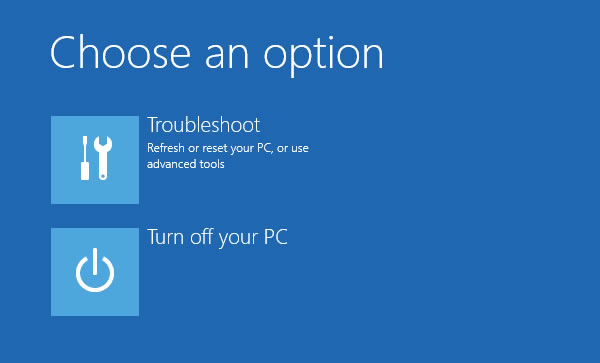
3. Click "Repair Your Computer" and "Troubleshoot" in turn.
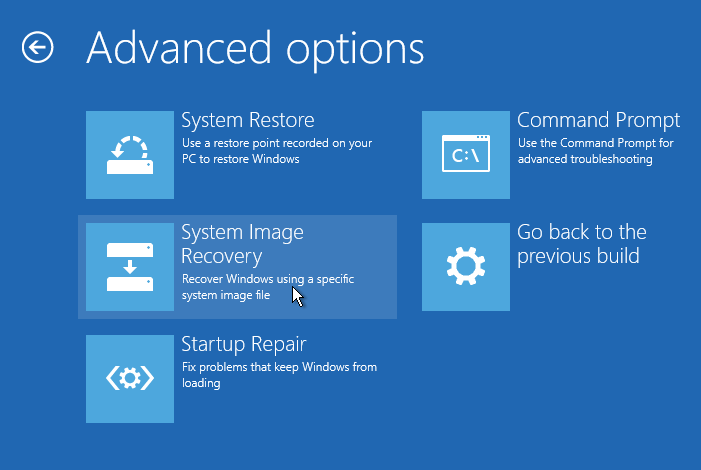
4. Select "System Image Recovery".
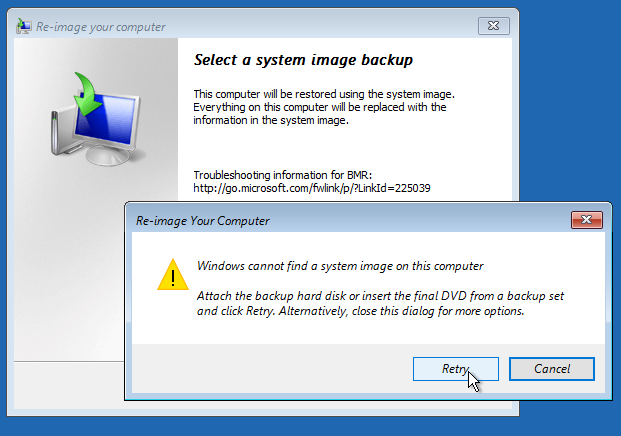
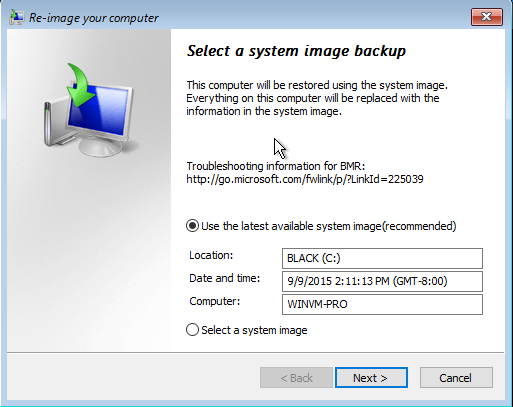
5. Make sure the disk where the system image is located is connected.
6. The latest system image will be selected, and click "Next".
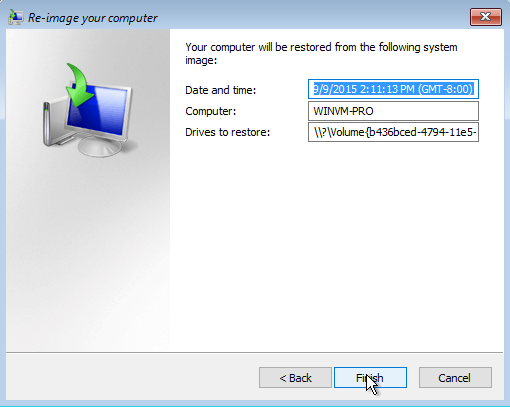
7. Click "Finish" to begin.
8. Recovery from a setback may take some time, so it's best to wait patiently until it occurs. This process can be lengthy, requiring patience and understanding.
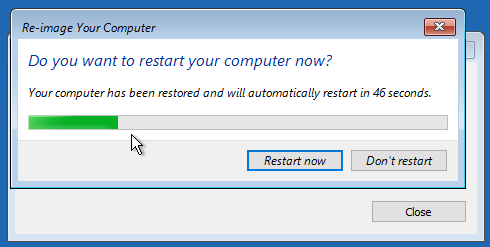
Once you've completed the cloning process, your PC will automatically restart, and you'll have successfully cloned Windows 10 to the new hard drive.
Related Articles
- Move System Reserved Partition to another Drive Safely
System reserved partition is on the wrong disk? Learn to move system reserved partition to another drive in Windows 11/10/8/7. - Migrate Windows 7 from HDD to SSD without Third Party Tools
This post aims to tell you Qiling Disk Master Standard allows you to free migrate Windows 7 to SSD without reinstalling. - Easily Clone Larger Drive to Smaller Drive Right Now
To clone larger drive to smaller drive (HDD to SSD, HDD to HDD, SSD to HDD or SSD to HDD) in Windows 11, 10, 8.1, 8 or 7, Qiling Disk Master can be helpful! - How to Remove MBR Partition Table from USB Flash Drive in Windows 7/XP?
Learn what a MBT partition table is and how to remove or delete MBR partition table from hard drive or USB flash drive in Windows XP and Windows 7. - 2 Common Ways | Backup Outlook Emails to USB
Learn how to backup Outlook emails to USB easily on this page. This article provides you with 2 ways, one is to use its built-in function, and the other is to use reliable third-party software. If you are interested, keep reading! - Backup Outlook Emails with Attachments: A How-To Guide
How to backup Outlook emails with attachments? We will give you a detailed introduction on how to complete this with Outlook built-in function. There is also a simpler method in the article. If you are interested, read on!