How to Install a Second Hard Drive Windows 10 | Detailed Tutorial
- How to install a second hard drive Windows 10?
- What do we need to prepare?
- How to install a second SSD?
- How can Windows 10 recognize a second SSD?
- Migrate Windows 10 to the second hard drive without reinstalling
- Conclusion
How to install a second hard drive Windows 10?
"I have an old laptop that has been idle for over one year. Nowadays, I need to reuse it out of work. However, its original storage space is too small, so I have to reinstall a second SSD and Windows 10. The problem is I am a computer novice, I don't know how to install SSD at all, and don't know much about installing Windows system. Can anyone teach me how to install SSD? It would be better if anyone can provide a tutorial of installing Windows 10!"
If your computer only has a Hard Disk Drive (HDD) or a small Solid State Disk (SSD), you'll likely run out of storage space over time. The best solution is to install a second hard drive, and it's recommended to do this as an internal hard drive. While connecting it via USB as an external hard drive is convenient, it will take up a USB slot and may slow down your computer's performance due to slower read and write speeds. Internal installation is the better option.
Before installing a second built-in hard drive, we highly recommend preparing well. This includes making the necessary preparations for the installment, which will be the focus of the following contents.
What do we need to prepare?
To install a second hard drive, you'll need to ensure your computer can support it and choose the right type for your system. Simply plug in the new drive and connect it to your motherboard, then install the necessary drivers and operating system updates. Next, format the new drive and set it up as a separate partition or drive letter, depending on your operating system.
〖1〗 Verify whether computers can install a second hard drive
Installing a second hard drive on a laptop can be challenging, especially for older models with limited interfaces. Unlike desktops, which often have multiple interfaces like SATA and M.2, some laptops may only have one interface, making it impossible to install a second hard drive. To determine if a laptop can accommodate a second hard drive, you may need to disassemble the computer case or back cover to check the available interfaces and ensure they match the conditions for installing a hard drive.
☞ Completely turn off the computer and unplug the power cable.
☞ Open the case side panel of desktops or back cover of laptops.
☞ To find a suitable motherboard for your needs, you'll want to check the specifications, specifically the number of hard drive interfaces it has. This will determine whether you can install a second hard drive.
- ★Tip:
- If your computer lacks an extra hard drive interface, you can consider using the optical drive bay to install a hard drive with a SATA interface instead. This can provide additional storage space.
〖2〗 Find out which hard drive is more suitable for your computer
When installing a second hard drive, it's essential to consider the interface of the hard drive. The interface is determined by the built-in slots of the hard drive, which can be IDE, SATA, or M.2. This is crucial to ensure compatibility and a smooth installation process.
Among the three types, IDE connectors have become outdated and are rarely seen on the market, so we won't discuss them further. In contrast, SATA and M.2 interfaces are currently popular and recommended for SSD connections, making them a top priority.
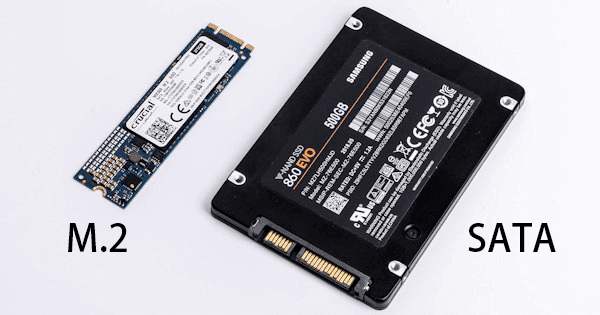
To choose between an HDD and a solid-state drive (SSD), consider the size of the HDD, as desktops use 3.4 inches and laptops use 2.5 inches. For SSDs, the mainstream sizes are 2280 for M.2 and 2.5 inches for SATA, making size a non-issue.
How do I install a second hard drive in Windows 10?
Due to the continuous price reduction of SSD in the market, HDD is losing its merits in cost performance, making SSD a highly recommended storage option unless specific needs require otherwise. This post will guide you through installing a second SSD on various types of computers.
Part 1: Install a second SSD on a laptop
With long-Installing a second SSD can be an effective way to optimize a laptop system's performance when it's running slowly. The process involves installing a second storage drive, which can improve the overall speed and efficiency of the system. However, due to the different installment of SATA and M.2 interfaces, the tools required for the installation may vary, making it a slightly more complex process.
| Interface | Required Tools |
| SATA | Cross screwdriver, anti-A set of static gloves, a SATA connection cable, and a hard drive bracket that converts a 2.5 inch hard drive to a 3.5 inch format are being requested. |
| M.2 | Cross screwdriver, anti-static gloves |
► Install a second SSD on SATA interface
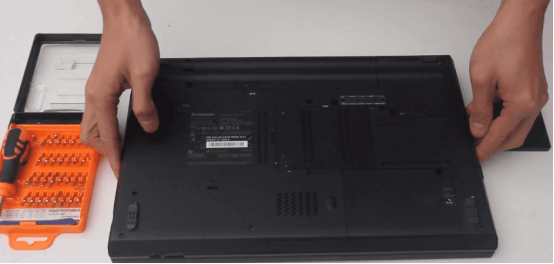
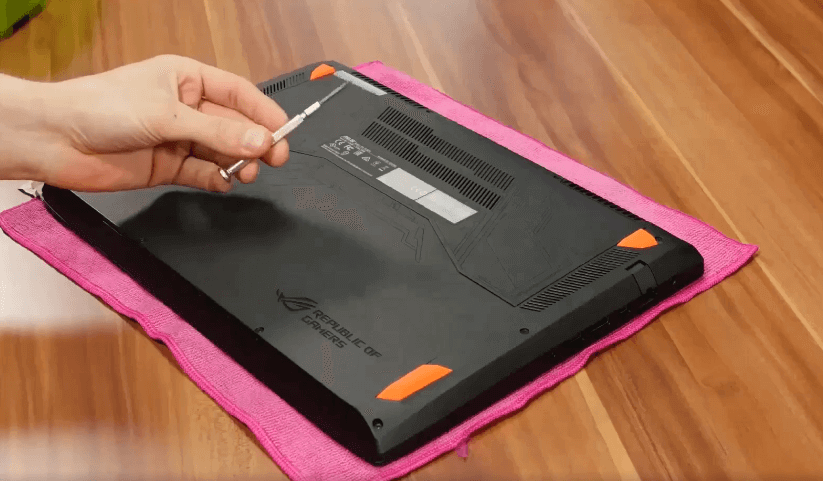
Step 1. To access the hard drive, you'll need to remove the back cover of the laptop from the hard drive area using a cross screwdriver. This will allow you to access the hard drive itself.
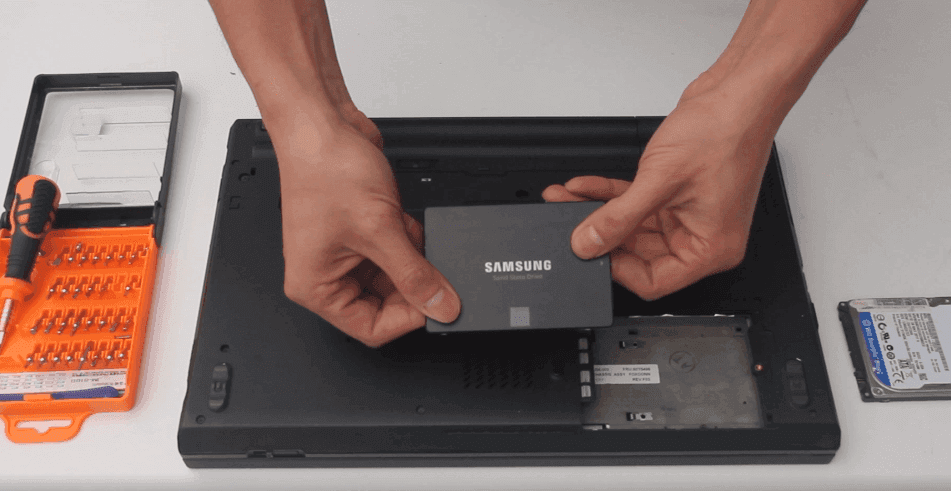
Step 2. Insert the second SSD into the hard drive slot, ensuring the SSD's magnetic plate interface aligns with the slot's magnetic plate interface.
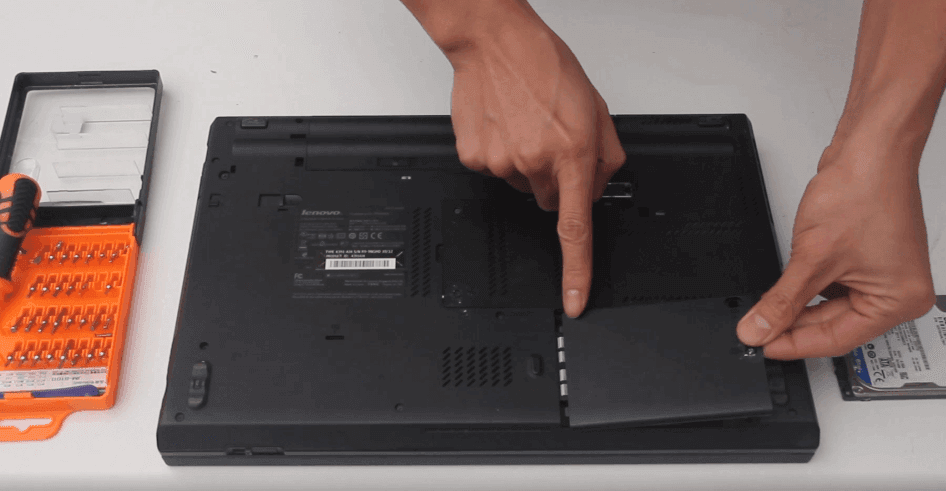
Step 3. After replacing the hard drive, reinstall the hard drive back cover of the laptop. This involves snapping the cover back into place, ensuring it is securely fastened to prevent any damage or overheating issues.
► Install a second SSD on M.2 interface
Step 1. Remove the back cover from the hard drive area of the laptop with a cross screwdriver, then flip the laptop over.
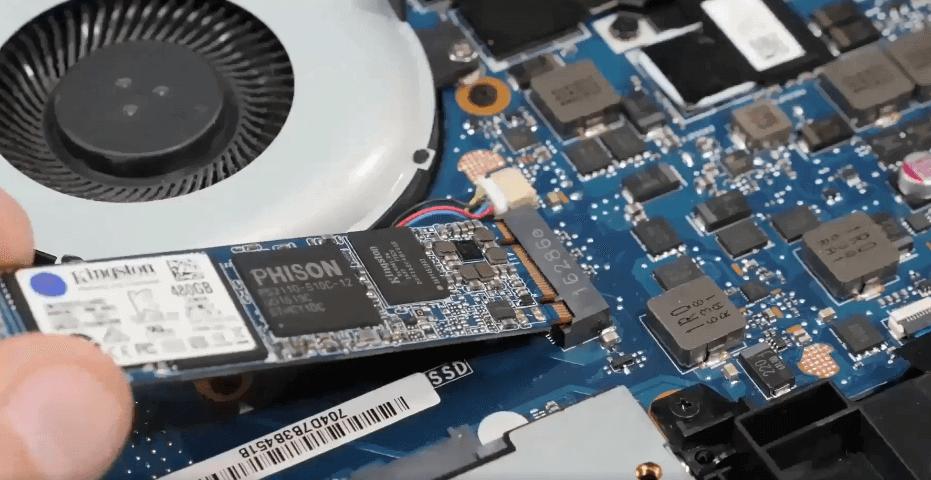
Step 2. Locate the M.2 slot on your device, insert the SSD into it at an angle, and gently press it down to ensure a secure connection between the SSD and the motherboard.
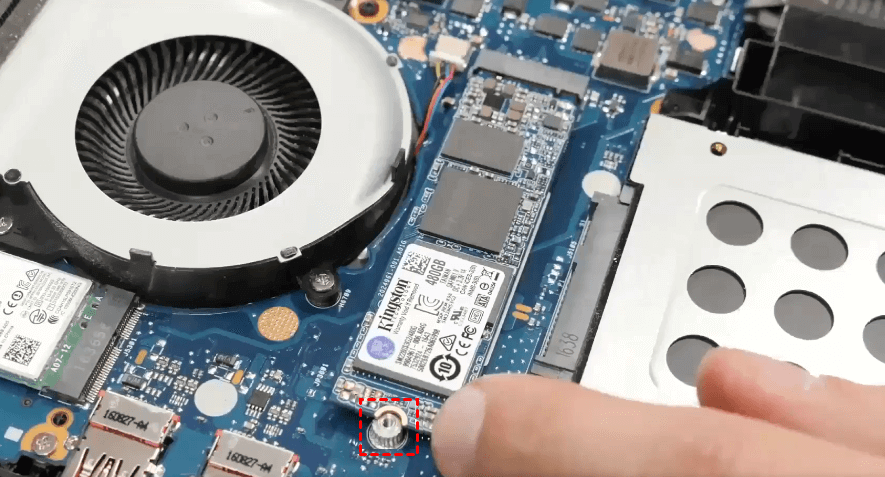
Step 3. Tighten the screws on the rear and reinstall the cover.
Part 2: Install a second SSD on a desktop
Installing a second SSD on a desktop is easier than on a laptop, but it still requires consideration of the interface, with SATA and M.2 being the primary options. This involves selecting the appropriate interface for the new SSD, ensuring compatibility with the desktop's motherboard, and following proper installation procedures to avoid any potential issues.
► Install a second SSD on SATA interface
Step 1. Turn off your computer, press the power key for 10 seconds, and then open the desktop case to locate the storage slot.
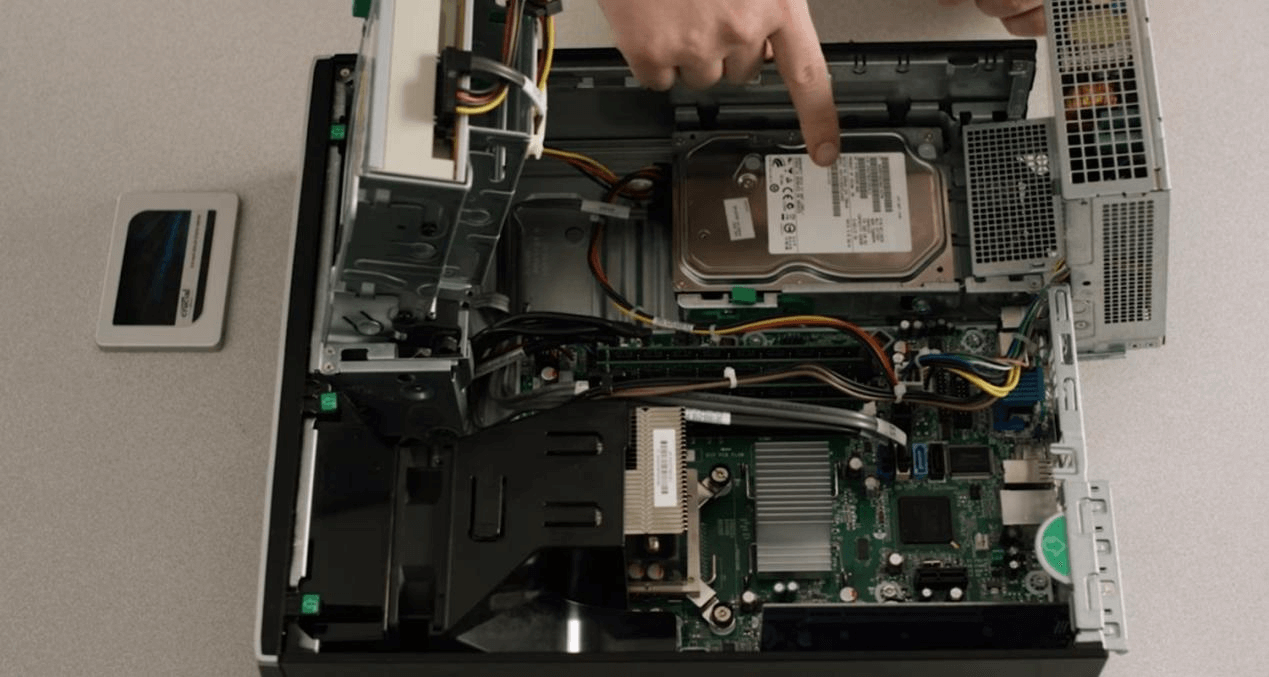
Step 2. Connect one end of the SATA cable to the motherboard's SATA connector and the other end to the second SSD.
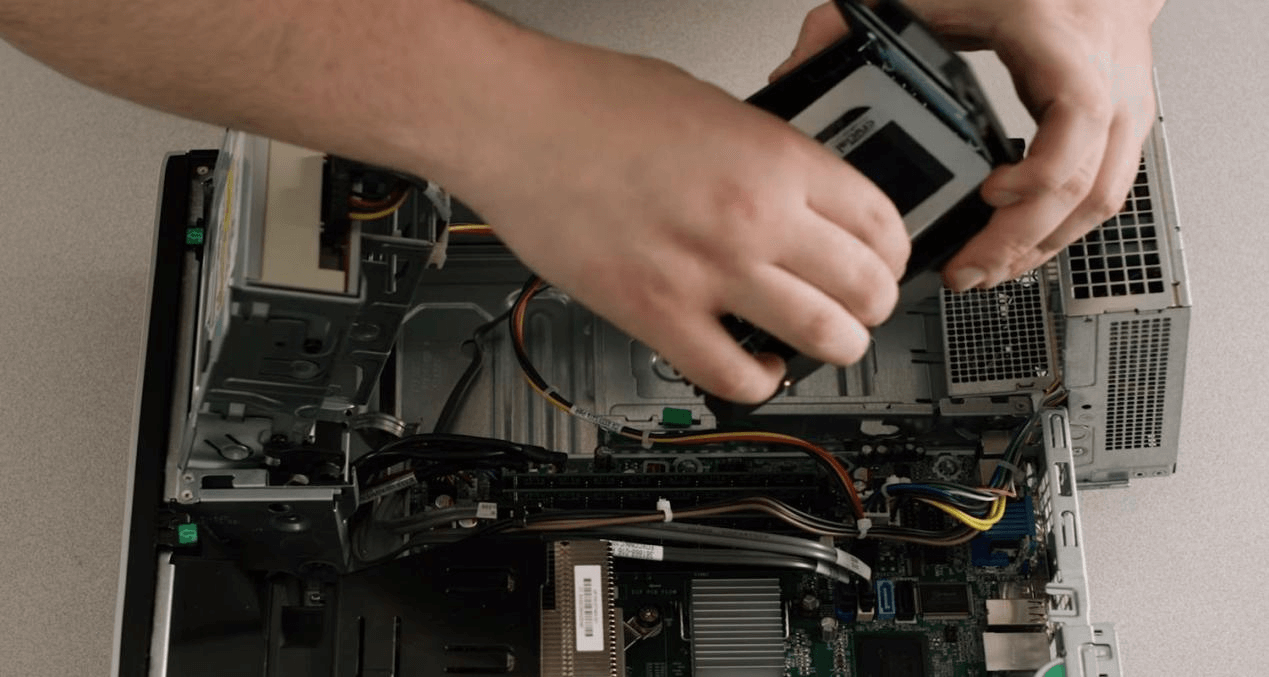
Step 3. Reassemble the desktop and power on the computer.

► Install a second SSD on M.2 interface
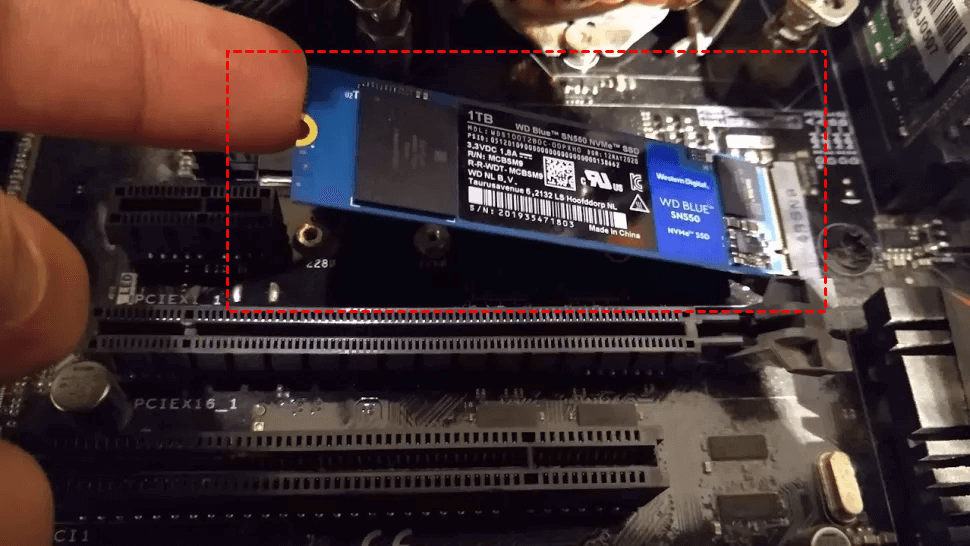
Step 1. Turn off your computer, unplug the power cable, and open the case to locate the M.2 slot. Next, align the SSD's connector with the motherboard's slot and gently insert it at a 20-degree angle, making sure it clicks into place.
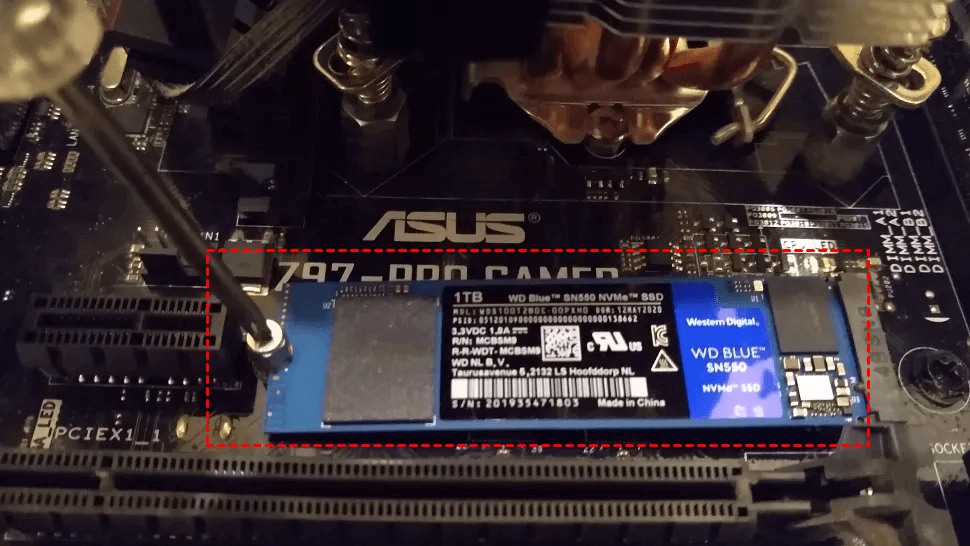
Step 2. Insert screws into main board mounting holes, screw tightly with cross screwdriver, check for missing screws/components, reassemble desktop and power on.
How can Windows 10 recognize a second SSD?
If you've installed a new second hard drive and connected it to your computer, but it still doesn't show up on "My Computer", it means Windows 10 can't recognize it. In this case, you'll need to initialize the disk and set up partitions to make Windows 10 see the second hard drive.
Initialize disk
When the second hard drive is installed and booted, a window will appear asking to initialize the drive, prompting to choose between MBR (Master Boot Record) and GPT (GUID Partition Table) partitioning schemes.
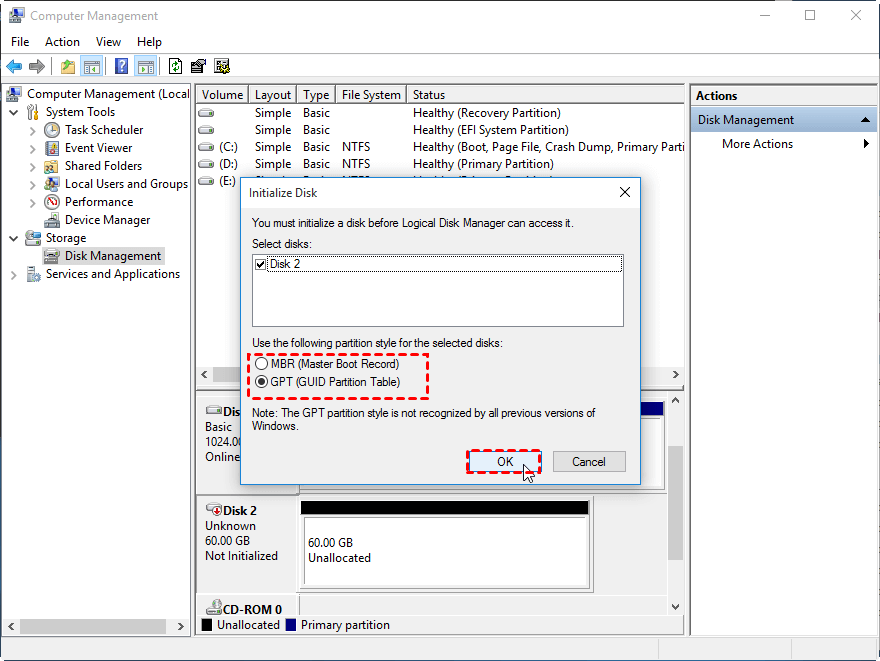
MBR and GPT are two disk partition styles for Windows systems. MBR, an older specification, supports up to 4 primary partitions and can only recognize disks up to 2TB, whereas GPT, the newest specification, supports disks up to 18EB and can contain up to 128 partitions. It's essential to note that MBR is typically used for BIOS systems, while GPT is used for UEFI systems. Therefore, when selecting a partition scheme, ensure your motherboard supports the chosen style.
Set partition size
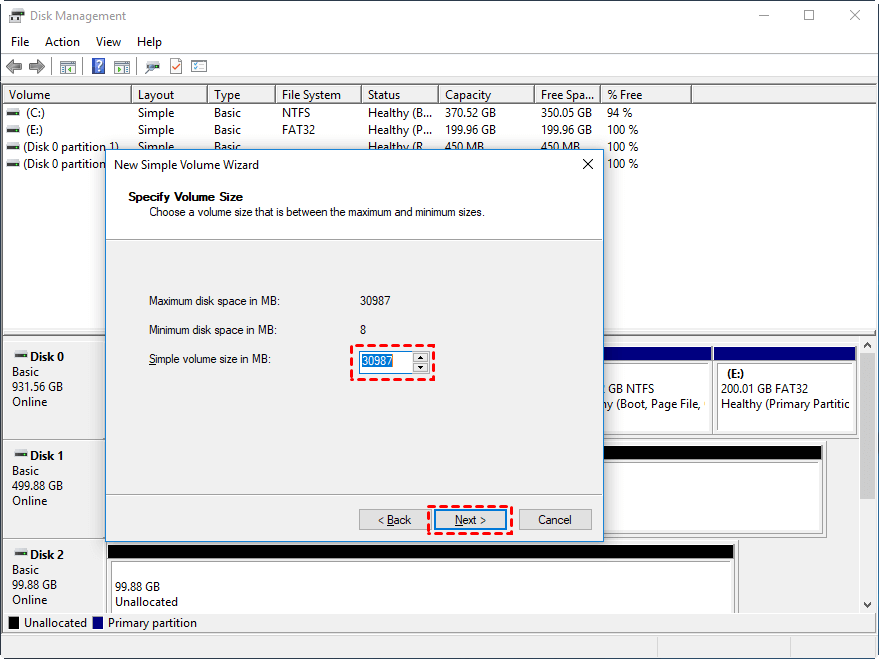
When a new hard drive is initialized, it needs to be partitioned, otherwise, it won't be recognized. To do this, right-click the unallocated space, select "New Simple Volume Wizard", and set the partition size using the mouse.
Step 1. Windows system will remind you of the maximum space and minimum size you can set. Input the size according to your real condition, and click "Next".
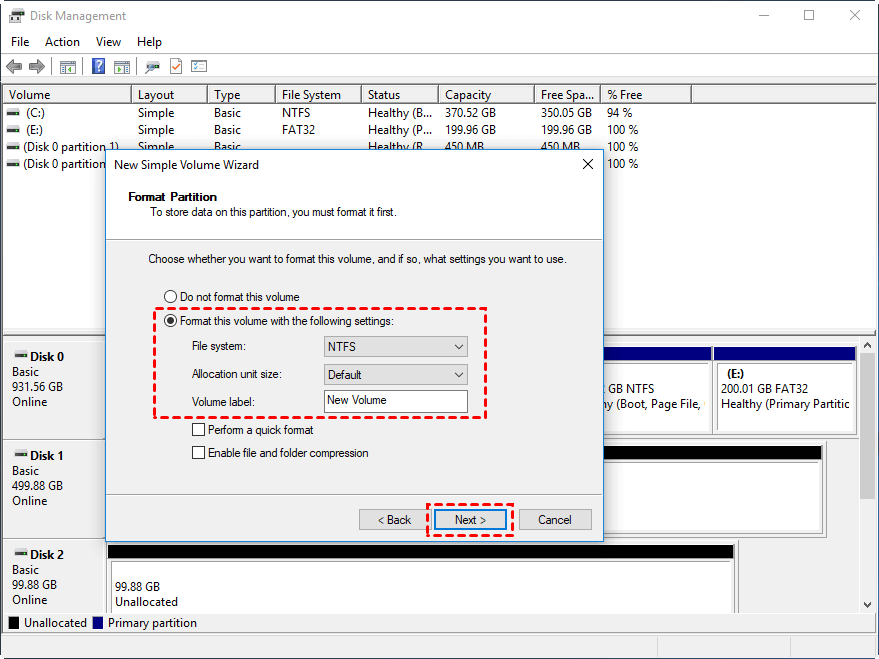
Step 2. To proceed, you need to set the drive letter. This step is not crucial, so you can click "Next" immediately. In the Format Partition window, select the file system and assign a volume label. Uncheck the option to perform a quick format and click "Next" to continue.
Step 3. To create a new disk partition, go to Disk Management, right-click on the unallocated space, select "New Simple Volume", click "Next" three times, and then click "Finish". This will set up the new partition and make it visible in Disk Management.
Migrate Windows 10 to the second hard drive without reinstalling
If the second hard drive has better performance than the first, installing Windows 10 on it will upgrade the computer's overall performance and speed. However, this process can be time-consuming and labor-intensive, so it's recommended to use a powerful system transfer tool, Qiling Disk Master Professional, to migrate Windows 10 to the second hard drive without reinstalling.
Using Qiling Disk Master Professional can save time and keep all applications in the source boot partition, making it a more practical option compared to reinstalling Windows 10. This powerful partition manager allows you to migrate your current Windows system to an SSD or HDD on Windows 11/10/8.1/8/7/Vista/XP editions.
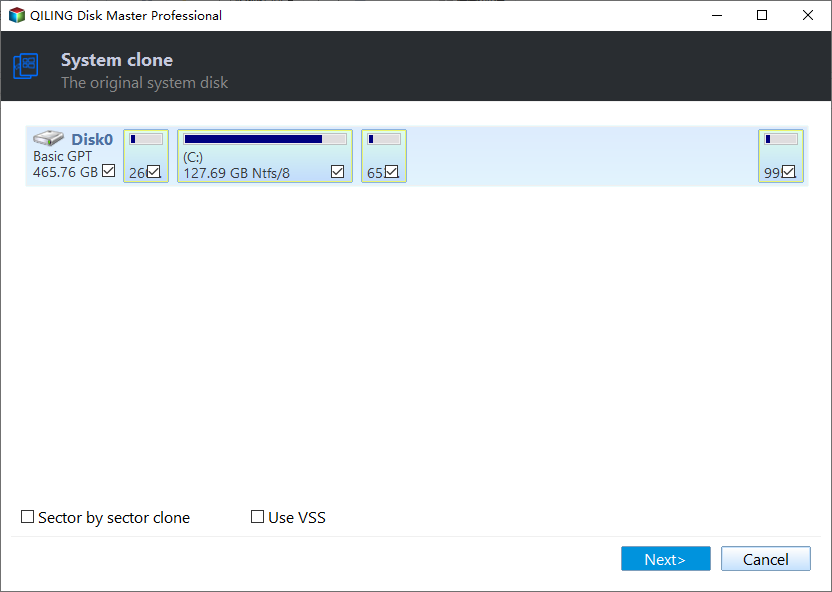
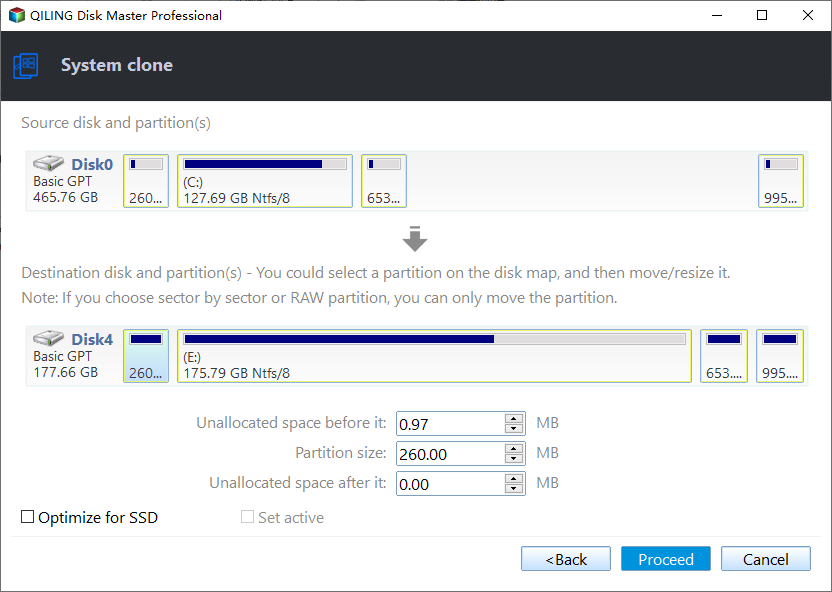
Step 1. To proceed, ensure the second SSD is connected to your computer, then open Qiling Disk Master Professional and navigate to "Tools and utilities" > "System Clone".
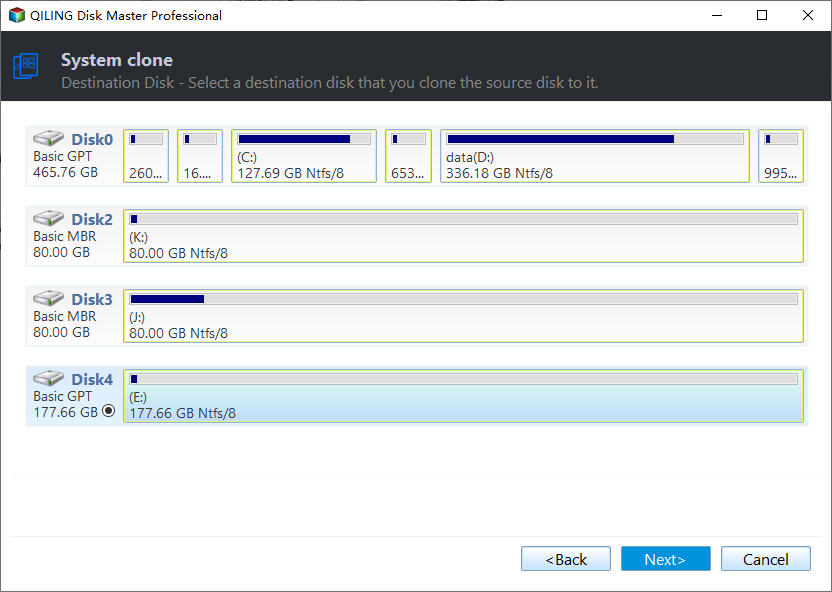
Step 2. In the "Select Disk Space" window, choose an unallocated space on your target SSD, select the option to delete all partitions on the disk, and then click "Next" to proceed with migrating the system to the disk.
Step 3. In the "Resize partition" window, drag the border to the right to extend the partition on the target disk, and then click "Proceed".
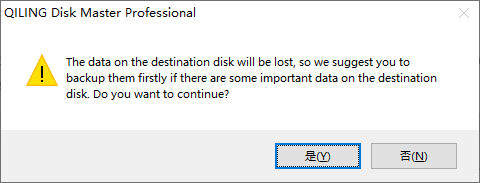
Step 4. After reading attentions, click "Yes". Then you will wait for the operation to be processed.
Qiling Disk Master Professional offers additional features beyond its core functionality, including [insert features].
- To migrate all contents of the installed disk to the second SSD newly installed, you can try using a cloning software such as Qiling Backup. These programs allow you to create a sector-by-sector copy of your entire hard drive or partition, including the operating system, programs, and data.clone diskClonezilla can resize the partition on the disk when cloning, allowing you to create a new partition with the same size as the original one. This feature is useful when you want to clone a disk with a different partition scheme.
- Merge partitions You can merge two adjacent partitions into a larger one to utilize unused disk space and simplify partition management.
- Via NTFS to FAT32 converterYou can transfer a disk partition from NTFS to FAT32 or from FAT32 to NTFS with ease and without losing any data.
- If you upgrade to the professional edition, converting dynamic disk to basic disk is available, making date safe and secure.
Conclusion
To install a second hard drive on Windows 10, choose a suitable disk and follow the steps described in this tutorial. Qiling Disk Master Professional is recommended to directly migrate the OS to the new SSD, keeping the transferred OS bootable, rather than reinstalling Windows 10 on the second SSD, which can be troublesome even for a computer expert.
Qiling Disk Master Professional offers a user-friendly interface, making it easy to operate, even for computer novices. The software guides you through a simple process to migrate an OS to a newly installed SSD in just a few steps. Additionally, it features advanced functions like rebuilding the Master Boot Record, changing drive letters, and resizing/moving partitions without data loss.
Related Articles
- Solved: Second Hard Drive Not Detected in Windows 11/10/8/7
If you find your second hard drive not detected in Windows 10, read this post, please. It teaches you what to do respectively when second hard drive is not detected in FIle Explorer, Disk Management, BIOS or after Windows 10 update. - Why Your Hard Drive Missing in Windows 10 or 11 and How to Fix It?
If you meet new hard drive disappeared in Windows 10 or hard drive missing Windows 10 after installing, learn how to fix this issue with several practical ways from this post. - 2 Methods to Install Windows 10 on M.2 SSD Drive Step by Step
If you want to install Windows 10 on M.2 SSD drive, you can refer to this article, which not only shows how to clean install Windows on M.2 SSD, but also introduces how to directly move Windows 10 on M.2 SSD drive. - [Bootable] Clone OS Drive in Windows 11, 10, 8, 7
Here, you'll learn to clone an OS drive to another drive like SSD or HDD quickly in Windows 11, 10, 8, 7. - Clone Smaller SSD Drive to Larger SSD in Windows 10/8/7
If you still have no idea how to clone smaller SSD to larger SSD, luckily, you've come to the right place. Here, you'll learn to use the best disk clone software to get it done without any data loss.