Step-by-Step Guide: How to Run Windows 10 from USB Drive
Stage 1: Make USB drive bootable with Windows 10 ISO
To run Windows 10 from a USB drive, it's necessary to make the USB drive bootable first. There are two ways to do this: [insert the two methods here].
Way 1. Create Windows 10 bootable USB drive via the Windows 10 built-in tool: Windows To Go
Windows 10, the latest operating system from Microsoft, comes in 7 editions, including Home, Professional, Enterprise, Education, Mobile, Mobile Enterprise, and IoT Core. Among these, only Windows 10 Enterprise has the feature Windows To Go, which allows creating a Windows workspace on a USB drive. If you have Windows 10 Enterprise or Education, you can follow certain steps to create a Windows 10 bootable media.
Preparation work:
- Prepare a Microsoft-To prepare for the exam, it's recommended to use a certificated USB drive with a capacity of at least 32GB. Before the exam, backup all necessary data, such as notes and study materials, on the USB drive to ensure you have a reliable and portable source of information. This will help you stay organized and focused during the exam.
- Download the Windows 10 ISO from Microsoft's official website and insert a USB drive into your PC.
Step 1. Input "Windows To Go" in the Search box and click it to open Windows To Go in Windows 10.
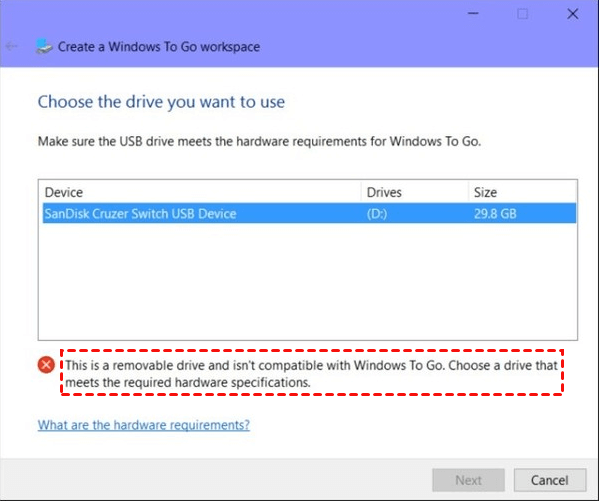
Step 2. In the "Create a Windows To Go workspace" window, choose the USB drive you want to make bootable and click "Next".
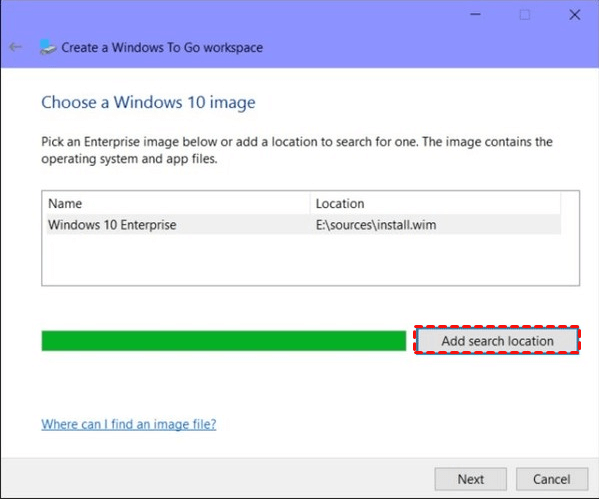
Step 4. In the next window, click "Add search location" to add the path where the Windows ISO file is located, then select the mounted ISO file.
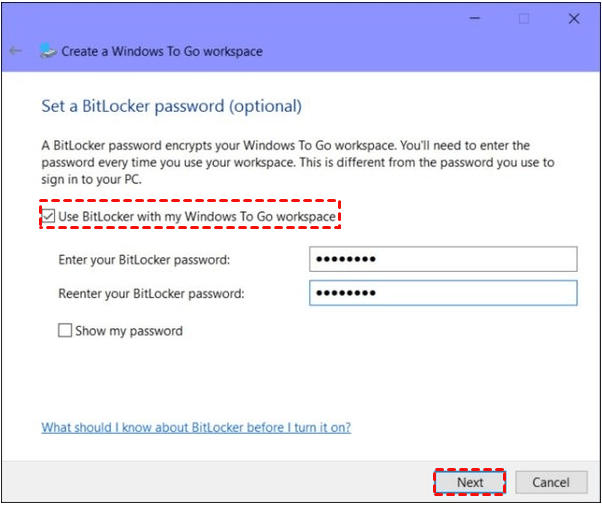
Step 5. To enable BitLocker encryption on your Windows To Go workspace, click "Next" after selecting the option, and then wait for the process to complete.
Way 2. Make Windows 10 bootable USB via a third-party tool
If you have Windows 10 Home installed on your PC, you can't use Windows To Go, but you can use Qiling Disk Master Standard to create a bootable USB drive instead. This tool allows you to create a bootable USB for Windows 10/8.1/8 Enterprise or Education edition, and even other editions, without needing a Microsoft-certificated USB drive. You can use a smaller USB drive, as small as 13GB, and download Qiling Disk Master Standard for free to follow the detailed steps.
Notes:
- If you have essential files on the USB hard drive or flash drive, please back up them in advance, so that you can still access them even if the drive fails.
- You can use the tool to rebuild MBR, check disk, clone hard drive, and perform other tasks.
Stage 2: Run Windows 10 from USB drive
To boot from a Windows 10 bootable USB drive, insert the USB drive into the PC, then enter the BIOS settings by pressing the corresponding key (usually F2, F12, Del, or Esc), navigate to the boot order settings, and set the USB drive as the first boot device. Save the changes and exit the BIOS settings.
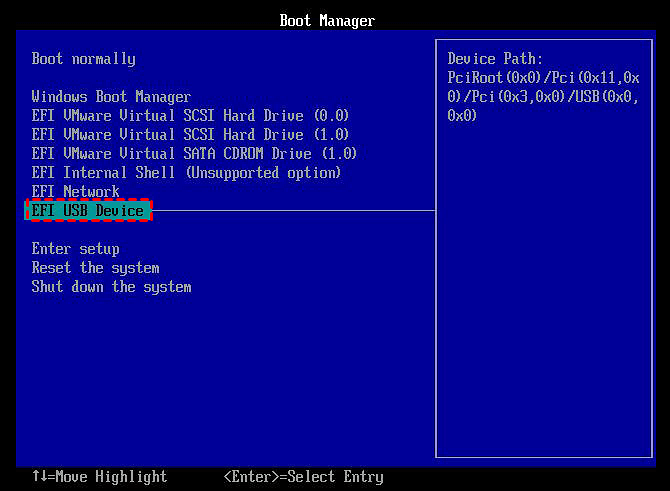
Press a functional key (F11 or F12, the key can be different on PCs of different modes or brands) to enter boot menu, then choose USB drive and press Enter to boot from it.
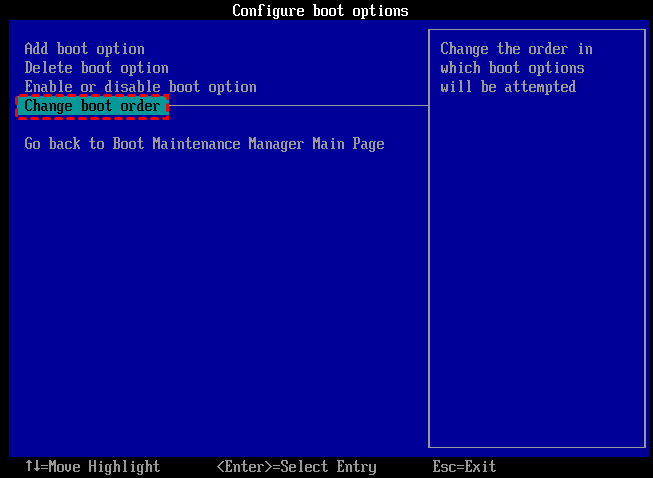
To change the boot order enduringly, go to the BIOS Setup, select Configure boot options, and change the boot order. Move the USB drive to the top of the list, save the changes, and restart your PC. This will set the USB drive as the first boot device.
Related Articles
- Is There Any Way to Create Windows 10 Bootable USB from the Current System?
Want to create Windows 10 bootable USB but don't have Windows installation disc or Windows ISO file? Here to learn how to create Windows 10 bootable USB from current system directly. - Create Windows Server 2012 Bootable USB for Repairing
When Windows Server-based computer fails to boot and you are without a recovery disk, you can turn Qiling Disk Master Server to create a bootable USB drive to repair Windows Server. - Best Software to Create Bootable USB for Windows and Mac
The best software to create bootable USB-Qiling Disk Master enables you to create a portable system device for Windows or Mac computer. - How to Run Windows 10 From SD Card?|Step-by-Step Guide
If you want to run Windows 10 or 11 from SD card on a notebook or tablet computer, you can first use Qiling Disk Master software to move Windows 10 or 11 onto SD card, and then boot from it successfully. - How to Create a Windows 11 to Go USB
Creating a Windows 11 to Go USB drive allows users to run Windows 11 on any qualified device. To do this, you'll need to download the Windows 11 ISO file and use a tool like Rufus to create a bootable USB drive. - How to Rebuild RAID Without Losing Data [for RAID 0/1/5]
Can I rebuild RAID without losing data? You can follow our organized tips to avoid data loss during the RAID rebuild. Don't forget to recover data from RAID with Qiling Data Recovery Software before starting to rebuild the RAID.