Fix SSD Slow Boot on Windows 10 with 8 Effective Methods
- User Case
- How to Fix SSD Slow Boot on Windows 10
- Method 1. Enable AHCI and Update AHCI Driver
- Method 2. Disable Ultra Low Power State (ULPS)
- Method 3. Change Power Options in Control Panel
- Method 4. Disable Unnecessary Services on Startup
- Method 5. Turn on Fast Startup
- Method 6. Uninstall Your Graphics Card Drivers
- Method 7. Adjust/Increase Virtual Memory
- Method 8. Clone SSD with 4K Alignment via Qiling Disk Master
- To Sum Up
User Case
Windows 10 slow boot on an SSD
"I cannot recall when this started but I know this is not normal for the kind of laptop I have. I have started to notice that my Windows 10 has been getting this behavior where after the boot up process, to be more specific after the windows logo disappears (that time in between) until you see the login screen is about 45 seconds. Used to, it wouldn't be more than 5 seconds. Thank you in advance to whichever wizard can help me with this problem."
- Question from Microsoft Community

Installing a solid-state drive (SSD) on your Windows 10 computer can significantly improve boot speeds, typically taking around 20 seconds, compared to 45 seconds for a traditional hard disk drive (HDD). However, some users have reported slower boot times, ranging from 30 seconds to 2 minutes, even when using an SSD as the boot drive.
How to Fix SSD Slow Boot on Windows 10
Windows 10 booting slowly on an SSD can be caused by various factors. If your computer or laptop is running numerous services, it can lead to slow boot times. Additionally, issues with the AHCI driver, graphics card, or power plan can also contribute to the problem. To resolve this, you can try the following 8 methods: [list the methods].
Method 1. Enable AHCI and Update AHCI Driver
AHCI is a technical standard that enables software to communicate with SATA devices, allowing for advanced features such as hot swapping and Native Command Queuing (NCQ).
NCQ optimizes data requests on SSDs and hard drives, minimizes read-write head movement, and uses AHCI to speed up hard drive access times, improving SSD performance for large file transfers. Enabling AHCI and updating the AHCI driver may also help with slow Windows 10 SSD boot times.
- To access the Registry Editor on Windows 10, go to the Search function, type "regedit", and then open the Registry Editor.

- In the left panel of Registry Editor, browse to the key location below.
▶ HKEY_LOCAL_MACHINE\SYSTEM\CurrentControlSet\Services\iaStorV
- Double click on the Start DWORD in the right panel of the iaStorV key, type 0 for AHCI, and click OK.
- To open the Device Manager, type "Device Manager" in the search box on the taskbar, and click the top result.
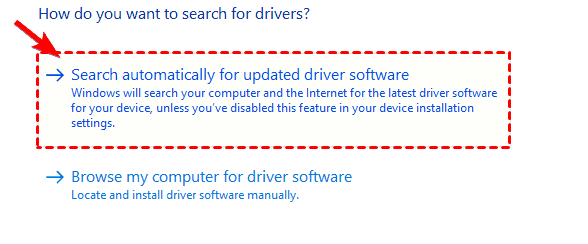
- Locate your AHCI driver, right-click it and choose Update driver from the menu.

- Click on Search automatically for updated driver software in the window that opens. Windows will now try to automatically update your driver.
Method 2. Disable Ultra Low Power State (ULPS)
Ultra Low Power State The Ultra Low Power State (ULPS) feature lowers power consumption by reducing frequencies and voltages of non-primary cards, but may cause performance loss and crossfire instability, potentially leading to slow Windows 10 boot times on SSDs, and can be resolved by disabling ULPS in the Registry Editor.
- Go to Search, type regedit, and open Registry Editor.
- In the Registry Editor, click Edit in the upper left corner and select Find in the expanded menu. Enter EnableUlps and press Enter.
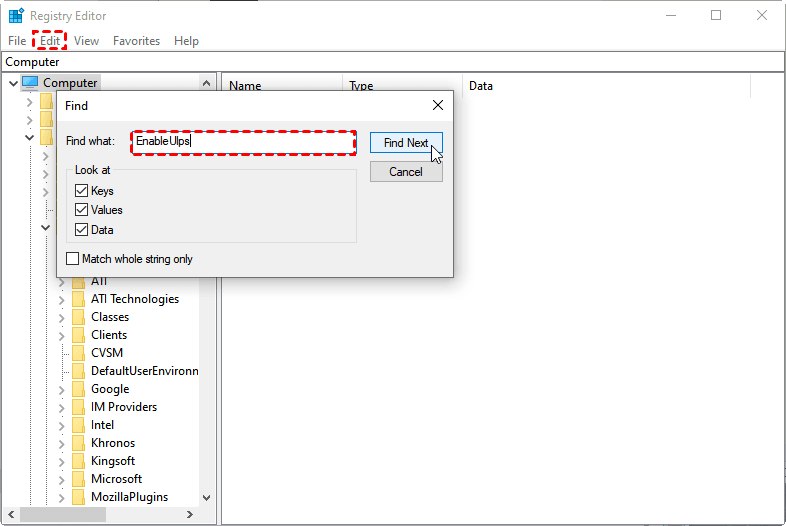
- Then double-click on EnableUlps and change its value to 0.

After trying the workaround, restart your computer to see if the boot time improves. If the issue persists, try the solutions below to address the Windows 10 SSD slow boot problem.
Method 3. Change Power Options in Control Panel
If disabling ULPS doesn't improve Windows 10 boot speed on an SSD, try adjusting power options in the Control Panel to further reduce boot time.
- Go to Search, type power management, and open Power Management.
- In the Power Management window, choose the High performance plan.

Method 4. Disable Unnecessary Services on Startup
If your computer and laptop are running a lot of services, your SSD on Windows 10 may take a long time to boot. To fix this, you can try disabling unnecessary services, programs, and startups, which can help speed up the boot process.
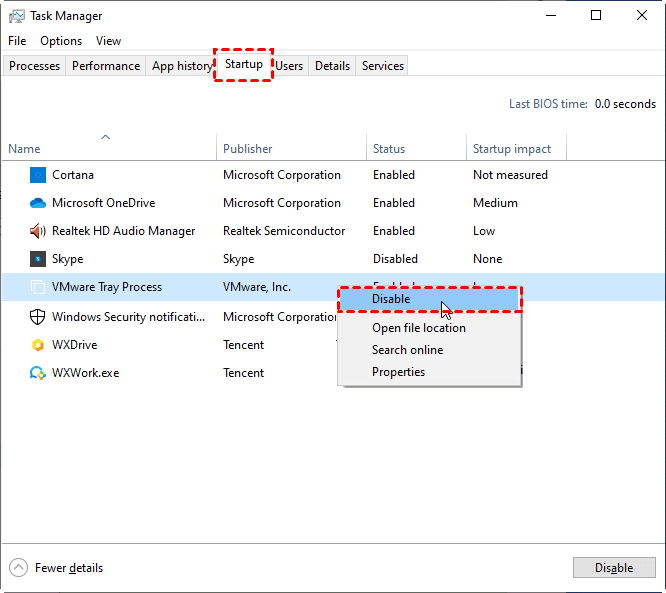
- To access the Task Manager in Windows, open the search bar and type 'Task Manager', then select it from the search results.
- To identify which processes need to be disabled, open the Startup tab, where you can see a list of all the programs that are set to launch automatically when your computer starts. This will allow you to review and potentially disable any unnecessary or unwanted programs that are consuming system resources.
Method 5. Turn on Fast Startup
Windows 10's Fast Startup feature enables your computer to start up faster after a shutdown by putting it into hibernation instead of a complete shutdown. This can help resolve slow boot times on Windows 10 SSDs, and can be enabled to fix these issues.
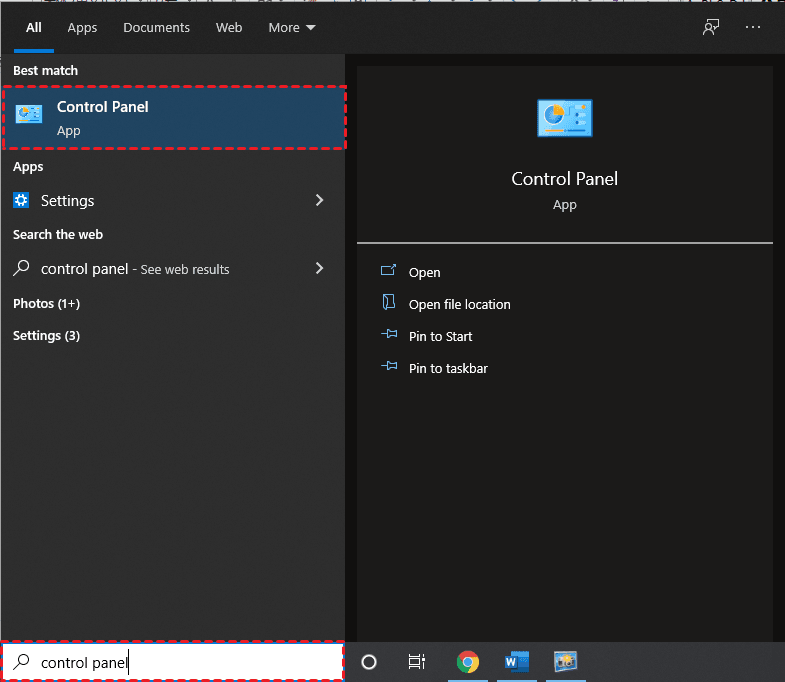
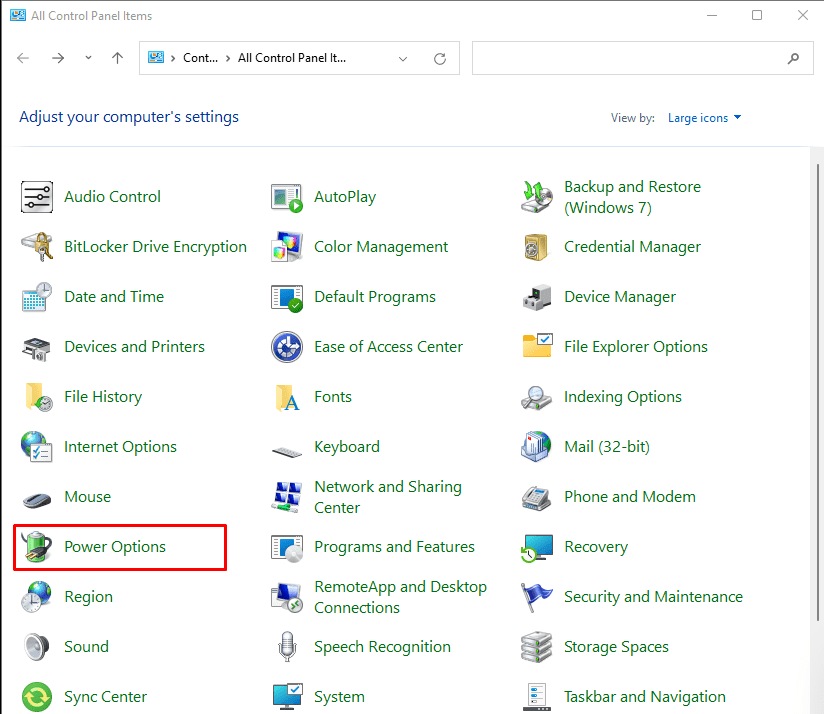
- To access the Control Panel in Windows, simply type "Control Panel" in the Windows search box and click on the top result that appears. This will open the Control Panel window, where you can manage various system settings and options.
- Select Power Options in the control panel.
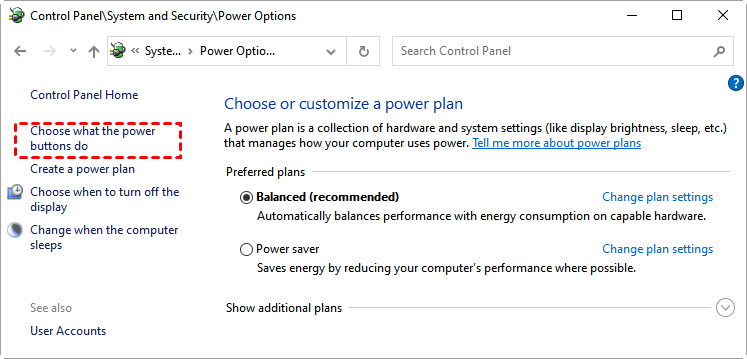
- Go to the Power Options in the Control Panel, then click on "Choose what the power button does" in the left menu. This will allow you to select what happens when you press the power button on your computer.
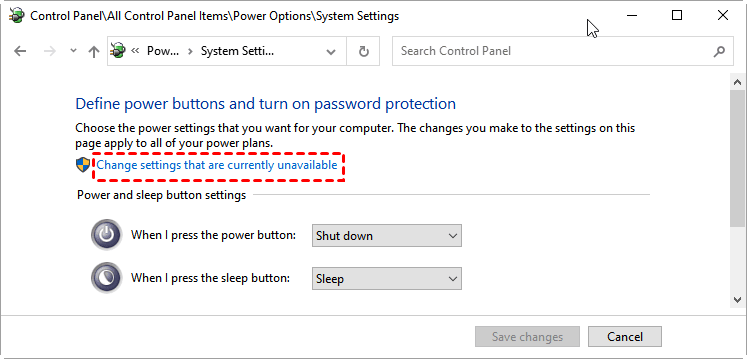
- Then click on Change settings that are currently unavailable.
- To enable fast startup, look for "Turn on fast startup (recommended)" and make sure it's checked. Then, click on "Save changes".
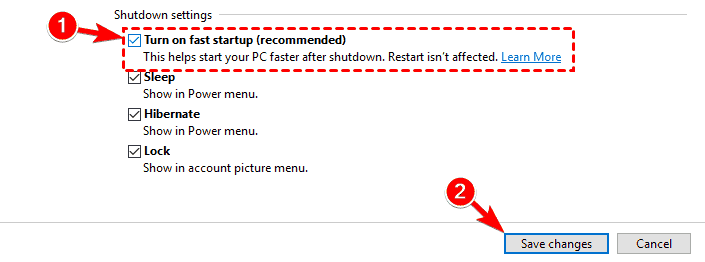
✪ Note: The Fast Startup feature is enabled by default, and disabling it may resolve the SSD slow boot issue on Windows 10.
Method 6. Uninstall Your Graphics Card Drivers
Windows 10 SSD slow boot problem may be related to your graphics card, as some users have reported getting stuck on a black screen when trying to start Windows. To resolve this issue, try uninstalling your graphics card drivers from your PC by following a series of steps.
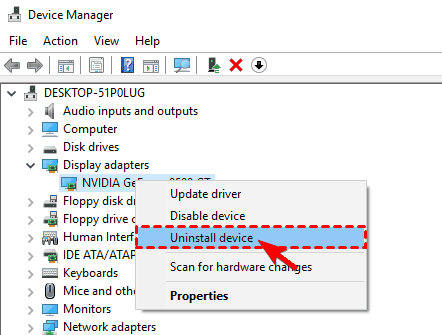
- Open the Device Manager as mentioned in Method 1.
- To uninstall the graphics card driver, locate it in the Device Manager, right-click on it, and select "Uninstall device" from the context menu. This will remove the driver, but the graphics card itself will remain.
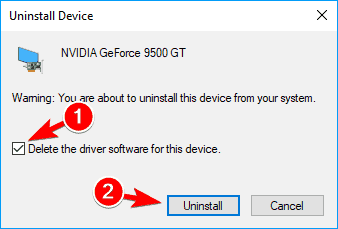
- When the confirmation dialog appears, check "Delete the driver software for this device" and click on "Uninstall".
After uninstalling the driver, check if the problem is resolved. If not, Windows will use the default driver, which may not provide the same performance as the updated driver.
Method 7. Adjust/Increase Virtual Memory
On Windows 10, virtual memory is a feature that temporarily stores infrequently used modified pages from RAM to the hard drive, freeing up physical memory for more frequent processes and applications. This approach prioritizes faster physical memory, improving overall performance and preventing system crashes when memory is low.
To fix SSD slow boot on Windows 10, users can adjust the amount of virtual memory by following a series of steps to manually increase it.
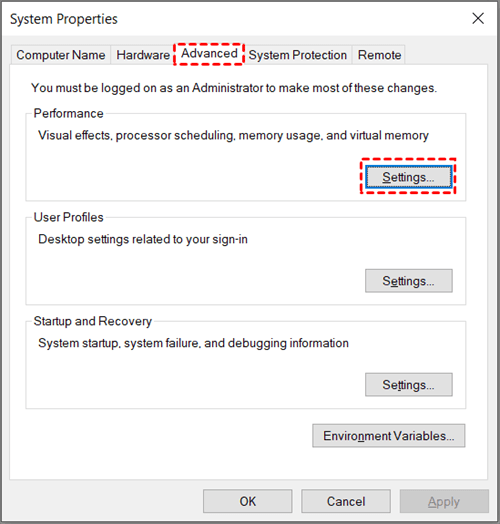
- To view advanced system settings in Windows, type "advanced" in the search box and select "View advanced system settings" from the result.
- Then in the pop-To access the System Properties window, click on it. Then, click the Advanced tab at the top. Next, click Settings under the Performance section.
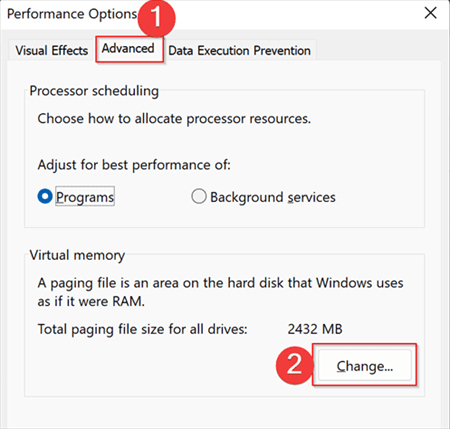
- Navigate to the Advanced tab on the top and click Change under the Virtual memory section.
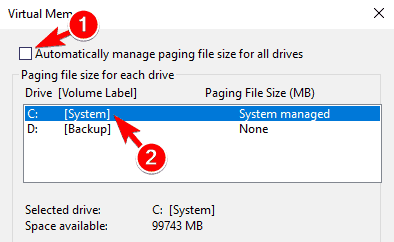
- When the Virtual Memory window opens, uncheck "Automatically manage paging file size for all drives" and select your system drive.
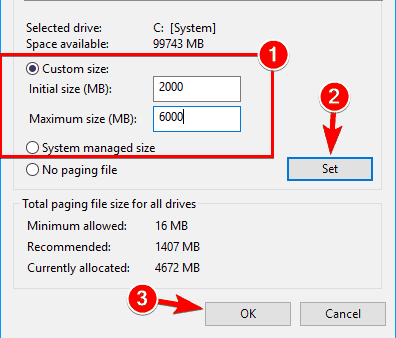
- Select the Custom size option, set the Initial size and Maximum size in MB, with the Maximum size being 1.5x or 2x the size of your RAM in MB. Click Set and OK to save changes.
Method 8. Clone SSD with 4K Alignment via Qiling Disk Master
If you've tried the previous methods and still experience slow boot times on your Windows 10 SSD, it may be due to the SSD not being 4K aligned. This means the SSD is not optimized for the smallest 4K sector in the file system, resulting in slower data read and write speeds, which in turn affects the overall computer speed.
If you're experiencing slow boot times on Windows 10 with an SSD, you can try cloning your system and using 4K alignment with a free disk cloning software, such as Qiling Disk Master, which offers an "SSD Alignment" function to accelerate input and output performance for both HDD and SSD drives.

To avoid slow boot issues on Windows 10, you can use Qiling Disk Master to clone an SSD with 4K alignment. First, download this free software on your computer.
- Launch Qiling Disk Master, navigate to the Clone tab on the left and select Disk Clone on the right panel.
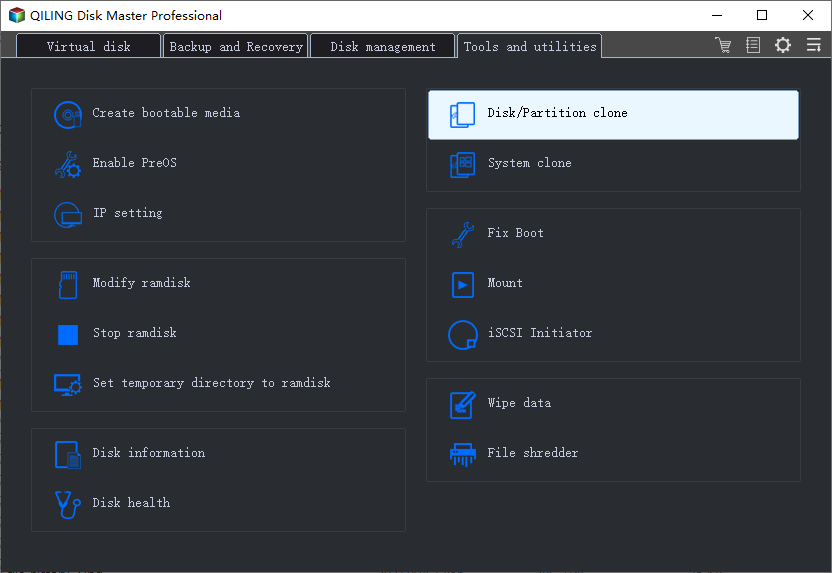
✾ Tip: This function allows the entire disk to be cloned to an SSD, but for system cloning, an upgrade to the Professional edition is required to utilize the System Clone function.
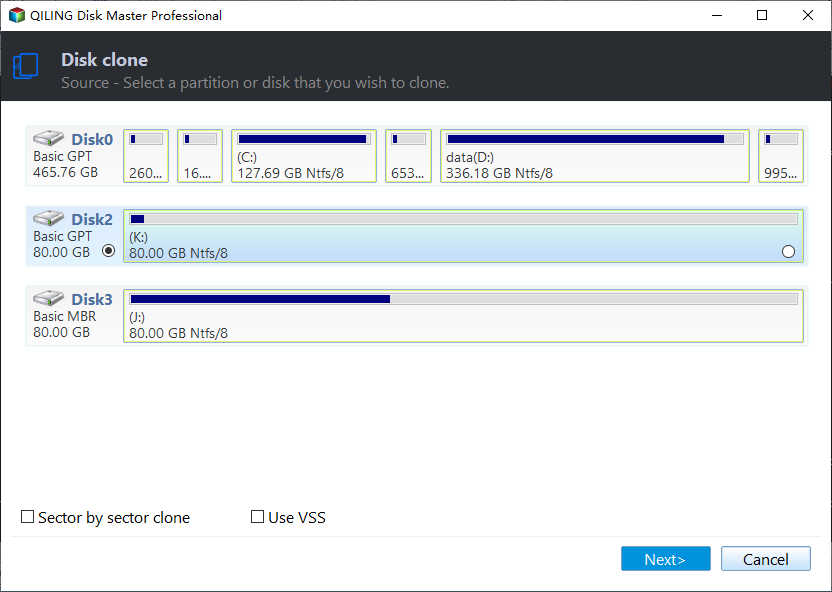
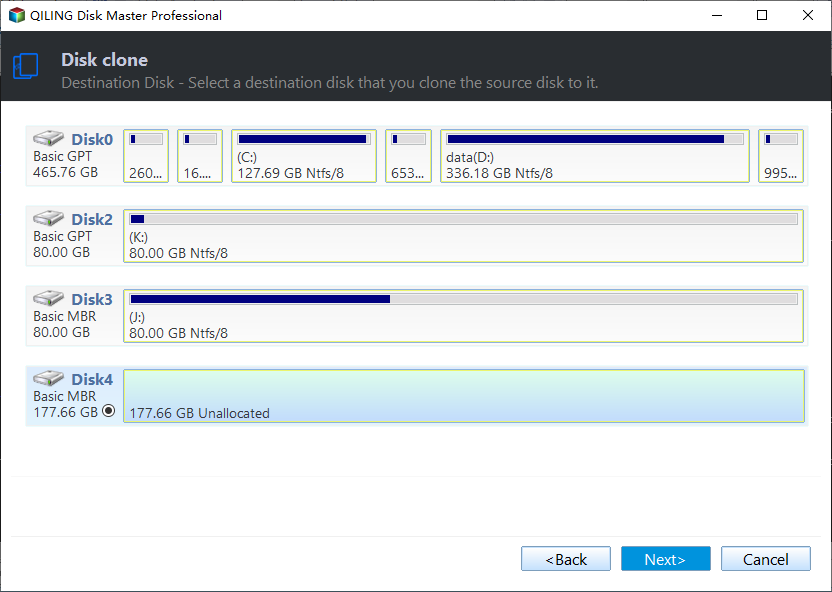
- Select the original hard disk containing Windows 10 system as the source disk and click Next. This will initiate the cloning process, and the system will be duplicated to the target disk.
- Select the SSD as the destination path to clone the source disk and click on Next.
- To improve the writing and reading speed of an SSD disk, check the "SSD Alignment" option in the Operation Summary page, confirm other settings, and click "Proceed".
Tips:
❀ Sector By Sector CloneBy default, Qiling Disk Master just clones the existing data (used sectors) on the disk, which enables you to quickly create a backup of your data without having to clone the entire disk.clone a larger hard drive to a smaller oneIf you want to clone all sectors on the source disk, regardless of whether it's used or not, try this option.
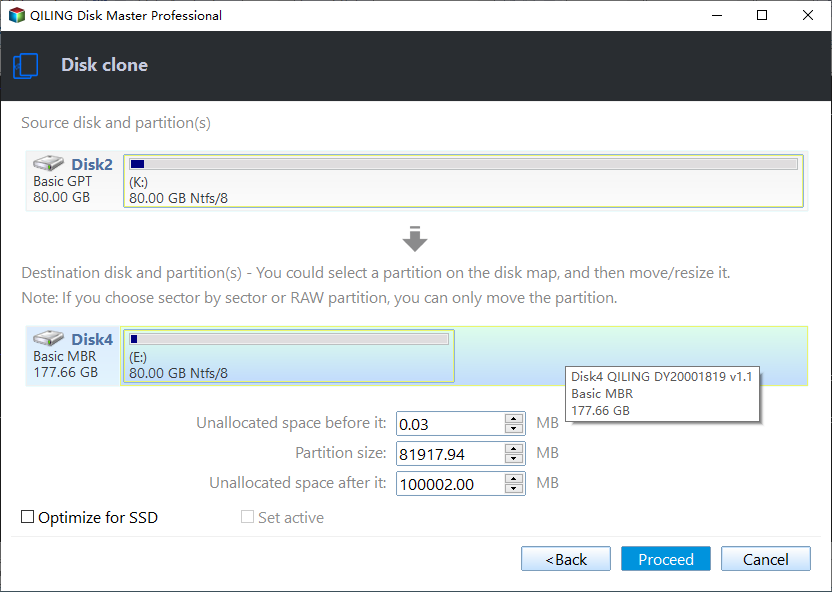
❀ Edit Partitions The AOME Disk Master Professional allows you to adjust the partition size of the destination disk, preventing unallocated space after cloning, which is particularly useful when cloning to a larger disk.
To Sum Up
If your Windows 10 SSD is experiencing a slow boot, there are 8 solutions to help you resolve the issue. Depending on your situation, choose the solution that best suits you. Additionally, the disk cloning software mentioned can not only fix the slow boot issue but also help you solve the "Windows 10 inaccessible boot device after clone" error.
Qiling Disk Master Cloning software is a versatile tool that can protect your computer and data, and its cloning feature allows you to upgrade your hard drive with ease, ensuring a successful boot from the cloned hard drive.
Related Articles
- How to Do System Clone in Windows 10 without Reinstalling OS
- Top 2 Way to Move Windows 10 Boot Partition to SSD Without Reinstalling
- Best Free Clone Software for Windows 8/8.1/10/11
Need the best free clone software for Windows 8/8.1/10/11? Thus, you can easily clone hard drive to another one or directly use a different type of disk. - How to Migrate Windows 8/8.1 to SSD with Secure Boot
Want to migrate Windows 8 to SSD? You can find a powerful software to help you do this in this article. Read this article for more details. - How to Free up Space on PlayStation 4 [Four methods]?
Learn how to free up space on PS4 in this post if it says there is not enough storage to download or install games. - How to Solve Hard Disk Error 301 Efficiently? (4+1 Fixes)
Have you encountered hard disk 301 error in your HP computer? Find quick fixes to the error from this page.