How to Solve My WD Hard Drive Not Recognized in Windows 10 Or 11
- My WD hard drive not recognized in Windows 10
- Different solutions under different situations
- ▶ Method 1: Initialize WD hard drive in Disk Management
- ▶ Method 2: Assign drive letter to WD hard drive partition
- ▶ Method 3: Format WD hard drive to a compatible file system
- ▶ Methods 4: Update WD hard drive device driver
- ▶ Method 5: Enable USB device in BIOS
- ▶ Method 6: Switch connection port
- Conclusion
My WD hard drive not recognized in Windows 10
I have a Western Digital 1TB Elements Portable external hard drive, which used to work well with my friend's computer. However, I found that WD Elements not showing in my computer File Explorer after I connected it to my computer running Windows 10. That is to say, I am unable to access my WD hard drive from File Explorer. But I would like to use it to store some files. Is there anyone who encountered a similar issue? Can you give me some advice? Thanks for your help!
Different solutions under different situations
WD hard drives may not be recognized in Windows 10 due to various reasons such as incompatible file system, invalid USB port, or outdated drivers. To resolve this issue, users can try updating the drivers, checking the file system, and ensuring the USB port is functioning properly. This may resolve the issue and allow the WD hard drive to be recognized in Windows 10/11 File Explorer.
▶ Method 1: Initialize WD hard drive in Disk Management
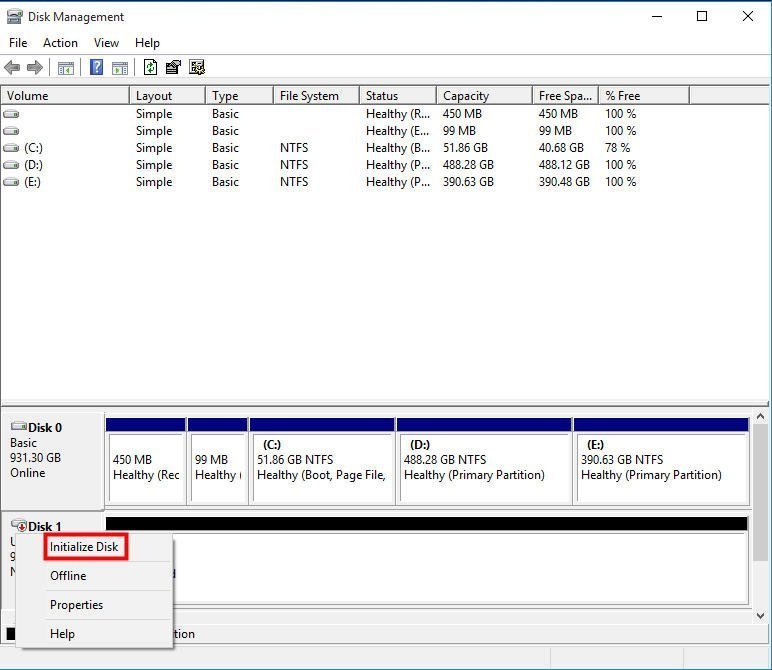
This way applied to the situation that your WD hard drive shows as not initialized disk when you open Disk Management. Follow the steps below:
1. Right-click on the WD hard drive that will be initialized.
2. Choose "Initialize Disk" and pick one partition system between MBR and GPT.
3. Right-click the disk and choose "Create New Simple Volume".
Then, you can do what New Simple Volume Wizard prompts.
PS:
»Initializing WD hard drive will lead to data loss. If you don't care about the data on WD hard drive, you can apply this way.
»It is possible that you are unable to initialize hard drive and receive errors like the device is not ready.
▶ Method 2: Assign drive letter to WD hard drive partition
If your WD external hard drive is not showing up in Windows 10/11 File Explorer, it may be due to a missing drive letter or conflict. You can resolve this by assigning a drive letter to the hard drive or changing its existing drive letter, which should allow it to be recognized and displayed in File Explorer.
1. Open Disk Management in Windows 10/11.
2. Right-click the hard drive partition and choose "Change Drive Letter and Path…"
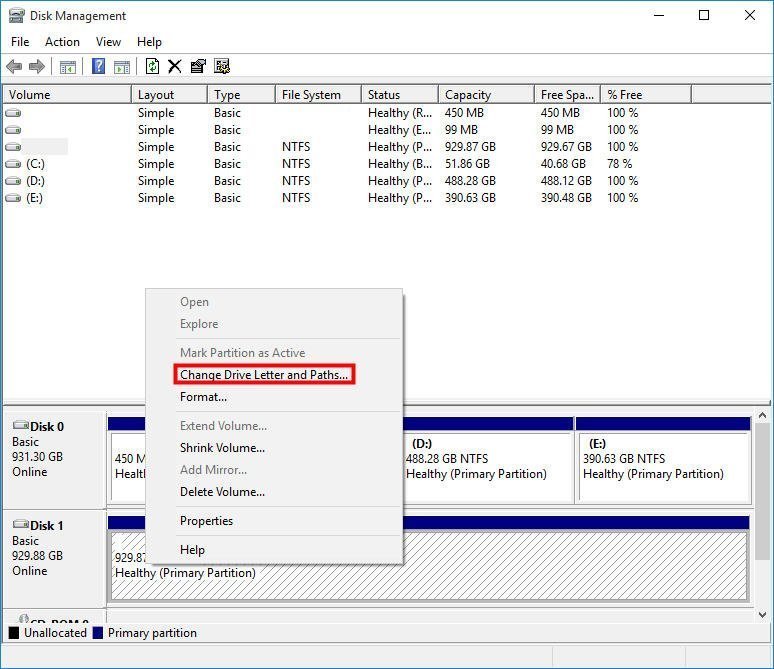
3. In the pop-up window, click on "Add" to assign a drive letter to the hard drive partition or click "Change" to change the drive letter.
4. To access your hard drive from Windows 10/11 File Explorer, close Disk Management and go to File Explorer. You can do this by clicking on the File Explorer icon on your taskbar, or by searching for "File Explorer" in the Windows search bar.
▶ Method 3: Format WD hard drive to a compatible file system
If your WD hard drive was previously formatted with an unrecognized file system under Windows or has corrupted files, you can try formatting it using Disk Management. However, this method has some limitations, such as being unable to format a hard drive partition over 32GB in size to FAT32 file system.
To format a WD hard drive, it is recommended to use Qiling Disk Master Standard, a powerful disk formatting tool that can break the limit of 32GB in partition size and offers more options for file systems. It is compatible with Windows 11/10/8.1/8/7, XP, and Vista. For Windows Server, Qiling Disk Master Server can be used instead.
In the beginning, you can free download this great software.
Then, do the step-by-step tutorial given below.
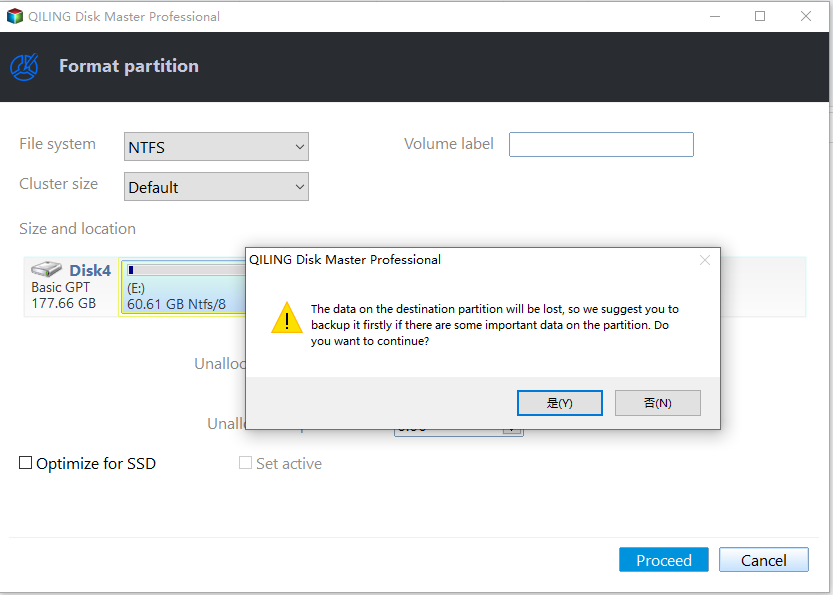
1. Install and fire up Qiling Disk Master. Right-click the hard drive partition that needs formatting in the main interface and choose "Format Partition".

2. Western Digital (WD) hard drives are compatible with various file systems, but choosing the right one depends on your specific needs. For a general-purpose use, NTFS (New Technology File System) is a good choice, as it offers good performance, reliability, and security features.
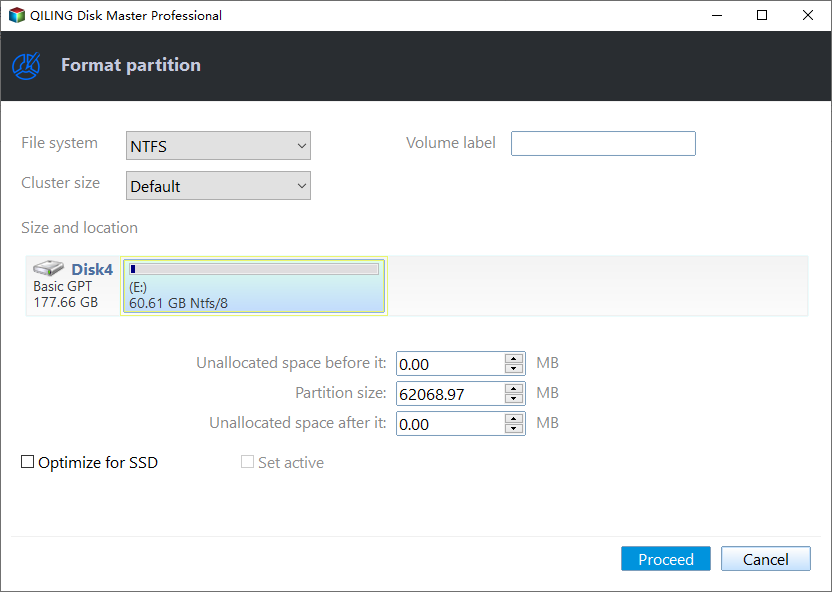
3. Go back to the main interface. Confirm the formatting operation and click "Proceed" to execute it.
PS: Qiling Disk Master is compatible with a range of Windows operating systems, including Windows 10, 11, 8.1, 8, 7, XP, and Vista.
▶ Methods 4: Update WD hard drive device driver
If your WD hard drive is not showing up in Windows 10 or Windows 11 Disk Management, you can check if the device driver is the issue. Open Device Manager by pressing "Windows + R", inputting "devmgmt.msc", and hitting "Enter".
To resolve the issue with the WD external hard drive not being recognized in Windows 10/11, check the disk drives for a yellow exclamation mark with the WD hard drive device. If present, right-click the WD device, select "Properties," and click "Update Driver" or "Uninstall" under the Driver tab. Restarting the computer after this process may allow the WD external hard drive to be recognized by Windows.
▶ Method 5: Enable USB device in BIOS
If your WD hard drive is not detected or working in Windows 11/10, it might be due to the USB interface being disabled in the BIOS settings. To resolve this, enter your BIOS settings, enable the USB device, and restart your computer to see if the WD hard drive is visible.
▶ Method 6: Switch connection port
If your WD hard drive isn't showing up in Windows 10 or 11, check if the connection port is damaged or dead. Try plugging it into a different USB port to see if it's recognized by Windows.
Conclusion
To quickly and securely fix a WD hard drive not recognized in Windows 10/11, identify the most likely causes and take targeted measures. The possible events include hardware issues, driver problems, or software conflicts.
Related Articles
- Fixed: WD Quick Formatter Failed in Formatting External Drive
Learn how to fix the failed error or application not working issue when use WD Quick Formatter tool to format external hard drive by using better format software in Windows. - Western Digital MBR Repair Tool for Windows 10, 8, 7| Free Download
Corrupted MBR of Western Digital disk can make booting fail or the disk inaccessible. In this article, you can find the steps to repair MBR of WD with a free and great MBR repair tool, or installation CD/DVD. - What Files Can Be Moved C Drive to D Drive in Windows 10 and How to
In Windows 10, you can safely move files from the C drive to the D drive by relocating the following files and folders: the "Videos", "Music", and "Pictures" folders, as well as any other files or folders that you no longer need on the C drive. To do this, simply right-click on the files or - What is File System in Windows Operating Systems?
What is file system? And how many types of it? This post will give you an elaborate introduction. - How to Deploy Windows 10 System Image to New Hardware?
Deploying Windows 10 system image to computer with new hardware enables you to keep your Windows 10 but upgrade hardware. Qiling Disk Master could be a good Windows 10 deployment tool. - Use DISM Offline to Repair Windows 10 Image (2 Ways)
You can easily perform DISM offline repair in Windows 10 to repair Windows images, even if not booting into the running operating system.