Best Way to Clone Windows 11 to NVMe SSD
Windows 11 & NVMe SSD: Best Combination
Windows 11 is Microsoft's latest operating system with a sleek interface and enhanced security features, offering improved performance when upgraded.
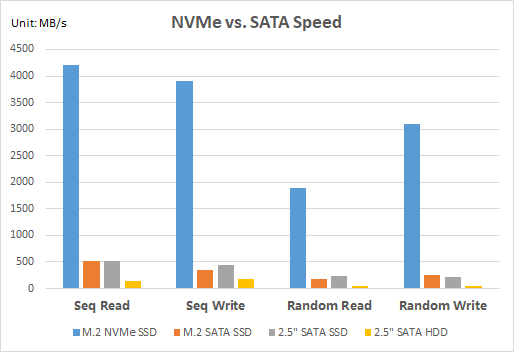
NVMe is a storage protocol optimized for SSDs and NVMe drives, enabling lightning-fast read and write speeds that significantly reduce boot and application load times.
Leveraging NVMe can significantly enhance Windows 11 performance. Cloning Windows 11 to an NVMe drive can provide notable benefits.
- It enables faster data transfer speeds, improving overall system performance.
- Migrating the OS and applications to NVMe can significantly reduce boot times.
- Cloning allows for a smooth transition by replicating the entire system, including programs and settings, without the need for a fresh installation.
- Preparations for Windows 11 NVMe Cloning
- Best Windows 11 NVMe Cloning Software - Qiling Disk Master
- How to Clone Windows 11 to NVMe SSD Step by Step
- Important: Optimizing Windows 11 on NVMe
- Answered! FAQs on Windows 11 NVMe Cloning
Preparations for Windows 11 NVMe Cloning
To ensure a seamless transition, you should prepare for cloning by understanding the process, identifying the right clone, and setting up a suitable environment for the clone to thrive. This includes researching the cloning process, selecting a clone that is genetically compatible with the original, and creating a suitable habitat for the clone to grow and develop.
1. Connect the NVMe SSD
- If there are two M.2 slots: To install an NVMe drive, shut down your computer, open the case, and find an available M.2 slot on the motherboard. Insert the NVMe drive into the slot and secure it in place using the provided screw(s).
- If there is only one slot: Connect the new NVMe SSD to a USB-C to NVMe SSD enclosure, then connect the enclosure to your computer using a USB-C cable. This will allow you to access the new drive externally.
2. Initialize the NVMe SSD (for a brand new SSD)
If you want to use an NVMe SSD to boot your computer, you'll need to initialize it in the GPT partition style, which is compatible with UEFI boot mode.
3. Backup files on the NVMe SSD (for a used SSD)
Cloning a disk will completely replace the contents of the destination disk, so any existing data on the target disk will be lost. It's essential to back up any important data before proceeding with the cloning process.
4. Choose a reliable cloning software
A professional cloning tool is essential for ensuring data integrity and secure boot after cloning. To achieve this, consider investing in a top-notch NVMe cloning software that can handle your data with precision and security.
Best Windows 11 NVMe Cloning Software - Qiling Disk Master
Qiling Disk Master Professional is a specialized disk cloning software that enables Windows 11 to NVMe cloning, among other features.
★ The software offers a feature called Disk Clone, which allows users to transfer everything from one hard drive to another. This feature can even clone a larger hard disk drive to a smaller solid-state drive, as long as the new SSD is larger than the data being transferred. This capability makes it possible to upgrade to a smaller SSD while still keeping all the data and programs from the original larger HDD.
★ The System Clone feature allows you to migrate the OS to a new drive, making it possible to install Windows 11 on an NVMe SSD.
★ Acloning software supports cloning MBR and GPT disks, allowing for various clone combinations, and the destination disk remains bootable after cloning.
Download Qiling Disk Master now to have a try!
How to Clone Windows 11 to NVMe SSD Step by Step
Step 1. Install and launch Qiling Disk Master. Go to the Clone tab, select Disk Clone.

Step 2. To clone the current boot drive to the NVMe SSD, select the current boot drive as the source disk by clicking on it. Then, choose the NVMe SSD as the destination disk for the cloning process.

Step 3. Check the SSD Alignment option to optimize NVMe SSD performance and click Proceed to begin Windows 11 to NVMe cloning.

Boot from the Cloned NVMe SSD
👉If you installed the NVMe SSD in a slot, you should connect the power cable from the power supply to the M.2 NVMe SSD.
- Restart your computer and press the specified key (usually F2, Del, ESC, F10, etc.) to access the BIOS settings.
- Look for the Boot tab and set the cloned SSD as the first boot option to ensure it boots up properly.

- To save the changes and exit the BIOS screen, press F10, and the computer should boot successfully from the cloned SSD drive.
👉If you connected the NVMe SSD via an enclosure, you'll need to install the enclosure's driver and software, and then you can follow the same steps as in case 1 to install the NVMe SSD. The enclosure's driver and software will handle the communication between the NVMe SSD and the motherboard, allowing you to access the SSD's storage.
- Shutdown your computer.
- Remove the old hard drive and install the new SSD there.
- Install the operating system on the new SSD, and then connect the old SSD as a secondary drive. This will allow you to access your files from the old drive while running the operating system from the new drive.
Important: Optimizing Windows 11 on NVMe
After cloning Windows 11 to an NVMe drive, you can improve stability and performance by confirming the NVMe drive is first in the boot order, enabling UEFI mode when required, keeping SSD firmware updated, and checking that TRIM is enabled.
- Enable NVMe optimizations: To maximize the performance and efficiency of your NVMe drive, ensure that the settings are configured to enable features like "Write Caching" and "Trim". This allows for optimal handling of data transfers and maximizes the drive's capabilities.
- Disable unnecessary services and features: Disabling unnecessary services and features can improve overall performance by freeing up system resources, allowing the NVMe drive to focus on essential tasks. This can be achieved by identifying and turning off resource-intensive services and features that are not required for your specific needs. This will enable your system to run more efficiently and effectively, making the most of your NVMe drive's capabilities.
- Keep drivers and firmware up to date: To ensure compatibility with Windows 11 and take advantage of any performance enhancements and bug fixes, regularly update the drivers and firmware of your NVMe drive.
To optimize NVMe performance on Windows 11, prioritize the installation of the latest drivers, ensure the correct configuration of the NVMe drive, and consider disabling the Windows Search feature if it's not necessary. Additionally, update your system to the latest version, run a disk cleanup, and consider upgrading to a faster NVMe drive if your current one is outdated.
Answered! FAQs on Windows 11 NVMe Cloning
Q1: How long does it take to clone Windows 11 to NVMe?
The cloning process can take anywhere from 30 minutes to over an hour, depending on the size of the Windows installation and the speed of the NVMe drive.
Q2: Can I clone Windows 11 to NVMe on a laptop?
If your laptop has an available M.2 slot that supports NVMe drives, you can clone Windows 11 to an NVMe drive on your laptop. This is a great way to upgrade your storage and potentially improve your laptop's performance. To do this, you'll need to purchase an NVMe drive that is compatible with your laptop's M.
Q3: What happens to my old drive after cloning Windows 11 to NVMe?
After successfully cloning Windows 11 to an NVMe drive, you have several options for your old drive. You can repurpose it for additional storage or create backups of important files, and if the NVMe SSD works perfectly after a period of time, you can wipe the old hard drive for reuse.
Conclusion
Cloning Windows 11 to an NVMe drive is a great way to give your system a performance boost, faster boot times, and improved overall responsiveness. With Qiling Disk Master, you can easily migrate your Windows 11 installation to an NVMe SSD, taking advantage of modern storage technology and unlocking its full potential.
You can use a cloning software to clone an NVMe drive on Windows 11, and also clone an SSD to a larger SSD on Windows 10, or clone an IDE hard drive to a SATA drive, among other options.
Related Articles
- How to Clone Windows 10, 11 to NVMe SSD (Step by Step Guide)
- How to Clone NVMe SSD to NVMe SSD in Windows 10, 11 (2 Ways)
- Easy | Migrate Windows 11/10 to M.2 SSD without Reinstalling
- How to Backup Old Emails in Outlook: A Comprehensive Guide
How to backup old emails in Outlook? This article provides you with three methods to backup old Outlook emails. Let's see how it works. - Top 3 Ways to Backup Laptop on Windows 11 (Both Files and OS)
You can learn top 3 ways to backup laptop on Windows 11 from this article. Read on by yourself to grab the detailed information and full guide below. - Complete Guide to Backup Specific Folders on Windows 11 | 5 Ways
This article tells you how to backup specific folders on Windows 11 in 5 different ways. Four of them are provided by Microsoft, and one is the best free backup software.