How to Install Windows 11 from USB without losing data?
How can I install Windows 11?
To install Windows 11 from a USB stick without losing data, you'll need to create a bootable USB drive with the Windows 11 installation media. This process typically involves downloading the Windows 11 installation tool from Microsoft's official website, which will guide you through the process of creating the bootable USB drive. Make sure to back up any important files on your Windows 7 PC before proceeding, as the installation process will erase all data on the target drive. If you're a novice, it's a good idea to consult the official Microsoft documentation or seek guidance from a trusted tech support resource to ensure a smooth and safe installation process. Additionally, you may want to consider upgrading your PC to meet the minimum hardware requirements for Windows 11 to ensure a stable and efficient installation.
How to install Windows 11 from a USB flash drive without data loss?
Windows 11 is a game-changer in computing, making it a must to know how to install it. The most common method is to install Windows 11 from a USB flash drive, which helps avoid data loss. Before proceeding, some preparations are necessary, including getting ready to install Windows 11 from a USB flash drive, which is the focus of this tutorial.
1) Steady network conditions.
2) Sufficient free storage space for the Windows installation.
A USB flash drive with at least 8GB of free space is required. If the USB stick contains important files, back them up first, as all data will be deleted during the process.
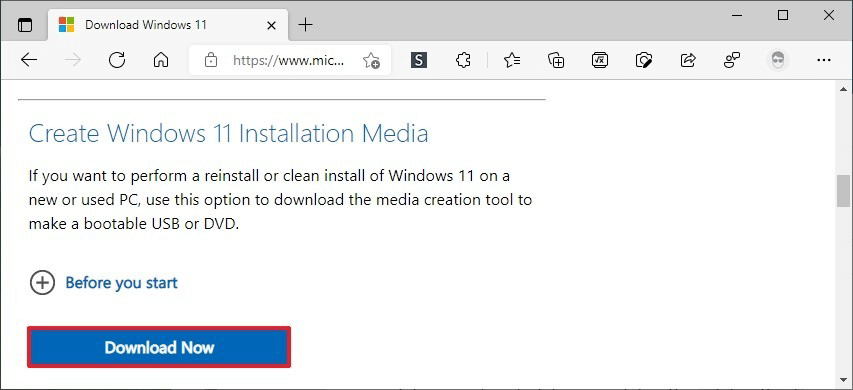
Part 1. Create a Windows 11 installation media
To create the installation media, go to Microsoft's official website and download the media creation tool.
1. Connect the USB drive to your PC, wait for it to be detected, and then download the media creation tool.
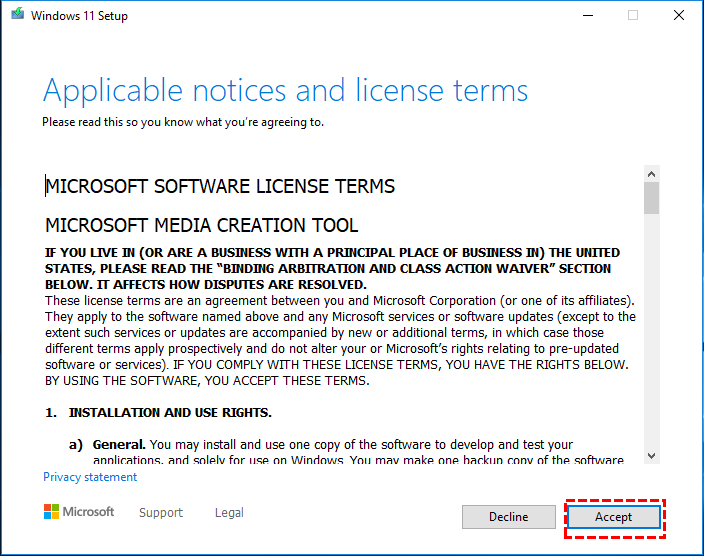
2. When the download is completed, open the exe. File.
3. To start the Windows 11 Setup process, click on "Accept" at the start of the Windows 11 Setup window.
4. Select "Create installation media for another PC" and hit "Next".
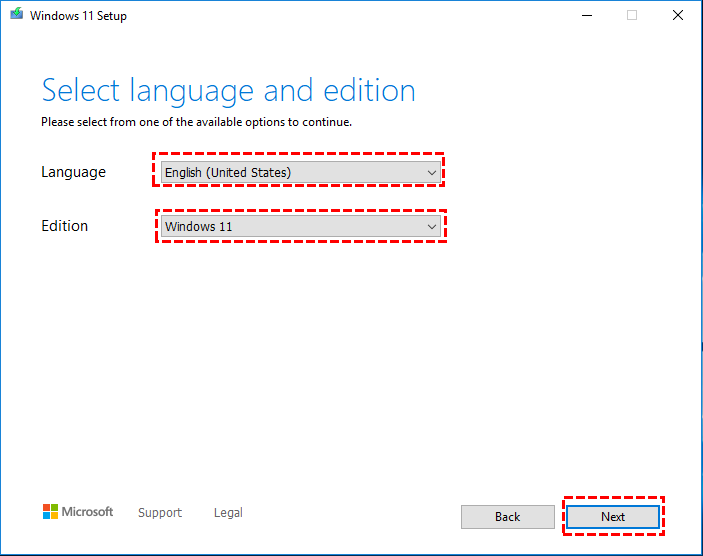
5. Select language, edition, and hit "Next".
6. A USB flash drive is a portable storage device that can be used to transfer files between computers. It is a small, compact device that can be easily carried around and plugged into a computer's USB port to access its contents. USB flash drives are often used to transfer files between computers, to store data, and to provide a backup of important files.
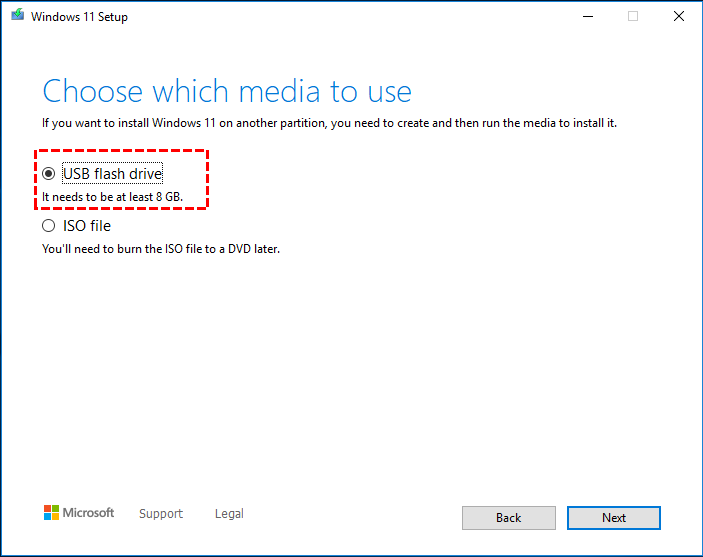
7. Select the USB flash drive and start the downloading process.

A Windows 11 installation USB will be created in just a few minutes.
Part 2. Install Windows 11 from the installation USB
After creating the Windows 11 installation media, boot from it and follow the on-screen guide to complete the installation process.
1. Insert the installation USB into your PC and restart it. Enter the BIOS settings and use the arrow keys to move the USB to the top of the boot sequence. Press Enter to save the changes and Esc to exit the BIOS settings.

Note: The process of entering the BIOS (Basic Input/Output System) can vary depending on the type of Windows system you have. Typically, you can access the BIOS by pressing a specific key during the boot-up process, such as F2, F12, or Del, and following the on-screen instructions.
2. Plug in your USB flash drive, turn on your PC, and it should boot from the USB drive. If it doesn't, you may need to change the boot order in your BIOS settings.
3. In a short while, the Windows 11 setup window will appear where you need to preset language, time and currency format, and input method.

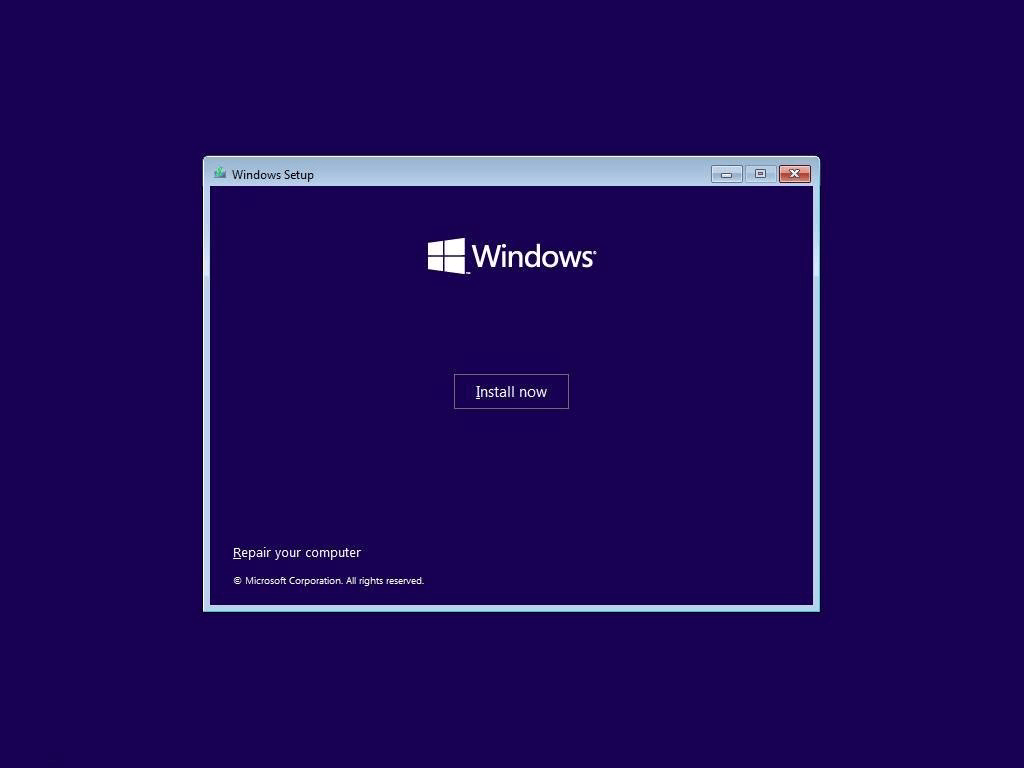
4. Click on "Install Now".
5. Enter the product key. If you don't have the product key, click on "I don't have a product key".

Note:
Without a product key, some features of Windows 11 will be limited.
If you're unable to locate your Windows 11 product key, you can try using a product key finder tool, such as the Windows 11 product key finder, to attempt to recover or find the key.
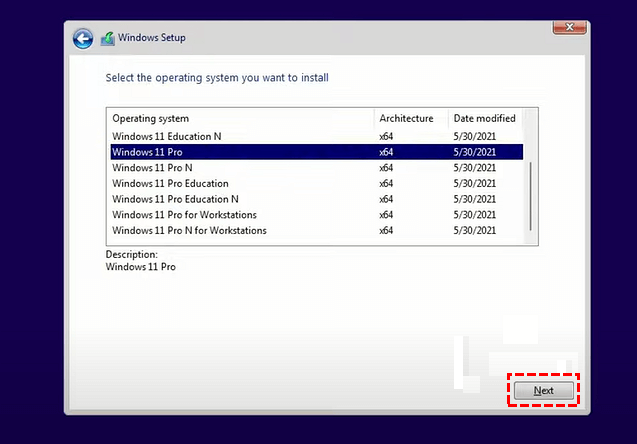
6. Select an edition you plan on installing and hit "Next".
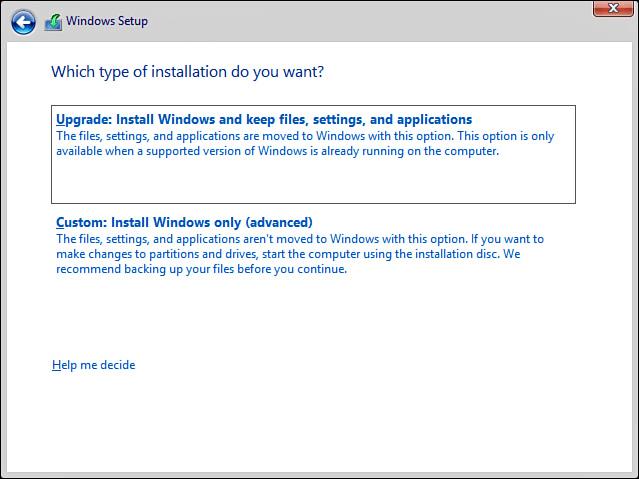
7. Accept the license terms and choose the "Upgrade: Install Windows and keep files, settings, and applications" option to preserve most of your files and apps during the Windows 11 installation process.
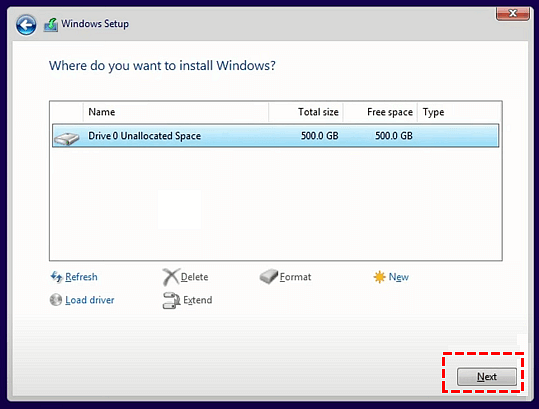
8. The destination for the Windows 11 installation will be selected, and then the "Next" button will be clicked.
The installation process can take anywhere from a few minutes to several hours to complete, so it's best to be patient and let it run its course.
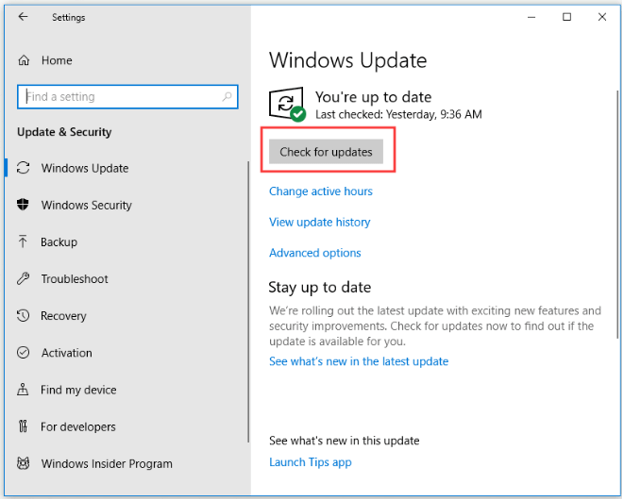
If you're currently running on Windows 10, you can directly upgrade to Windows 11 without data loss by going to "Settings" > "Update & Security" > "Check for Update".
How to create a Windows 11 to Go USB for portable use?
To simplify the Windows 11 installation process, you can create a portable Windows 11 USB stick that can be run on any PC without installation. This can be achieved using a powerful disk management software utility like Qiling Disk Master Professional, which allows you to perform various operations including OS migration, SSD secure erase, and Windows to Go creation.
If you don't want to install Windows 11 from a USB flash drive, you can also try using Windows 11 to Go, which allows you to use the OS on the go. You can download a demo now to give it a try.
Preparations:
1. A USB flash drive larger than 13GB.
2. Download the Windows 11 ISO file.
Conclusion
To install Windows 11 from a USB flash drive without losing data, follow the complex process outlined in this tutorial, which also teaches you how to create a portable Windows 11 USB flash drive for working on-the-go. This can be achieved using Qiling Disk Master Professional, a powerful and user-friendly disk manager compatible with Windows 11, 10, 8, 7, and XP, or its Server edition for servers.
Related Articles
- QILING Fast Cache Server
QILING Fast Cache can improve overall system performance and the life of hard disk. Free download the Fast Cache software to speed up your computer now! - Qiling File Shredder
Qiling File Shredder is permanently wipe the disk or shared data, irreversibly remove sensitive data easily and effectively. - QILING Disk Master Edition Comparison
QILING Disk Master offers affordable, reliable, easy and best backup and restore software and disk manager software and ramdisk software solutions for Windows. - QILING Disk Master Free
Qiling Disk Master Free is an award-winning and easy-to-use free data backup software and free partition manager software for windows PC. - Top 4 Ways to Restore Windows 11 Taskbar (Include 1 Tip)
Here, you will learn how to restore Windows 11 Taskbar with provided 4 fixes, and one best backup freeware is included. Read on to learn more detailed steps. - How to Schedule Automatic Backups in Windows 11 (4 Ways)
This tutorial provides 4 free ways to schedule automatic backups in Windows 11, offering basic information to help you understand automatic backups and how to set them up in your system.