How to Backup and Restore Files in Windows 11
About Windows 11 Backup and Restore
Windows 11 has introduced several new features and graphical interface changes, including a centered Start menu, taskbar, and rounded corners on windows. Users who have upgraded to the new operating system are also interested in the changes made to the built-in Backup and Restore tool, which is a feature that allows users to create and manage backups of their files and system. The changes to this tool are likely to be of interest to users who want to understand how to use it effectively in the new operating system.

Windows 11 still has the Backup and Restore feature, which allows you to backup your system or important files, and then restore them if needed.
In Windows 11, the Backup and Restore feature has been replaced by OneDrive's backup feature, making it less accessible. The original entrance to Backup and Restore is no longer available.
- In Windows 10, You can access the Windows 10 backup software, Backup & Restore, from Settings > Update & Security > Backup > Backup and Restore (Windows 7).
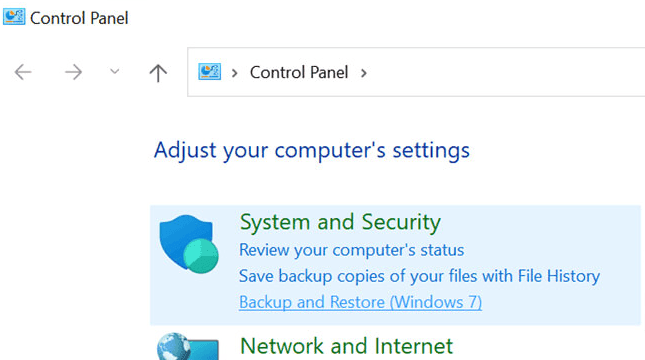
- In Windows 11, To access the Backup and Restore (Windows 7) feature, you can either go to the Control Panel, click on System and Security, and then select Backup and Restore (Windows 7), or you can go to Settings, click on System, then Storage, and finally Advanced Storage options, followed by Backup options, and then scroll down to Looking for an older backup and select Go to Backup and Restore (Windows 7).
How to Backup Files with Windows 11 Backup and Restore
To backup your files with Windows 11 Backup and Restore, you can follow the graphic tutorial below, which will guide you through the process of creating a backup of your important files and folders.
Step 1. Go to Control Panel > System and Security > Backup and Restore (Windows 7).
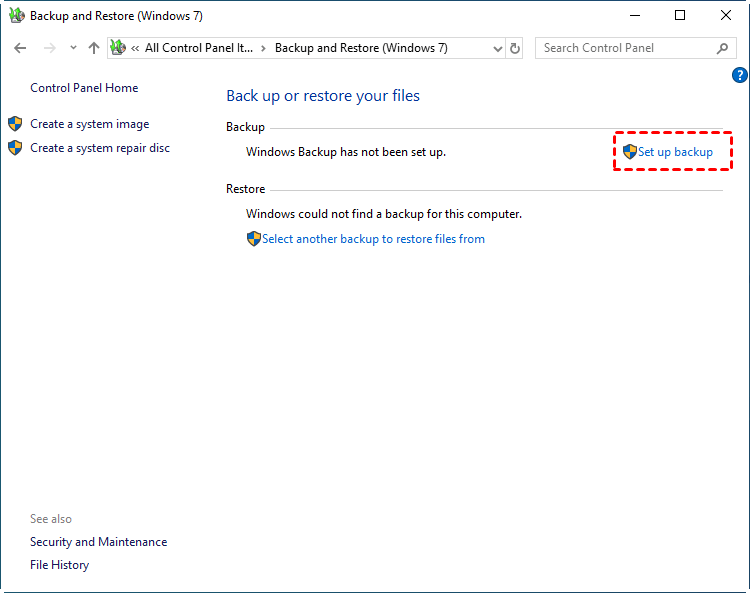
Step 2. Select the Set up backup option under the Backup section.
Step 3. If prompted, enter your admin password.
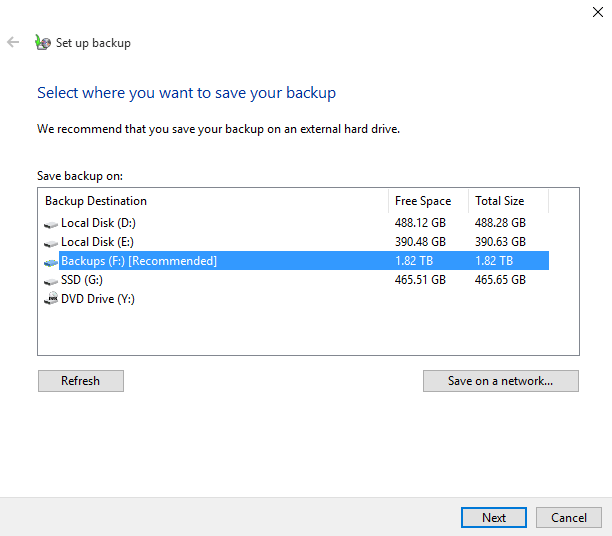
Step 4. Select your Backup Drive and click Next.
Step 5. Select the "Let Windows Choose" option and click Next. This will automatically backup files for users, including those saved in libraries, on the desktop, and in default Windows folders.
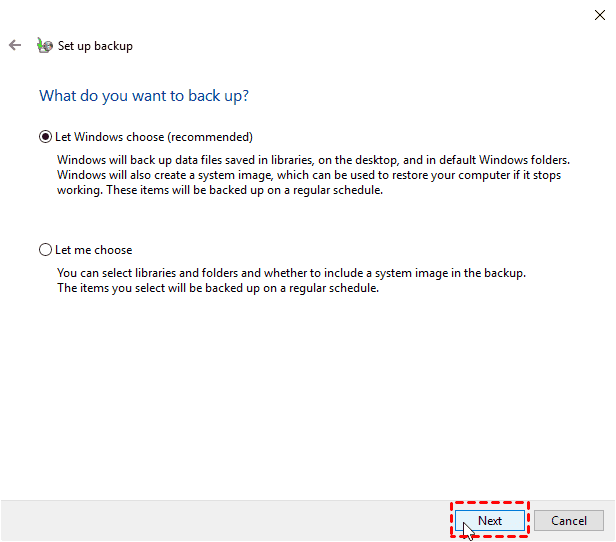
✡ Note: You can choose to select libraries and folders, along with whether to include a system image in the backup, and the items you choose will be backed up on a regular schedule.
Step 6. Click Save settings and run backup button.

✡ Note: The program automatically backs up files every Sunday at 7:00 PM, but this schedule can be customized by clicking the "Change Schedule" option.
How to Backup Files with Windows 11 File History
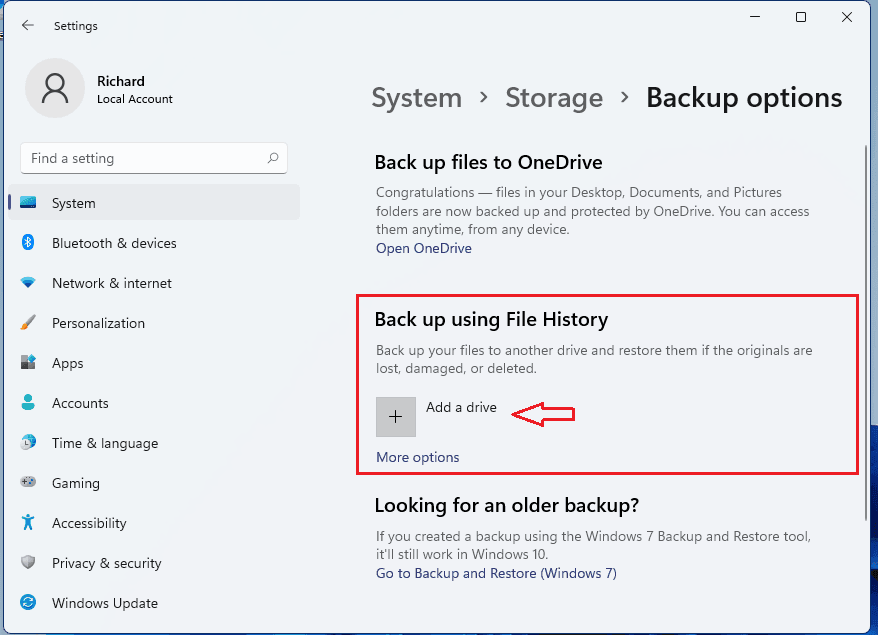
Step 1. Connect an external hard drive to your computer and navigate to System > Storage > Advanced storage settings > Backup Options, then click Add a drive under Back up using File History.
Step 2. Click "on" under the"Automatically back up my files"option.

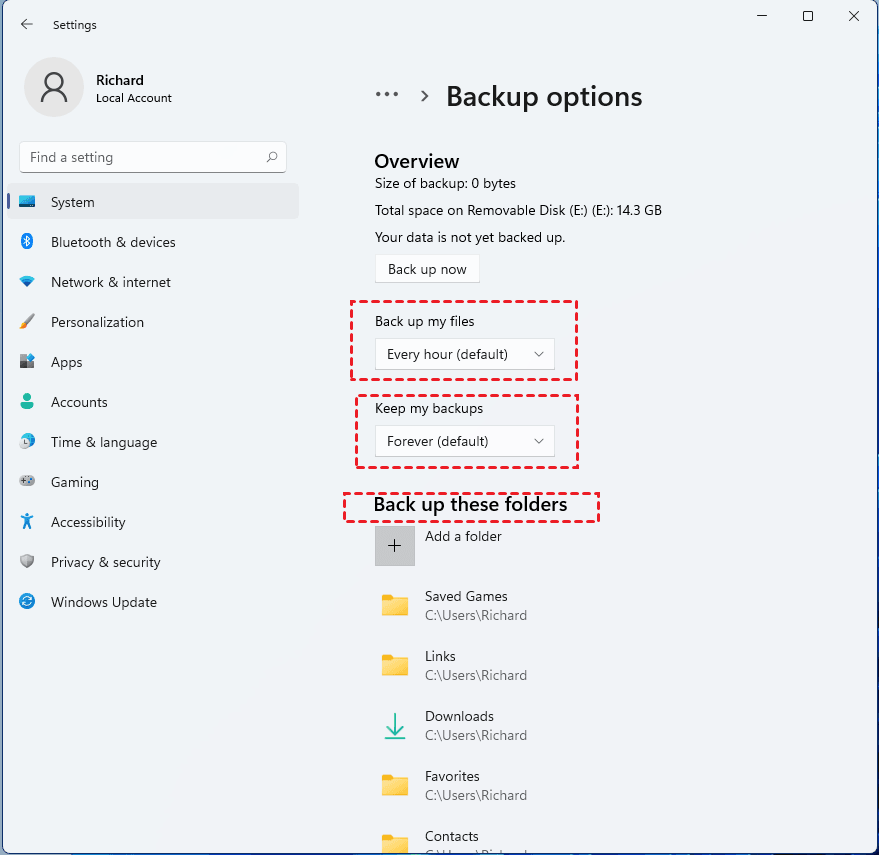
Step 3. To configure File History, select "More options" to set how often it backs up, how long it keeps those backup copies, and which files it backs up.
▶ Back up my files: File History allows you to change the backup interval from the default 1 hour to a range of 10 minutes to 24 hours.
▶ Keep my backups: The program is set to keep backups indefinitely, but users can adjust the retention period to keep backups for a month, six months, one year, or two years before deleting them.
▶ Back up these folders: In this window, you can view and manage the folders that are being backed up by Windows. You can add more folders to the backup list by selecting "Folder", and remove any folder from the backup list by selecting it and clicking the "Delete" button.
Step 4. When you're finished, save and exit. Then click Back up now. Windows 11 will automatically back up your files to the drive when you connect it to your computer.
Windows 11 Backup and Restore Alternative Tool to Backup Files
Backup and Restore, a built-in tool, can satisfy users' backup and restore needs, but it has limitations, such as not supporting differential backup. A more professional and secure alternative, like Qiling Disk Master Standard, can help with Windows 11 backups, offering 4 backup solutions, including System Backup, Disk Backup, Partition Backup, and File Backup, making it easy to backup and restore anything.
- The software offers three backup methods: incremental, differential, and full backup. Incremental backup is a space-saving option that keeps backups up-to-date.
- It supports schedule backup, allowing you to choose from daily, weekly, or monthly frequency options.
- The software offers two backup modes: intelligent sector backup and exact backup, and three compression levels: high, normal, and low.
- You can add notes to your backups and receive email alerts.
- This system supports various storage devices like USB, HDD, and SSD, among others.
- The software has good compatibility with various operating systems, including Windows 7, 8, 8.1, 10, 11, XP, and Vista, among others.
To backup your Windows 11, you can follow these steps: First, click on the Start button and type "Backup" in the search bar, then select "Backup settings" from the results. Next, click on the "Add a drive" button and select the drive you want to backup.
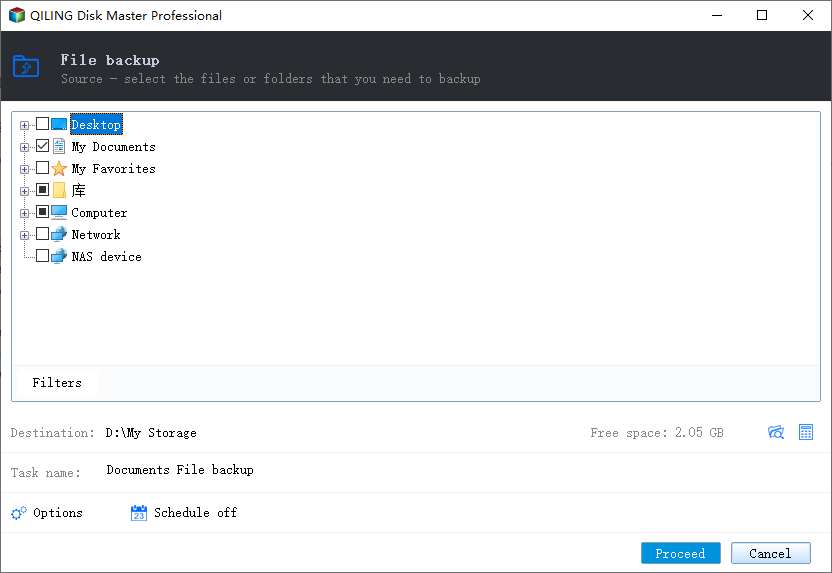
Step 1. Download Qiling Disk Master Standard, install and launch the software. Select "Backup" > "File Backup".

Step 2. Click "Files" or "Folders", then select the files or folders to be backed up.
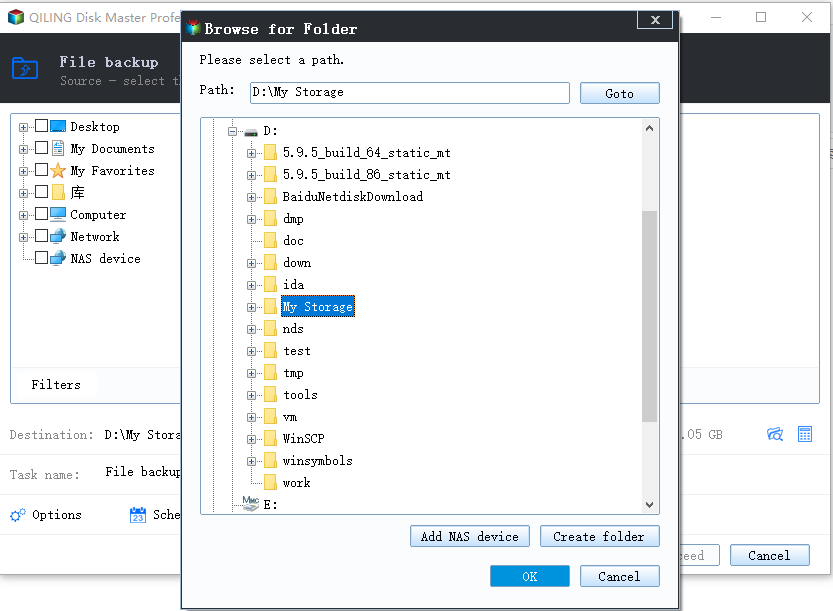
Step 3. Choose the destination for your backup.
More options you could use:
✾ Options: It allows you to compress or split an image file and send email notifications.
✾ Schedule Backup: It allows users to schedule a backup task to run at regular intervals, such as daily, weekly, or monthly.
✾ Backup Scheme: Qiling Disk Master Professional and higher versions offer features such as backing up only changed files with incremental or differential backup, and automatically deleting old backups to save target disk space.
Step 4. Click "Proceed" to execute this backup task with Windows 11 backup software.
Now, you have a duplicate copy of the original files. To keep it safer, it's suggested to backup to one more location, such as, a cloud with 1TB of free storage, and you have 15 days of free access after registration.
Summary
Windows 11 offers two built-in tools for backing up and restoring files: "Backup and Restore" and "File History". While both tools serve the purpose of backing up files, they have some differences. The "Backup and Restore" tool allows you to create a system image and backup files, while "File History" specifically focuses on backing up files.
You can use a free and professional file backup software called Qiling Disk Master Standard to help with the process. This software can backup anything and restore it easily, making it a convenient option. Additionally, if you need to restore your system to a computer with different hardware, the software's Universal Restore function in the professional edition can also assist with this.
The software provides a free SSD migration tool, allowing users to easily transfer their operating system to a solid-state drive (SSD), and also offers additional features that can be explored using Qiling Disk Master.
Related Articles
- How to Make a Bootable Backup on Windows 11 (2 Free Ways)
A bootable backup allows you to restore a bootable system image when your computer falls into serious system errors. Scroll down to learn how to make Windows 11 bootable backup easily in 3 free ways. - Best Free Backup Software Windows 11 to Protect PC and Data
You will learn the best Windows 11 free backup software and how to use it for system and data protection. - How to Backup Windows 10 Before Upgrading to Windows 11
It's important to backup Windows 10 before upgrading to Windows 11. If there is a problem after the upgrade, or if you don't like the functions of the new system, you can easily restore to the previous state through a backup. You can learn three ways to backup Windows 10 in this page. - Three Reliable Hard Disk Defragment Software for Windows
You can find three hard disk defragment software for Windows 10, 8, 7 from this article. Including built-in tools in Windows and a third-party software. - How to Restore Windows 7 without Restore Point
When system restore points is missing, you may have the concern that how to restore Windows 7 without restore point? You can find solutions here. - How to Stop Backup in Progress in Windows 7 Effortlessly
How to stop backup in progress in Windows 7? The answers will be presented in this article. For system backup, you can turn to Qiling Disk Master Standard.