How to Backup Windows 10 Before Upgrading to Windows 11
Why backup Windows 10 before upgrading to Windows 11?
Windows 11 will become available on October 5, 2021, and all eligible Windows 10 PCs can upgrade for free, but it's essential to backup Windows 10 before making the switch to Windows 11.
When encountering issues with Windows 11 installation, such as the "Windows Cannot Be Installed to This Disk MBR" error, it's possible to resolve the problem by running a disk check, checking the disk for errors, and ensuring the disk is properly formatted. This can help identify and fix any issues that may be preventing the installation of Windows 11. Additionally, checking for any compatibility issues and updating drivers may also help resolve the problem.
If you're experiencing issues with the latest version of Windows 11 or prefer the features of Windows 10, creating a backup of Windows 10 can help resolve these problems easily. By backing up your computer before upgrading to Windows 11, you can roll back to the stable version of Windows 10 if needed. Three solutions are provided below to help you create a Windows 10 backup.
3 solutions to backup Windows 10 before upgrading to Windows 11
In this part, I will introduce three methods to backup Window 10. The first two are built-in tools provided by Microsoft for Windows users, and the third is a piece of best free Window backup software.
- Solution 1: Backup files before upgrading Windows 10 to Windows 11 via File History
- Solution 2: Backup system before moving to Windows 11 through Backup and Restore
- Solution 3: Backup hard drive before upgrading to Windows 11 with Qiling Disk Master
Solution 1: Backup files before upgrading Windows 10 to Windows 11 via File History
File History To backup files via File History in Windows 10, follow these steps: the feature will automatically create incremental backups of files stored in Libraries to a different storage device like an external hard drive or network share. This ensures that your data is safe in case of a system upgrade or other issues, and can be easily restored.
- Connect an external hard drive to your computer, and ensure it can be detected by the system.
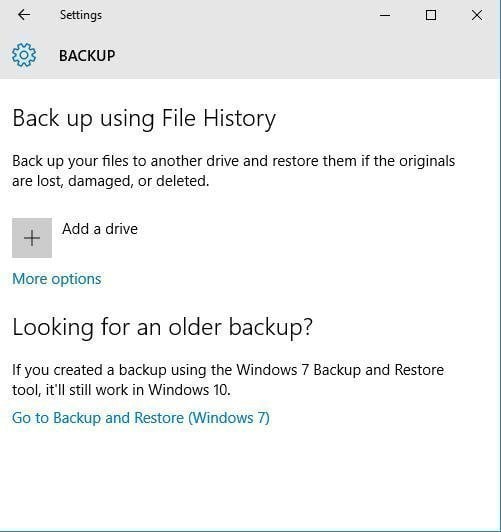
- To check if your Windows 10 device has a backup, open Settings from the start menu, then choose Update & Security -> Backup. This will show you if a backup has been created and when it was last updated. If you don't see a backup listed, you can create one by clicking on the "Add a drive" button.
- In the backup window, click the “+ Add a drive” button and select the prepared external hard drive.
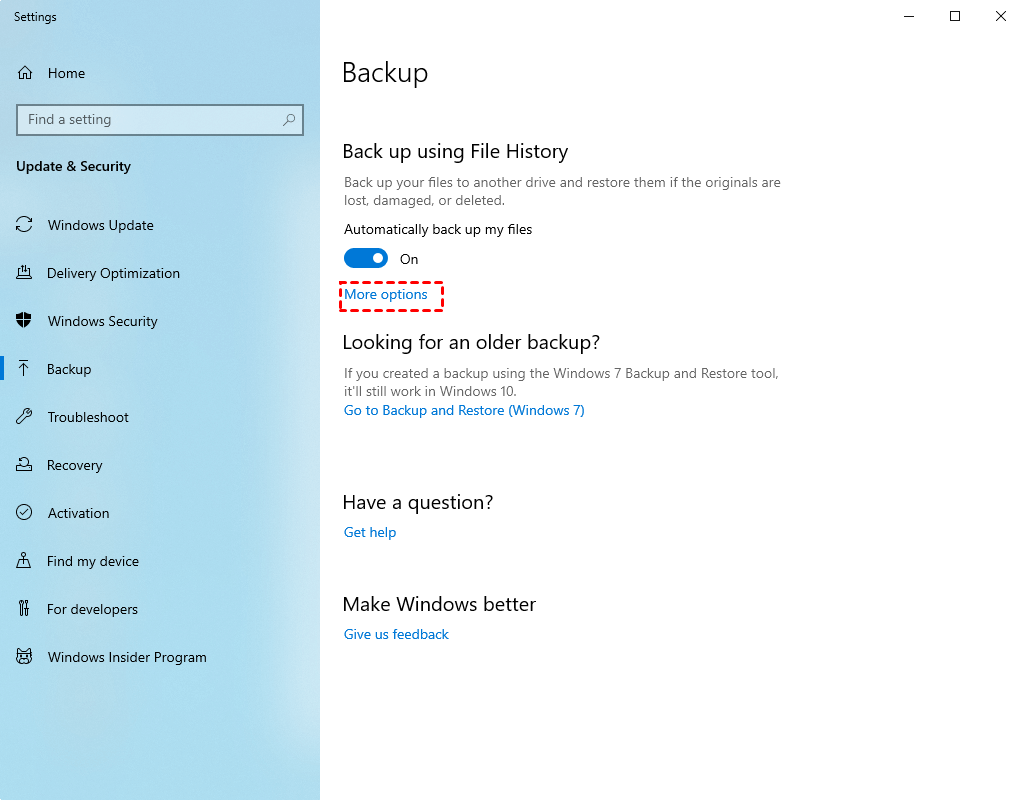
- To enable File History, click on the Start menu and select "File History". Then, click on the "Turn on" button. Next, click on the "More options" link to configure the backup settings, including the frequency of backups, the number of previous versions to keep, and the folders to include in the backup.
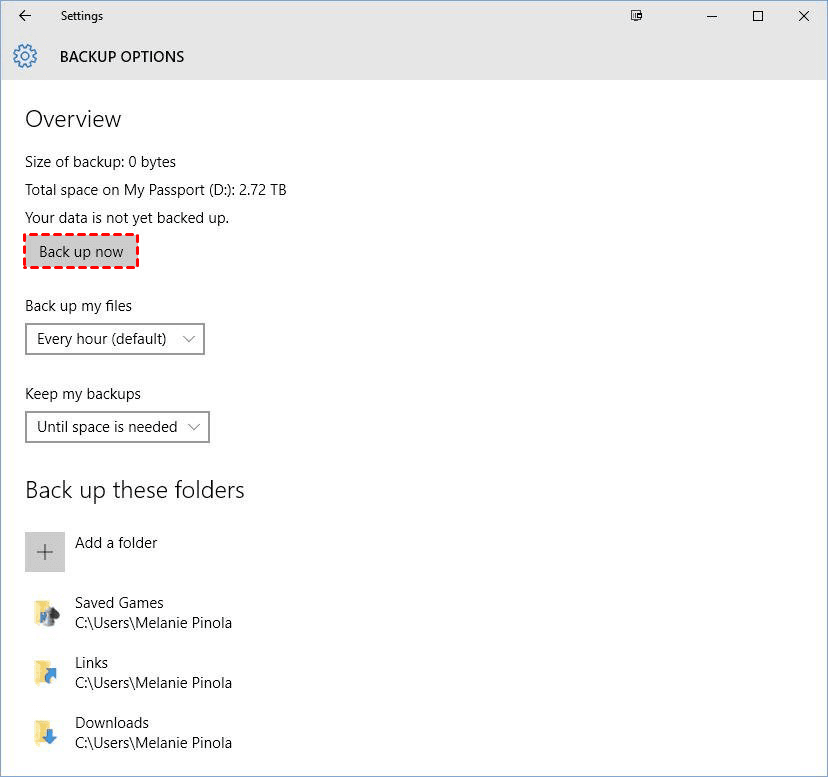
- Click the Back up now button at the top location to start your file backup.
Solution 2: Backup system before moving to Windows 11 through Backup and Restore
Backup and Restore The Backup and Restore feature in Windows allows users to create system image backups as well as file/folder backups, enabling them to backup their system in Windows 10 before upgrading to Windows 11. This allows for easy restoration to the previous system if the new one is not liked, and supports backing up to internal or external hard drives and network locations.
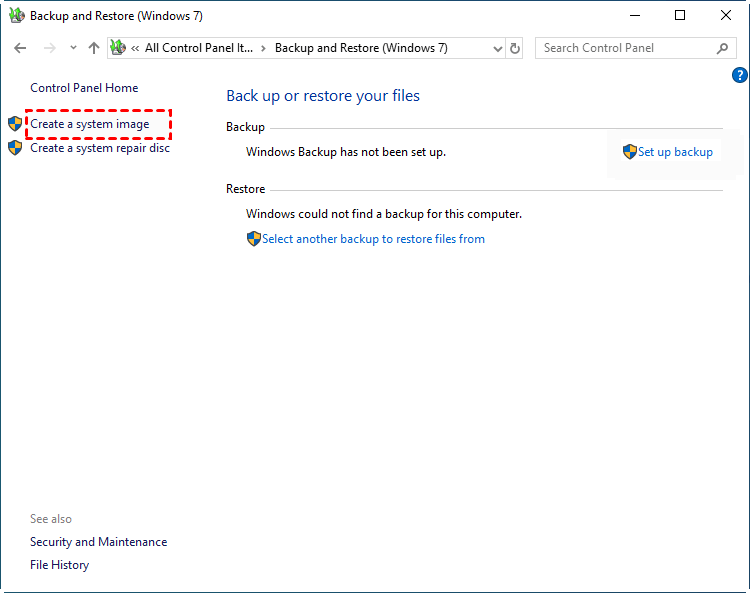
- To access the Control Panel, type "Control Panel" in the search box and click it. Then, navigate to "Backup and Restore (Windows 7)" under the "System and Security" section.
- In the left panel, click on "Create a system image" which will initiate a scan of your storage device to list all available storage options.
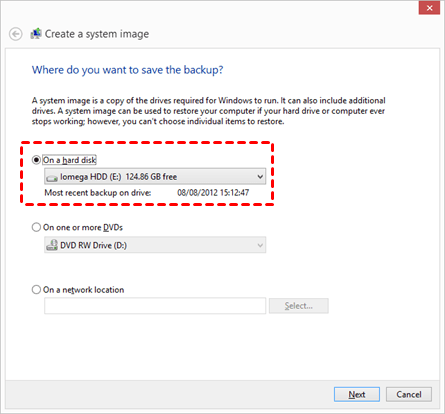
- Select the option to save your backup on a hard disk, choose a disk from the drop-down menu, and click "Next" to proceed.
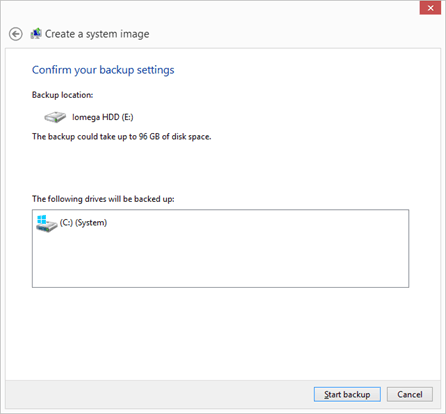
- The drives that are required for Windows to run are selected by default. Additional drives can be added for backup and the process can proceed by clicking "Next".
- Confirm your backup settings and click "Proceed".
After creating a system backup, you will be asked to create a system repair disc or a Windows 10/11 recovery drive, which can be used as a bootable media. This can be done using a CD/DVD disc or a USB drive. If you don't have either, you can use the other option.
Solution 3: Backup hard drive before upgrading to Windows 11 with Qiling Disk Master
From the above two built-Microsoft's backup tools, File History and Backup and Restore, have some limitations. File History can only back up files from the user folder to an external drive or network share, excluding internal drives. Additionally, neither tool allows backing up to cloud drives. This highlights the need for alternative backup solutions.
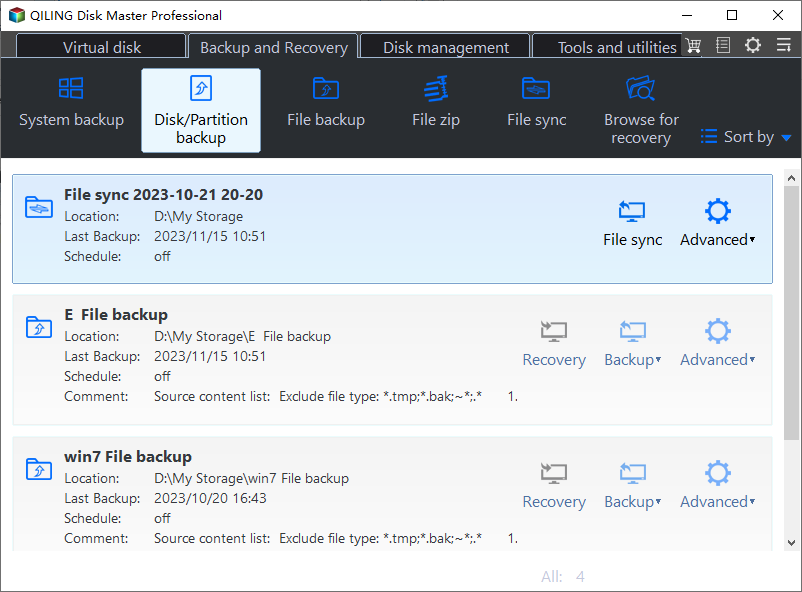
I recommend Qiling Disk Master Standard, a FREE backup software that meets all your needs in different situations. It allows you to backup files, system, disk, partition, and then restore them, making it a comprehensive tool.
♨ Multiple backup destination: All backup types support backing up to internal or external hard drives, cloud drives, network locations, and NAS devices, including options such as auto-backup to a USB drive and backing up a PC to the cloud.
♨ This software enables automatic backup of data, ensuring that all changes are captured. Users can choose from daily, weekly, or monthly backup frequencies. It also offers three backup methods: Incremental Backup, Differential Backup, and Full Backup. To save time and disk space, users can opt for incremental and differential backup features, which keep backups up-to-date without creating a full backup each time. Additionally, the software allows users to create bootable media, which can be used to boot a computer in case of a problem.
Windows PC operating systems, including Windows 11/10/8.1/8/7/Vista/XP, are supported, but not Windows Server operating systems. To backup hard drive before upgrading to Windows 11, you can use Qiling Disk Master, which can create a disk image of the specified hard disk, including the operating system, installed programs, and personal data.
Step 1. Download, install and launch Qiling Disk Master.
Step 2. In the left panel, click Backup, and then select Disk Backup.
Tips✍:
☪ File Backup: Automate file backup to various storage spaces without consuming excessive disk space.
☪ System backup refers to the process of copying and saving all system files, boot files, and program files to a secure location, ensuring that the system can be restored to its original state in case of a system failure or data loss.
Step 3. To choose the source disk that contains Windows 10, click on the "+ Add Disk" button.
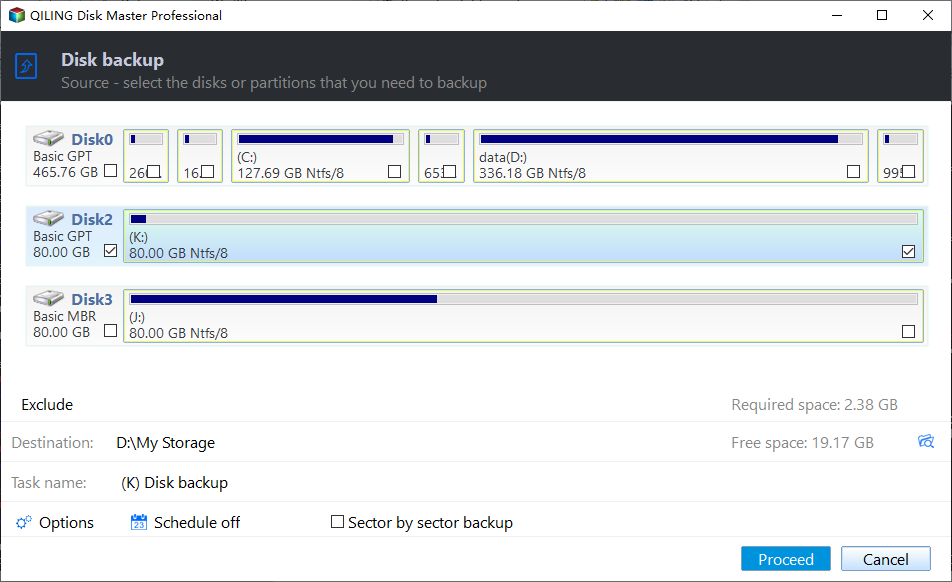
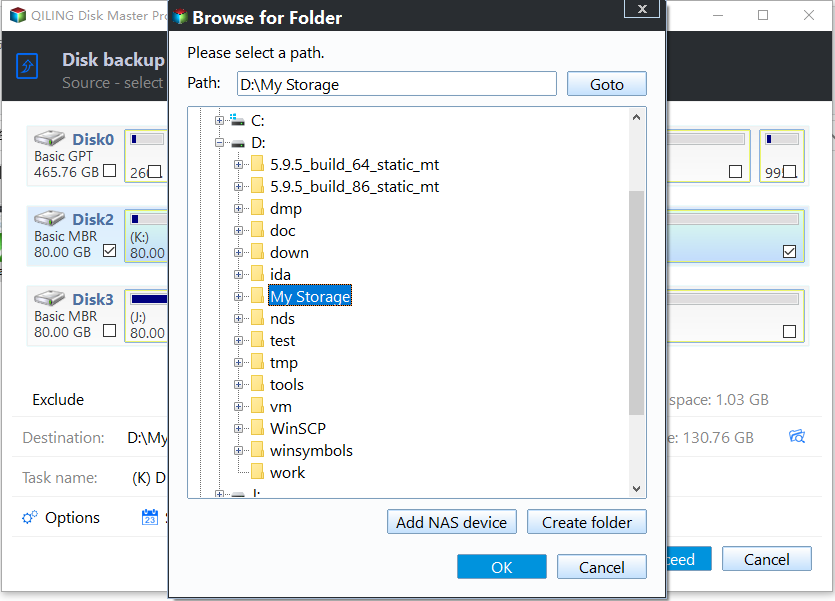
Step 4. Choose the destination place where you plan to store the backup image, and optionally check "Options", "Schedule", and "Scheme" in the left corner.
Tips✍:
☪ Options: Here, you can add comments and adjust the compression level for the backup. If you want to encrypt your backups, you'll need to upgrade to the professional edition. Additionally, you can enable a scheme to automatically delete old backup images and keep only the new ones, which is available in the advanced version.
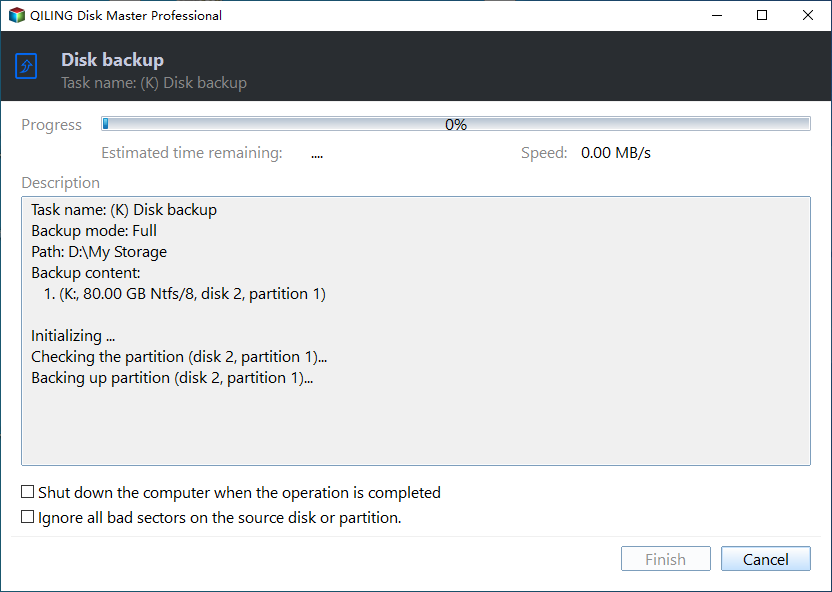
Step 5. After confirming all your settings, click Proceed.
Conclusion
It's crucial to back up your Windows 10 system before upgrading to Windows 11, as the built-in tools can sometimes malfunction, leading to issues like the Windows 10 backup tools not working or the File History drive being disconnected.
Qiling Disk Master is an all-around backup software that can help you avoid issues and provides features to protect your computer, including Restore, Clone and Sync. It can also help with migrating Windows 11 to HDDs or SSDs by performing a bootable clone. Try it now.
Related Articles
- Best Free Backup Software Windows 11 to Protect PC and Data
- Upgrade Windows 11/10 32 Bit to 64 Bit FREE without Losing Data
- How to Return/Roll Back Windows 11 to Windows 10 (4 Ways)
- Write Zeros to Toshiba Hard Drive with Powerful Software
Need to write zeros to Toshiba hard drive, but does not find zero fill hard drive utility on the toshiba website? Click on this article and here are 3 ways you can use. - Unable to Extend C Drive in Windows 10/8/7 [Solved]
Unable to extend C drive in Windows 11/10/8/7 Disk Management even there is unallocated space on the same disk? Read this tutorial and get quick and effective solutions. - Upgrade Hard Drive in Windows 10 - No Reinstallation
This tutorial highlights the importance of upgrading to a solid-state drive (SSD) in Windows 10 and provides a step-by-step guide on how to upgrade a hard drive to an SSD using the best cloning software.