Windows 11 Installation Has Failed
The message "Windows 11 installation has failed" can appear during upgrade or setup when compatibility, drivers, space, update cache, or installation files are not ready.
Understand the problem
Installation failures can leave temporary files or partial setup records. Back up files before retrying, especially on older or nearly full computers.
- Confirm the exact disk, partition, file system, Windows version, boot mode, or sync setting before making changes.
- Back up or recover important files before wiping, formatting, converting, cloning, reinstalling, or repairing Windows.
- For boot and update tasks, prepare recovery media and check BIOS or UEFI settings before deeper repair.
Use Windows built-in tools
Prepare a clean retry.
- Check Windows 11 hardware requirements.
- Free enough space on C drive.
- Disconnect unnecessary USB devices.
- Update BIOS, storage, and chipset drivers.
- Clear temporary setup files and rerun installation media as administrator.
Use Qiling tools for guided steps
 Qiling Disk Master
Back up Windows files and create bootable media before retrying Windows 11 installation.
Function. Back up important files first
Step 1. Connect an external drive or choose a safe network location with enough free space for files on the PC before Windows 11 setup.
Step 2. Open Qiling Disk Master and choose File Backup. This protects files before cleanup, partition changes, repair, or system updates.

Step 3. In the tree control, select the files and folders that must be protected. Protect user folders and license records before another install attempt

Step 4. Choose a destination that is not affected by the operation, such as another disk, external drive, NAS, or shared folder.
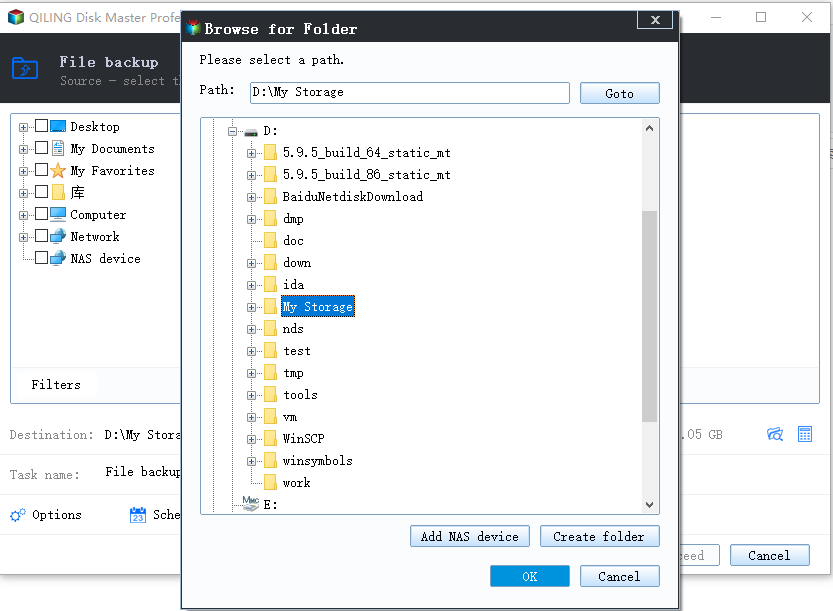
Step 5. Review the source and destination, then click Proceed. Wait for the backup to finish before continuing.
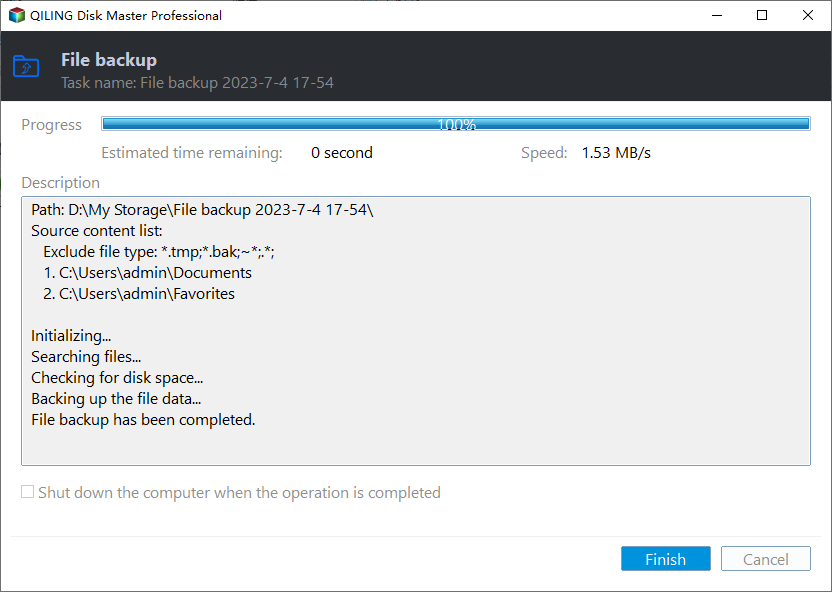
Function. Create bootable media for repair or recovery
Step 1. Prepare an empty USB drive. Back up existing USB files because the drive may be formatted.
Step 2. Open Qiling Disk Master and choose Create Bootable Media.
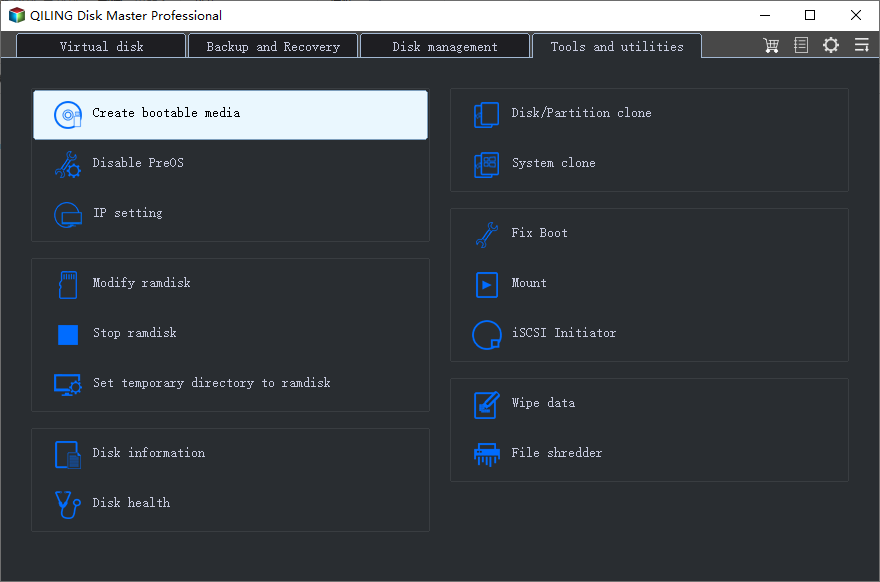
Step 3. Select the USB boot device option, then choose the correct USB drive by capacity and drive letter.
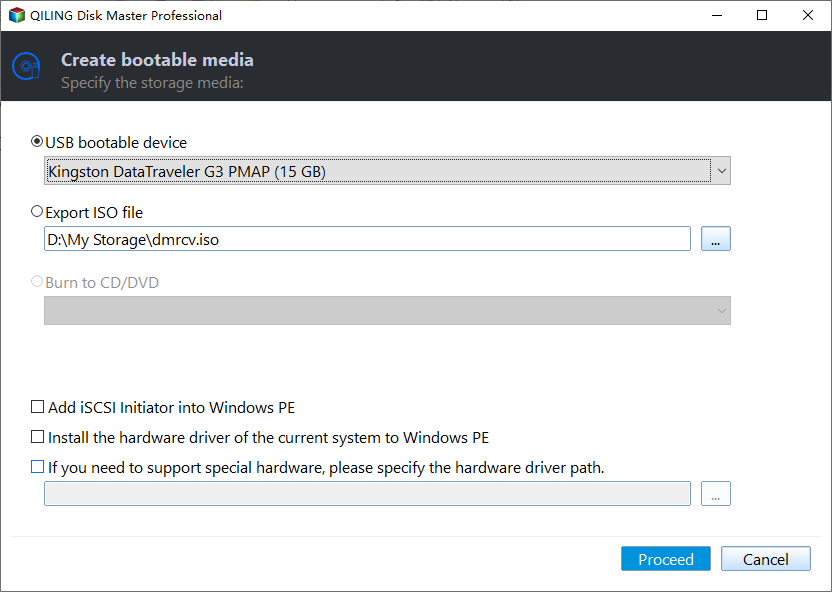
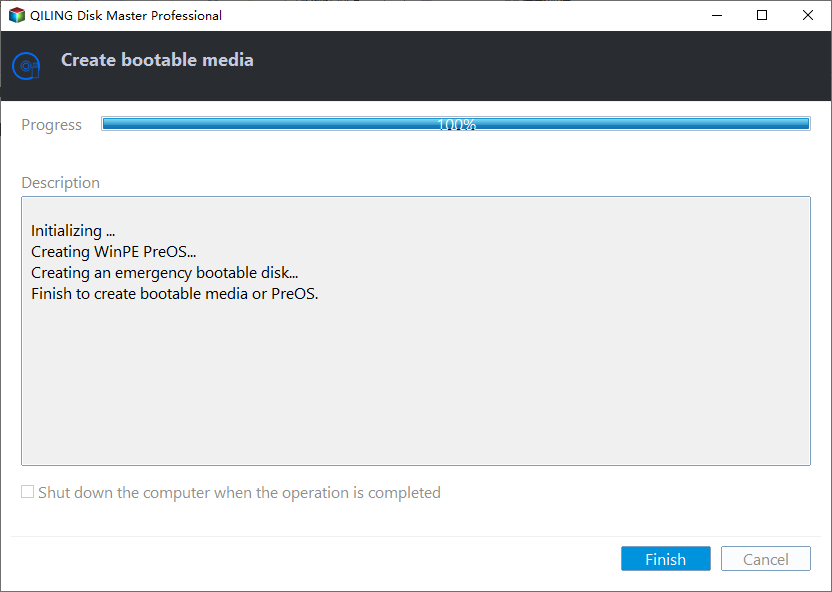
Step 4. Click Proceed and wait for the media to be created. Use it for Windows 11 installation or recovery if setup fails again.
Check the result
After installation succeeds, check Device Manager, Windows Update, activation, and application compatibility.
Related Articles
-
Upgrade to Windows 11
Prepare a supported upgrade path before running Windows 11 setup. -
Windows 11 Update Stuck
Fix update problems that can block Windows 11 installation.
Products
Articles & Tutorials
- Data Recovery
- Data Backup
- File Recovery
- File Backup
- File synchronize
- System Backup and Restore
- Disk and Partition Clone
- Technical articles
- Disk Master Help
- Windows Deleted File and Disk Recovery Tutorials
- Windows File and Data Recovery Tutorials
- More Windows Tutorials for Install, Security, Files, and PC Tips
- Windows Boot, Repair, and Recovery Environment Tutorials
- Windows Backup Tutorials
- Windows Restore Tutorials
- Windows Clone and Migration Tutorials
- Windows Server Backup, Recovery, and Management Tutorials
- Windows Disk, Partition, and Storage Management Tutorials