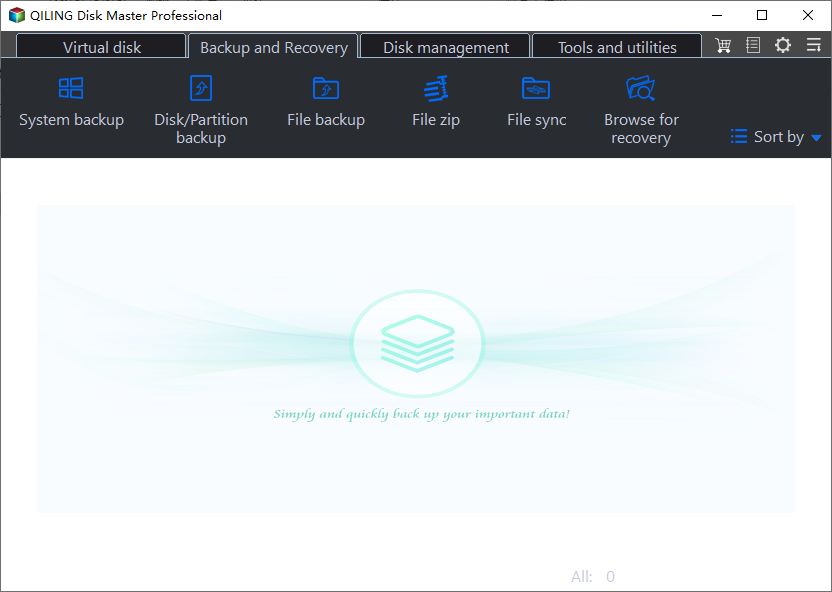
Backup Files in Windows 7 to External Hard Drive Easily (3 Ways)
- Why Backup Files in Windows 7?
- Ways to backup data on your computer
- How to Easily Backup Files in Windows 7 to External Hard Drive
- #1: Backup Files in Windows 7 with Backup and Restore
- #2: Backup Files in Windows 7 with Windows Easy Transfer
- #3: Backup Files in Windows 7 with all-in-one backup software
- How to Backup Computer to External Hard Drive in Windows 7
- Final Words
Why Backup Files in Windows 7?
Windows 7 reached end of support on January 14, 2020, so it no longer receives regular security updates from Microsoft. If you still use Windows 7 or plan to upgrade to a newer system, backing up files is an important first step to avoid data loss.
A file backup can protect documents, photos, videos, desktop files, and other personal data from accidental deletion, disk failure, system crashes, or upgrade errors.

To back up files in Windows 7, you can use Backup and Restore, Windows Easy Transfer, or third-party backup software such as Qiling Disk Master. An external hard drive or USB drive is often a practical destination because it keeps the backup separate from the system disk.
Ways to backup data on your computer
You can back up files in Windows 7 to an external hard drive or USB drive with Microsoft tools or dedicated backup software. Backup and Restore is suitable for file backup and system image backup, while Windows Easy Transfer is mainly designed to move files and settings to another computer.
In short, use Backup and Restore when you need a real backup that can be restored later. Use Windows Easy Transfer when you mainly want to move user files and settings to another Windows 7 computer. For automatic, compressed, and more flexible file backup, an all-in-one backup tool is more convenient.
- Backup and Restore may take up considerable disk space, and its schedule and cleanup options are limited compared with dedicated backup software.
- Windows Easy Transfer is not a full backup solution. It is designed for migration, does not support transfer from a 64-bit system to a 32-bit system, and is not included in Windows 10 or Windows 11 by default.
To avoid these limitations, you can use an all-in-one backup software like Qiling Disk Master Standard. It can back up files to an image file, compress backups to save space, and also sync files while keeping the original folder structure.
How to Easily Backup Files in Windows 7 to External Hard Drive
The following three methods show how to back up or move Windows 7 files to an external hard drive. Choose Backup and Restore for basic file backup, Windows Easy Transfer for migration, or Qiling Disk Master for scheduled and compressed backups.
#1: Backup Files in Windows 7 with Backup and Restore
Backup and Restore is the built-in Windows 7 backup tool. It can back up selected files and folders, and it can also create a system image if you need a full system copy.
1. Open Backup and Restore in either of the following ways.
Through search box: type "backup and restore" in the Start Search box, select "Backup and Restore", and press Enter.
Use control panel: go to Start > Control Panel > System and Security, and then click Back up your computer.
2. In the Backup and Restore window, click Set up backup to create a new one if you have never used it before.

☛If you have already created a backup task, click Back up now to run it again or click Change settings to create a new file backup task.
3. Select the external hard drive or another destination to save the backup, and then click "Next" to proceed.

4. Tick Let me choose, and hit Next.

5. Choose the files or folders you want to back up, and then click Next.
6. Review the backup settings. If needed, click "Change schedule" to customize how often Windows runs the backup.

7. Click "Save settings and run backup" to start backing up the selected files in Windows 7.
#2: Backup Files in Windows 7 with Windows Easy Transfer
Windows Easy Transfer can save user files and settings to an external hard drive and then restore them to another Windows 7 computer. It is useful for migration, but it should not replace a regular backup plan.
1. To search for the MigWiz program, open the Start menu and click on the "Start Search" box. Type "MigWiz" into the search box and press the Enter key on your keyboard.
2. Click Next on the welcome window.

3. Select An external hard disk or USB flash drive option.

☛Tip: you could transfer files via an Easy Transfer cable or using a network location.
4. Select This is my old computer.

5. Windows Easy Transfer will check all the files supported in Windows 7, select the files you want to back up, and click Next.

6. Set a password for the transfer file if needed, and click Save.

7. Select the external hard disk as the destination and click the "Save" button.
☛Tip: the Windows Easy Transfer file is usually named Windows Easy Transfer - Items from old computer.MIG.
8. Wait until the transfer file is created on the external drive. Keep the drive connected until the process finishes.

9. To restore the saved files and settings on another Windows 7 computer, run Windows Easy Transfer on the target computer, choose the saved .MIG file, and follow the on-screen instructions.
#3: Backup Files in Windows 7 with all-in-one backup software
Qiling Disk Master Standard provides File Backup and File Sync for different needs. File Backup creates an image file that can be restored later, while File Sync copies files to another location and keeps the folder structure easy to access.
File Sync copies files from one location to another while keeping the original folder structure, so you can access and modify synced files without restoring an image backup.
For better data protection, this section uses File Backup as an example. First, download Qiling Disk Master Standard to back up files in Windows 7 to an external hard drive. For server users, try Qiling Disk Master Server.
1. After installation, run Qiling Disk Master, select Backup, then File Backup in sequence.

☛Tip: You can upgrade to use the Cloud Backup feature to back up Windows 7 files to Qiling Cloud.
2. Select the Windows 7 folders or files you want to back up.

☛Tip: You could rename the Task Name to distinguish from other backups.
3. To save the Windows 7 backup image, click the folder icon and select the external hard disk or USB drive as the destination.

☛Tip: You can click the inverted triangle icon to choose Select a network location or Select a cloud drive, such as NAS, Google Drive, Dropbox, or OneDrive.
4. To easily perform a Windows 7 file backup, press the Proceed >> button.

This operation backs up the selected files as they are now. To include future changes automatically, set up a scheduled backup. You can choose Daily, Weekly, Monthly, Event trigger, or USB Plug in, while the latter two are premium features in the Professional edition.

If scheduled backups run for a long time, backup images may fill the destination disk. To avoid this, enable the Backup Scheme and set it to delete old backup files automatically by quantity, time, daily, weekly, or monthly. This feature requires an upgrade.
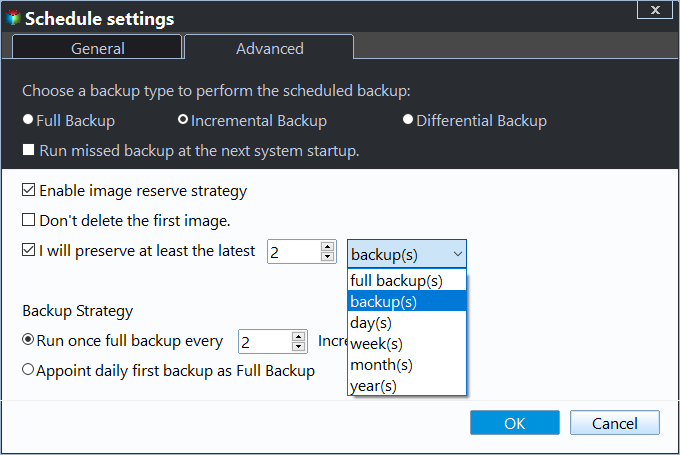
Incremental and differential backups work differently. Incremental backups depend on the previous backup chain, while differential backups are usually easier to restore because they depend on the last full backup. Choose the method that matches your recovery needs.
You can also enable email notifications after the task is finished, add comments, split the backup image, compress the image, or select a backup mode.

If Windows 7 cannot boot, you can create a bootable USB or add a boot menu with the Recovery Environment feature. Then you can start the computer from the recovery environment and safely backup files in Safe Mode or WinPE.

How to Backup Computer to External Hard Drive in Windows 7
Some Windows 7 users want to back up the entire computer to an external hard drive, not just selected files. In this case, you can back up the system partition or the whole disk. A disk backup includes the operating system, programs, settings, registry, personal files, and other data on the selected disk.
#2: Use Qiling Disk Master. You can use System Backup to create a system image or Disk Backup to back up the entire disk, and you can also schedule backups and manage backup space.
For detailed steps with the built-in tool, refer to the Windows 7 Backup and Restore guide. To back up a disk directly with Qiling Disk Master, follow the steps below.
Step 1. Choose Backup > Disk Backup in order.

Step 2. Click the Disk option, select the Windows 7 hard drive as the source disk, and then click Next.

Step 3. Select the external hard drive as the destination disk, and press Next.
Step 4. Press the "Proceed" button to back up Windows 7 to the external hard drive. You can also configure schedule settings as needed.

Final Words
In Windows 7, you can back up files with built-in tools or comprehensive backup software like Qiling Disk Master. Backup and Restore is enough for basic needs, while Qiling Disk Master is more suitable if you want scheduled backups, compression, file sync, and disk backup in one place.
In addition to backup capabilities, Qiling Disk Master also allows you to create bootable media for emergency booting, restore files from backup, and clone disks to larger drives for backup purposes. For unlimited PCs or servers, consider upgrading to the Technician or TechPlus edition, which can be compared to the other editions on the edition comparison page.
Related Articles
- Backup Files and Folders for Windows 7/8/10 with Simple Steps
- How to Backup Files before Reformatting in Windows 7/8/10?
- How to Backup Entire Computer to USB Flash Drive in Windows 7/8/10?
- Create System Image with Windows 7 Backup and Restore for Free
- Backup Data before Replacing Hard Drive in Windows 10 (2 Ways)
This article tells you how to backup data before replacing hard drive to ensure data security. - Can I Backup Dropbox to External Hard Drive Safely?
If you don't know how to backup Dropbox to external hard drive, please continue to read this article. In this article, you will get 4 simple and effective methods with detailed instructions to help you get it done in seconds.