Clone Windows 7 to Multiple Computers or New One Simultaneously
- Real case about cloning Windows 7 to multiple computers
- Why do we need to clone Windows 7 to multiple computers?
- Situation 1: clone Windows 7 to multiple computers
- Preparations for cloning Windows 7 to multiple computers
- Create system Image without SID on well-configured computer
- Situation 2: clone Windows 7 to new computer
- Conclusion
Real case about cloning Windows 7 to multiple computers
"I need to clone windows 7 over 60 computers for a school. And all the computers employ the same hardware and configuration. I want to clone all of them with the same operating system and hardware etc. However, I do not want to clone them one by one. It's complex. Can I clone all the computers at the same time? If possible, please tell me how."
Cloning Windows 7 to multiple computers can be a challenge, but it's achievable with image deployment software that allows you to create and deploy a standardized Windows 7 image to multiple machines.
Cloning Windows 7 to another computer is a straightforward process that works best when the new computer's hardware is identical to the original. If the hardware is different, you can use the backup and restore method with the Universal Restore feature, which ensures a secure boot. This approach simplifies the cloning process and is a good option if you're looking for an easy way to transfer Windows 7 to another machine.
Why do we need to clone Windows 7 to multiple computers?
When searching for ways to "clone Windows 7 to multiple computers", you may also encounter the need to transfer Windows 7 to a new computer. This can be due to various reasons, such as upgrading to a new device, replacing a faulty computer, or simply wanting to reuse the existing operating system on another machine. In both cases, the goal is to efficiently transfer the Windows 7 installation to one or more new computers without having to reinstall the operating system and all the associated software and settings.
- Recover a failed system.
- Update hardware like motherboard, CPU, chipset, etc. Windows 7 may struggle to boot after hardware changes due to its inability to integrate various drivers for system startup, potentially causing compatibility issues with drivers.
- Built system on a new computer.
- Batch built system on multiple bare-metal computers to save time and effort.
- Uniform computer configuration (eg: programs, drivers, system settings, etc) to meet work requirements.
Situation 1: clone Windows 7 to multiple computers
To clone Windows 7 to multiple computers, you can use image deployment software like Qiling Image Deploy, which is available in stand-alone, Technician, or TechPlus editions. This software can help you deploy a Windows 7 image to multiple computers with ease.
| Qiling Image Deploy Free Edition | Qiling Image Deploy Technician Edition | Qiling Disk Master Technician or TechPlus edition | |
| Usage | image deployment software | image deployment software | all-in-one backup software integrated with deployment feature |
| Applicable operating systems | unlimited PCs and up to 20 servers | unlimited PCs and servers | unlimited PCs or unlimited PCs and servers |
| Boot mode | BIOS | BIOS | BIOS and or UEFI |
| Real-time process monitor | monitor IP address, restore status and progress, and final result. | monitor IP address, restore status and progress, and final result. | monitor IP address, restore status and progress, and final result. |
| Batch preset client computer name | Yes | Yes | Yes |
| Batch preset client computers IP address | No | Yes | Yes |
| Dissimilar hardware restore | No | Yes | Yes |
| Business use | No | Yes | Yes |
| Price | $0 | $199 | at least $599.2 |
The choice between Qiling Image Deploy, Qiling Disk Master Technician, and TechPlus depends on your priorities. If you're looking for a simple, stand-alone solution, Qiling Image Deploy might be the way to go. However, if you need more advanced features and flexibility, Qiling Disk Master Technician or TechPlus might be a better fit, but be aware that these options come with a higher price tag and more complexity. Ultimately, the decision comes down to how much you value your data, what you intend to do with the software, and your budget.
- If you need to deploy an image to multiple computers, try the stand-alone version of Qiling Image Deploy. The Technician edition is recommended, as it supports unlimited PCs and servers, and allows for batch preset IP and dissimilar hardware restore, saving you tedious installation and follow-up work. Additionally, you'll need a free backup software to create a system image for deployment, with detailed steps available on the image deploy page.
- If you don't want to download two software for this task or any of the client computers using UEFI firmware, you can try Qiling Disk Master Technician or TechPlus, which supports all the features of the stand-version of the Qiling Image Deploy Technician edition and allows you to backup system, disk, partition, and files as needed, making it very helpful for continuous data protection. Additionally, it enables you to create bootable media of the software and save it to a removable device.
Preparations for cloning Windows 7 to multiple computers
- Download and install all-To backup software on the server computer, consider using Qiling Disk Master Technician. It's recommended to use Windows 7 or higher version as the server computer, as this software requires Windows AIK/ADK for successful creation of Windows PE if using a previous version of Windows 7.
- To resolve the issue, check the cable connection between the server and client computers to ensure they are properly connected. Also, verify that both devices are on the same network segment in a local area network (LAN).
- To verify the network card of client computers supports network boot (PXE boot), check the device manager on the client computer for any network adapters. Ensure that the network card is enabled and configured to allow PXE booting.
- To prevent data loss, ensure that only the target disk is connected to the client computer. If other disks are connected, disconnect them to avoid accidental selection and potential data loss.
Create system Image without SID on well-configured computer
To work on image deployment, you'll need to configure a computer with all the desired settings, which doesn't necessarily have to be the server computer. When doing so, pay close attention to the following items.
- Remove SID before backing up the computer. The system generates a unique SID when installed with Windows, potentially leading to incompatibility with WSUS and other issues resulting from duplicate SIDs on the same network.
- Boot your computer into Windows PE after removing SID immediately. If not, it will create a new one.
To ensure the process of removing SID goes smoothly, it's essential to create a bootable USB beforehand. Please follow the steps carefully to prepare for this process.
Step 1. Create a bootable USB with Qiling Disk Master.
- To use Qiling Disk Master, download the Technician or TechPlus edition from the download page. The Technician edition allows unlimited PCs, while the TechPlus edition supports unlimited PCs and servers.
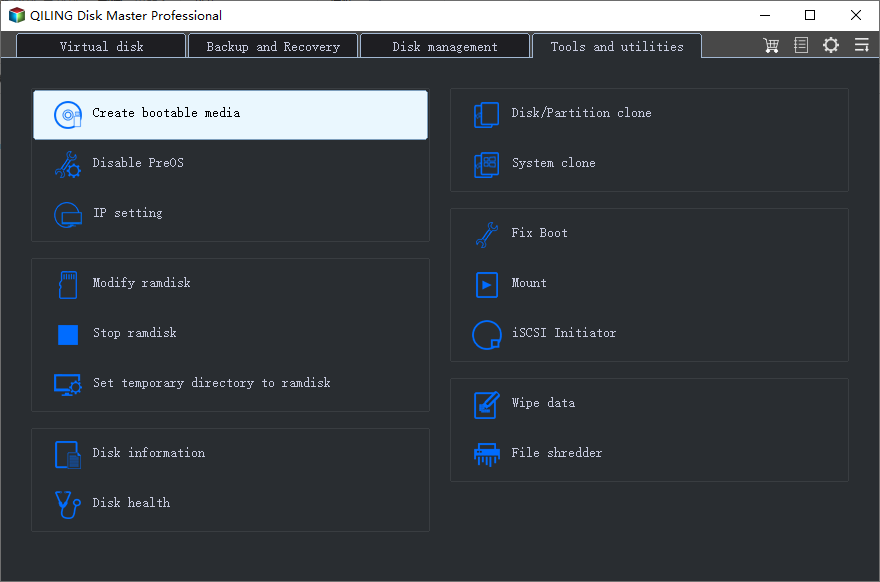
- Launch the software, then click "Tools" > "Create Bootable Media" and select the desired bootable disc type and device, such as a Windows PE bootable USB drive.
- Finally, click "Next" to start the creation of bootable media.
Step 2. Remove SID on the computer you want to backup.
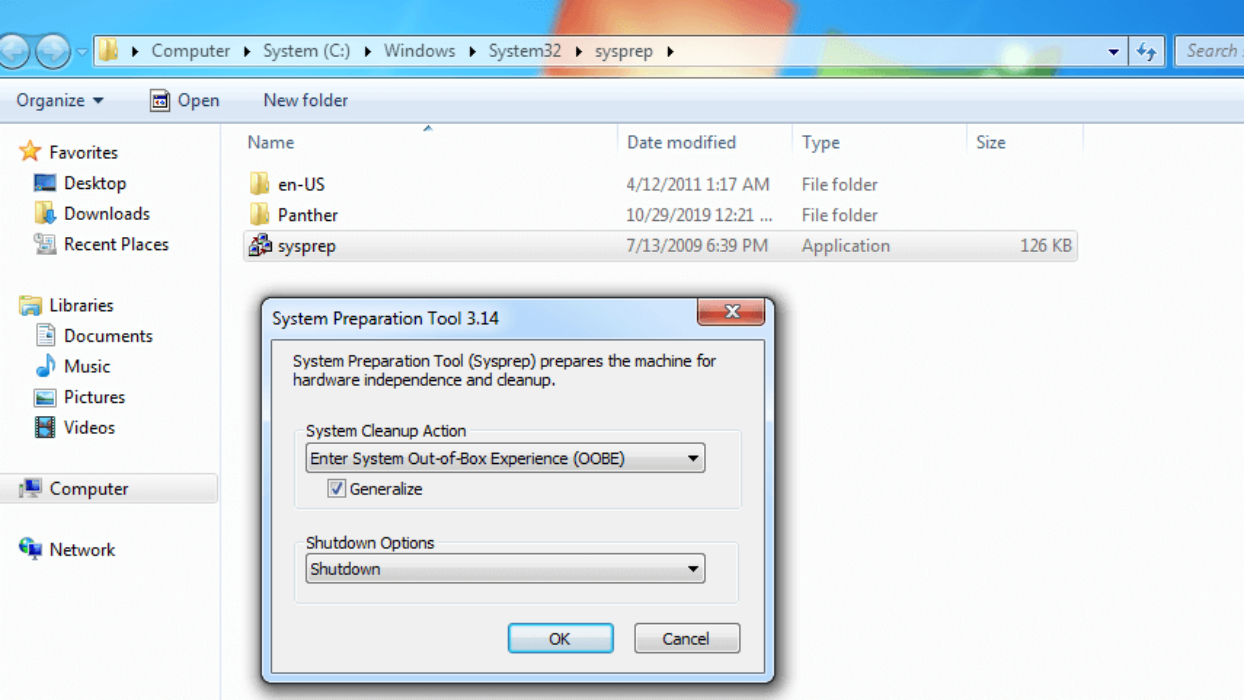
To prepare a Windows system for deployment, press the "Win + R" keys to open the Run dialog, type "sysprep" in the text box, and press Enter. This will launch the System Preparation Tool. In the System Preparation Tool, select the "Enter System OOBE" option, check the box next to "Generalize," and choose the "Shutdown" option. This process is essential to prevent potential compatibility issues after deployment.
Step 3. Boot the well-configured computer from a bootable USB and then create a system image with this software.
- Insert the bootable USB To fix the issue, create a new installation media for Windows 10, set it as the first boot option, and boot from it. This will allow you to reinstall Windows 10 and potentially resolve the issue with the Windows Update.
- To create a system backup in Qiling Disk Master, go to the main page and click on "Backup" then select "System Backup". Alternatively, you can create a disk backup by selecting Disk Backup.
- Select a network share or NAS to store the backup image and proceed with the operation, ensuring the network path is accessible by all client and server computers on the same network segment. For detailed steps, refer to the backup Windows 10 to network drive guide.

Deploy Image to Multiple Computers Step by Step
1. To launch the image deploy software, switch to "Tools" and select "Qiling Image Deploy".
2. Click "Create WinPE automatically" to create a bootable ISO file that supports booting from both BIOS and UEFI mode. Make sure to select "Enable DHCP" to allow client computers to boot up over the network. Then, click Next.

- Notes:✎...
- If the WinPE can't start on client computers due to incompatible drivers, select the "Create bootable WinPE ISO manually" option. This allows you to create Windows PE and add compatible device drivers to it by clicking "Make ISO" or "Make WIM file" on the main page and then "Add Drivers". If any client computers use UEFI firmware, choose the second option.
- The DHCP server is usually enabled when using a router, which assigns an IP address to computers. It's recommended to enable DHCP to allow automatic network connection. However, there should only be one DHCP server in the LAN to avoid IP address distribution issues.
3. In the second wizard page, Qiling Image Deploy will prompt "The service has started, waiting for connect…". Start all client computers, set PXE boot or network boot as the first boot option, and boot from it. This will display the IP address of the server and client computers, along with the connection status.

- The client computers can only be successfully booted when the prompt "The service has started, waiting for connect…" is displayed. Otherwise, they cannot boot successfully.
4. Specify backup image and image deployment settings.
- To add a share or NAS device, click "Browse" and then "Add share or NAS device". Enter the display name, IP address, username, and password. Afterwards, select the backup image you want to deploy, which should have a file name ending in .fvd.
- To deploy an image to online client computers, select the desired client computers by ticking the box next to each one, then select "All" to deploy the image to all selected computers. Alternatively, you can select specific computers by ticking only the boxes next to the desired computers.
- To ensure that your computer is bootable after imaging, it's recommended to set the batch preset computer name and IP address, and enable "Universal Restore".

- To use this software, all client computers must have the same disk number as the server computer, otherwise, an error will occur, and restoring to the wrong disk may result in data loss.
- The disk number on client computers starts at 0 and goes up to 256, with only one disk on each computer.
- The number of deployed computers is between 1 and 33, and the more computers you deploy, the longer it will take. A suggested number is 5, which would restore 5 computers at a time.
- If you can't find what you're looking for and need further help, please send an email to [email protected] or visit www.Qilingtech.com.
Situation 2: clone Windows 7 to new computer
Cloning Windows 7 to a new computer with the same hardware is a straightforward process. You can use System Clone or Disk Clone feature in Qiling Disk Master Technician or TechPlus edition, depending on the new computer's disk capacity. This approach offers several advantages, including a seamless transition with all settings and applications intact, no need to reinstall software or update drivers, and a significant time savings compared to a clean install.
- Clone HDD/SSD and GPT/MBR disk. You can clone a system from a Master Boot Record (MBR) hard disk drive (HDD) to a GUID Partition Table (GPT) solid-state drive (SSD) and have it boot successfully.
- Intelligent Clone. Clonezilla allows users to clone only used sectors of a system or disk on Windows 7, making it easier to transfer data from a large HDD to a smaller SSD without encountering boot issues.
- Adjust partition size automatically or manually. The System Clone and Disk Clone features automatically expand the system partition if the target disk is larger, and also allow for moving unallocated space to all partitions or selected partitions manually.
- SSD Alignemnt. To boost the reading and writing speed of an SSD (Solid-State Drive) disk, it's recommended to use a technique called TRIM (Trim command) and also enable AHCI (Advanced Host Controller Interface) mode in the BIOS. The TRIM command helps to maintain the SSD's performance by deleting unnecessary data, while AHCI mode optimizes the communication between the SSD and the computer's hardware.
To clone Windows 7 to a new computer, follow these steps: First, ensure you have a backup of the system on the old computer, as the destination disk on the new computer will be overwritten. Next, use a cloning software to create an image of the old computer's hard drive. Then, connect the new computer's hard drive to the old computer and use the cloning software to transfer the image to the new hard drive.
Step 1: Launch Qiling Disk Master Technician or TechPlus, click "Clone" and "System Clone" subsequently.

Step 2: Select a disk or partition to save your system and click "Next"

Step 3: If the destination disk is an SSD, tick the "SSD Alignment" feature, then click "Proceed" to clone Windows 7 to a new hard drive and install it on a new computer.

Wait until the process completes. Remove the hard drive from your original computer using a screwdriver and install it into the new computer. Boot into the BIOS, set the hard drive as the first boot option, press F10 to save changes, and then boot from it.

This operation is easy but not suitable for multiple computers, and it's time-consuming. It's best for one or two computers with the same hardware. If you need to use it on multiple computers with different hardware, consider Situation 1 instead.
Conclusion
You can easily clone Windows 7 to multiple computers simultaneously using all-in-one backup software like Qiling Disk Master Technician or TechPlus, which also allows you to transfer Windows 7 to another computer, either by cloning for identical hardware or backing up and restoring for different hardware, and then using the Universal Restore feature to install necessary drivers for system startup.
This software not only helps protect your system and data by cloning, but also enables you to schedule system, disk, partition, and file backups, automatically delete old backups, and even create bootable media to perform operations without reinstalling the software.
Related Articles
- How to Copy Windows 7 from One Computer to another Safely
You will learn how to copy Windows 7 from one computer to another safely within three simple portions, even with dissimilar hardware. See below for more details. - Best Solution to Clone Multiple Computers over Network in Windows
You will learn the best solution to clone multiple computers over network, which ensures that you could clone over network successfully and quickly. Get it right now! - Windows 7 WBAdmin Command Line and Its GUI Version
Windows 7 WBAdmin has less available features to backup your data. Now, we will show you the GUI version of WBAdmin to backup data easily. - 5 Free Backup Software for Windows Server 2003
Is there any backup freeware for Windows Server 2003 to create system state backup? You will find 5 free backup software for Server 2003 and the step-by-step guide. - What Is the Easiest Way to Save Backup Files to Two or More External Hard Drives at the Same Time
To ensure the security of important data, it is a good way to save its backup to multiple hard disks. So what is the easiest way to save backup files to two or more external hard drives at the same time? You can find the answer in this short post. - What Is the Recovery Key for Lenovo Laptop?
What Is the Recovery Key for Lenovo Laptop? What can it do for a Lenovo laptop? Can it solve the system problem easily? This short post is going to tell you all these answers.