Reimage Your Computer in Windows 7
Reimaging Windows 7 restores the computer from a system image. It can fix severe system problems, but it replaces current system data with the image version.
Understand the problem
Before reimaging, confirm the image date, target disk, and files created after the image. Newer files may be lost if they are not backed up separately.
- Confirm the disk, partition, file system, Windows version, boot mode, or update state before making changes.
- Back up or recover important files before conversion, deletion, formatting, cleanup, reimage, or boot repair.
- For boot-related work, check BIOS or UEFI mode, boot order, system partition status, and recovery media first.
Use Windows built-in tools
Use Windows 7 recovery tools carefully.
- Connect the drive that stores the system image.
- Back up newer personal files if Windows still starts.
- Boot into System Recovery Options.
- Choose System Image Recovery and select the correct image.
- Confirm the target disk before starting the reimage.
Use Qiling tools for guided steps
 Qiling Disk Master
Back up current files and create bootable media before reimaging Windows 7.
Function. Back up important files before repair or conversion
Step 1. Connect an external drive or choose another safe destination with enough space for new files created after the system image date.
Step 2. Open Qiling Disk Master and choose File Backup. A backup gives you a rollback point before Windows repair, disk conversion, cleanup, or installation work.

Step 3. In the tree control, select the files and folders that must be protected. Protect documents, desktop files, downloads, and photos before restoring an older image

Step 4. Choose another internal disk, external drive, NAS folder, or network path as the destination. Avoid saving the backup on the partition that will be changed.
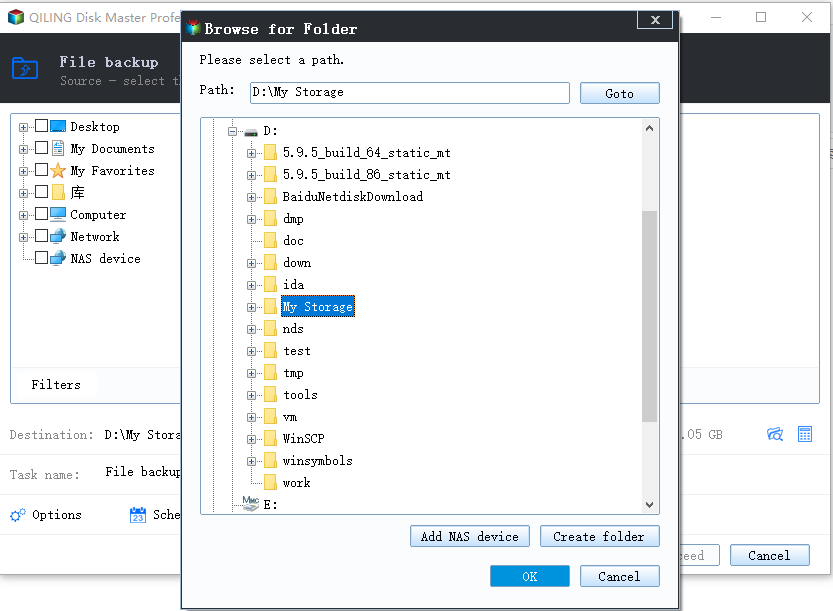
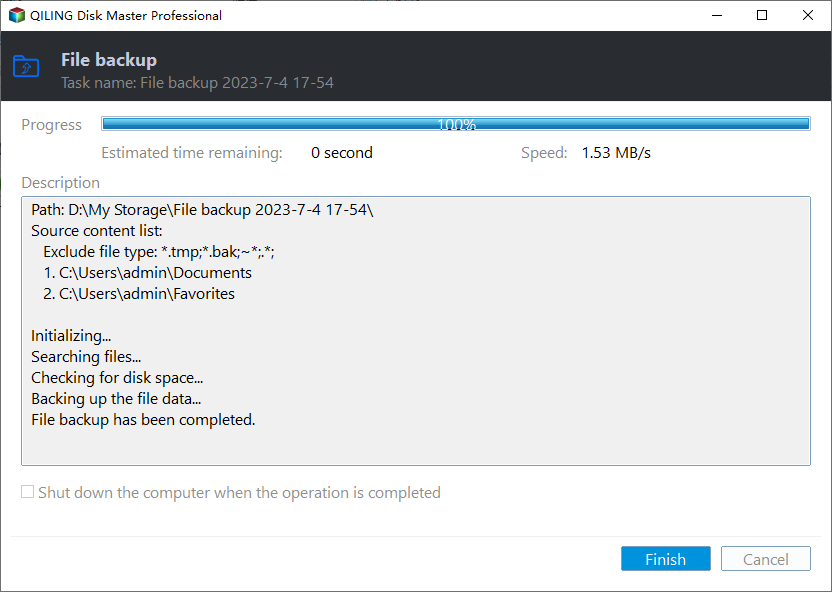
Step 5. Review the task and click Proceed. Wait for the backup to finish before continuing.
Function. Create bootable media for offline repair
Step 1. Prepare an empty USB drive and connect it to a working computer. Back up the USB because it may be formatted.
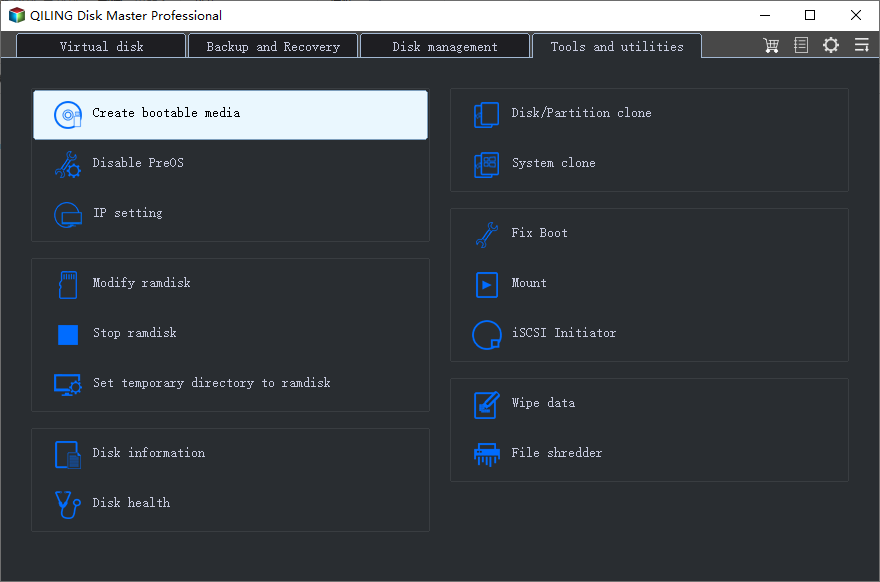
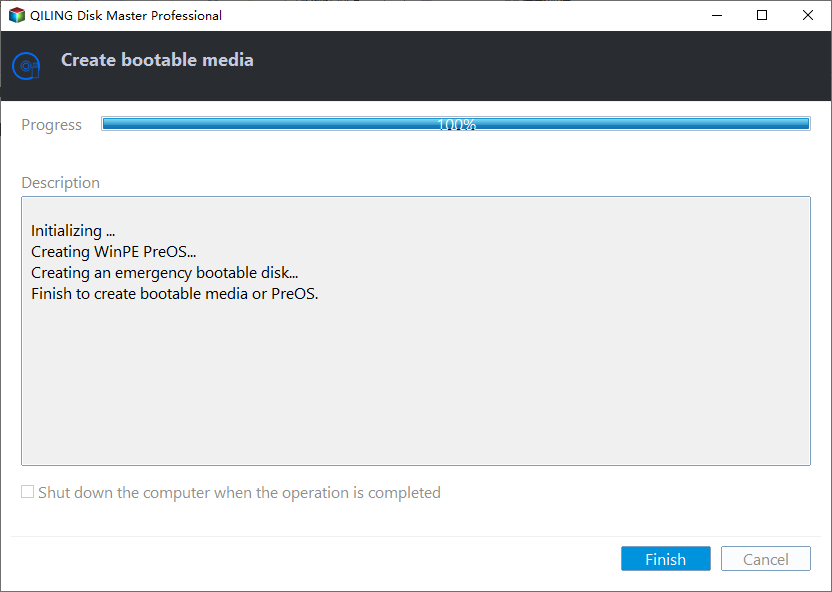
Step 2. Open Qiling Disk Master and choose Create Bootable Media. This helps when normal Windows startup or repair access is unavailable.
Step 3. Select the USB boot device option and choose the correct USB drive by capacity and drive letter.
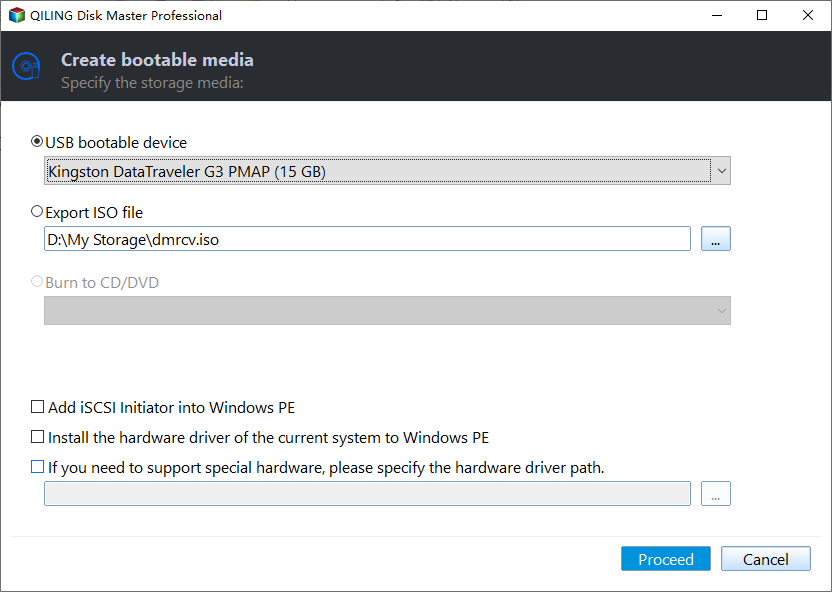
Step 4. Click Proceed and wait until creation finishes. Use the USB for Windows 7 image restore or offline file backup.
Check the result
After reimage, check Windows activation, drivers, programs, and restored files. Apply security updates available for the system.
Related Articles
-
Restore Windows 7 to Previous Date
Restore Windows 7 settings or system state to an earlier working point. -
Restore Windows from Recovery Partition
Use recovery partitions when a full system image is not available.
Products
Articles & Tutorials
- Data Recovery
- Data Backup
- File Recovery
- File Backup
- File synchronize
- System Backup and Restore
- Disk and Partition Clone
- Technical articles
- Disk Master Help
- Windows Deleted File and Disk Recovery Tutorials
- Windows File and Data Recovery Tutorials
- More Windows Tutorials for Install, Security, Files, and PC Tips
- Windows Boot, Repair, and Recovery Environment Tutorials
- Windows Backup Tutorials
- Windows Restore Tutorials
- Windows Clone and Migration Tutorials
- Windows Server Backup, Recovery, and Management Tutorials
- Windows Disk, Partition, and Storage Management Tutorials