How to Backup Windows Server 2016 to NAS Device
Why perform Windows Server 2016 backup to NAS?
To protect your system from potential security breaches, backing up Windows Server 2016 is recommended, which can be done by storing it on an external hard drive, local drive, or Network Attached Storage (NAS).
Backup Windows Server 2016 to NAS has many advantages:
- The server does not require an external hard drive, which reduces the cost of the server.
- You can use the backup image on your NAS to restore the system to multiple computers over the network, saving time and effort in installing the system individually.
- You can share files through NAS.
Besides its many functions such as disaster recovery, network printing, and media server, NAS also offers benefits like backing up Windows Server 2016. With its convenience, you may want to backup Windows Server 2016 to NAS without hesitation. However, the question remains, how to backup Windows Server 2016 to NAS?
Best server backup software - Qiling Disk Master Server
To backup Windows Server 2016 to NAS in a simple and easy way, we highly recommend using Qiling Disk Master Server. This tool offers a range of benefits, including a simple and easy backup process, making it an ideal solution for managing backups of Windows Server 2016 to NAS.
★ It offers four types of backup: System/Disk/Partition/File Backup.
★ You can back up your data to various storage devices, including internal and external hard drives, USB flash drives, network shares, and NAS devices.
★ You can schedule automatic backups and have old backups automatically deleted via backup scheme.
★ It supports various Windows operating systems, including Windows Server (2022, 2019, 2016, 2012, 2008, 2003) and Windows PC (11, 10, 8.1, 8, 7, Vista, XP).
Stepwise guide to backup Windows Server 2016 to NAS
Step 1. Launch the software, which has a deep-blue interface. Click on System Backup under the Backup tab.

Step 2. The system backup interface will automatically select the system partitions as the source partition, and you only need to expand the drop-down menu and choose "Add Share or NAS Devices".
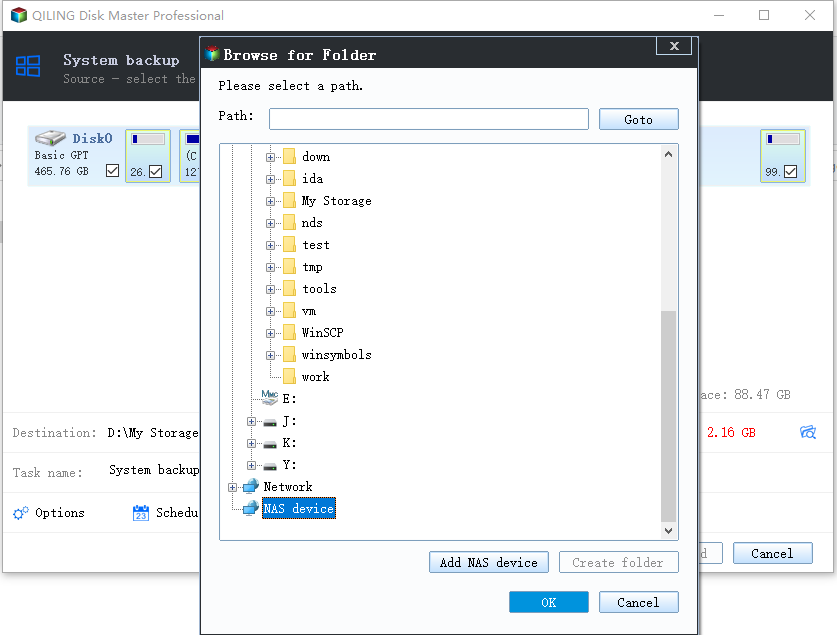
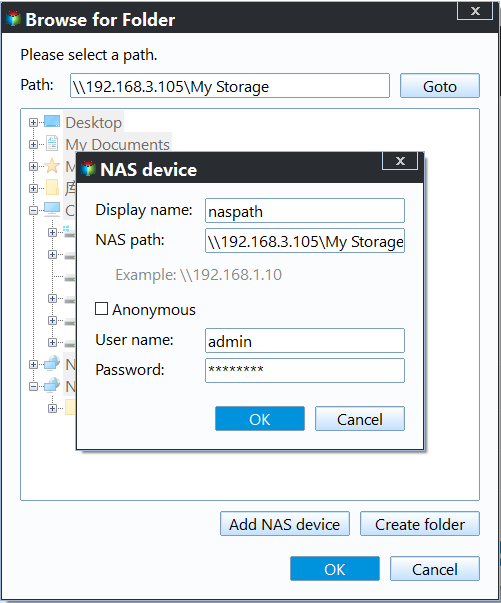
Step 3. In the pop-up window, enter the network path or name and click the blue button on the right. If necessary, also input your username and password.
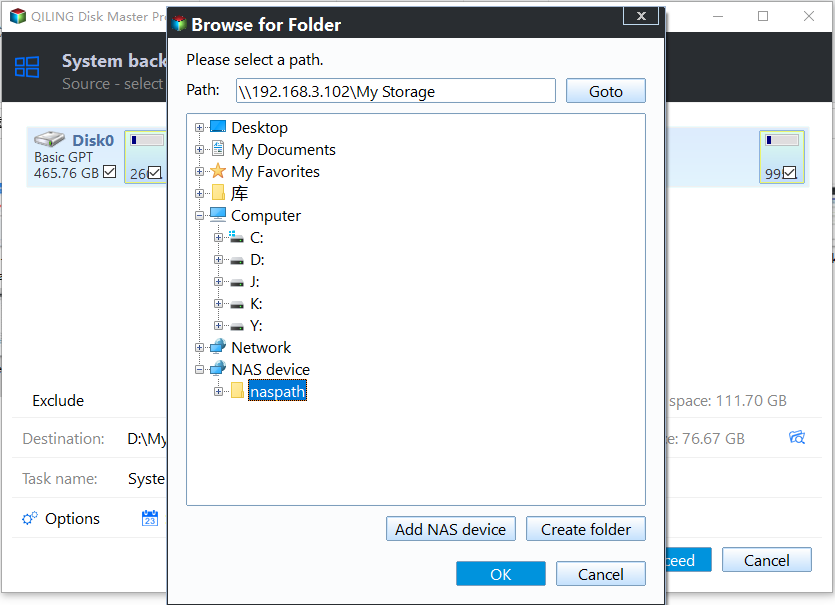
Step 4. After successfully accessing the network path, select one shared folder to store the backup image.
Step 5. Click Proceed to execute the pending operations and wait till the progress reaches 100%.
You may find that there are three more options at the bottom of the window.
1. Options: You can use the backup script to set more backup requirements, such as adding comments for operations, compressing the backup image file, splitting the backup images, or encrypting the backup image.
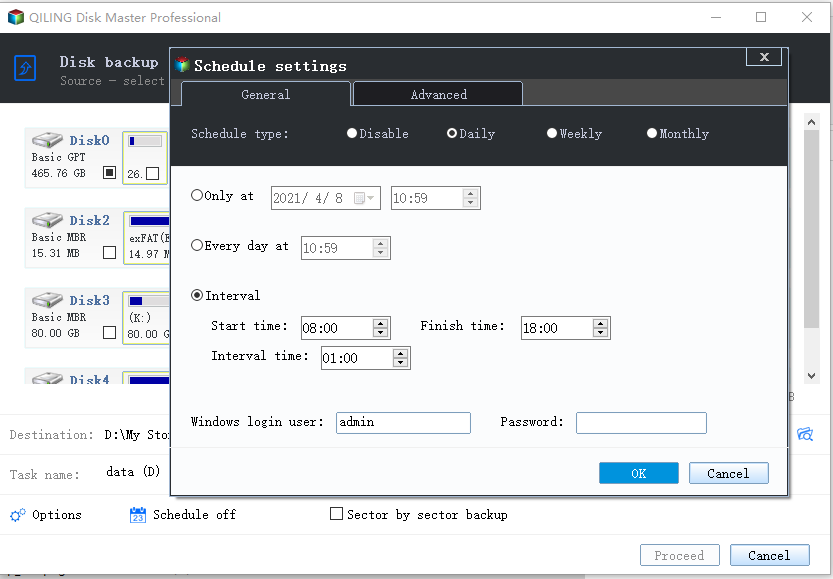
2. Schedule Backup: You can set up an automatic backup to run daily, weekly, or monthly, or even trigger it based on specific events, and it can also be set to run when a USB device is plugged in, giving you flexibility and control over your backup schedule.
- Event Triggers: You could trigger the backup task by the User logon, User logoff, System startup, System shutdown event.
- Qiling Disk Master will automatically back up data from a USB drive or copy local data to the USB device when it detects the USB drive is plugged in.
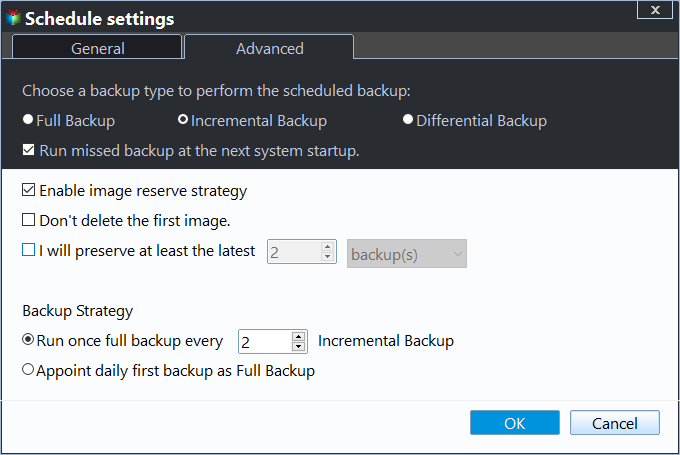
3. Backup Scheme: This is where you can configure the backup method (incremental, differential, or full backup) and the backup image retention policy. For more details, refer to the backup scheme.
Qiling Disk Master Server can easily backup a Windows Server 2016 to a NAS with minimal effort. Additionally, this tool offers a range of other features, including file sync, system clone, system recovery, and creating bootable media, among others.
Related Articles
- Windows Server Backup Restore Step by Step Guide
How to restore Windows Server backup? This article will detail every step of Windows Server Backup restore. It applies to Server 2022, 2019, 2016, 2012, 2008, etc. Also it recommends an enterprise backup to centrally backup multiple Windows Server and other Windows machines. - Windows Server Backup Limitations You Should Know
Do you use Windows Server Backup to perform backups in Windows Servers and find it fails sometimes? It's time for you to learn Windows Server Backup limitations and get the best alternatives. - How to Let Windows Server Backup Overwrite Old Backups?
You can perform Windows Server backup overwrite old backups manually with 3 methods in simple steps, to make it flexible and automatic, try professional backup and restore software. - 2 Ways to Boot Windows Server 2012 to Recovery Mode
This guide covers 2 ways to boot Windows Server 2012 into recovery mode and offers you an easier way to backup and restore Server 2012. - Solved: Cobian Backup "The Engine Is Not Found" Error
This article provides you with solutions to the Cobian Backup “the engine is not found” error as well as a Cobian Backup alternative. - Bootrec or Bcdboot Command Prompt Fix Issues with Your Boot Records
The Bootrec and Bcdboot are powerful command prompts that can fix issues with your boot records if your Windows operating system won't boot and the Startup Repair is not working. They can help resolve problems with your computer's boot process, allowing you to recover and start your system again.