2 Ways to Boot Windows Server 2012 to Recovery Mode
- What is Windows Server 2012 Recovery Mode?
- How to Boot Windows Server 2012 to Recovery Mode in 2 Ways
- Method 1. Boot to Server 2012 Recovery Mode from Installation Media
- Method 2. Boot to Server 2012 Recovery Mode without Installation Media
- Tip: Easier Way to Perform Windows Server 2012 Backup and Restore
- In the End
What is Windows Server 2012 Recovery Mode?
Windows Recovery Mode, also known as Windows Recovery Environment (WinRE), is a specialized environment that helps resolve issues causing Windows operating systems to fail to boot. It provides various options, such as Command Prompt, UEFI settings, Startup Repair, System Restore, and Startup Settings, tailored to different Windows server versions.
There are various situations where booting into Windows Server 2012 Recovery Mode is necessary, including system crashes, hardware failures, and software issues.
◆ Fix boot errors
◆ Uninstall problematic Windows updates
◆ Restore the server to a previous restore point
◆ Troubleshoot issues with your computer
How to Boot Windows Server 2012 to Recovery Mode in 2 Ways
To boot Windows Server 2012 in Recovery Mode, you have two practical methods at your disposal. Firstly, you can press the 'Shift' key while booting the system, which will allow you to access the Advanced Boot Options menu.
Method 1. Boot to Server 2012 Recovery Mode from Installation Media
To boot into recovery mode and perform a system restore on Windows Server 2012 using a USB or DVD, follow these steps: boot from the installation media, select your language and other preferences, and then click Next. On the next screen, click Repair Your Computer, and then select Troubleshoot.
Step 1. Plug your Installation recovery USB or DVD into your Server 2012.
Step 2. Set boot priority for installation disc or recovery USB and make Windows Server 2012 boot to system recovery options.
Step 3. Then, select Repair your computer after loading files.
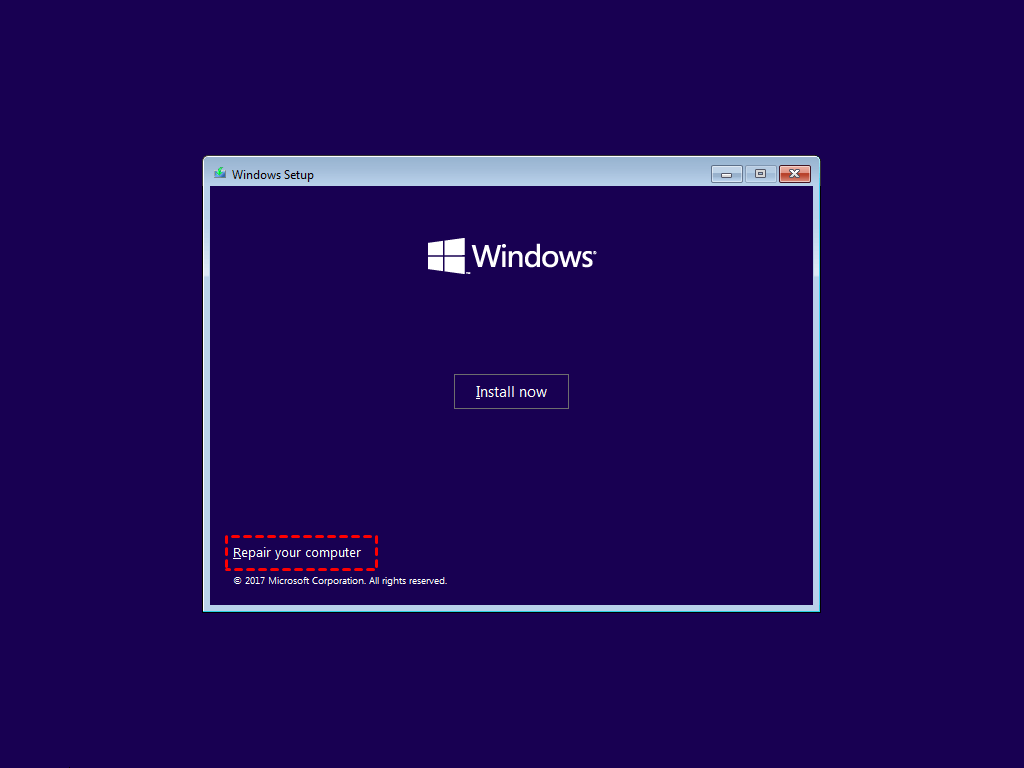
Step 4. After about one minute, Recovery Mode will be displayed as follows.
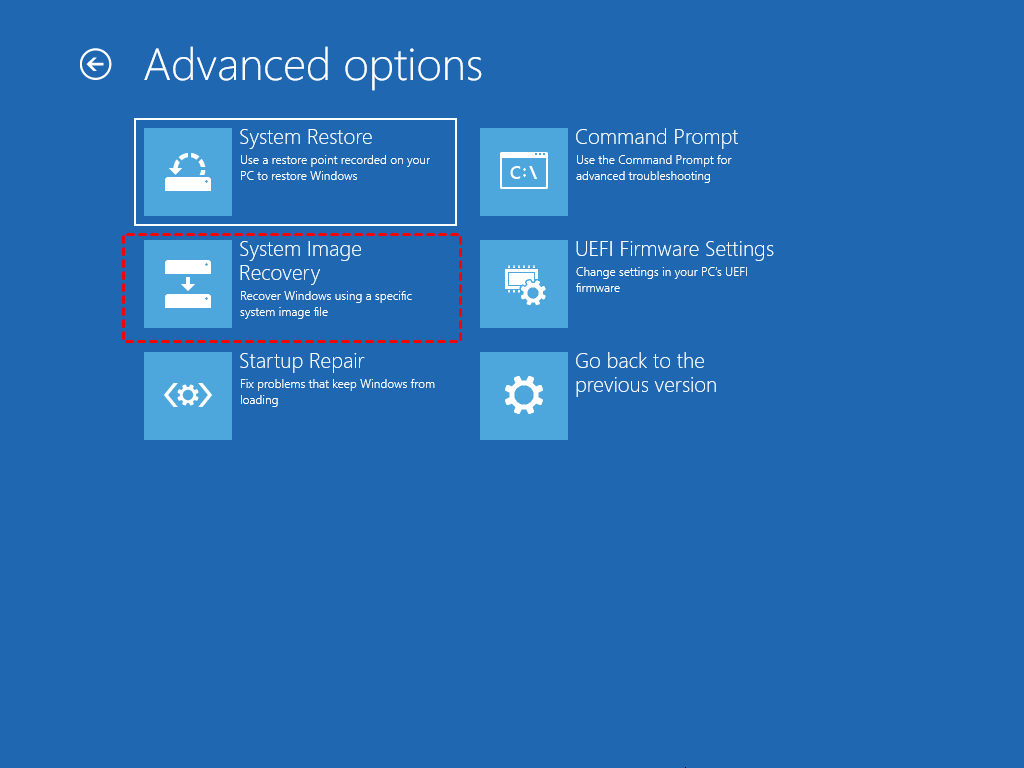
Here is an explanation of the available options within Windows Server 2012 Recovery Mode:
👉 System Image Recovery: System Image Recovery is a process that uses a system image to restore a computer to its previous state, effectively recovering the system to its original settings and configuration.
👉 System Restore: If you previously enabled system restore and have accessible restore points, choose this option to restore your system to a previous state. This will undo any changes made to your system since the last restore point was created, potentially resolving issues caused by recent software installations or updates.
👉 Startup Repair: Startup Repair is a useful feature that allows users to access Safe Mode boot options.
👉 Command Prompt: Selecting this option loads a command prompt interface, where you can execute various cmd commands to troubleshoot and fix problems.
👉 UEFI Firmware Settings: Selecting this option allows access to the UEFI BIOS settings, where you can configure hardware and system components.
👉 Go back to the previous version: This option allows you to revert to the previous version of Server that was installed on your computer before an upgrade.
Step 5. Select Troubleshoot > Advanced Options > System Image Recovery.
Step 6. Select the operating system - Windows Server 2012.
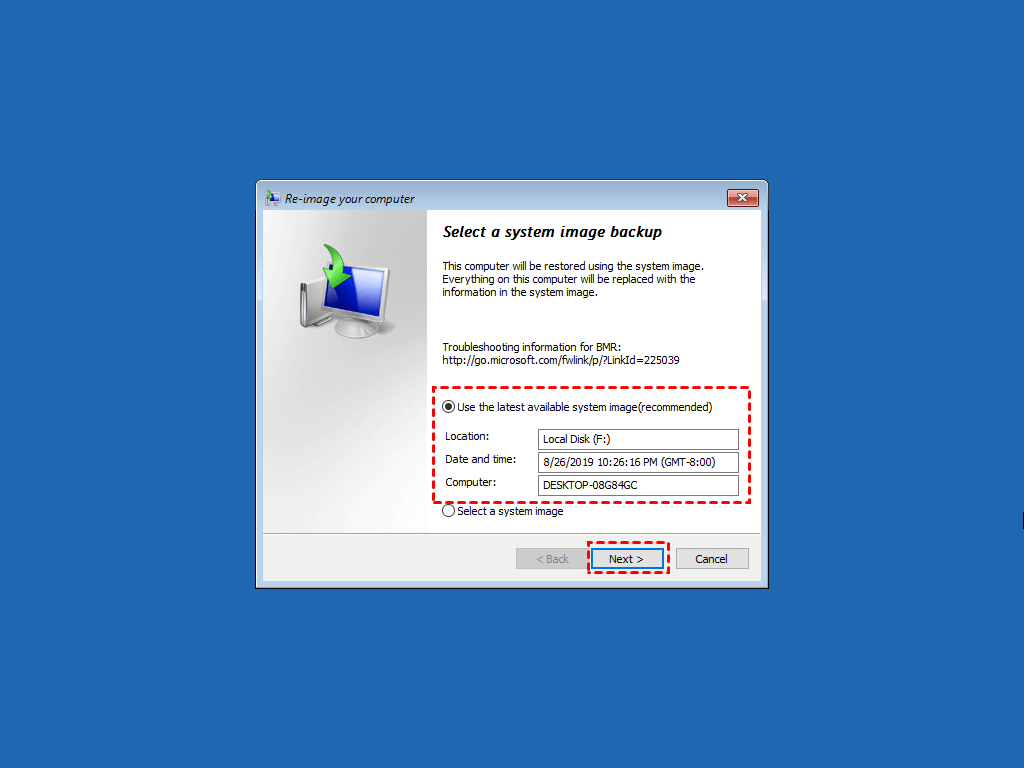
Step 7. To restore your computer, go to the screen where you can re-image your computer, select the Windows Server Backup image, click Next, and follow the on-screen instructions to complete the system restore.
Method 2. Boot to Server 2012 Recovery Mode without Installation Media
To let Windows Server 2012 boot to Recovery Mode without using installation media, follow these steps:
Step 1. Power on your server and wait until the white circles appear. Press the power button to turn off the server.
Step 2. Power on the server, then power it off once the boot circles appear. Repeat this process two more times.
Step 3. On the third startup, the server will initiate the Preparing Automatic Repair process, after approximately a minute, the Recovery Mode page will be displayed, similar to the one accessed through the first method.
Step 4. To access additional Recovery Mode options, click on the Troubleshoot option, then proceed with the same steps to restore Server files.
Tip: Easier Way to Perform Windows Server 2012 Backup and Restore
Qiling Disk Master Server is a powerful backup and restore software that offers comprehensive features to safeguard your system and data, supporting various server versions including Server 2003/2008 (R2)/2012 (R2)/2016/2019/2022.
This software allows you to create bootable media, such as CD/DVD or USB, that enables booting from a stored file system in case of a system crash or boot failure, protecting your server environment and ensuring continuity of critical data and systems.
√ This software offers multiple backup modes, including System Backup, Disk Backup, Partition Backup, and File Backup, among others.
√ The software supports backing up Server 2012 to various destinations, including external hard drives, local disks, network locations, NAS devices, USB drives, and cloud services.
√ This system supports automatic and flexible backup options, including scheduling, full, incremental, and differential backups, as well as compression and splitting of backups.
To create a system backup of your Windows Server 2012 using the free trial version of Qiling Disk Master, please follow the steps below:
Step 1. Open this backup utility, click Backup, and then System Backup subsequently.

Step 2. To modify the Task Name and select the destination path for the backup, simply choose a new name and select the desired path. The system partitions will be selected by default.
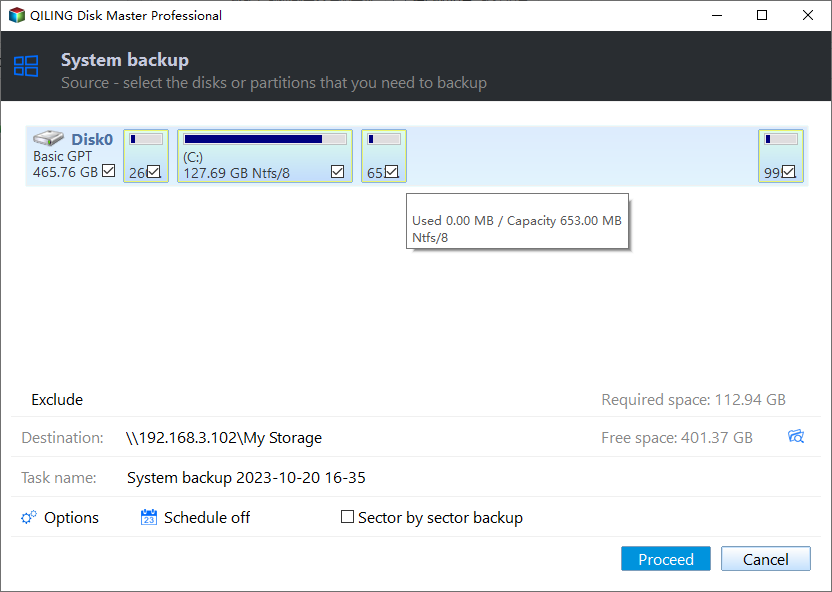
Step 3. Confirm the backup task, tap on Proceed, and then wait for the backup process to complete.
To restore a Windows Server 2012 backup on Qiling Disk Master, you can follow these steps. First, ensure that the Qiling Disk Master software is installed on your system.
Step 1. Click on Restore and then select Select Task.
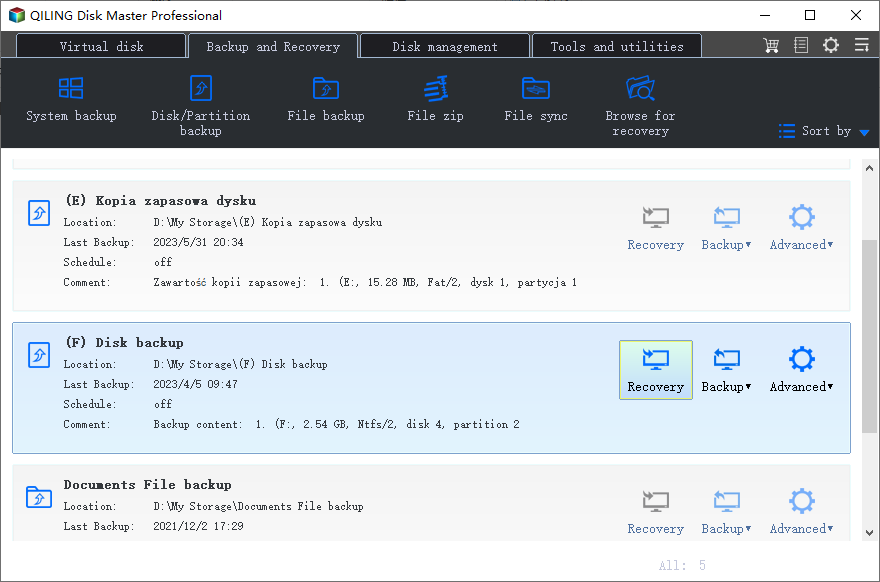
Step 2. To restore a system image backup, choose the backup you want to restore and click Next. Then, select Restore this system backup and click Next again.
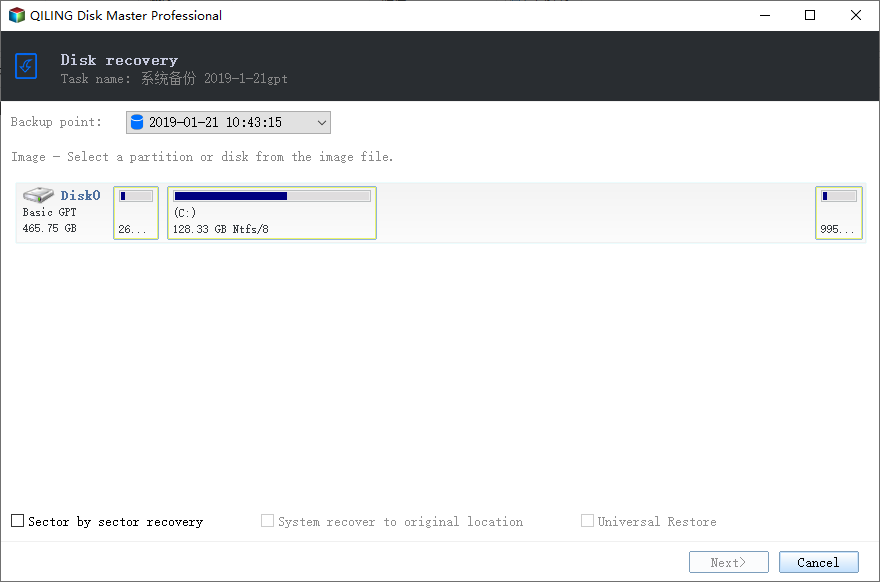
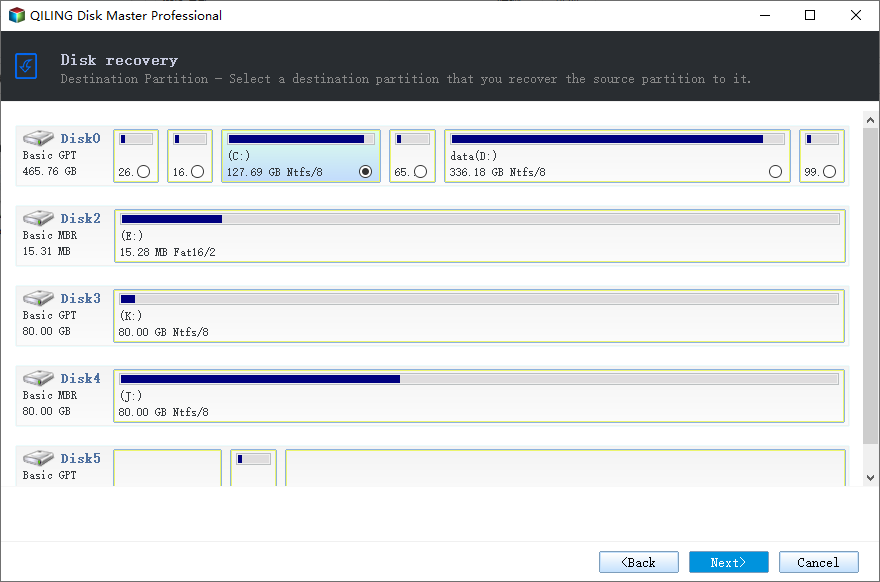
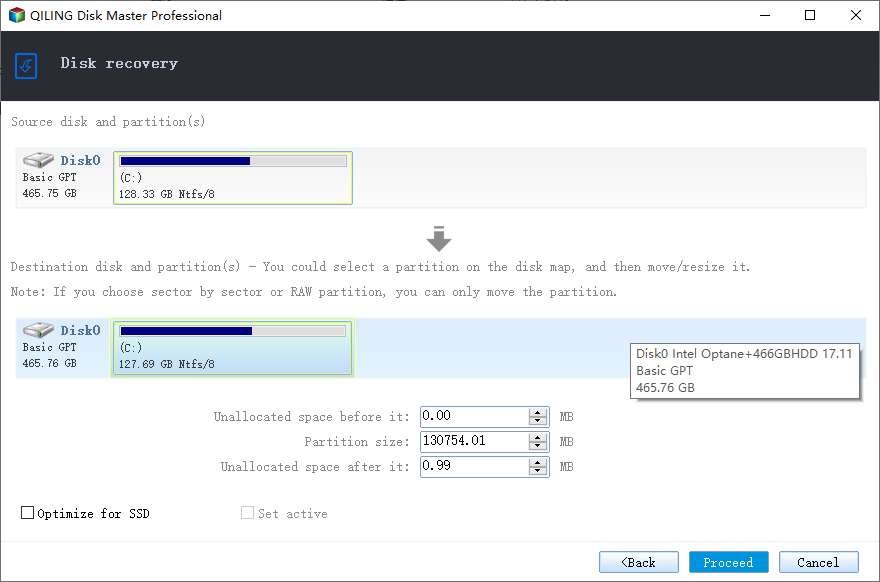
Step 3. If your old disk is damaged or you want to restore the system to a different location, tick the option "Restore system to another location" in Step 2 and choose a new hard drive or partition for the restore process.
Step 4. Once you have confirmed, click on Proceed to initiate the Windows Server 2012 recovery process.
In the End
To boot Windows Server 2012 into Recovery Mode, you can either boot from your installation media or interrupt the normal boot process.
If you're looking for an easy way to manage backups and restores, Qiling Disk Master Server is a Windows Server backup and restore software that allows you to create highly flexible image backups. These backups can be easily restored to their original location or any other desired location, making it ideal for restoring backups to different hardware or migrating your system to a new drive. This flexibility is a key benefit of using Qiling Disk Master Server.
To see more features of this software, you can check out the edition comparison page.
Related Articles
- Create Windows Server 2012 Recovery Disk for Disaster Recovery
If you are looking for a way to create Windows Server 2012 recovery disk in case your computer fails and restore it to previous date, please continue to read this article and learn the operating steps. - [Fixed] Server 2012 Keeps Booting to the Blue Choose an Option Screen
If you have no idea how to solve Windows Server 2012 keeps booting to the blue choose an option screen, you can look through this page to get the exact fixes to tackle it. - 2 Ways to Migrate Windows Server 2012 R2 to New Hardware
Here are 3 ways to migrate Windows Server 2012 R2 to new hardware for different situations. You could choose one way to follow according to your situation. - How to Stop Backup in Progress in Windows 7 Effortlessly
How to stop backup in progress in Windows 7? The answers will be presented in this article. For system backup, you can turn to Qiling Disk Master Standard. - How to Backup PS4 Game Save Data to the Cloud?
Learn how to backup PS4 Game Save Data to the PlayStation Plus Online Storage as well as to mainstream Cloud Storage like Google Drive and OneDrive step by step. - How to Check MBR or GPT in Windows 11/10/8/7[3 Free Ways]
To check whether your Windows 11/10/8/7 system uses MBR (Master Boot Record) or GPT (GUID Partition Table), you can use the Command Prompt, Disk Management, or a free partition manager. In the Command Prompt, type "wmic diskdrive get status" and press Enter.