How to Image Windows Server 2012 (R2) to New Hard Drive
Why image Windows Server 2012 (R2)?
Windows Server 2012 is primarily used by small to medium business administrators and IT experts in large companies, as well as individual enthusiasts. As a result, the operating system contains sensitive client information and commercial data, making it essential to image Windows Server 2012 to a new hard drive, network drive, or other storage devices.

When you image Windows Server 2012 (R2), you're essentially creating a system backup that includes the system state, settings, and all important applications. This allows you to recover quickly in case of a virus attack, accidental system crash, or computer failure, giving you peace of mind and minimizing downtime.
The system state of Windows Server 2012 includes Active Directory, System volume (if it's a domain controller), Certificate Services (certification authority only), Cluster Database (cluster node only), Boot Files, The Registry, Performance counter configuration information, and Component Services Class registration database. This allows for the creation of a system image that can be used to quickly recover from a system failure, reducing server downtime and ensuring business continuity.
Create Windows Server 2012 image backup using Windows Server Backup
To backup Windows Server 2012, you can't rely on a built-in backup tool, so you'll need to add the Windows Backup Role first using the Add Roles and Features Wizard. This will enable you to use Windows Server Backup, a solution that's not readily available in Server 2012. Once installed, you can use Windows Server Backup to create backups of your server.
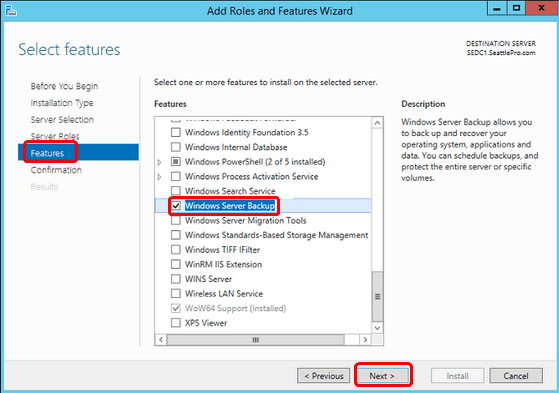
To add Windows Server Backup, go to Server Manager, click on the Tools menu, select Windows Server Backup, and install it. Then, navigate to "Local Backup" and select "Backup Schedule" to set up a daily backup, or choose to backup more frequently. Next, go to "Specify Backup Time" to schedule the backup, followed by "Specify Destination Type" to choose the backup location. Finally, confirm the settings to complete the setup.
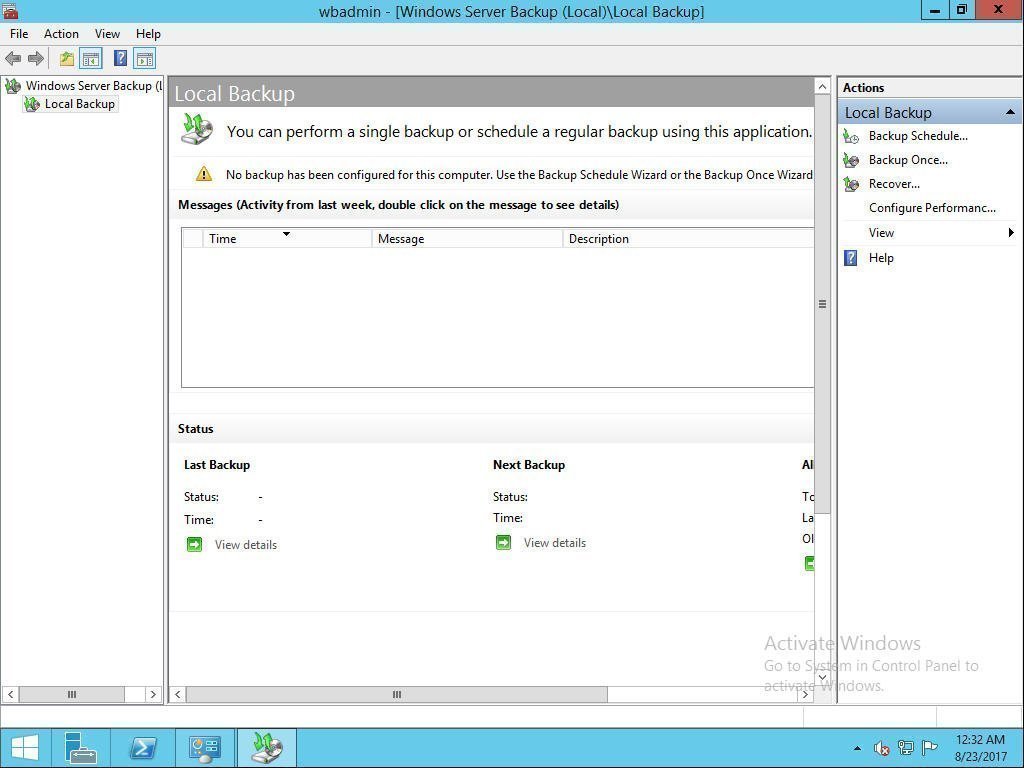
After setting your personal configurations, you can start backing up your data. If you choose to back up to a shared network folder, you'll need to specify the location and provide administrator credentials if required.
To image Windows Server 2012 to a new hard drive, select the system backup created earlier and perform a system state restore.
Windows Server Backup utility limitations
If you want to backup Windows Server 2012 to a new hard drive using Windows Server Backup, that's okay. However, you may need to use alternative software in certain situations or if you're looking for more advanced features, such as incremental backup, and want to explore other options beyond the standard Windows Server Backup tool.
✬ Size limit. You cannot use Windows Server Backup to back up files and folders on volumes that are more than 2040 GB (or 2 TB).
✬ File System limit. Windows Server Backup requires disks to be formatted as NTFS because it uses shadow copies to maintain backup versions, and FAT32 formatted disks are not compatible with this feature.
✬ Destination path limit. You cannot store backups on USB flash drives or pen drives.
✬ Permission limit. To use Windows Server Backup, you must be a member of the Backup Operators or Administrators group, or have been delegated the authority to perform backups.
Windows Server 2012 R2 will reach its end of life on October 10, 2023, after which Microsoft will no longer provide security updates or patches, leaving it vulnerable to potential threats.
Windows Server Backup utility alternative
Given the limitations of Windows Server backup, you may need to use alternative software or want more advanced features such as incremental backup for Windows Server 2012. A more reliable backup software is Qiling Disk Master Server, which can ensure a system backup including all data and boot files for recovery. This software allows you to set up automatic backup tasks with different frequencies, such as daily, weekly, monthly, or event triggers, and even with USB plug-in.
Qiling Disk Master helps prevent potential problems by automatically backing up data, cleaning up accumulated backups, and managing disk space. It also allows for incremental or differential backups, and has features such as automatic backup cleanup and compression. Additionally, it has great compatibility with various storage devices and file systems, making it easy to back up data to external hard drives, local disks, network drives, and even Windows Server 2012 (R2) systems.
Image Windows Server 2012 to new hard drive with Qiling Disk Master Server
Here, you will use Qiling Disk Master Server to create a Windows Server 2012 image backup, which can then be restored to a new hard drive or even a different computer with dissimilar hardware, in the event of a disaster. This software can also be used on other server computers, including Windows Server 2008, 2011, 2016, 2019, and 2022, as well as their R2 versions.
To image Windows Server 2012 (R2), start by clicking the download button below to access the 30-day free trial. From there, proceed with the step-by-step process for Windows Server backup 2012 (R2).
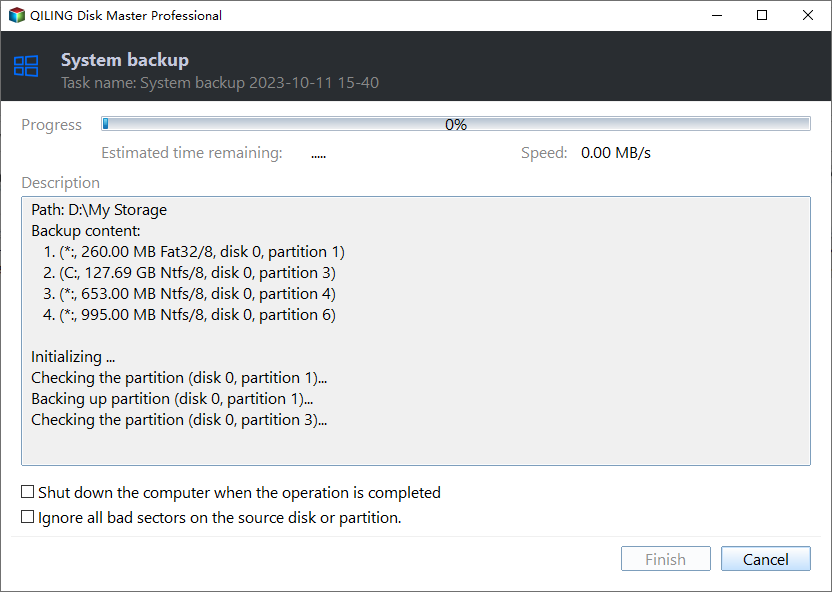
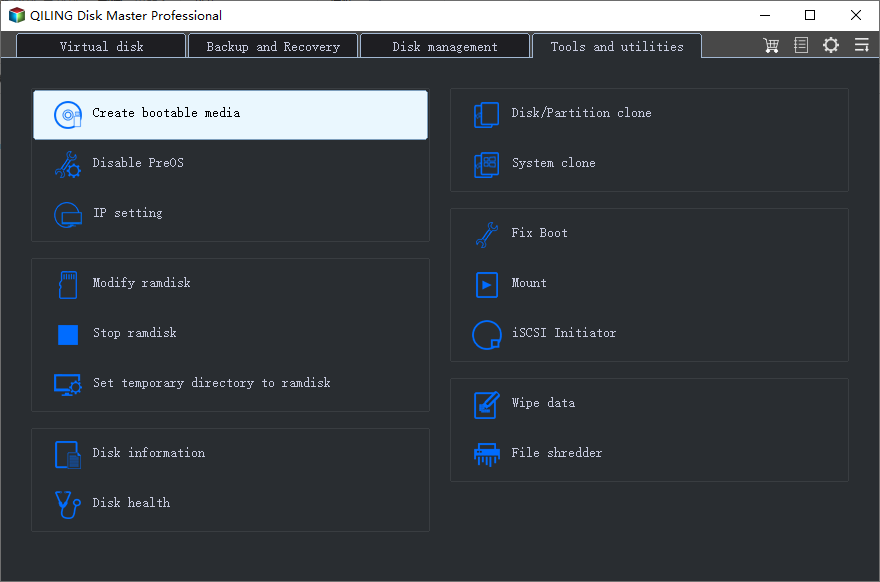
Step 1. Launch the Qiling Disk Master software, and on its deep-blue screen, select "Backup" > "System Backup" to initiate the system imaging task.

Note✍: If your target disk has enough space, you can either back up the entire disk using the "Disk Backup" feature or select specific files or folders to back up using the "File Backup" feature.
Step 2. Click "Proceed" to start the backup process.
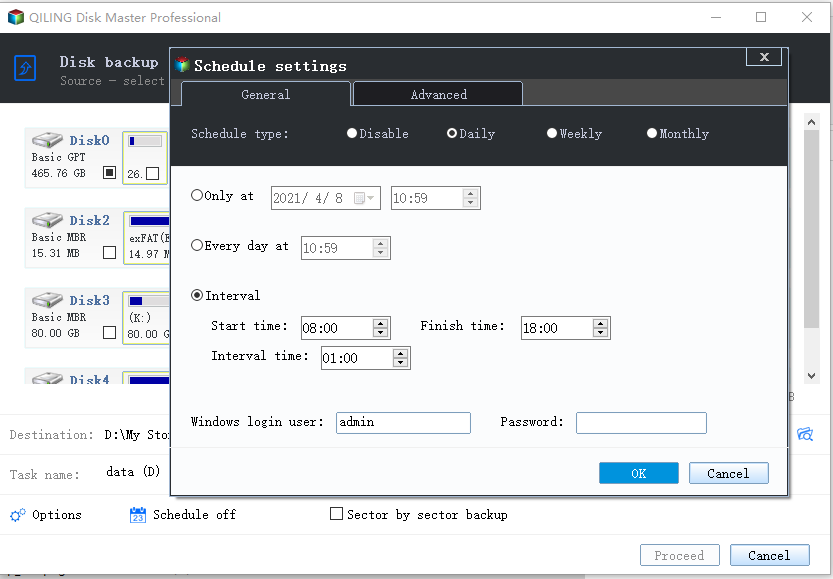
Step 3. To schedule a backup, click the "Schedule Backup" option and choose a frequency of daily, weekly, or monthly. It's also recommended to set up a backup scheme that automatically deletes old backups, ensuring you always have the latest backup for recovery purposes.
Notes✍:
◉ To differentiate this backup task from others, you can add a comment by selecting "Options" and making modifications such as encrypting the backup, setting a high compression level, or customizing the splitting process.
◉ This software uses incremental backup by default, but also offers differential backup, which saves files changed since the last full backup, providing a more complete and independent backup that can be restored with just one differential and one full backup.
Step 4. To image Windows Server 2012 (R2) to a new hard drive, click "Proceed" after selecting the drive to image and the destination drive. This action will initiate the imaging process, which will create a bit-for-bit copy of the original drive on the new drive.
Tip: During the backup process, you'll see a "Settings" icon at the lower-left corner. You can tick the "Check backup integrity on completion" feature to ensure your data is intact, and also specify what the computer will do on completion, either shutting down or restarting the PC.

To create a system image in Windows Server 2012 (R2) and save it to a new hard drive, follow these steps. Once the image is created, it's recommended to create a bootable USB drive to easily restore the server computer in case it fails to boot. Alternatively, you can use the Recovery Environment if you don't have a USB or CD/DVD.
To restore your system from a disaster, boot your computer from the bootable media and follow these steps: boot from the media, select the restore option, choose the correct restore point, and confirm the restore process. This will restore your system to the state it was in at the chosen restore point, reverting any changes made since then.
- Go to the Restore tab, then select Select Image File to manually locate the backup image.
- After selecting the backup image, check the boxes for "Restore this system image" and "Restore to other location". Then, click Next.
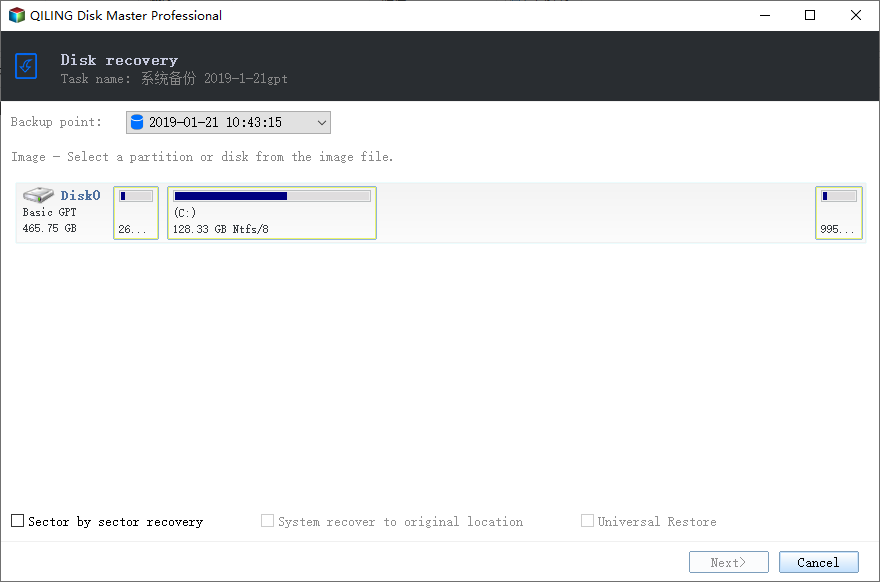
- Choose a destination path to receive the backup image and click Next.
- Confirm this task and click Proceed. If you are restoring system to new computer with different hardware, check if the Universal Restore feature.
Restoring the system to a new hard drive or another computer is a viable option, but it can be time-consuming and tedious if you have multiple computers. A more efficient approach would be to use image deployment software, such as Qiling Disk Master TechPlus, to deploy the image to multiple computers simultaneously, saving you time and effort.
This software allows you to copy installation directory for portable version creation and also offers unlimited billable technical services to clients.
Conclusion
You can choose to image Windows Server 2012 to a new hard drive using either Windows Server Backup or Qiling Disk Master Server, depending on your preference. In the event of a disaster, you can restore Windows Server 2012 using the created image, and this feature also supports newer OS versions like Windows Server 2022 or 2019.
Using the latter one is recommended due to its simplicity and efficiency. It features a clear interface and user-friendly design, and offers additional backup features like schedule backup, event triggers, and more, making it a more comprehensive option.
This software offers a user-friendly interface and powerful features such as Clone and Sync, making it easy to migrate a hard drive on Windows Server.
Related Articles
- The Easiest Way to Clone Windows Server 2012 to New Hard Drive
How to clone Windows Server 2012 to new hard drive? This article provides you with powerful software to help you do this. Read this guide to get the easiest method. - How to Clone Windows Server 2012 (R2) Hard Drive
This paper shows how to clone Windows Server 2012 (r2), 2008(r2) or 2003 hard drive with secure boot under the help of the best disk clone software and Windows Server Backup. - Migrate Windows Server 2016 to New Hardware Effortlessly (2 Ways)
You can successfully migrate Windows Server 2016 to new hardware with Windows Server Backup or third-party migration tools. This article also helps to migrate Windows Server 2016 to 2019 or 2022. - Easily Migrate Old Server to a New Server (Different Hardware)
Are you in need of migrating to a new server with different hardware? You can get three efficient solutions from this page. - How to Solve C drive full on Dell Computer Problem?
C drive on Dell computer gets full and Low Disk Space alert appears? Don't worry, this article will show you how to free up space and increase the capacity of C drive. - Top 3 Ways to Fix Invalid Partition Table in Windows 7/8/10 Dell PC
An error message "Invalid Partition Table" occurs to your Windows 11/10/8/7 Dell computer without any signs? This article will give you the best 3 ways to fix Dell invalid partition table.