Full Guide to Restore VHD File in Windows 2008 (R2) Server
- How do I restore a windows backup VHD?
- Why you cannot find the backup image?
- How to restore VHD file in Windows 2008 (R2) Server
- Way 1: Restore VHD file in Windows Server 2008 (R2) using installation disc
- Way 2: Create a new virtual machine and restore VHD file
- Easier Way to backup and restore image in Windows 2008 (R2) Server
- Creating a system backup in Windows Server 2008 (R2)
- Restoring system backup to new hard drive or computer
- Wrapping thing up
VHD stands for Virtual Hard Disk, a common disk image format used with Hyper-V in Windows Server 2008 (R2). It can store files, folders, file systems, and disk partitions, encapsulating all this data in a single file.
How do I restore a windows backup VHD?
"I made a backup of a virtual machine running on Hyper-V. It's Windows Server 2008. The backup is a VHD. How do I do a full system restore on this? I've tried booting to a windows installation disc and doing a restore from a share, but that's resulting in an error message: The selected system image cannot be restored in this recovery environment. Any ideas?"
Why you cannot find the backup image?
Users who backup files to a network drive via VHD may encounter issues when trying to restore their computer using an installation disc, as they cannot find the backup image from the VHD file. This problem can arise due to various reasons, including the inability to locate the backup image within the VHD file.
- The Hyper-V requires drivers under Server 2008 (R2) for the regular Network Adapter. If there are no drivers, the Windows Recovery Environment can't use the network card, making it impossible to find the image on the network. To resolve this, install a Legacy Network Adapter in your virtual machine before restoring VHD files.
- Windows Server Backup creates a backup of the operating system and data, but it does not include the boot loader in the backup image. This means that even if you restore the backup image, you will not be able to boot the system as the boot loader is not included in the backup.
- If you're trying to install Windows but it's not working, you might be able to boot from the recovery environment by pressing F8 instead of using the installation disc. This could be an alternative solution.
After exploring the possible causes, you may consider some solutions, such as restoring a VHD file in Windows Server 2008 (R2) using an installation disc, which is a reliable method, and you can also try other solutions.
How to restore VHD file in Windows 2008 (R2) Server
To restore a VHD file to a physical disk in Windows Server 2008 (R2), there are two methods. One approach is to restore the VHD file using the installation disc, which provides a straightforward method. Alternatively, you can create a new virtual machine and attach the VHD file to it, which is another viable option.
Before starting, you need to be sure the following 2 things:
- To get the correct VHD locations that contain backups, you can use the following PowerShell command:\\192.168.0.120\share\backup.
- To confirm that both your computer and the backup are working correctly, make sure they are connected to the same network. This will allow you to easily access and verify the backup data on your computer.
Then, select a method and follow the corresponding steps to restore VHD file.
Way 1: Restore VHD file in Windows Server 2008 (R2) using installation disc
Step 1. Insert the installation disc into your computer, set boot priority to this disc, and press any key to boot from it when prompted. In the first screen, set up language and other preferences, and click "Next".
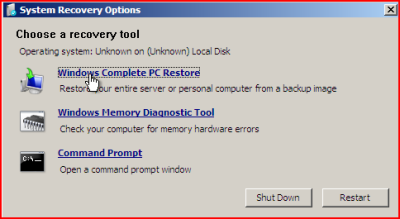
Step 2. To repair your computer, click on "Repair your computer" and then select "Troubleshoot". From the Troubleshoot menu, choose "System Recovery Options" and finally select "Windows Complete PC Restore".
Step 3. Select Windows Server 2008 (R2).
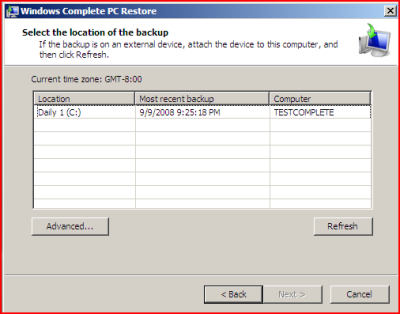
Step 4. Click Cancel if it does not find a backup image and then Next > Advanced > Search for a system image on the network.
Step 5. Click Yes to confirm you want to connect to network. Then, it will ask you to specify the location of your backup image, you need to click Cancel twice > Troubleshoot > Command Prompt and then type the following commands, because it cannot find the VHD file.
- net use \\192.168.0.120\share\backupThe command is used to connect the network share that contains the VHD file. You may be prompted to enter a user name and password if required.
- diskpart
- select vdisk file="\\192.168.0.120\share\backup\backup.vhd"
- attach vdisk
Step 6. Type exit twice To restore your Windows Server to its previous state, exit Diskpart and Command Prompt window. Then, go to the Windows Complete PC Restore window, select the latest backup image, and follow the on-screen instructions to complete the restore process.
Way 2: Create a new virtual machine and restore VHD file
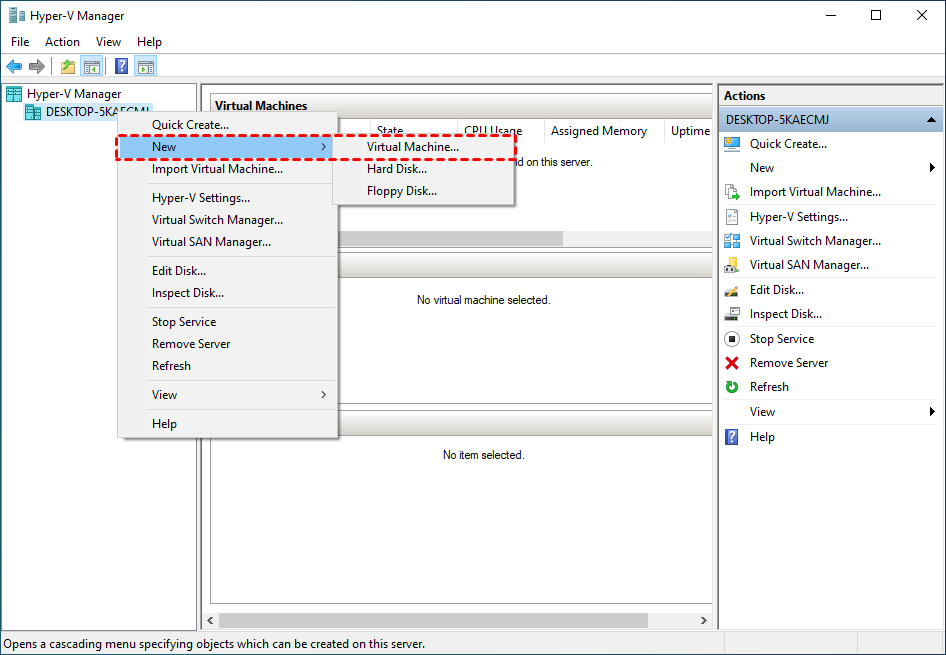
Step 1. Launch Hyper-V Manager, connect to your server, and right-click the server name. From the drop-down menu, select "New" > "Virtual Machine".
Step 2. Specify a name To create a new virtual machine in Hyper-V, start by clicking on the "New" button in the Hyper-V Manager. Then, select "Virtual machine" and click "Next". Choose a name for your virtual machine and select the version of Windows you want to install.
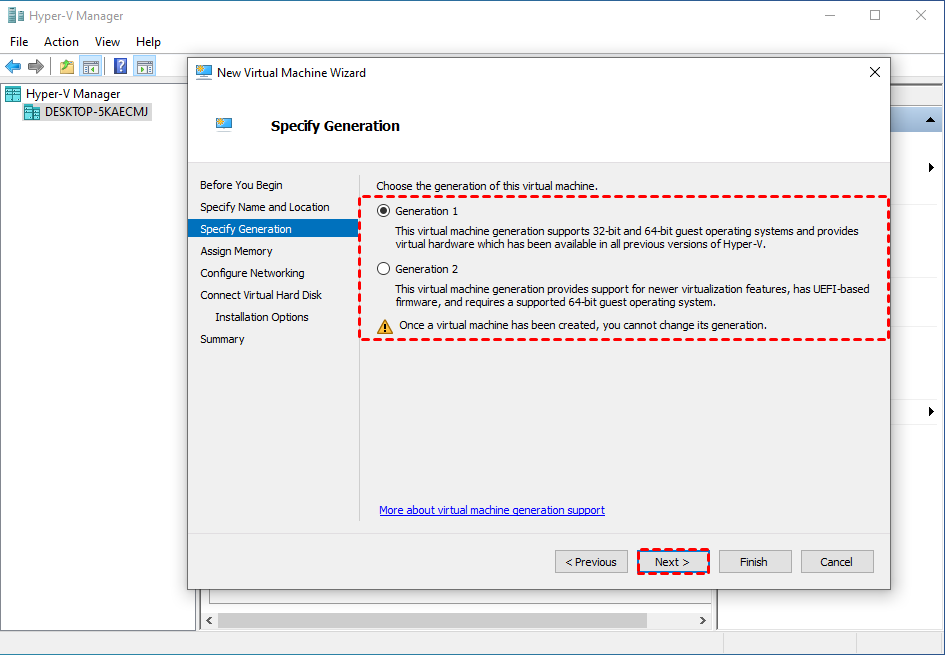
Step 3. Select the generation your VM was. Click Next.
Step 4. Allocate 4 GB of memory to the virtual machine. Click Next.
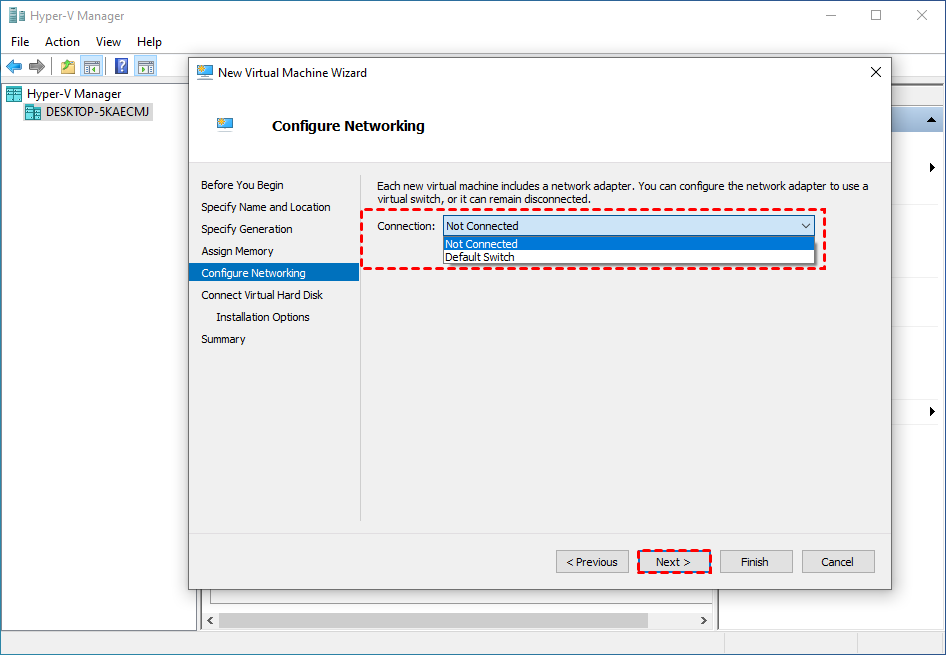
Step 5. Configure the network adapter to use a virtual switch, or remain disconnected. Click Next.
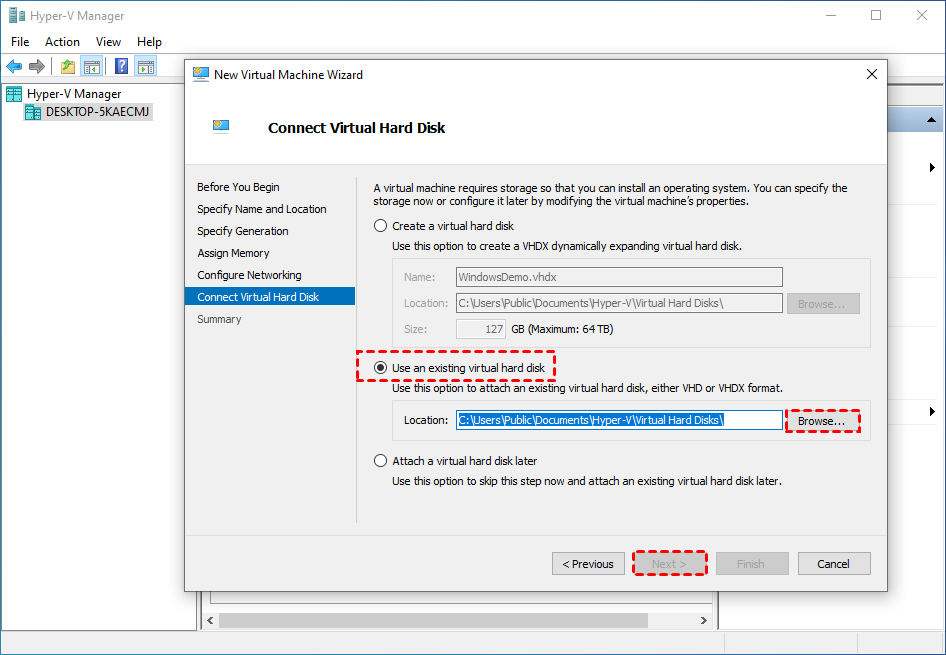
Step 6. To restore VHD files in Windows 2008 Server, select "Use an existing virtual hard disk" and click "Browse..." to locate the .vhd file, then click "Next" and "Finish".
Easier Way to backup and restore image in Windows 2008 (R2) Server
In Windows Server 2008 (R2), restoring a VHD file is a challenging process, often resulting in Windows not being able to find a backup image on a network share. This issue poses a significant risk of data loss, especially after January 14, 2020, when Microsoft stopped providing security updates for this operating system. As a result, servers running Windows Server 2008 (R2) are exposed to potential security vulnerabilities and data loss risks.
I strongly recommend using Qiling Disk Master Server, a top-notch server backup software, instead of relying solely on built-in backup tools. It's incredibly user-friendly, even for beginners, and boasts numerous valuable features.
- Schedule Backup: This tool supports various backup triggers, including daily, weekly, and monthly schedules, as well as event-based triggers like system shutdown. It also supports USB plug-in backups, ensuring that your system is regularly backed up, including any recent updates, installed applications, and modified files.
- Backup Scheme: The backup and cleanup methods are divided into two parts, helping to save backup time and disk space or directly free up space. You can use incremental or differential backup to save time by backing up only changed files, or delete old backup images by quantity, time, or daily/weekly/monthly schedule.
- Various restore methods: This software can restore entire systems, disks, partitions, or individual files to a new hard drive or computer, even with different hardware, and allows for selective file restoration.
Creating a system backup in Windows Server 2008 (R2)
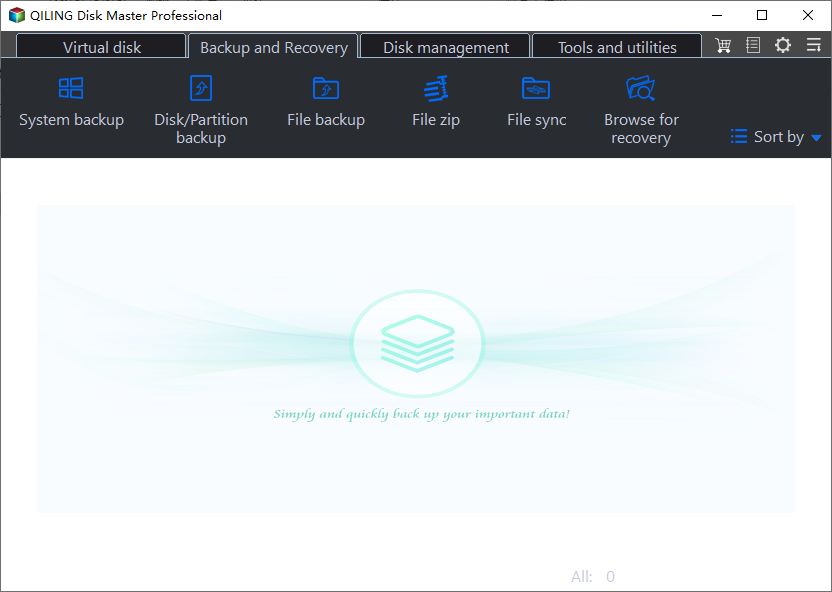
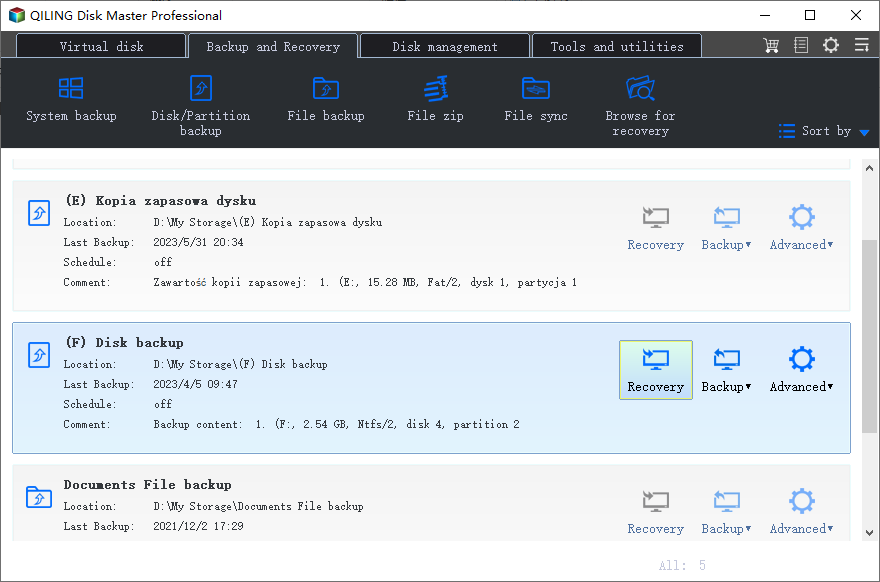
Download, install and open Qiling Disk Master Server, then click Backup, select System Backup, choose a destination path, and click Proceed.
Tips:
- For continuous data protection, it's recommended to set up a schedule for backups, including incremental or differential backups, and automatic cleanup of older backups, ensuring multiple backups are always available.
- For destination, you can choose to backup your image to an external hard drive, a network drive, a NAS, your internal hard drive, Google Drive, or other options.
Restoring system backup to new hard drive or computer
After creating a backup, you can restore your system at any time. To do this, click "Restore" and "Select Task", then choose a system image backup and select "Restore this system backup". Next, choose a destination path and click "Proceed" to complete the restoration process.
Tips:
- If your backup isn't stored on the same computer, you can copy it to a USB drive and then restore it from there.
- When restoring an image on a different computer with different hardware, make sure to check the Universal Restore feature to ensure the new computer boots correctly.
- If you need to deploy a system image to multiple computers, consider using image deployment software, which is available on the techplus edition of Qiling Disk Master.
Wrapping thing up
If you're trying to restore a VHD file on a Windows 2008(R2) Server but Microsoft's backup tool can't find the backup image on a network share, don't worry! There are two helpful methods to resolve this issue, which can be found in this article. However, to ensure system and data security, it's recommended to use a third-party server backup software like Qiling Disk Master Server instead.
The software has a clear and user-friendly interface, allowing most users to complete the process easily with a step-by-step guide. It also keeps track of changes made and provides a schedule backup, such as a USB plug-in, which uses minimal space. In the event of a disaster, the system can be easily restored to a new hard drive or computer, even with different hardware.
Related Articles
- 3 Useful Methods to Restore Windows Server 2008 R2 to Previous Date
How to restore Windows Server 2008 R2 to previous date? If you are looking for a way to do it, pleas continue to see below and this article will introduce you to 3 effective methods. - Windows Server Backup Limitations You Should Know
Do you use Windows Server Backup to perform backups in Windows Servers and find it fails sometimes? It's time for you to learn Windows Server Backup limitations and get the best alternatives. - Fix Volumes Larger Than 2088958 Megabytes Cannot Be Protected
Learn the workaround to fix the error that volumes larger than 2088958 megabytes cannot be protected when uing Windows Server Backup in Windows Server 2008 or 2008 R2. - How to Clone HDD to SSD with Alignment Easily
You can learn what is SSD alignment and how to clone HDD to SSD with Alignment easily. Please read on for more details. - Solved: "File History Service Is Not Accessible" Error
This article tells you how to fix the “File History Service is not accessible” error and provides you with a more reliable backup software. - Fix - The File Too Large for the Destination File System
If the file is too large for the destination file system, you can refer to a post for guidance on how to resolve the issue without formatting the system.