How to Schedule Automatic Backup in Windows Server 2016
Why create automatic server backup?
Windows Server 2016 users can prevent many disasters, such as system crashes, by backing up their server in a timely manner. This can help prevent large losses, even for the whole company, and is a necessary step to take to avoid the consequences of a system failure.
To avoid tedious daily backups and potential data loss, you can set up Windows Server 2016 to automatically backup your data. This way, you can schedule regular backups to run without your direct intervention, ensuring your important data is protected even when you forget to do it manually.
Fortunately, you can create Windows Server backup schedules using built-in or third-party tools, allowing for multiple scheduled backup tasks like daily, weekly, and monthly backups.
Part 1. Create a schedule to backup Windows Server 2016 with the built-in tool
If you're experiencing issues with your Windows Server backup schedule not running, it's still worth trying. Before attempting to resolve the issue, ensure that the Windows Server backup feature is installed on your system. If it's not installed, you'll need to install it first before proceeding.
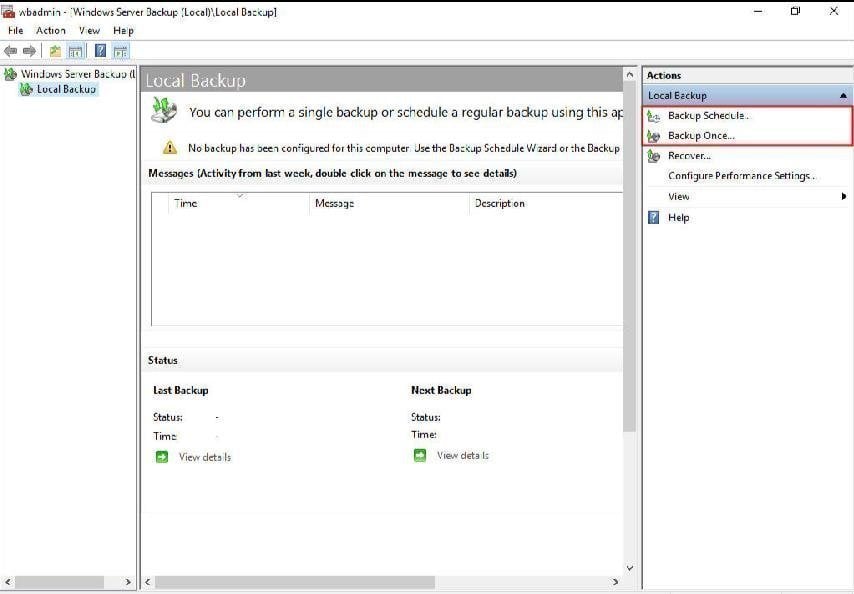
After installing Windows Server Backup, you can access it by opening Server Manager, clicking on Windows Server Backup at the bottom of the Tools menu, and then selecting Local Backup. Two backup options are available: Backup Schedule... and Backup Once... .
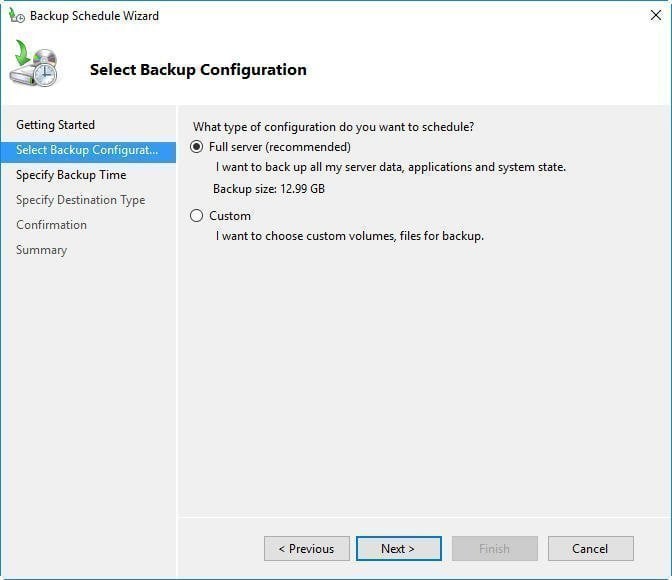
To create an automatic schedule backup for Windows Server 2016, select "Backup Schedule..." to launch the Backup Schedule Wizard and follow the prompts, choosing to back up the entire server, including data, applications, and system state, by selecting "Full server".
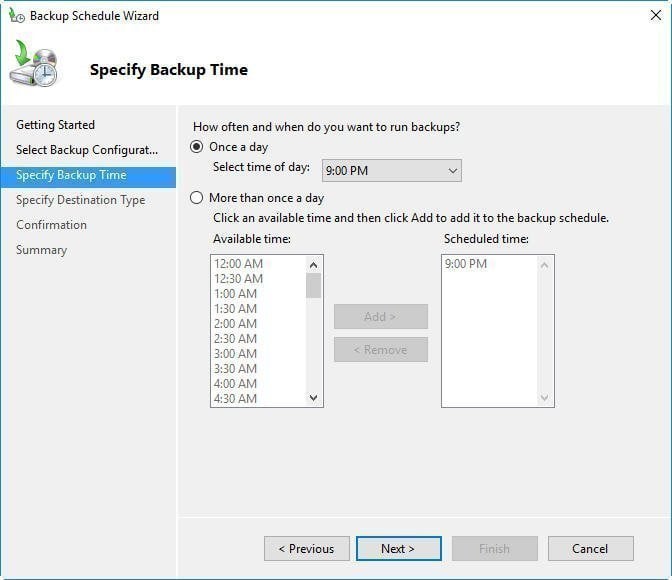
In the "Specify Backup Time" section, you can set the frequency and time of automatic backups, allowing you to choose whether to back up once a day or more frequently.
To schedule a backup of Windows Server 2016, choose a destination for the backup, such as a hard disk, volume, or network location, and select the local disk to back up to if multiple disks are available. Click Next to proceed.

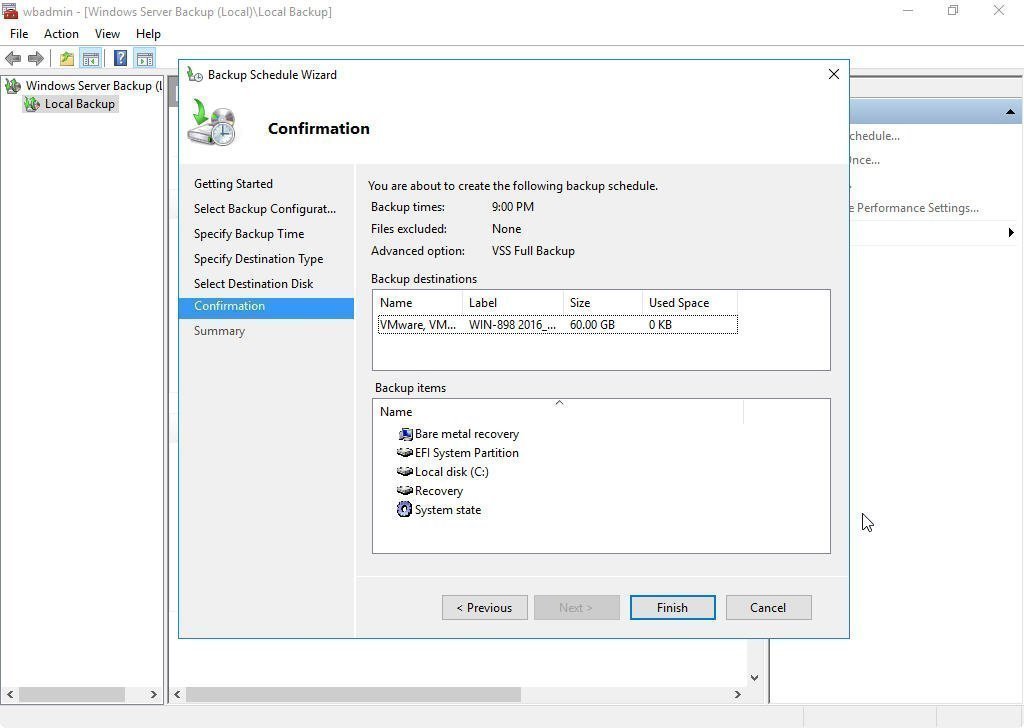
You will move to the Confirmation step, where you can review and confirm the operations. If everything looks good, click Finish to complete the process.
Finally, you can check the automatic schedule backup for Windows Server 2016 at the Summary. You may feel that using Windows Server Backup will take a lot of steps, which is so complex, and you may find that there are many limits of the schedule backup. For example, you can only perform a daily backup or more frequent backups.
If you want to create less frequent schedule backups for some personal reasons, Windows Server Backup could be helpless. Is there a more flexible way to schedule backup Windows Server 2016? Please keep reading.
Part 2. Create Windows Server 2016 backup schedule via Qiling Disk Master
Qiling Disk Master Server is a powerful backup and restore software designed for all Windows Server systems, including Windows Server 2022/2019/2016/2012 (R2)/2008 (R2), offering capabilities beyond simple backups.
- It provides system backup, file backup, disk backup, and partition backup capabilities.
- It lets you configure multiple backup schedules like daily/weekly/monthly/event triggers.
- Apart from full backup, it supports incremental/differential backup that saves space and time.
Compared to Windows Server Backup, Qiling Disk Master has several advantages, particularly in terms of operation steps. For instance, creating a Windows Server 2016 backup schedule weekly is much simpler with Qiling Disk Master. To start, download the software on your server.
Step 1. Install and launch the best server backup software. It will show you the simple GUI. Click System Backup under the Backup tab.

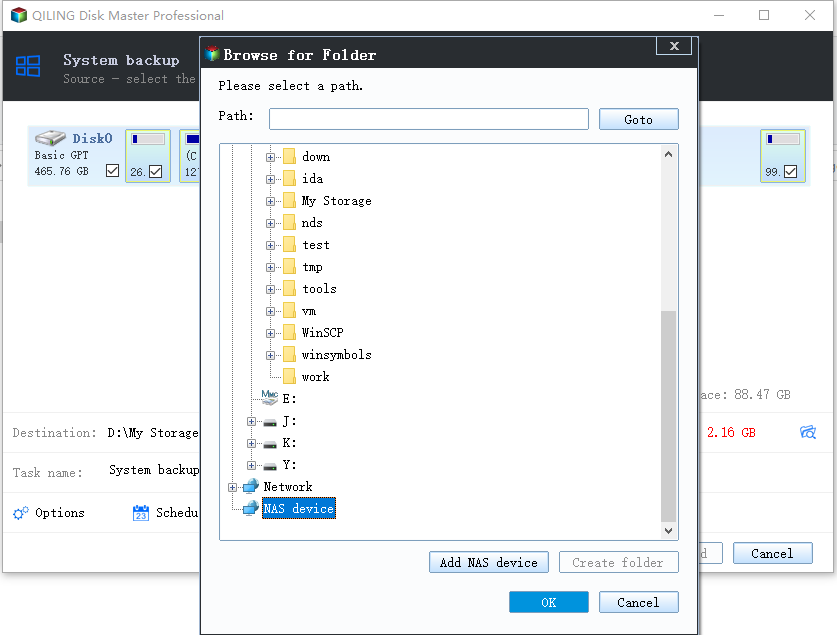
Step 2. The System Backup will automatically select all source parts by default, so you only need to choose the destination location. You can back up to another local disk or volume, or a network drive, as long as the destination is formatted as NTFS.
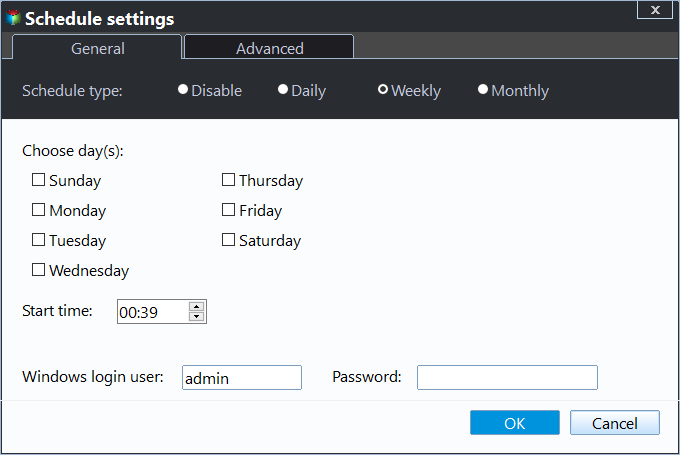
Step 3. After selecting the destination place, click "Schedule Backup". A window will appear where you can set automatic backups. Choose "Enable Schedule Backup" and select "Weekly" to set the backup frequency, then choose the specific day and time to run the backup.
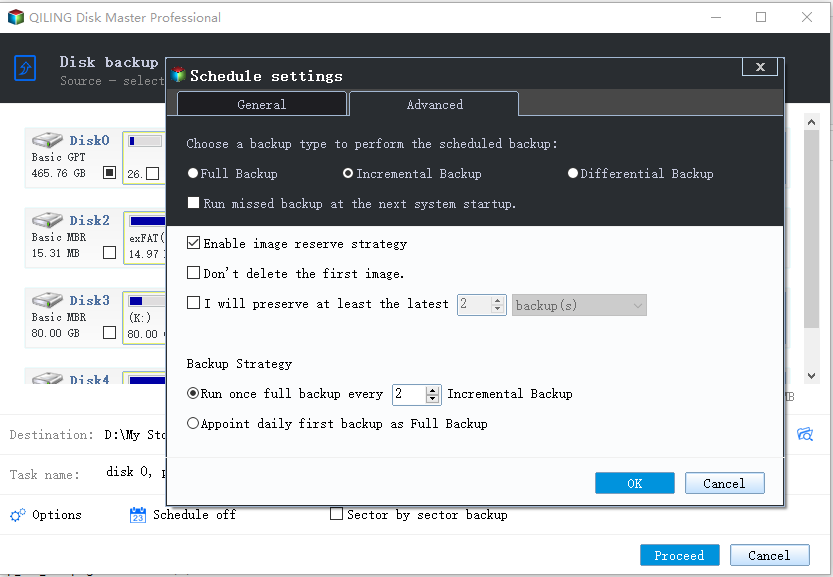
Step 4. (Optional) Click Backup Scheme in the Schedule window.
You can set the scheduled backup to be performed as a full, incremental, or differential backup.
To free up space on the backup destination drive, enable automatic cleanup of outdated backup images by selecting a deletion mechanism. This will help to automatically delete unnecessary backup files.
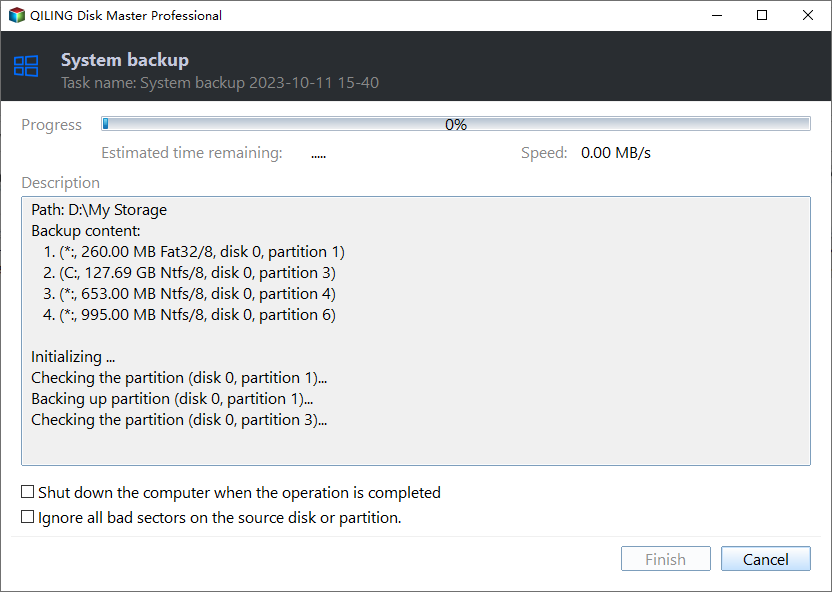
Step 5. After all the settings, click Proceed to start the progress.
Part 3. Auto backup Windows Server 2016 using Qiling Disk Master
Qiling Disk Master is the best enterprise backup software, providing a convenient and reliable solution for centralized backup management of all Windows operating systems.
- A software that allows you to create system, disk, or partition backups for multiple Windows PCs and Servers, supporting Windows 11/10/8.1/8/7 and Windows Server 2022/2019/2016/2012 (R2)/2008 (R2).
- You can save backup images on a local disk, external hard drive, network share, or NAS device.
- You can schedule a backup task to run daily, weekly, or monthly, using the full, incremental, or differential backup method.
Get this powerful enterprise backup software and learn how to automatically backup Server 2016.
Step 1. Install and run Qiling Disk Backup, then log in with the default username and password, both of which are "admin", by clicking the Log in button.
Step 2. To add a Windows Server 2016 device for backup, click on "Source Device" followed by "Windows" and then "Add Windows Device". You will then need to enter the device's IP address, username, and password.
Step 3. Create a new backup task.
Summary
You can create automatic server backups using Qiling Disk Master and Qiling Disk Master, allowing you to schedule backups at your desired frequency. This ensures you're always prepared in case of data loss, with backup images readily available.
Qiling Disk Master offers a range of features, including a PXE Boot Tool that allows for synchronous booting of multiple computers, and Qiling Disk Master Technician Plus, which provides unlimited billable technical services and enables portable version creation by copying the installation directory.
Related Articles
- Windows Server Backup Limitations You Should Know
Do you use Windows Server Backup to perform backups in Windows Servers and find it fails sometimes? It's time for you to learn Windows Server Backup limitations and get the best alternative. - Create Windows Server Backup Incremental to Network Share with Ease
Want to perform Windows Server Backup incremental to network share? This guide will show you 2 methods to make it. Applied to Windows Server 2003, 2008, 2012, 2016, 2019 and 2022. - Easiest Way to Clone Windows Server 2012 to New Hard Drive
How to clone Windows Server 2012 to new hard drive? This article provides you with powerful software to help you do this. Read this guide to get the easiest method. - How to Use File Sync in QILING disk master Software
File Sync is an utility that has been designed to be easy to use and quick to update two folders in two different places. - Windows 10 Backup Error Code (0x807800C5) – Why & How to Fix
Are you experiencing the Windows 10 backup error code (0x807800C5)? This guide will show you why the error occurs and how to fix it. Moreover, we'll provide an alternative to Backup and Restore, which can help you create a system image with ease. - Windows 10 Backup Keeps Failing? Solutions to Fix It Quickly
If you're using Windows Backup and Restore to back up files and system, but it keeps failing, you're not alone. Here we will show you why it occurs, and some solutions to fix Windows 10 backup keeps failing issue quickly.