Convert to MBR Disk Not Available in Windows
Why Convert to MBR Disk is unavailable
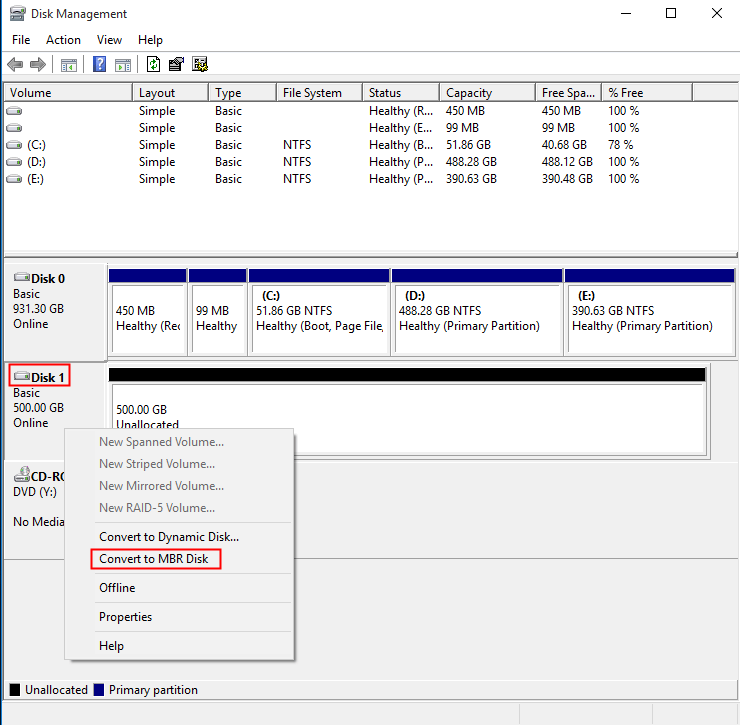
Disk Management only enables Convert to MBR Disk when the GPT disk is empty. The option may also be unavailable on the running system disk, on read-only media, or when the disk has damaged partition metadata.
Check whether MBR is really needed
MBR is mainly required for old BIOS computers or legacy tools. It supports only four primary partitions and about 2TB per disk. If your computer supports UEFI, GPT is usually the better choice.
Method 1. Convert an empty GPT disk to MBR
Step 1. Move all files from the target disk to another location.
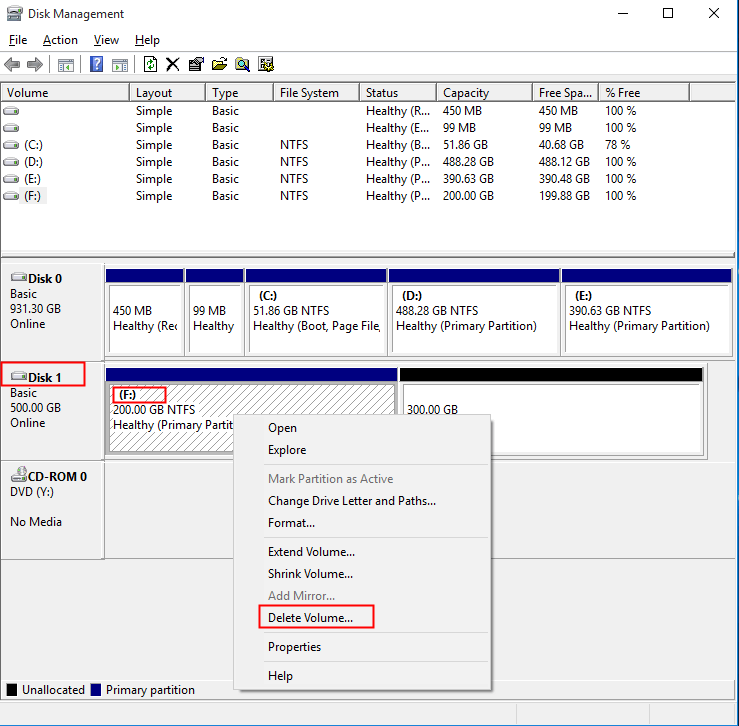
Step 2. Open Disk Management, right-click every volume on the GPT disk, and choose Delete Volume.
Step 3. Right-click the disk label and choose Convert to MBR Disk.
Method 2. Convert with DiskPart after backup
Step 1. Open Command Prompt as administrator.
Step 2. Run these commands carefully. The clean command erases the selected disk.
diskpart
list disk
select disk X
clean
convert mbr
exit
Step 3. Return to Disk Management and create new partitions on the MBR disk.
Method 3. Back up before changing boot disk style
 Qiling Disk Master
Qiling Disk Master can create a disk backup before conversion so you can restore files if the disk is cleaned or the computer cannot boot.
Step 1. Connect an external hard drive, another internal disk, or a network location with enough free space for the backup image. Do not save the backup image on the GPT disk you are going to convert.
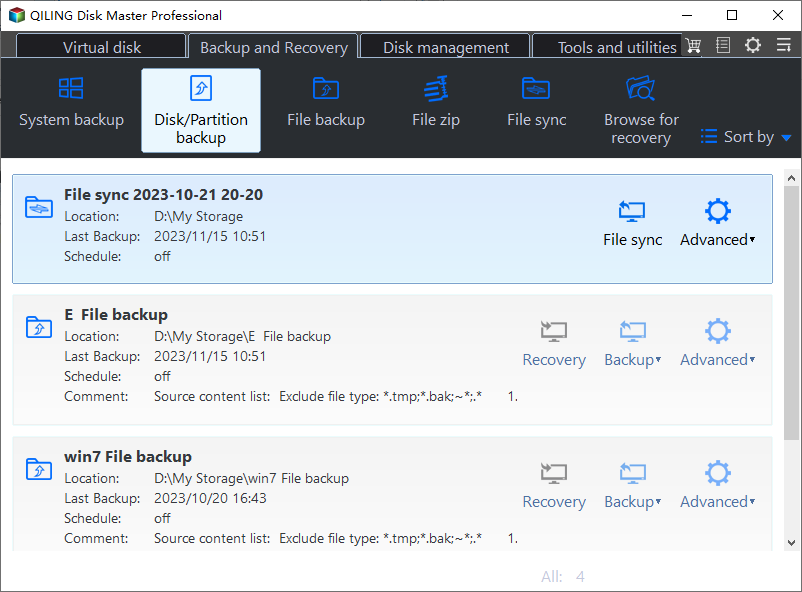
Step 2. Open Qiling Disk Master and choose Backup > Disk Backup. This option is better than copying files manually because it backs up the disk layout and all partitions together.
Step 3. Select the GPT disk or the required partitions directly in the source area. If it is a boot disk, include the EFI/System, MSR, Windows, and recovery partitions so the whole disk can be restored later.
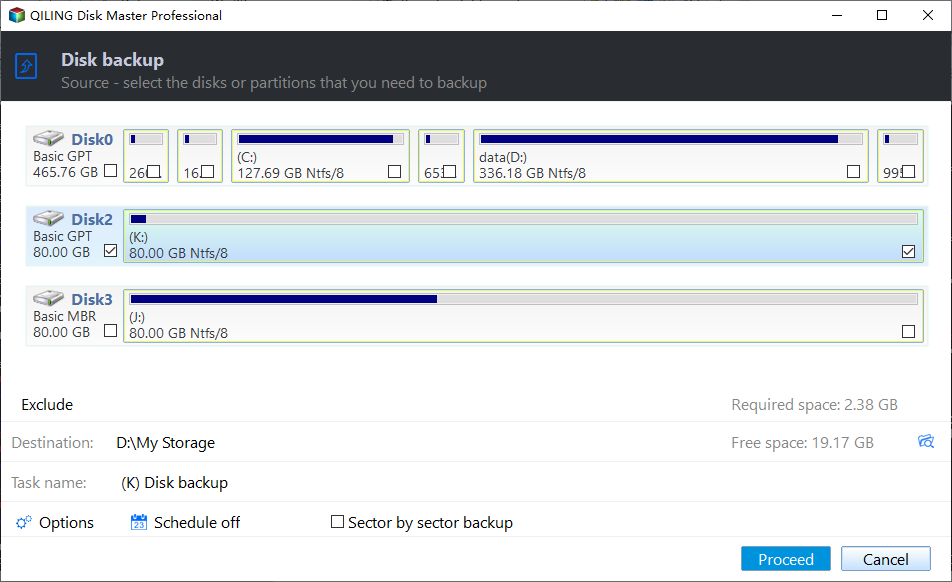
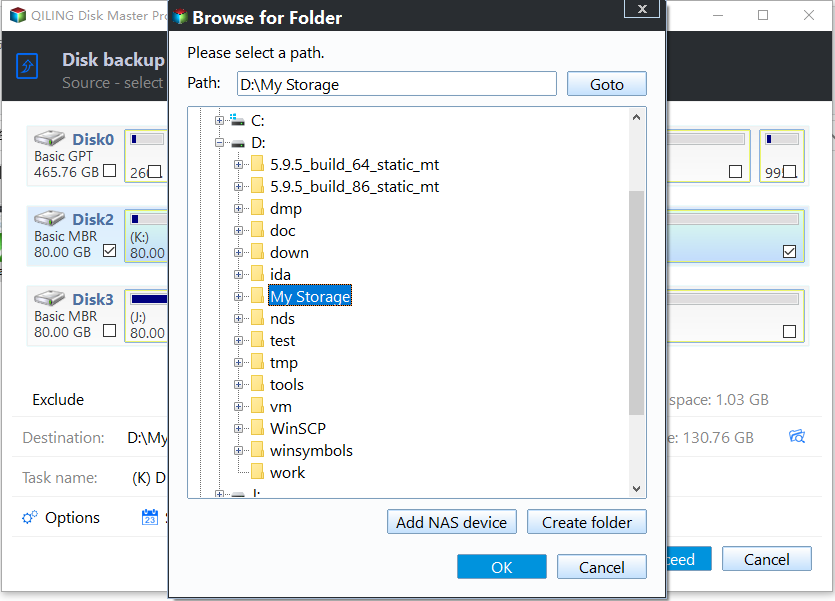
Step 4. Select the destination path on another disk, external drive, or network folder. Check the disk letter carefully so the backup is stored away from the disk that may be cleaned or converted.
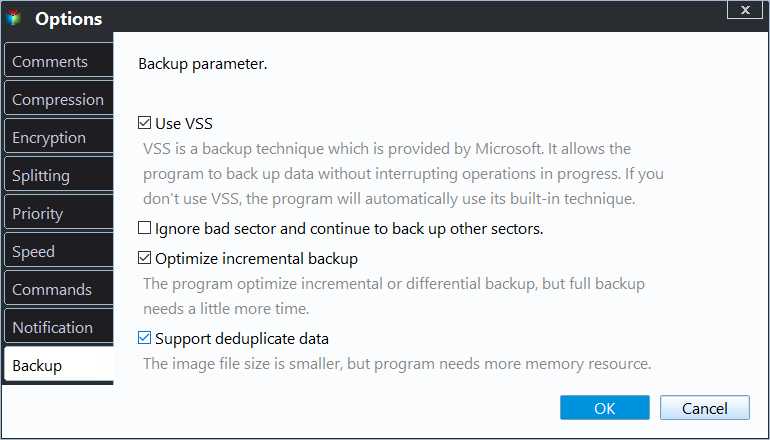
Step 5. Open Options if you need compression, splitting, password protection, or VSS settings. Keep VSS enabled when backing up a running Windows system so files can be copied consistently.
Step 6. Review the source disk and destination path, then click Proceed to start the backup. Wait until the task is complete and do not disconnect the destination drive during the process.
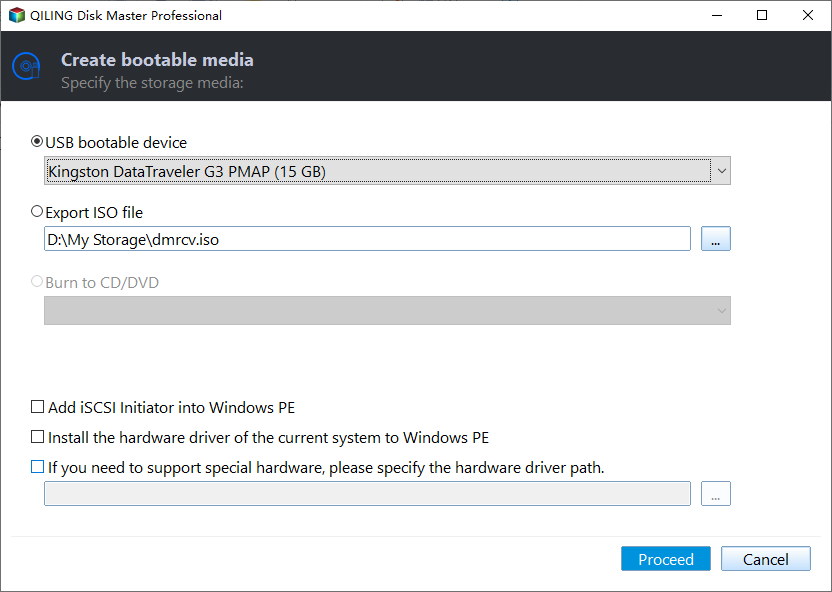
Step 7. Create bootable media from Qiling Disk Master before converting a boot disk. If Windows fails to start after the GPT-to-MBR change or BIOS boot mode adjustment, you can boot from this USB and restore the disk image.
Step 8. Open the backup destination and confirm that the backup image exists. If possible, use the program to browse or check the backup image before deleting partitions, converting the disk to MBR, or changing firmware boot mode.
Conclusion
Convert to MBR Disk is unavailable mainly because the disk still has partitions. Back up data, confirm MBR is necessary, then convert only the correct disk.
Related Articles
-
Convert GPT to MBR without Data Loss Using Command Prompt
Understand GPT-to-MBR conversion choices and data protection steps. -
How to Solve "The Selected Disk Is of the GPT Partition Style" on Windows
Fix installation errors caused by mismatched boot mode and partition style. -
How to Convert External Hard Drive to GPT without Data Loss?
Use GPT when an external disk needs more than 2TB capacity or more partitions. -
MBR2GPT Is Not Recognized in Windows: How to Fix
Resolve MBR2GPT recognition issues before converting a boot disk.
Products
Articles & Tutorials
- Data Recovery
- Data Backup
- File Recovery
- File Backup
- File synchronize
- System Backup and Restore
- Disk and Partition Clone
- Technical articles
- Disk Master Help
- Windows Deleted File and Disk Recovery Tutorials
- Windows File and Data Recovery Tutorials
- More Windows Tutorials for Install, Security, Files, and PC Tips
- Windows Boot, Repair, and Recovery Environment Tutorials
- Windows Backup Tutorials
- Windows Restore Tutorials
- Windows Clone and Migration Tutorials
- Windows Server Backup, Recovery, and Management Tutorials
- Windows Disk, Partition, and Storage Management Tutorials