Move AppData to Another Drive in Windows 11
Should you move the AppData folder?
AppData stores program settings, caches, profiles, and temporary files. Moving the entire AppData folder can break apps, updates, and user profiles. A safer approach is to move large app caches, game libraries, browser downloads, and user folders while keeping core AppData in place.
Safer options before moving AppData
- Use Windows Storage settings to change where new apps and files are saved.
- Move Documents, Downloads, Pictures, and Videos with the Location tab.
- Clean temporary files and browser cache.
- Move individual app libraries inside the app settings.
Method 1. Move app cache or download folders
Step 1. Open the app that uses a large cache, such as a browser, cloud sync tool, game launcher, or design program.
Step 2. Find its download, cache, or library location setting.
Step 3. Create a folder on another drive, such as D:\AppData-Moved\AppName.
Step 4. Change the app location and restart the app to confirm it uses the new folder.
Method 2. Move user folders to another drive
Step 1. Open This PC, right-click Downloads or Documents, and choose Properties.
Step 2. Open the Location tab and click Move.
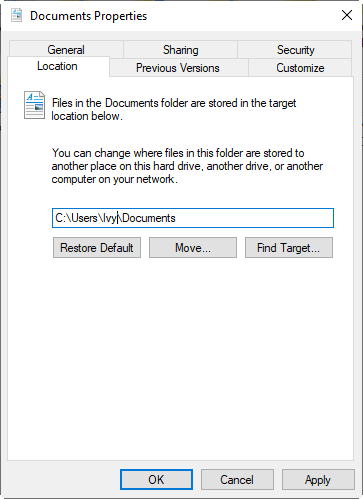
Step 3. Select a folder on another drive and confirm the move.
Step 4. Repeat for other large user folders.
Method 3. Back up before advanced path changes
 Qiling Disk Master
Qiling Disk Master can create a system backup before registry edits, symbolic links, or profile path changes that may affect Windows login.
Step 1. Connect an external drive with enough free space for the Windows system backup. Do not save the backup on the same partition where Windows and AppData are stored.
Step 2. Open Qiling Disk Master, select Backup, and then choose System Backup. The program selects the partitions required for Windows to start.
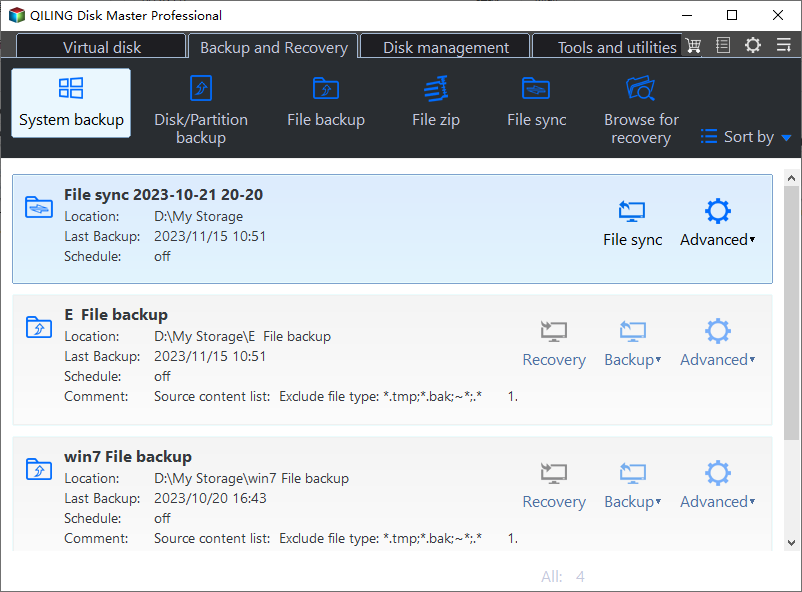
Step 3. Choose the external drive or a network location as the destination. Give the backup a clear name, such as Before AppData path change, so it is easy to identify later.
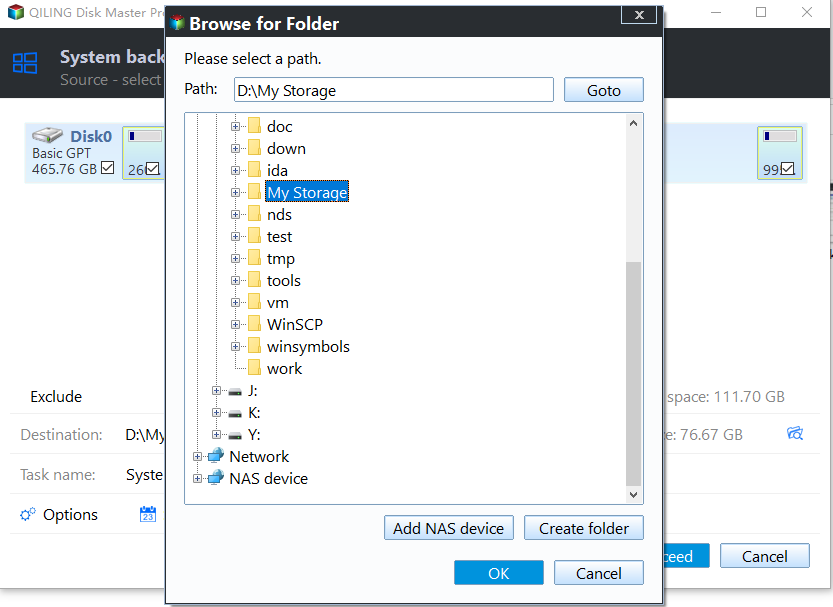
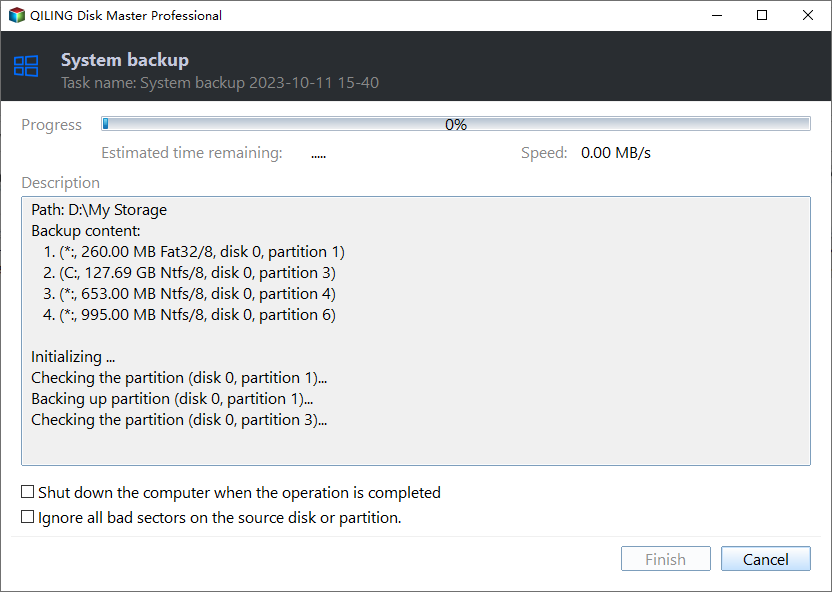
Step 4. Review the source partitions and destination, then click Proceed to create the backup. Keep the external drive connected until the task finishes.
Step 5. Create recovery media while Windows is working normally. This gives you a way to start the computer and restore the backup if a path change prevents Windows from loading.
Step 6. Export settings for any app that provides an export option, then change only one app cache, download location, or supported user folder at a time. Do not move the entire AppData folder.
Step 7. Restart Windows and test sign-in, app launch, updates, and file access after each change. If a problem appears, undo the most recent change or restore the system backup.
Conclusion
Moving the whole AppData folder in Windows 11 is risky. Move large app data and user folders instead, and create a system backup before any advanced path change.
Related Articles
-
How to Move Apps in Windows 11 Without Losing Data
Move installed apps and app data with less risk to Windows profiles. -
Delete Large Files Quickly in Windows
Locate and remove large files before deciding what to move to another drive. -
How to Move Windows 11 to Another Drive without Data Loss?
Migrate Windows 11 when the entire system needs to move to a larger drive. -
How to Backup Laptop Windows 10 Safely and Completely
Create a dependable system backup before moving application data or changing advanced Windows paths.
Products
Articles & Tutorials
- Data Recovery
- Data Backup
- File Recovery
- File Backup
- File synchronize
- System Backup and Restore
- Disk and Partition Clone
- Technical articles
- Disk Master Help
- Windows Deleted File and Disk Recovery Tutorials
- Windows File and Data Recovery Tutorials
- More Windows Tutorials for Install, Security, Files, and PC Tips
- Windows Boot, Repair, and Recovery Environment Tutorials
- Windows Backup Tutorials
- Windows Restore Tutorials
- Windows Clone and Migration Tutorials
- Windows Server Backup, Recovery, and Management Tutorials
- Windows Disk, Partition, and Storage Management Tutorials