Split Partition without Losing Data in Windows
What does splitting a partition mean?
Splitting a partition means taking free space from one large partition and creating another partition from it. Windows does this by shrinking the existing volume first, then creating a new simple volume in the unallocated space.
Before splitting a partition
- Back up important files on the partition.
- Run a disk check if the drive reports errors.
- Leave enough free space on the original partition after shrinking.
- Do not interrupt resizing operations.
Method 1. Shrink volume in Disk Management
Step 1. Press Win + X and open Disk Management.
Step 2. Right-click the partition you want to split and select Shrink Volume.
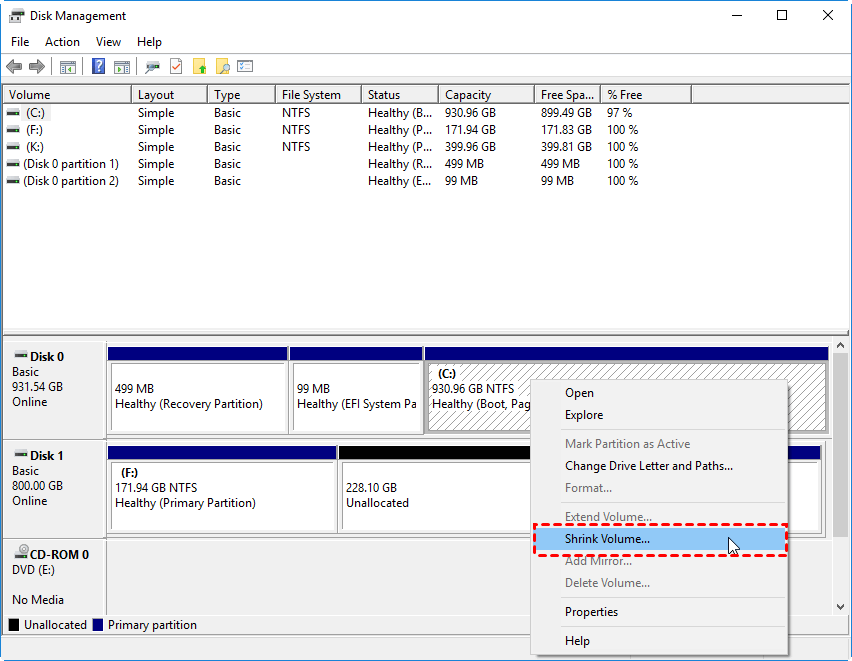
Step 3. Enter the amount of space to shrink in MB.
Step 4. Click Shrink and wait for unallocated space to appear.
Method 2. Create a new partition from unallocated space
Step 1. Right-click the unallocated space created by shrinking.
Step 2. Choose New Simple Volume.
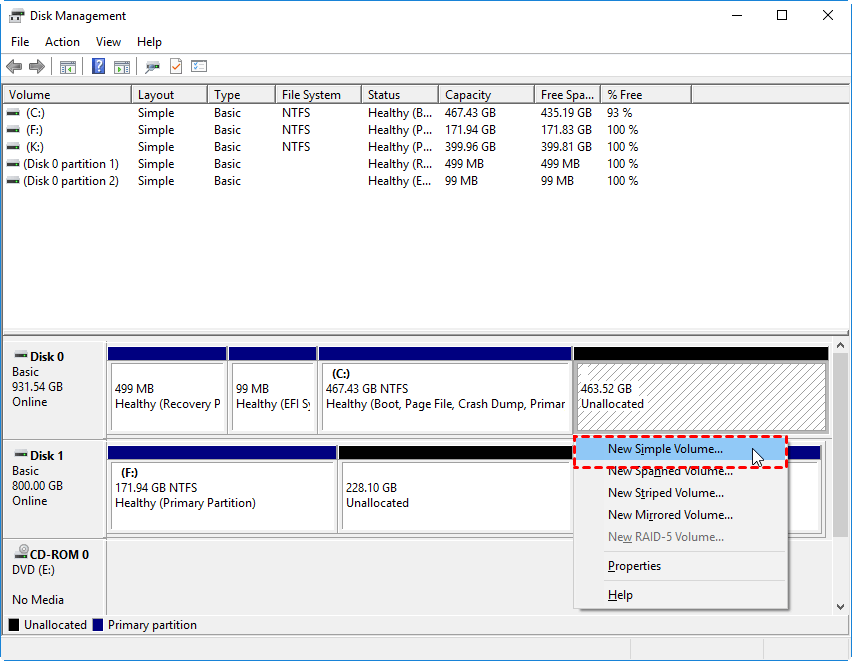
Step 3. Set volume size, drive letter, file system, and label.
Step 4. Finish the wizard and check the new partition in File Explorer.
Method 3. Split partition with preview
 Qiling Disk Master
Qiling Disk Master lets you preview partition resize and creation operations before applying them, which helps avoid choosing the wrong disk or size.
Step 1. Back up important files from the partition you plan to split. Confirm that it has enough unused space for both the existing files and the new partition.
Step 2. Open Qiling Disk Master, locate the correct disk in the disk map, right-click the large partition, and choose Split Partition.
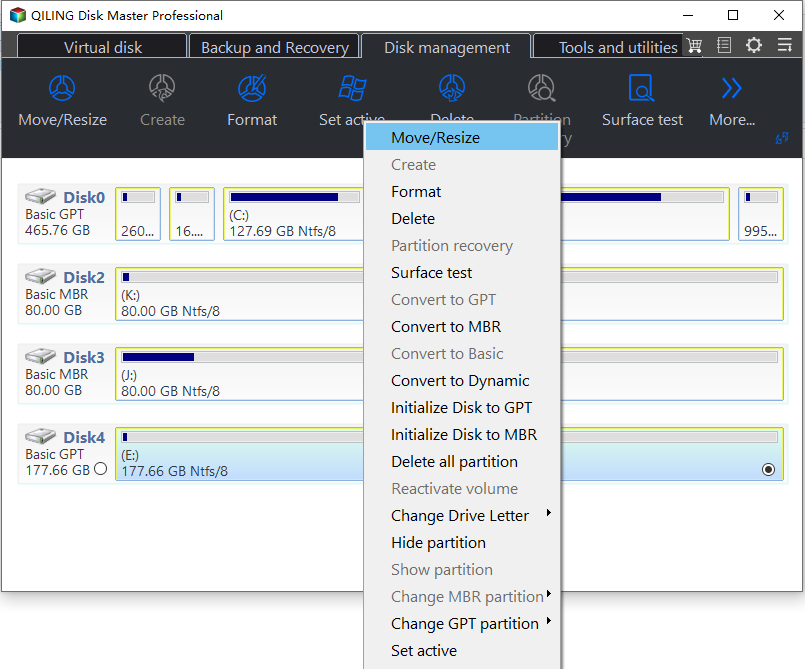
Step 3. Drag the divider or enter the size for the new partition. Leave enough space on the original partition for Windows, installed programs, and future updates.
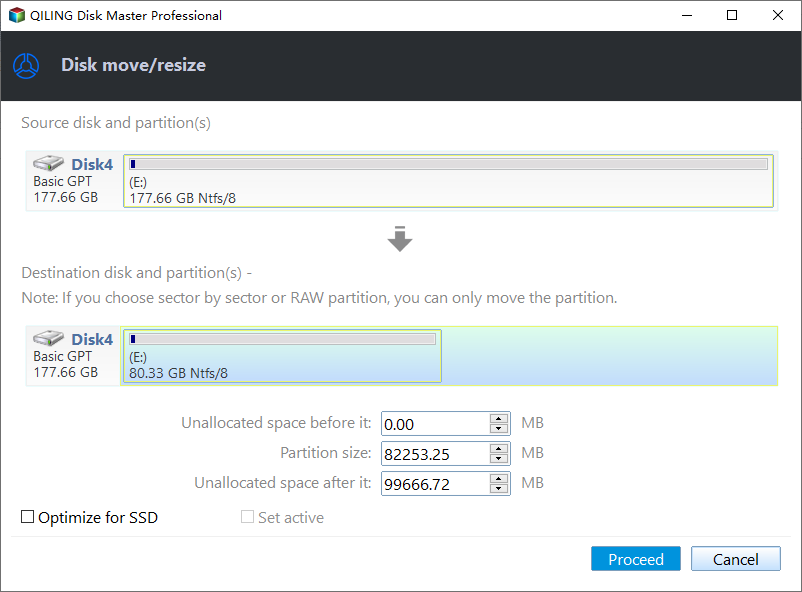
Step 4. Set a drive letter and label for the new partition, then check that the new layout shows two partitions on the intended disk.
Step 5. Review the pending operation and click Proceed. Do not turn off the computer or disconnect the disk until the split is complete.
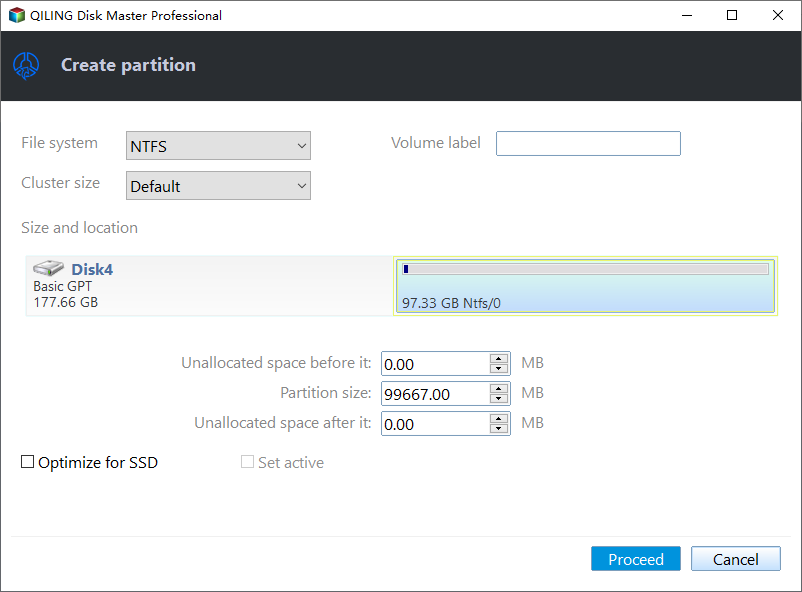
Step 6. Open File Explorer after the task finishes to confirm the new drive appears and that files on the original partition are still accessible.
Conclusion
To split a partition without losing data, shrink the volume first and create a new partition from the released space. Backups are still important because resizing changes disk layout.
Related Articles
-
Free Merge Partitions without Losing Data in Windows 11/10/8/7
Combine partition space after checking backups and partition order. -
Shrink Volume with Disk Management in Windows 11, 10, 8, 7
Shrink partitions safely and understand common shrink limits. -
How to Create Partition with Qiling Disk Master?
Create a new partition after releasing unallocated disk space. -
Merge Logical Drive with Primary Partition in Windows
Use adjacent unallocated space to expand a primary partition after reorganizing disk volumes.
Products
Articles & Tutorials
- Data Recovery
- Data Backup
- File Recovery
- File Backup
- File synchronize
- System Backup and Restore
- Disk and Partition Clone
- Technical articles
- Disk Master Help
- Windows Deleted File and Disk Recovery Tutorials
- Windows File and Data Recovery Tutorials
- More Windows Tutorials for Install, Security, Files, and PC Tips
- Windows Boot, Repair, and Recovery Environment Tutorials
- Windows Backup Tutorials
- Windows Restore Tutorials
- Windows Clone and Migration Tutorials
- Windows Server Backup, Recovery, and Management Tutorials
- Windows Disk, Partition, and Storage Management Tutorials