Auto Backup Folders to USB Drive in Windows 10 (When Plugged in)
The necessity of auto backup files & folders
In today's digital age, it's crucial to back up important files regularly to avoid loss due to unforeseen events such as hard drive failure, virus attacks, blue screens, electricity failures, or natural disasters that can damage your computer. To minimize loss, it's essential to perform backups on a regular basis.

Backing up computer files and folders is an ongoing process, as they are constantly changing. Even after initial backups, new documents and modified folders require additional backups. For those without a regular backup habit, this process can be seen as troublesome. However, performing auto backups can save time and provide convenience, making it the best choice for maintaining a secure and up-to-date backup system.
How to auto backup folders to USB drive in Windows 10?
Setting up auto backup files and folders to USB drive have distinctive advantages. For instance, users can restore their documents at any time or on any device as long as their USB drives are around. Please keep reading below, I'll introduce you to two backup software and how to use them step by step.
Way 1: Schedule backup folders in Windows 10 via File History
File History is a free software that automatically backs up files to a USB drive, and is also built-in to Windows 10. It only saves copies of files from specific folders, including Documents, Music, Pictures, Videos, and Desktop, as well as OneDrive files available offline on your PC. If you have files elsewhere that you want to back up, you can add them to one of these folders.
To perform an auto backup of a folder to a USB drive via File History, connect the USB drive to your computer and ensure it's recognized. Then, go to Settings > Update & Security > Backup, and select the drive as the backup location. Next, go to the "Back up" tab and select the folders you want to back up, and set the backup frequency to your preference.
Step 1. Open File History in Windows 10, you have two ways in the following.
To access the backup settings, go to the Start menu, click on Settings, then select Update & Security, and finally click on Backup.
To access your backup settings, tap the search box at the top of the screen, type "backup settings" and select it from the search results.
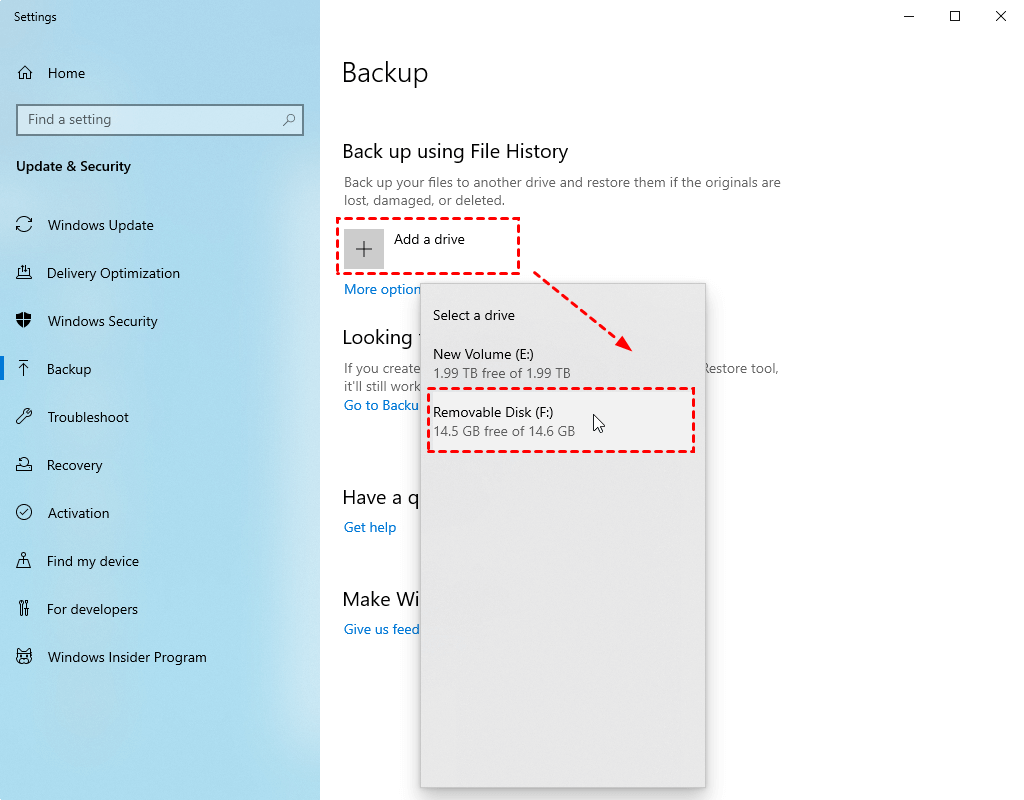
Step 2. To back up using File History, click or tap the "+" next to "Add a drive" and select the connected USB drive.
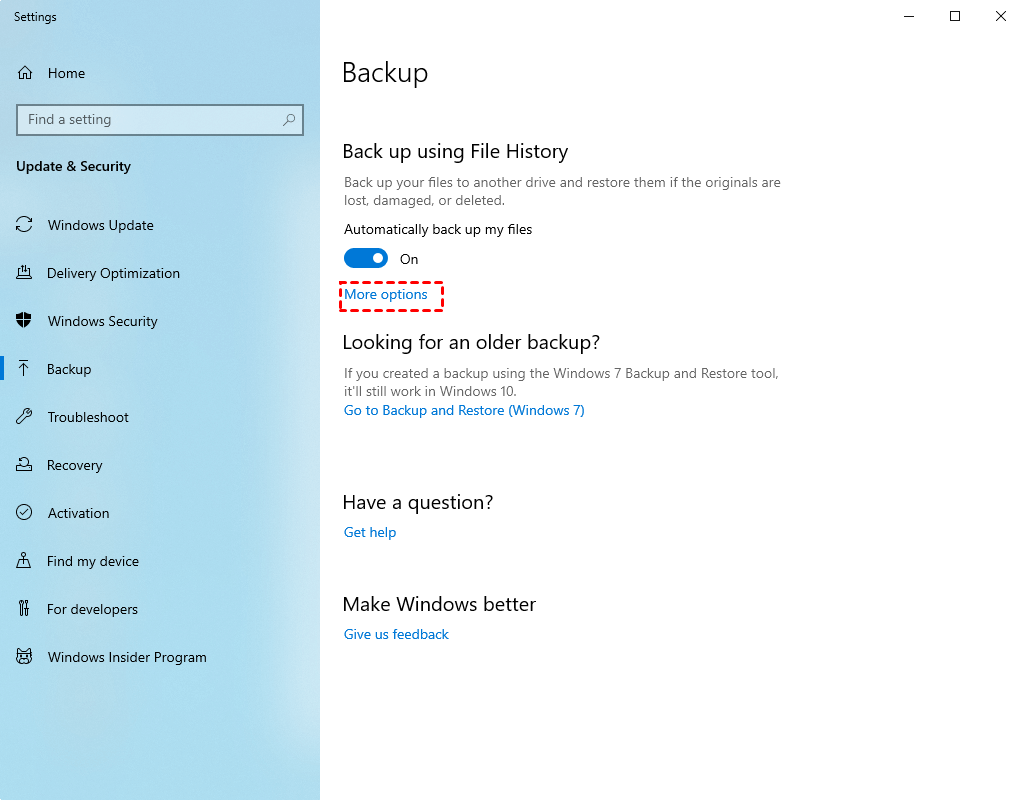
Step 3. After clicking "More options", you can configure how often File History backs up and how long it keeps saved versions. You can also choose which folders to back up.
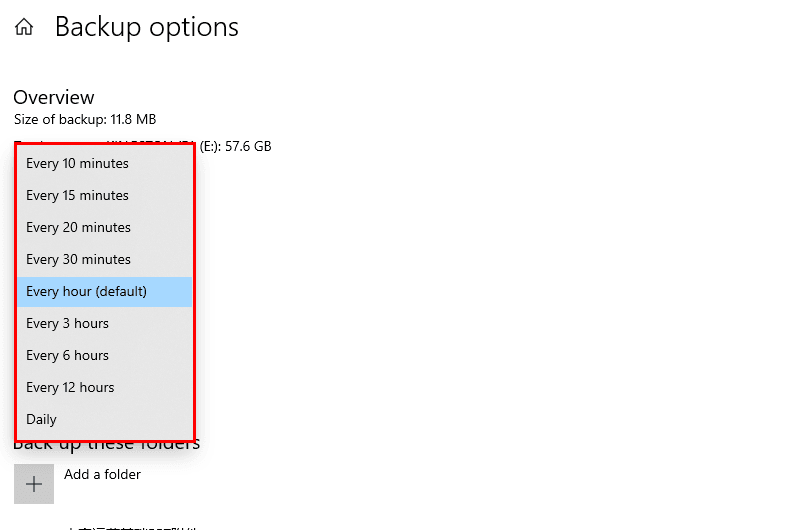
Windows 10's File History can be set to auto backup folders at intervals such as every 10 minutes, 15 minutes, 20 minutes, 30 minutes, 1 hour, 3 hours, 6 hours, 12 hours, or once per day, allowing users to customize the backup frequency to suit their needs.
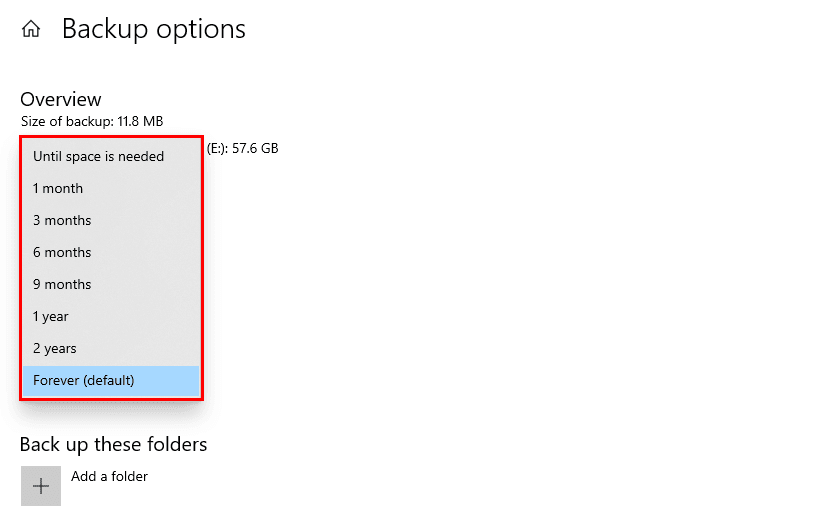
You can choose to keep saved backups forever by default, or set a time limit such as one month, three months, six months, nine months, one year, or two years. If no time limit is set, backups will not be automatically deleted to free up disk space.
Way 2: Automatic backup folders to USB drive via Qiling Disk Master
In addition to the built-in File History feature, Qiling Disk Master Professional is a backup software that allows for automatic backup of a Windows 10 folder to a USB drive, and also backs up the folder when the USB drive is plugged in.
The software runs backups using the methods you choose, including Full Backup, Incremental Backup, or Differential Backup. The latter two options backup only changed files, making them ideal for scheduled tasks.
Besides, you can automatically delete old backup images based on their quality, time, or frequency (daily, weekly, monthly) with the automatic backup cleanup feature.
To perform an auto backup of a Windows folder to a USB drive using the freeware Qiling Disk Master Professional, download, install, and launch the software.
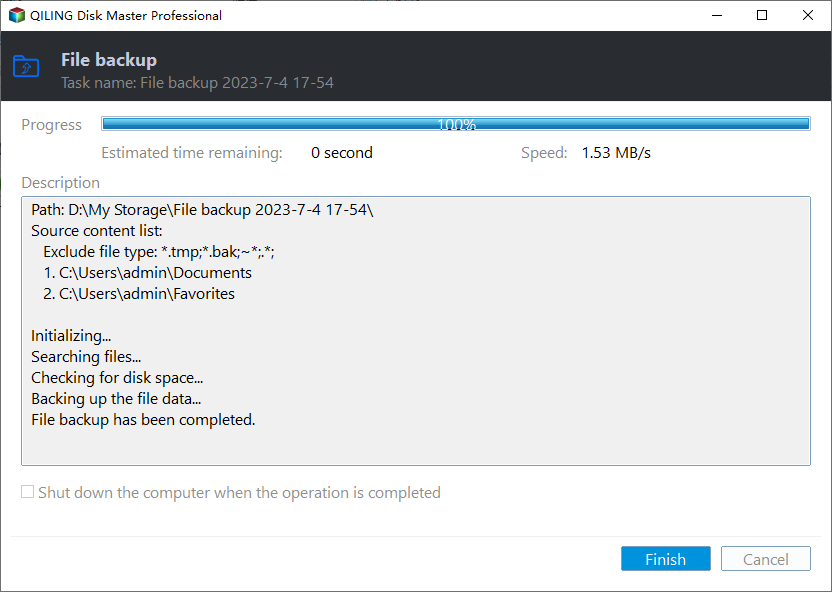
Step 1. On the main page of Qiling Disk Master, click "Backup" and then "File Backup".

Step 2. Select specific folders you want to backup.

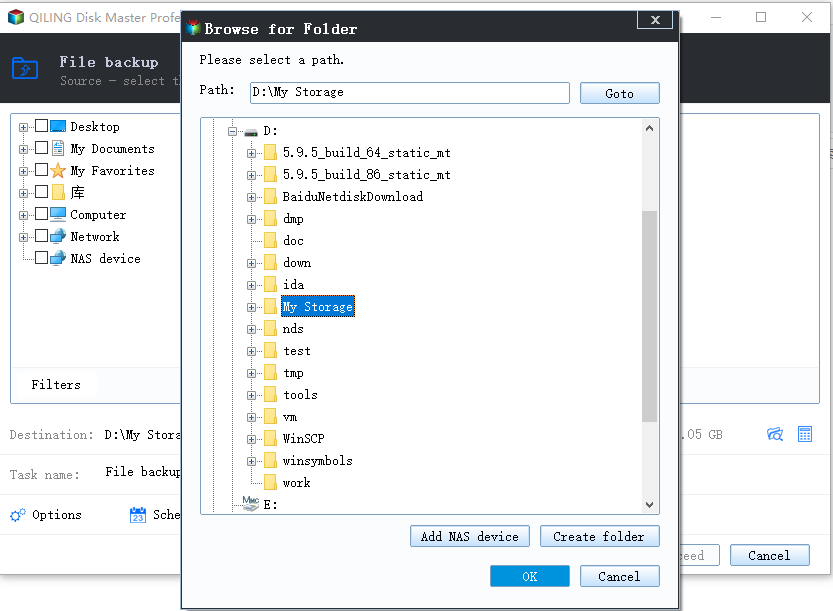
Step 3. Select a destination path by clicking the second bar and choosing a recognized USB drive in the pop-up window.
Step 4. To configure how often you want to auto backup a folder to a USB drive, click on "Schedule Backup" and choose from 5 options: Daily, Weekly, Monthly, Event trigger, and USB plug in.
- For Daily, you need to set a particular time or intervals at a day.
- For Weekly, you can select a backup day from Monday to Sunday and set a specific time.
- For Monthly, you can schedule a specific day and time of the month.
- For Event trigger, you can choose from system startup, system shutdown, user logon, and user logoff as the event to trigger the action.
- For a USB plug in, it's suggested if you don't want to keep the USB always connected on a computer, but need to keep changes made later automatically.

Step 5. Click Proceed after all configurations.
Note: To summarize, if you've chosen a daily, weekly, or monthly auto operation, you need to plug in the USB drive at the scheduled time to ensure the process completes successfully.
★ How to backup files to Qiling Cloud
There's a growing trend to store files in the cloud, which is safer than a USB drive as it's less likely to get lost or infected. You can backup files to Qiling Cloud if you have an account, and even get 1TB of free storage for 15 days after signing up.
Conclusion
Data backup is a crucial part of our daily life, as it helps prevent the loss of precious files and folders due to unpredictable situations. To ensure our important data is safe, it's essential to master at least one method to auto backup folder to a USB drive in Windows 10.
Both methods can achieve the desired result, but using the USB Plug in feature in Qiling Disk Master Professional is a more convenient option, especially if you don't want to constantly connect the USB drive to your computer. This feature simplifies the process and also allows for system, disk, or partition backup. It's worth trying.
Related Articles
- How to Backup Files on USB Flash Drive Windows 10/8/7
- Best Automatic Backup Freeware for USB Flash Drive
- Easiest| Backup Flash Drive Automatically When Plugged In
- Backup and Restore Windows 8.1 with/Without Built-in Tool [Full Guide]
We will introduce the built-in backup tools of Windows 8.1 in this article. You can also find the full guide to back up and restore Windows 8.1 with/without the built-in tools. We recommend you use Qiling Backup for its quick backup process and user-friendly interface. - How to Recover Permanently Deleted Pictures from Laptop Easily
Deleted your pictures/photos permanently from laptop and want to retrieve them? Learn efficient solutions to recover permanently deleted pictures/photos from this page. - Restore Deleted Files in Windows 10/8/7 for Free
If you find your important files deleted accidentally, don't stress out until you try these 4 methods to restore deleted files in Windows 11/10/8/7.