Best Synology File Recovery Tools to Recover Files on/from NAS
Need to perform Synology NAS data recovery
NAS stands for Network Attached Storage, an external storage device connected to the network, allowing multiple users and computers to store data in a central location, making it easy to share files among various connected clients.
According to the 3-2-1 backup rule, having at least three data copies, including one local and two on different devices, is the safest approach. Many users back up their operating system, user folders, or entire PC to external disks to prevent data loss from system failures or updates. Some also use NAS (Network-Attached Storage) for large families sharing multimedia files or those needing high storage space, which can be a cost-effective choice in the long run.
Two Synology NAS users have encountered some confusing problems while using their NAS devices.
♨ Case 1: "Hi all, I had accidentally deleted a wrong shared folder on my DS. And, all of my critical data is now gone. A dumb mistake. I am hoping there's a way to recover this deleted shared folder or the data behind it."
♨ You can try using the Synology DiskStation Manager's built-in file recovery tool, or a third-party recovery software like Qiling Disk Master, to scan your NAS for deleted files. Be sure to stop using the NAS immediately to prevent overwriting the deleted files. If you're unable to recover the files, you may want to consider contacting Synology support or a professional data recovery service for assistance.
Inevitably, operating errors will occur, leading to the loss of important files. This can happen on a computer or even on a Synology NAS, resulting in the need for Synology data recovery.
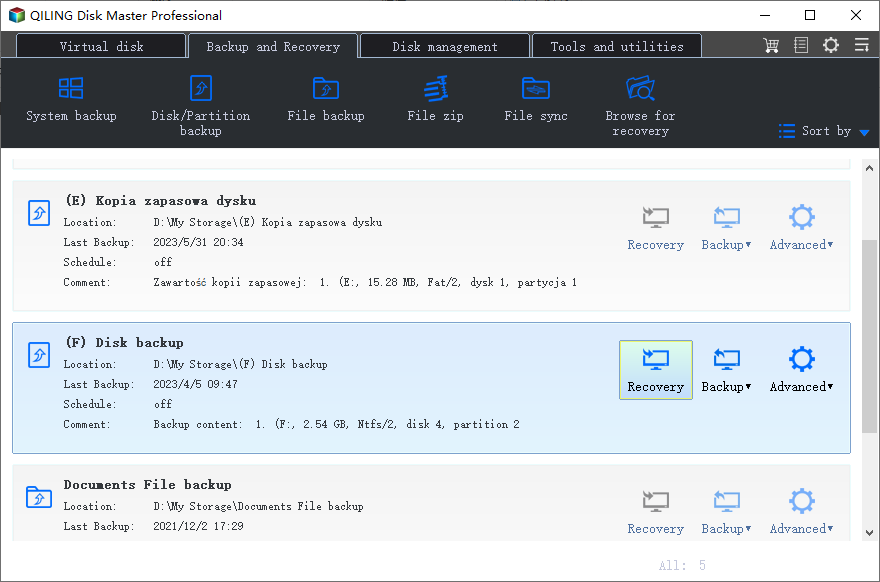
Recover deleted files on Synology NAS
If you accidentally delete files on your Synology NAS, you can easily retrieve the lost files using the Recycle Bin feature on DSM, which is enabled by default when creating a shared folder. If it's not turned on, you can manually enable the Recycle Bin feature to recover deleted files.
To recover deleted files on a Synology NAS, follow these steps: first, ensure that the " recycle bin" or "trash" feature is enabled on your NAS, as this will allow you to recover deleted files; next, navigate to the "Control Panel" on your NAS and select the "Recycle Bin" or "Trash" option; from there, you can select the files you want to recover and click "Restore" to retrieve them; alternatively, if the files are not in the recycle bin, you can use a third-party recovery software or the built-in "Disk Cleanup" tool to scan the NAS for deleted files and recover them.
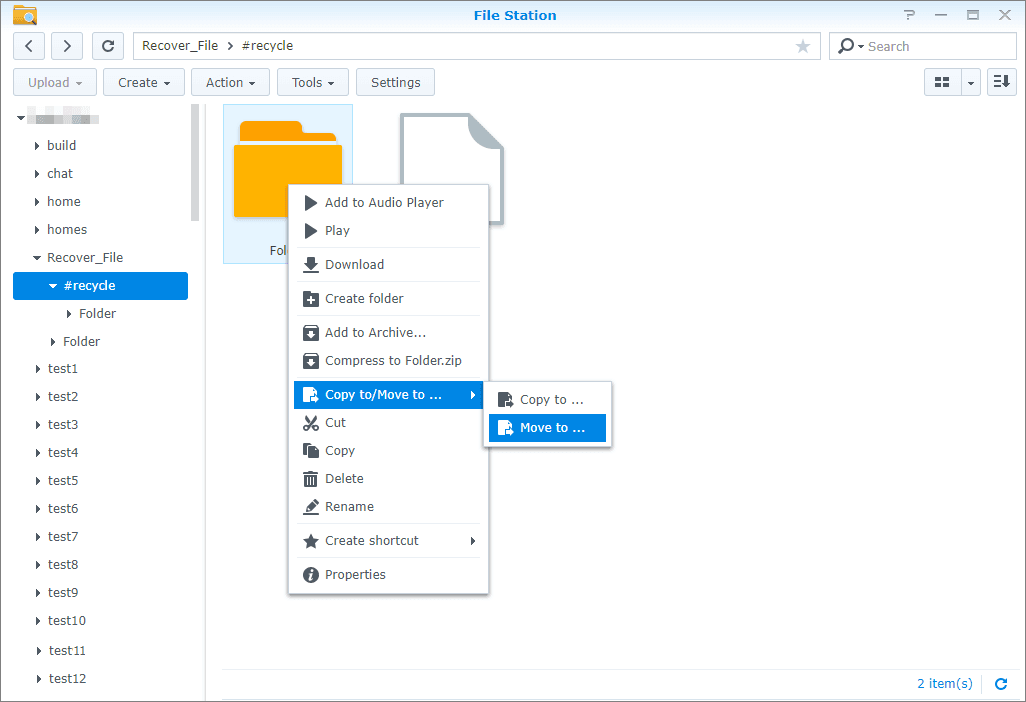
- Launch File Station, navigate to the shared folder, and enable the Recycle Bin feature.
- Go to the #recycle subfolder.
- Right-click on the file or folder to be retrieved.
- To restore a deleted file, go to the "Copy to/Move to" option and select "Move to" to relocate the file to the desired location.
✍ If you didn't enable Recycle Bin but want to recover deleted files or folders, you can use Hyper Backup on DSM instead.
How to recover deleted PC files from Synology NAS
Synology NAS If you're experiencing issues with your Synology NAS and need to restore your backed-up data, you can use either Method 1 or Method 2. Method 1 is for backups created using the Backup and Restore tool on Windows 7, and Method 2 is for backups made with third-party software. If you used Backup and Restore, you can restore your files directly from the Synology NAS. If you used third-party software, you'll need to use that software to restore your backups. This way, you can recover your important data even when your NAS is not functioning properly.
Method 1. Synology data recovery via Windows built-in tool
You can use the Windows built-in Backup and Restore (Windows 7) tool to recover lost files. This tool allows you to create a backup of your files and folders, and then restore them if they are lost or deleted.
Step 1. To access backup settings, tap the Search button on the taskbar, type "backup" in the search box, click "Backup Settings" from the search results, and select "Backup and Restore (Windows 7)" in the pop-up window.
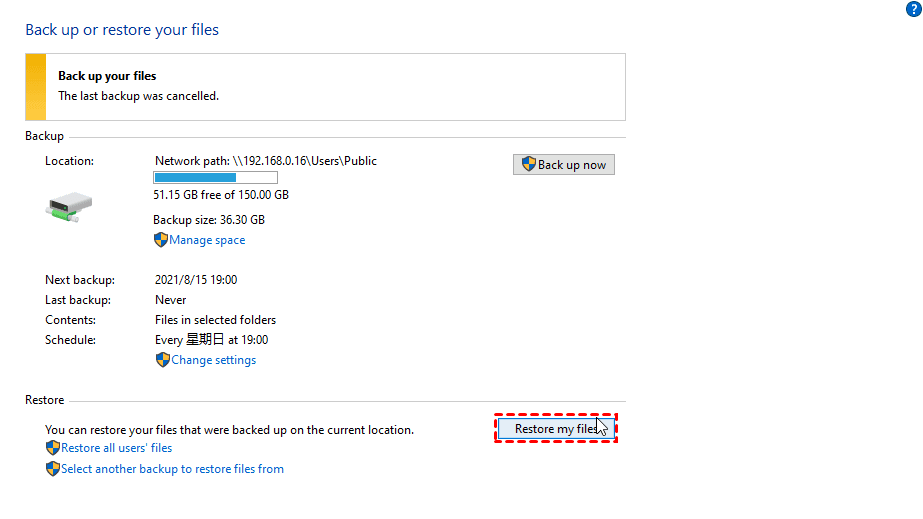
Step 2. To recover lost files from your Synology NAS, click on the "Restore my files" option. This will allow you to recover files that were accidentally deleted or lost due to a system crash.
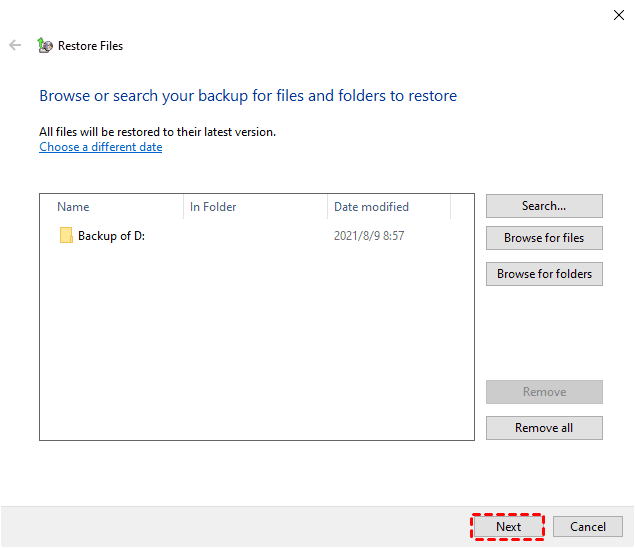
Step 3. In the Restore files page, click "Search, Browse for files or Browse for folders" to find files or folders you want to restore and select them, then click "Next" to proceed.
Step 4. Choose where to store your files: the original location or a new location, and click Restore to initiate the pending operation.
Method 2. Free Synology data recovery software—Qiling Disk Master
If you're looking for an easier way to recover files saved on Synology NAS, I highly recommend the best backup and recovery software, Qiling Disk Master. This software stands out among many others due to two main reasons.
✹ It is suitable for all Windows PCs and supports all NASA data recovery software can help you recover lost files from Synology, Seagate NAS, or QNAP devices, providing a solution for file recovery and disaster recovery.
✹ It allows you to back up data to NAS restore your data from the NAS backup. The NAS can also back up data to itself, as long as it is connected, and to other storage devices, such as cloud drives, USB drives, and local PCs.
The free Standard version of Qiling Disk Master includes various features, such as disk cloning, disk partitioning, disk wiping, and more, which can be explored by downloading and trying the software.
Here I use recovering deleted PC files from Synology NAS as an example to show you how to use this free software.
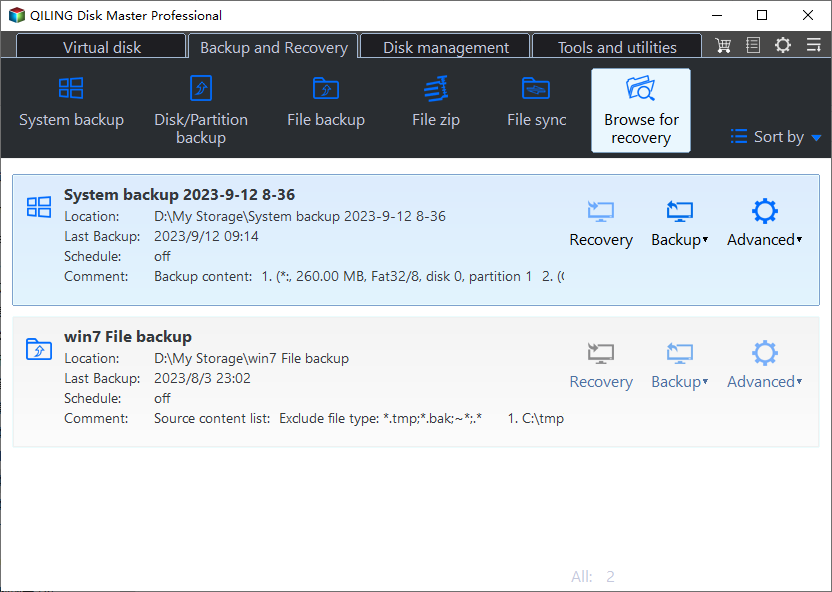
First of all, launch Qiling Disk Master Standard and click Restore, here are two ways provided to perform Synology NAS data recovery.
Way 1: Restore from a backup task
Step 1. Click Select Task.
Step 2. Select your file backup and click Next.
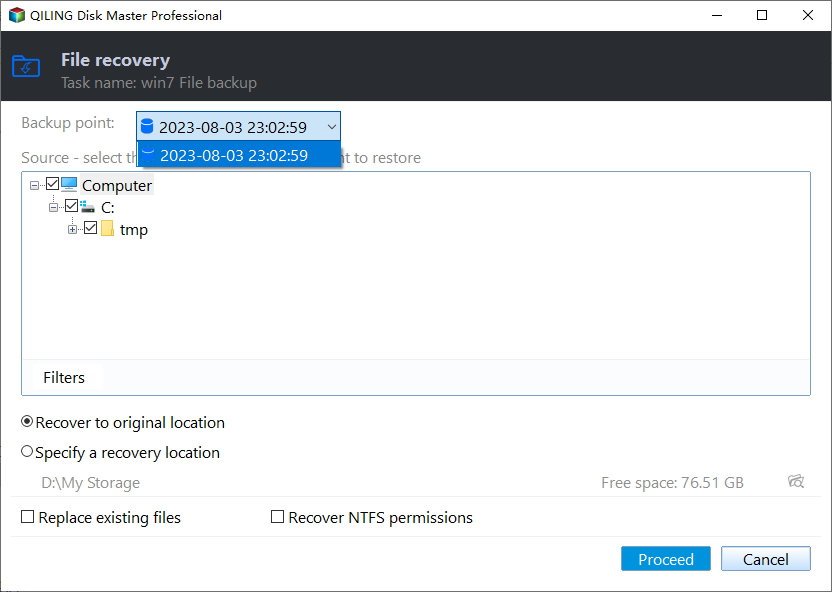
Step 3. Select the files you want to restore and click Next.
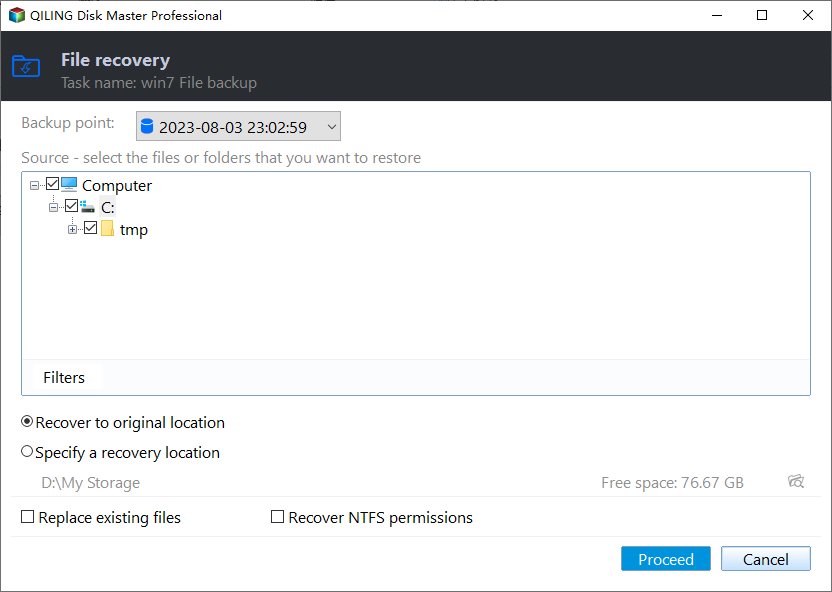
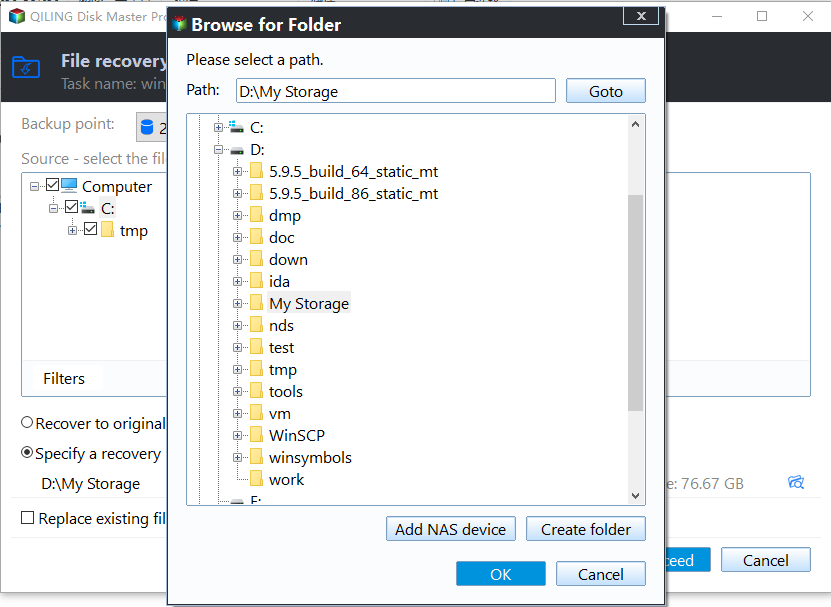
Step 4. Select a destination path to restore files and click Proceed.
Step 5. Wait until the operation has been completed and click Finish.
Way 2: Recover from an image file
Step 1. Click Select Image File.
Step 2. In the pop-up window, choose the backup saved on your NAS. And then click OK.
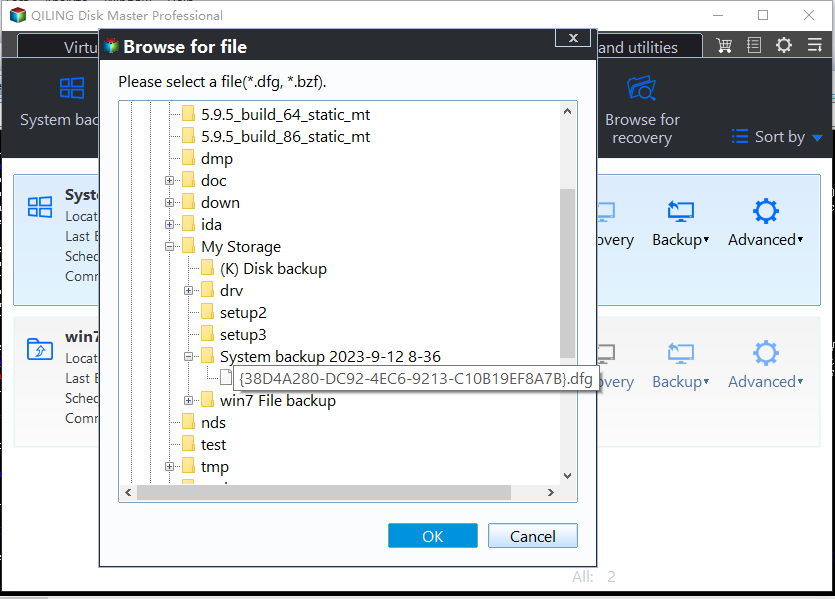
Note: If there is no Synology NAS path under NAS Devices, you can right-click it and select Add Share or NAS Devices in the drop-menu to add.
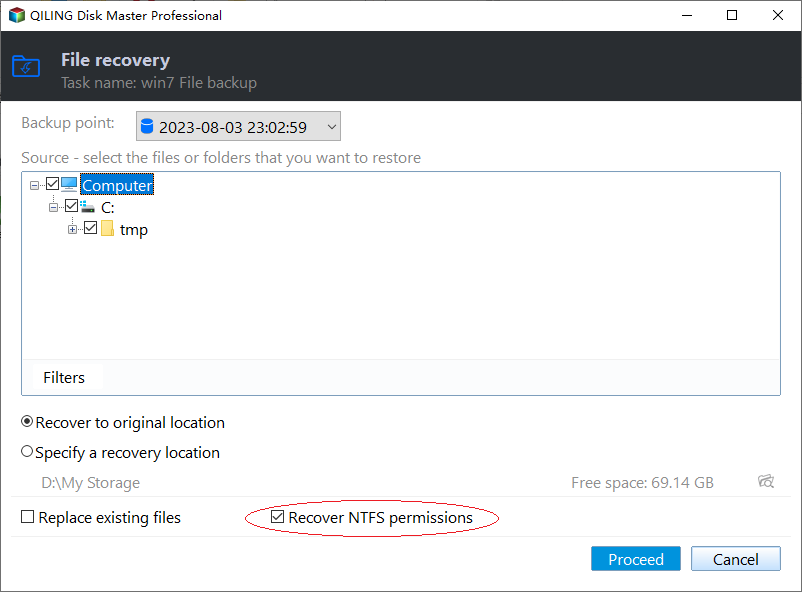
Step 3. Select files you want to restore and click OK.
Step 4. Select a destination path to restore files and click Proceed.
Step 6. Wait until the operation has been completed and click Finish.
Tips: ❀ You can check the Restore NTFS permissions option (available in the Pro versionThis option preserves the original ownership and permissions of the files or folders during the restore process.
Besides, you are still able to restore files from other backup solutions, such as system backup, disk backup, and partition backup.
To access all partitions on a virtual disk in Windows Explorer, you can use the "Explore image" feature. This will mount all the partitions to a virtual disk, allowing you to copy files from the image to another location.
Summary
You can use Synology's Qiling Disk Master Standard and Backup and Restore tools to recover deleted files from your NAS, as long as you have backed up your files in advance. If you accidentally delete a file backup on your NAS, the DSM software can also help you recover it.
Qiling Disk Master offers a range of convenient features, including the ability to create a file backup within just 5 steps and backup files to multiple storage options such as external hard drives, network drives, Google Drive, OneDrive, and USB flash drives. Its cloning function is also powerful, allowing for disk-to-disk clone, cloning an external hard drive to an internal drive, and more. Whether you need to back up data, restore NAS data, or clone a disk, this software provides an easy and convenient operation.
Related Articles
- Best NAS Backup and Disaster Recovery Solution in Windows 10/8/7
NAS drive isn't 100% safe. To ensure the data security, an efficient NAS backup and disaster recovery solution is required. If unluckily, you lost some data without any backup, you may need data recovery software to retrieve deleted files. - How to Free Backup Windows 7/8/10 Data to Synology NAS?
Synology Data Replicator has reached the end of its lifespan. What if you want to backup data on Windows 7/8/10/11 to Synology NAS? See this article and find your alternative way. - Easy Steps to Backup NAS to External Hard Drive
Easy-to-use and free NAS backup software will help you easily backup NAS to external hard drive. - How to Backup Sims 4 Saves in 2023 (Fully Protect Game Data)
As Sims 4 provides free downloads on various platforms, many new players flock into the Sims 4 community and excitedly explore this highly playable simulation world. This article will give you 5 ways to back up Sims 4 saves, help you better ensure game data security, and prevent the game crash caused by adding mods and cc in Sims 4. - How to Backup Windows 11 to Google Drive (OS and Files)
This tutorial shows you how to backup Windows 11 to Google Drive in two different ways. Whether you want to backup Windows 11 files or OS, here's a way to go. - What Is BSOD? How To Fix Blue Screen of Death on Windows 11
To fix the blue screen of death on Windows 11, follow our simple steps to troubleshoot and resolve this common issue quickly.