Easily Clone Windows 7 OEM including OEM Partition to SSD
Windows 7 OEM vs. Windows 7 OEM Partition
Windows 7 OEM is a version of Windows 7 available to computer manufacturers, tied to the computer it's first installed on and has an OEM license and product key.
The OEM partition is a small volume, typically under 100 MB, on a hard drive that stores system recovery programs, factory restore data, and diagnostic tools, allowing for easy Windows restoration or reinstallation with an OEM disk or from BIOS. It can also be deleted if found unnecessary.
Different manufacturers have different key combinations to access their OEM partitions, such as HP's F9 or Dell's F12, which can be used to restore the system to its factory settings.
In addition to the differences in partition formatting, the status of OEM partitions also varies. Some manufacturers, like HP, assign a drive letter to the OEM partition, making it visible in Windows Explorer, while others hide it, making it inaccessible through the operating system.
Why Clone Windows 7 OEM including OEM Partition?
The OEM partition serves as a last resort for system recovery or factory reset, typically used when experiencing system crashes or disk corruption, allowing users to restore their computer to its original state.
To avoid losing important data or running out of disk space, it's a good idea to clone the OEM partition in Windows 7 to an external storage device such as a flash drive or external hard drive. This way, you can safely delete the OEM partition on your computer to free up space, even if it only takes up a small amount of space, which can be significant for users with limited disk capacity.
Some users who upgrade their Windows 7 OEM to SSD may clone the OEM partition, but if they only clone the system drive or do a clean install, the OEM partition is not included. If the SSD has enough space, it's a good idea to keep the OEM partition installed.
Regardless of the situation that leads to cloning a Windows 7 OEM or OEM partition, the next step is to figure out how to clone Windows 7 OEM, including the OEM recovery partition.
How to Clone Windows 7 OEM including OEM Recovery Partition
To clone Windows 7 OEM including the OEM recovery partition, you can use a professional disk cloning software like Qiling Disk Master Professional, which can successfully clone the entire system, including the OEM recovery partition.
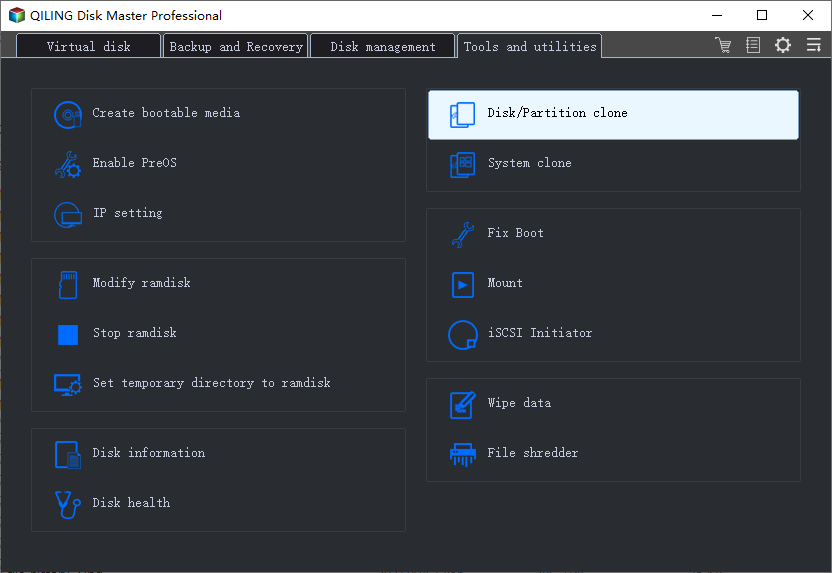
Qiling Disk Master provides an easy way to clone Windows 7 OEM from a hard drive to a solid state drive in Windows 11, 10, 8, 7, XP, and Vista. It offers three cloning methods: Disk Clone, System Clone, and Partition Clone, allowing you to choose what to clone and how to clone based on your specific needs.
- To clone an entire disk, including the OEM system and OEM recovery partition, use the Disk Clone feature.
- You can use the System Clone function to clone a Windows 7 OEM, creating an exact copy of your system drive, including the operating system, system reserved partition or EFI partition, installed programs, and personal data.
- You can use Partition Clone to clone the OEM recovery partition to an SSD, creating an intact duplication of the OEM partition, which is useful when cloning Dell or Lenovo OEM partitions.
Then, let's get started to clone OEM in Windows 7 to SSD with the following steps.
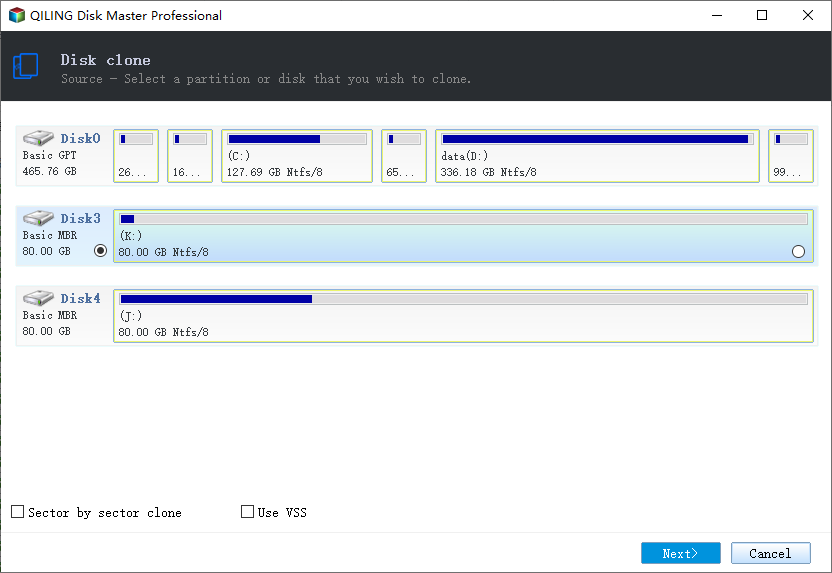
1. Connect your SSD to your PC via an external disk bay or USB-to-SATA cable, then download and install Qiling Disk Masterer Professional. Launch the software and click on 'Clone' > 'Disk Clone' to proceed.
2. In the Source Disk window, select the current disk with Windows 7 OEM and click Next.
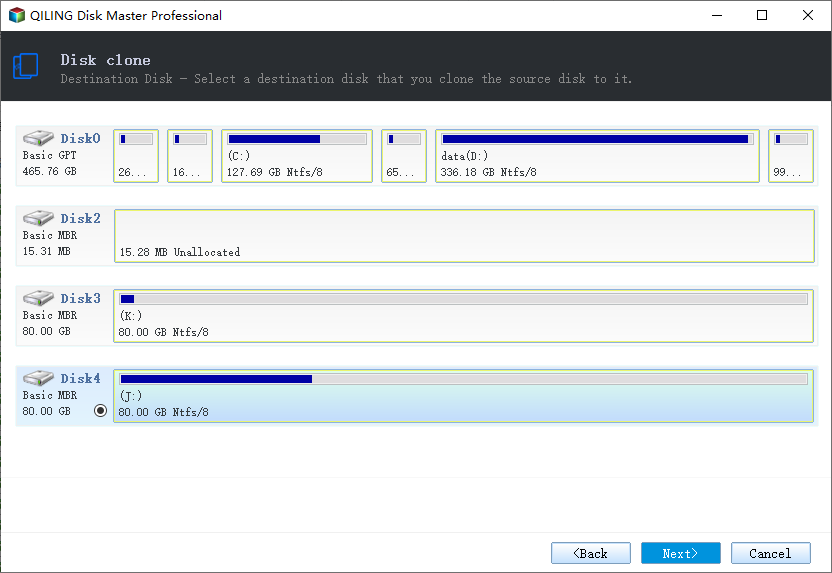
3. To replace the old SSD with a new one, select the new SSD in the Destination Disk window and click Next. Be aware that the new SSD will erase the old one, so back up any important files before proceeding.
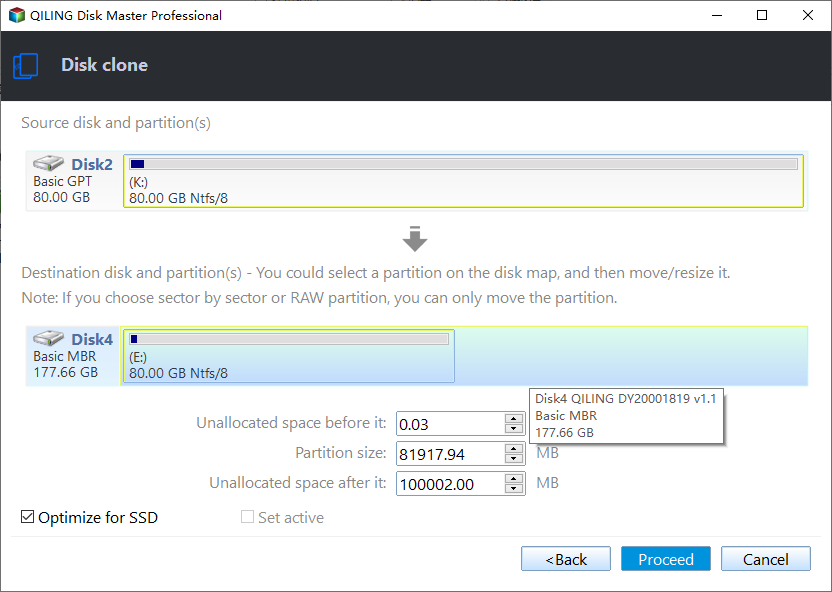
4. Tick SSD Alignment To accelerate the reading and writing speed of an SSD disk and prolong its lifespan, it is recommended to use a combination of techniques such as TRIM, garbage collection, and wear leveling.Sector by sector clone and click Proceed to start the cloning process.
Tips:
You can edit the partition size of Windows 7 OEM to include the remaining disk space of an SSD disk.
This method also applies to cloning Windows 8 or Windows 10 OEM partition to SSD.
The OEM active key is typically tied to the computer's motherboard in most cases.
Wrapping things up
Cloning a Windows 7 OEM with an OEM partition using Qiling Disk Master Professional is a straightforward process, resulting in a bootable cloned SSD.
This software defaults to Intelligent Clone mode, which clones only the used part of a hard drive, making it possible to clone a larger hard drive to a smaller one. However, to use OEM partitions after cloning, it's recommended to clone all sectors of a hard drive using the Sector by sector clone method.
The software can clone Windows 7 OEM partition with "System Clone" and clone recovery partition to USB drive with "Partition Clone", making it also an IDE to IDE hard drive duplicator.
Related Articles
- Easily Transfer OEM Windows 10 & License to New Hard Drive
- Top 3 Ways to Upgrade Motherboard and CPU without Reinstalling Windows 10/8/7
- 3 Ways to Transfer Windows 7/8/10 to New Hard Drive without CD [FREE]
- Safely Clone Hidden Recovery Partition to SSD in 5 Steps
- How to Clone SSD in Windows 7 Easily for Free?
- Create Image from USB Drive with Best USB Cloning Software
Making an image of your USB drive is crucial to duplicate it and keep your data safe. This article guides you through the process of creating an image of your USB drive using Qiling Disk Copy, a useful tool for achieving this.