Convert FAT32 to NTFS File System in Windows
FAT32 is compatible with many devices but cannot store files larger than 4GB. NTFS is better for Windows disks that need large files and permissions.
Background and causes
Windows convert.exe can convert FAT32 to NTFS without formatting in many cases, but backup is still needed because file system changes carry risk.
- Confirm the exact disk, partition, drive letter, file system, and capacity before changing anything.
- Recover or back up important files before formatting, deleting, converting, or recreating partitions.
- For boot-related changes, check BIOS/UEFI mode and boot order before editing disk layout.
Use Windows built-in tools
Run Command Prompt as administrator and use convert X: /fs:ntfs after replacing X with the correct drive letter. If Windows reports file system errors, insufficient space, or conversion failure, back up the drive first and then format it as NTFS.
Use Qiling tools for guided steps
 Qiling Disk Master
Back up readable files or the whole FAT32 partition before formatting it to NTFS.
Function 1. Choose the correct backup method
Use File backup if Windows can open the FAT32 drive and display files. Use Disk/Partition backup if Windows can detect the partition but cannot open the drive or list files. Store the backup on another disk or network location before formatting.
Situation 1. Windows can read files on the FAT32 drive
Step 1. Open Qiling Disk Master and go to Backup and Recovery. Click File backup.

Step 2. Select the folders and files on the FAT32 drive that you need to keep.

Step 3. Choose a destination on another disk, external drive, NAS, or network location. Make sure it has enough free space.
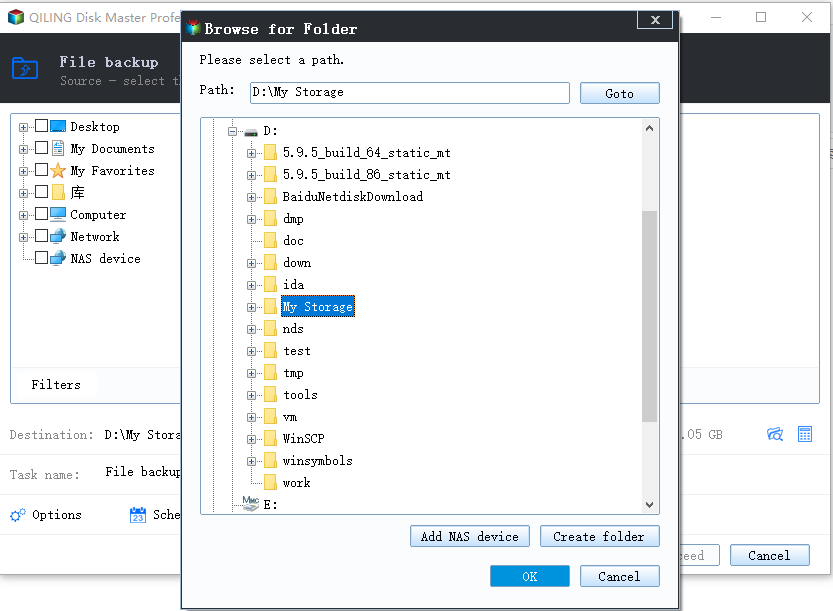
Step 4. Review the source list and destination path, then click Proceed to start the file backup.
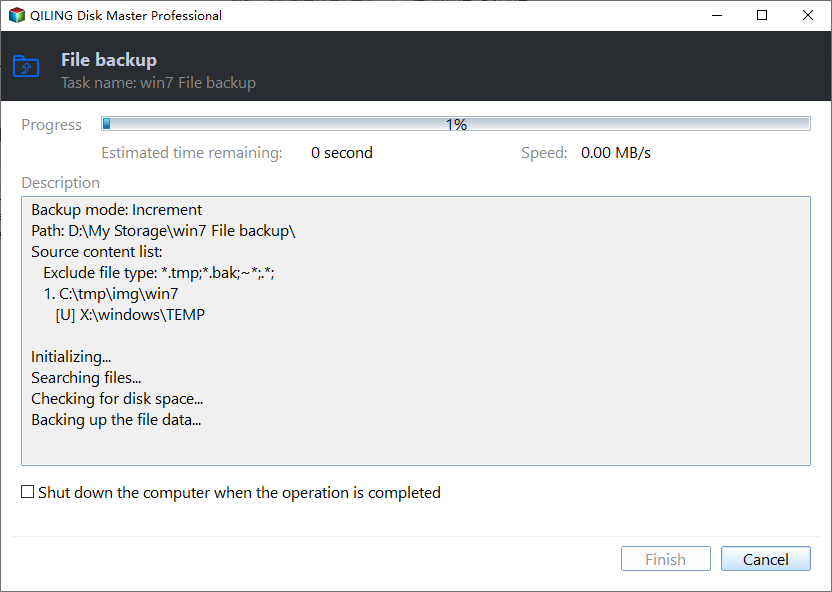
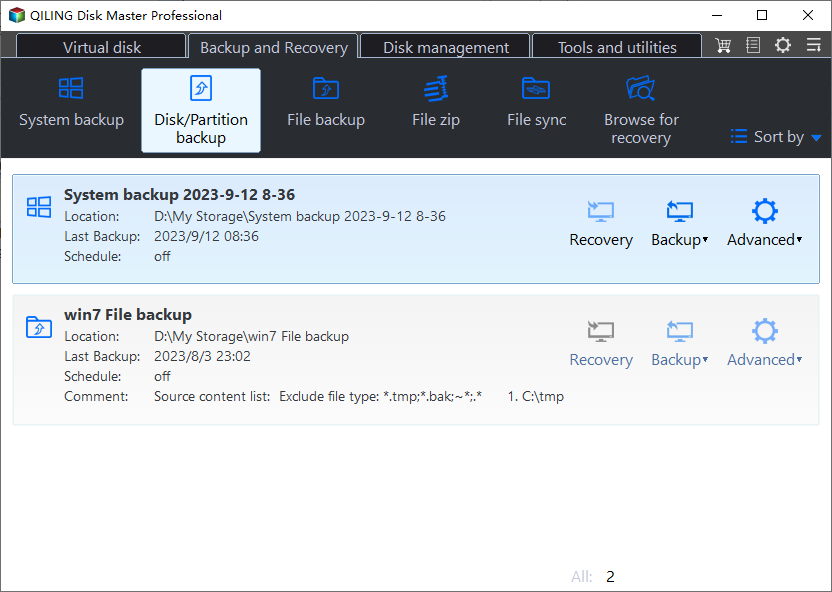
Situation 2. Windows detects the partition but cannot read files
Step 1. Open Qiling Disk Master and go to Backup and Recovery. Click Disk/Partition backup.
Step 2. Select the FAT32 partition by disk number, drive size, and position. Do not select the backup destination disk by mistake.
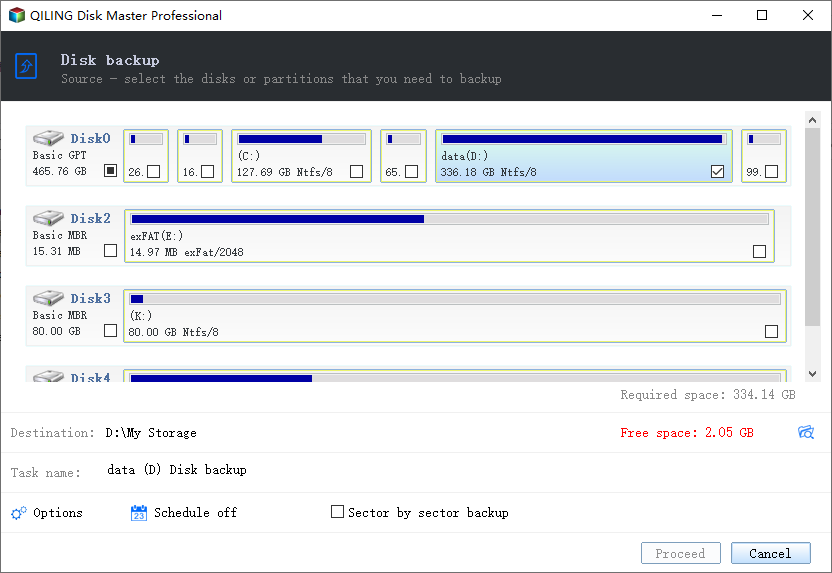
Step 3. Choose a backup destination on another disk, NAS, or network folder.
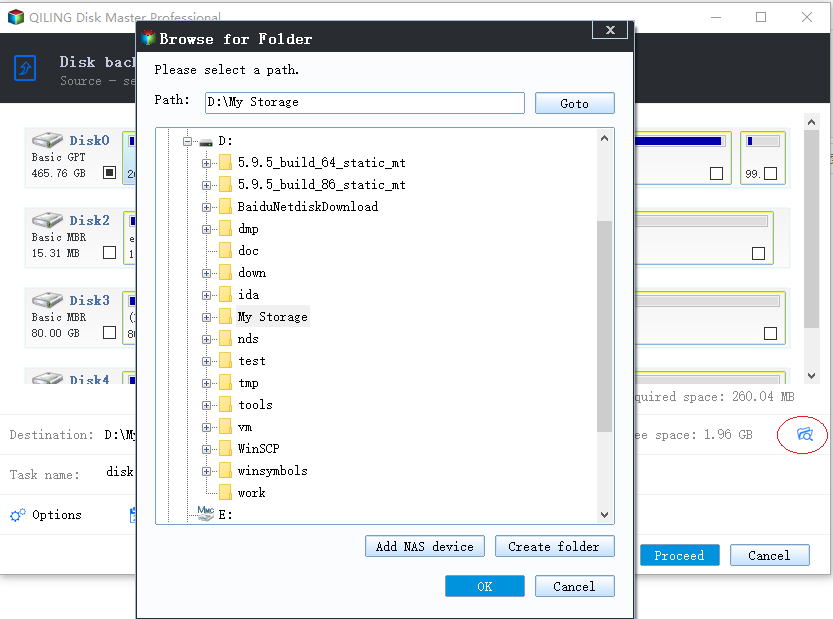
Step 4. Review the partition source and destination path, then click Proceed to start the partition backup.
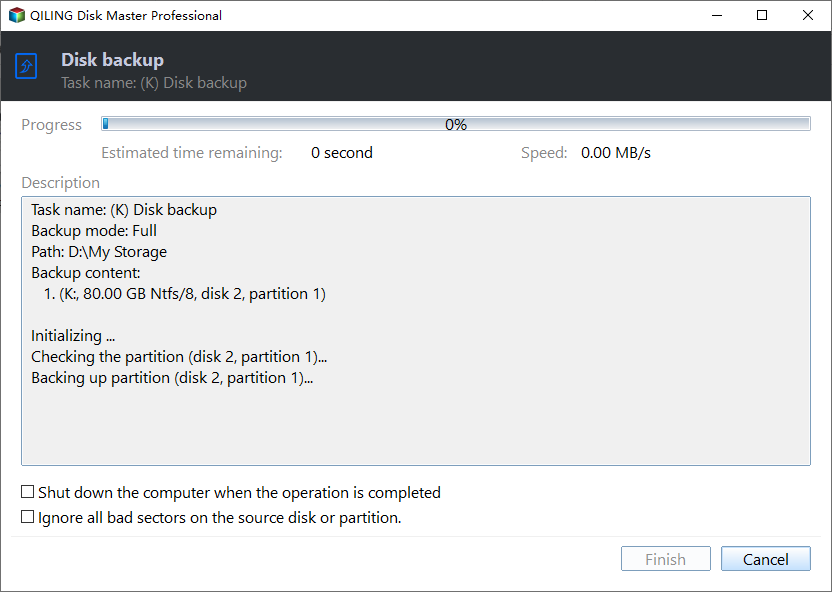
Function 2. Format the partition as NTFS
If the built-in convert command does not work, format the target partition as NTFS after confirming that the backup is complete.
Step 1. Select the FAT32 partition and choose the format operation.
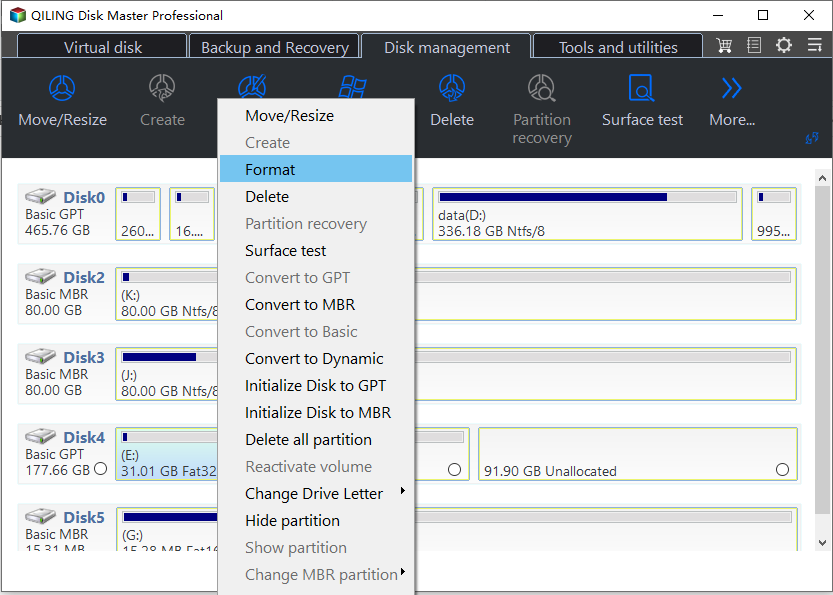
Step 2. Set the file system to NTFS. Confirm the volume label, cluster size, and selected partition before continuing.
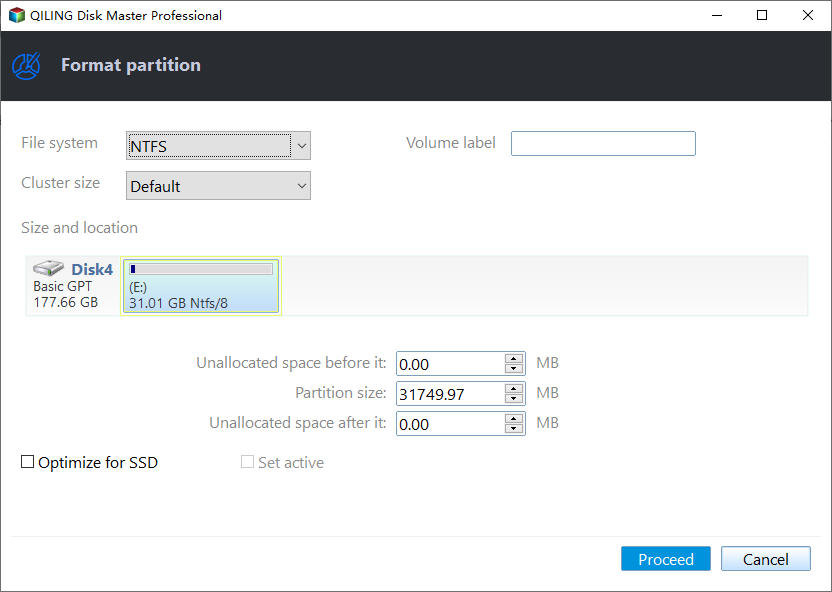
Step 3. Review the pending operation and click Proceed to apply the NTFS format.
Function 3. Restore files and test NTFS
Copy the backed-up files back to the NTFS partition. Then copy a file larger than 4GB to confirm NTFS works, and open several restored files to verify that the backup is usable.
Check the result
Copy a file larger than 4GB to confirm NTFS works, and check that existing files open normally.
Related Articles
-
How to Partition a Dell Hard Drive
Create, resize, and protect disk partitions without touching recovery partitions. -
We Could not Create a New Partition
Fix Windows Setup partition errors with boot-mode and disk-layout checks.
Products
Articles & Tutorials
- Data Recovery
- Data Backup
- File Recovery
- File Backup
- File synchronize
- System Backup and Restore
- Disk and Partition Clone
- Technical articles
- Disk Master Help
- Windows Deleted File and Disk Recovery Tutorials
- Windows File and Data Recovery Tutorials
- More Windows Tutorials for Install, Security, Files, and PC Tips
- Windows Boot, Repair, and Recovery Environment Tutorials
- Windows Backup Tutorials
- Windows Restore Tutorials
- Windows Clone and Migration Tutorials
- Windows Server Backup, Recovery, and Management Tutorials
- Windows Disk, Partition, and Storage Management Tutorials