Fix INACCESSIBLE_BOOT_DEVICE on Lenovo, HP, or ASUS PCs
INACCESSIBLE_BOOT_DEVICE means Windows started but could not access the system disk. It often follows BIOS changes, failed updates, cloning, or storage-driver problems.
Background and causes
The error may be caused by an AHCI/RAID mode change, missing boot files, disk errors, or a driver that cannot load during startup.
- Confirm the exact disk, partition, drive letter, file system, and capacity before changing anything.
- Recover or back up important files before formatting, deleting, converting, or recreating partitions.
- For boot-related changes, check BIOS/UEFI mode and boot order before editing disk layout.
Use Windows built-in tools
Enter BIOS, confirm the disk is detected, restore the previous SATA mode, boot into Windows Recovery Environment, and try Startup Repair, chkdsk, SFC, and boot file repair.
Use Qiling tools for guided steps
 Qiling Disk Master
Create bootable media, protect the system disk, and repair boot files when Windows cannot start.
Function 1. Create bootable media on a working computer
Use this function when the Lenovo, HP, ASUS, or other PC cannot enter Windows because of the INACCESSIBLE_BOOT_DEVICE error.
Step 1. On a working Windows computer, install and open Qiling Disk Master. Connect an empty USB drive and back up any files on it first because creating bootable media will erase the USB drive.
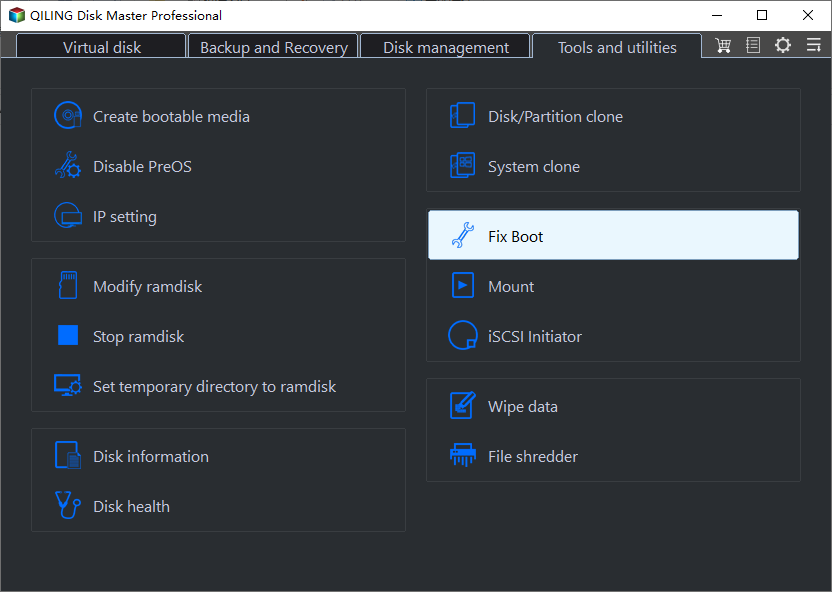
Step 2. Open Tools and utilities and choose Create bootable media to start the bootable-media wizard.
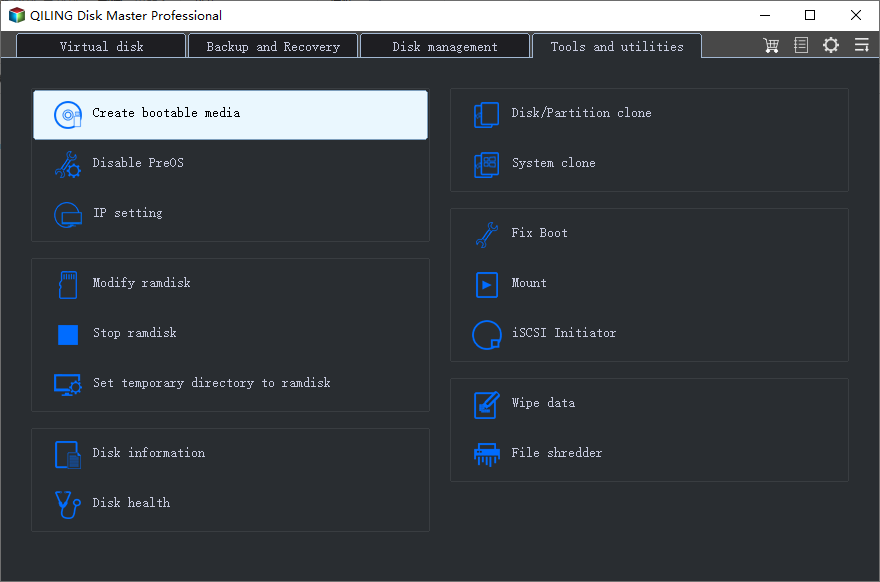
Step 3. Select the USB boot-device option, choose the connected USB drive, and confirm that it is the correct device before continuing.
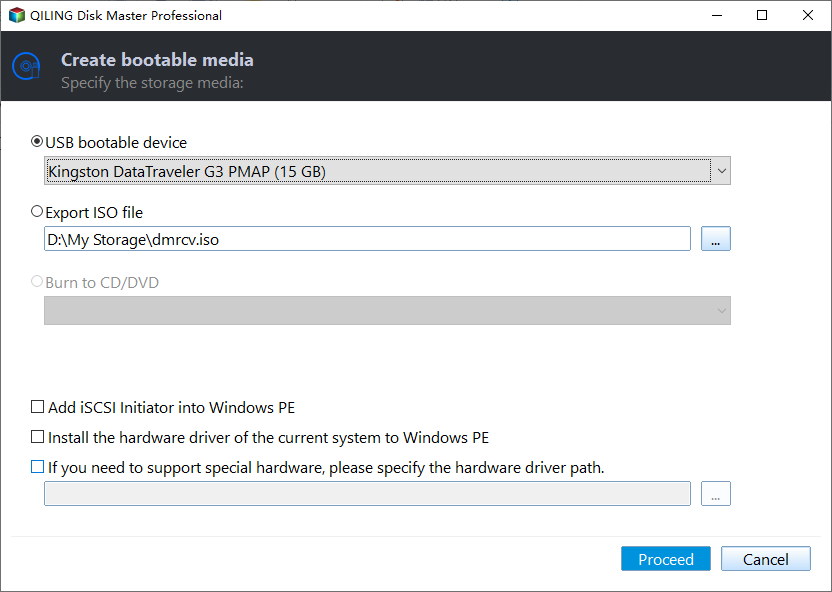
Step 4. If the Lenovo computer uses an NVMe, RAID, or other storage controller that may not be detected in the boot environment, add the required storage driver. If the system disk is supported automatically, continue without adding a driver.
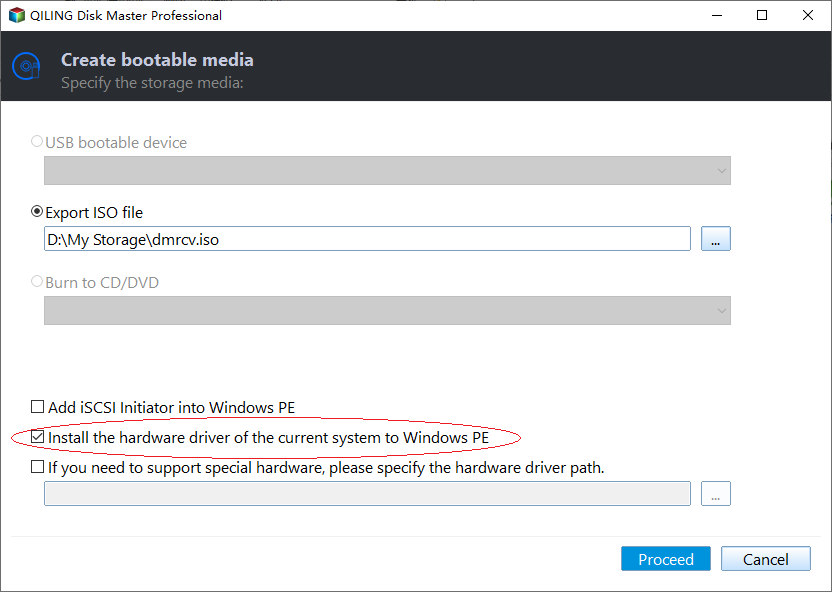
Step 5. Confirm the target USB drive, click Proceed to create the bootable media, and wait until the wizard reports that the process is complete.
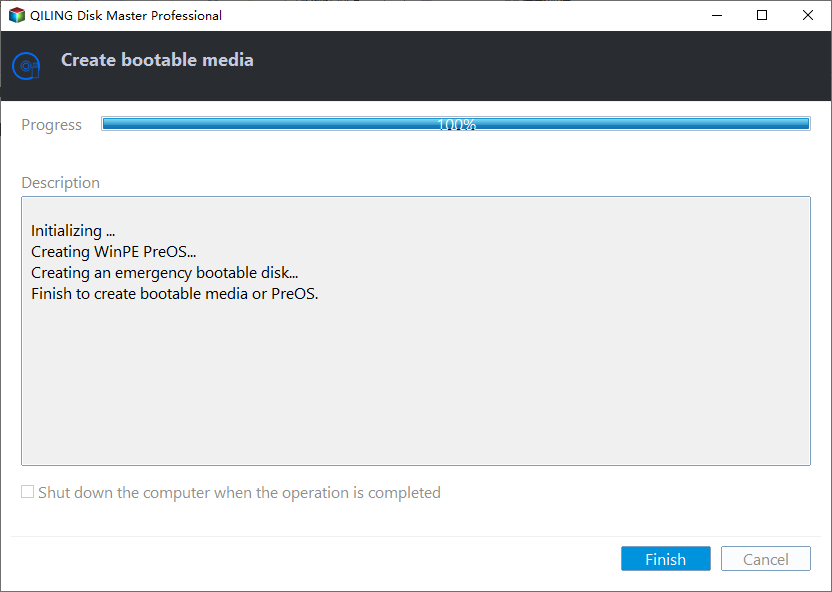
Step 6. Safely connect the bootable USB to the problem computer. Open the BIOS or boot menu, select the USB drive as the first boot device, and start the computer from the Qiling boot environment.
Function 2. Protect data before boot repair
If the system disk makes unusual sounds, disappears from BIOS, or shows disk errors, protect the disk first. Repair attempts on a failing disk may make data recovery harder.
Step 1. In the Qiling boot environment, check whether the Windows system disk is detected with the expected capacity. Connect a healthy destination disk with enough space for the source disk, and make sure the destination does not contain files you still need.
Step 2. Choose Disk/Partition clone to copy the system disk before attempting boot repair.
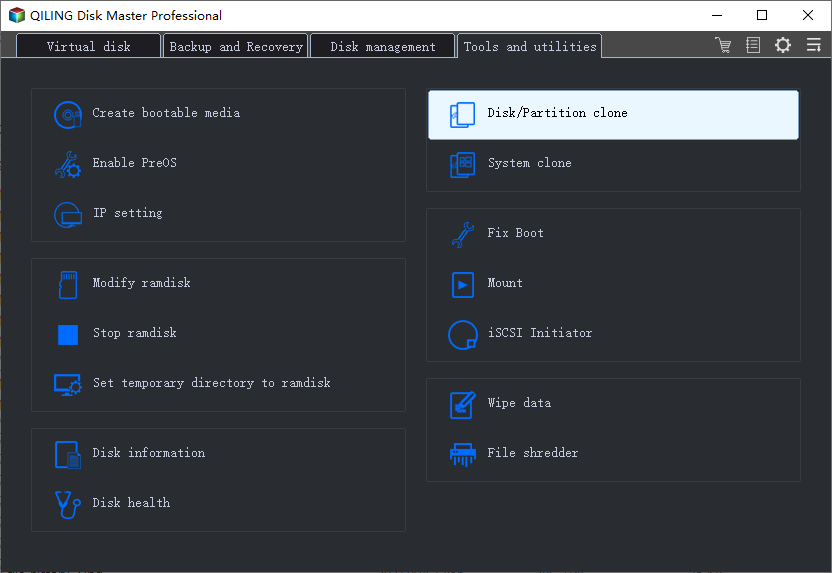
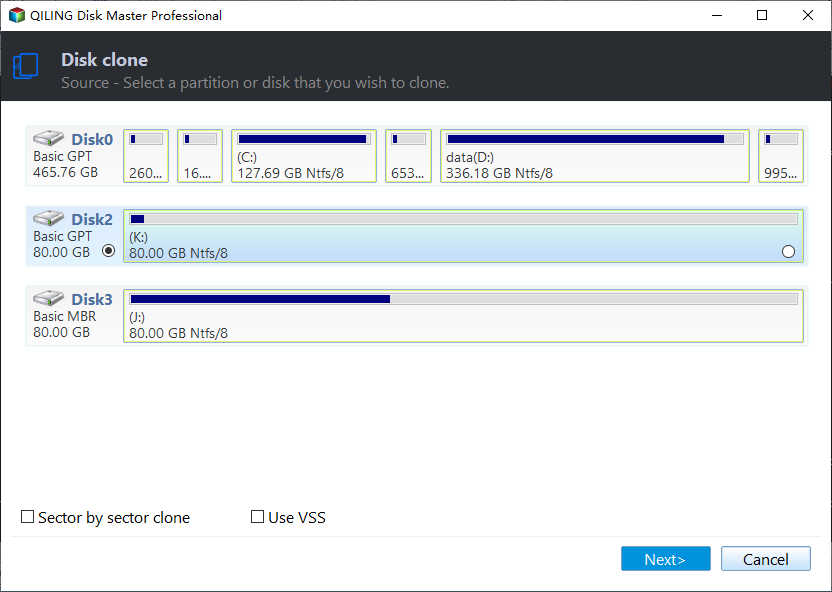
Step 3. Select the Windows system disk as the source disk, and verify its disk number, partitions, and capacity before continuing to the destination selection.
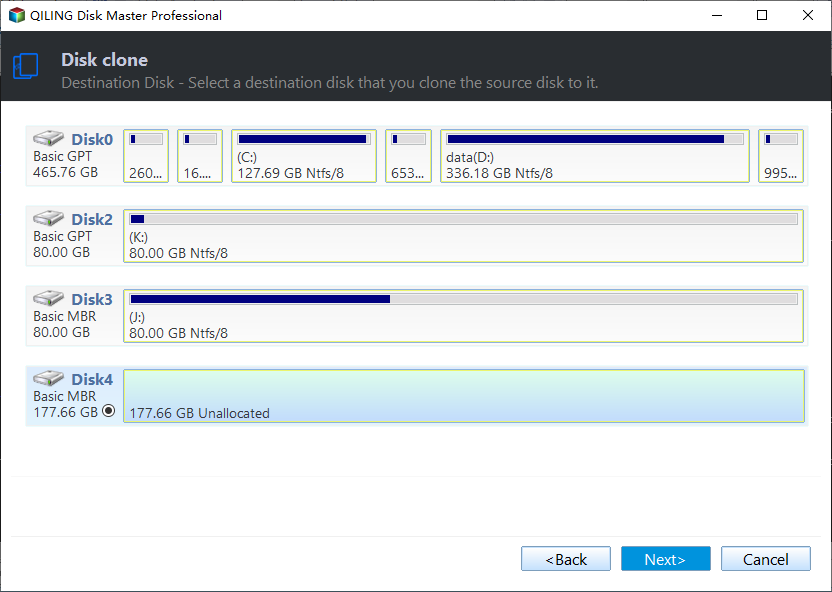
Step 4. Select the healthy disk as the destination. The destination disk will be overwritten, so confirm that you have selected the correct disk before continuing.
Step 5. Preview the clone layout. Keep the EFI, System Reserved, Windows, and Recovery partitions unless you have a specific reason to change them, then continue to the operation confirmation page.
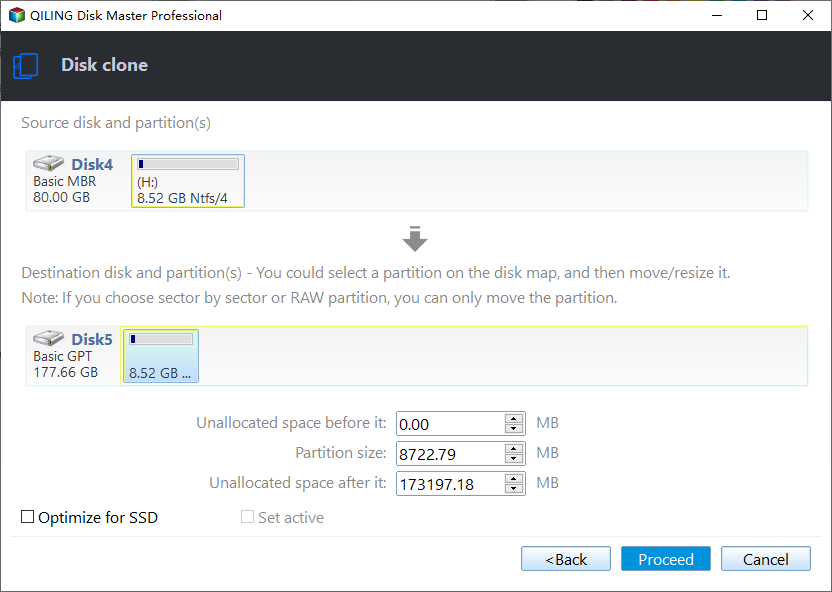
Step 6. Review the pending clone operation and click Proceed to start copying the system disk.
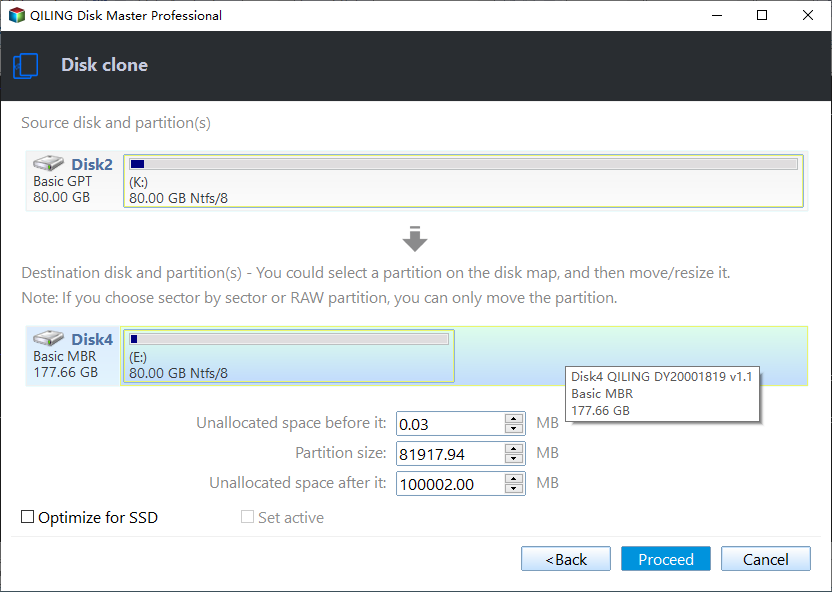
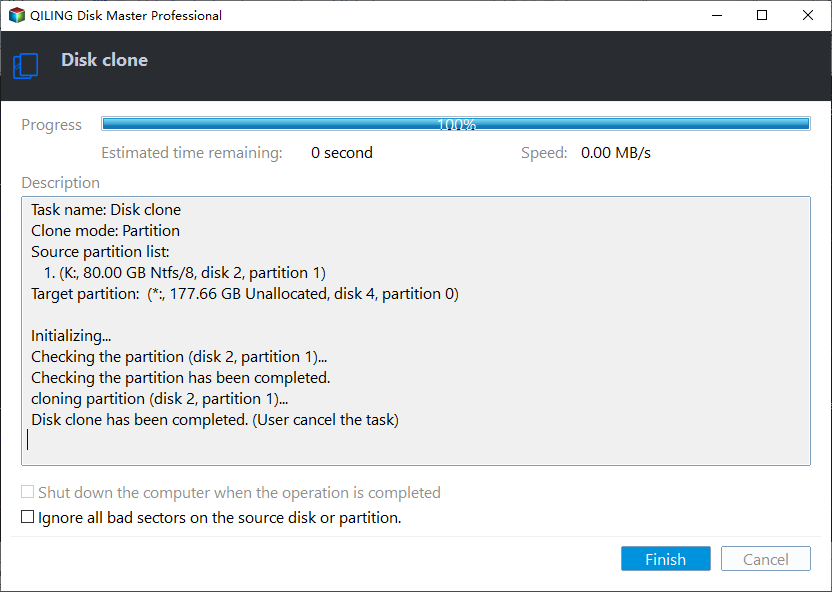
Step 7. Wait until the clone finishes and click Finish. Keep the original disk unchanged, and use the clone as a protected copy while you continue repairing the boot problem.
Function 3. Repair Windows boot files
Use this function when the disk is detected and you suspect damaged boot files, BCD information, or storage drivers.
Step 1. In the bootable environment, open Tools and utilities and choose Fix Boot.
Step 2. Select the Windows system partition or boot partition. If the error started after cloning or storage-driver changes, check Fix main drivers.
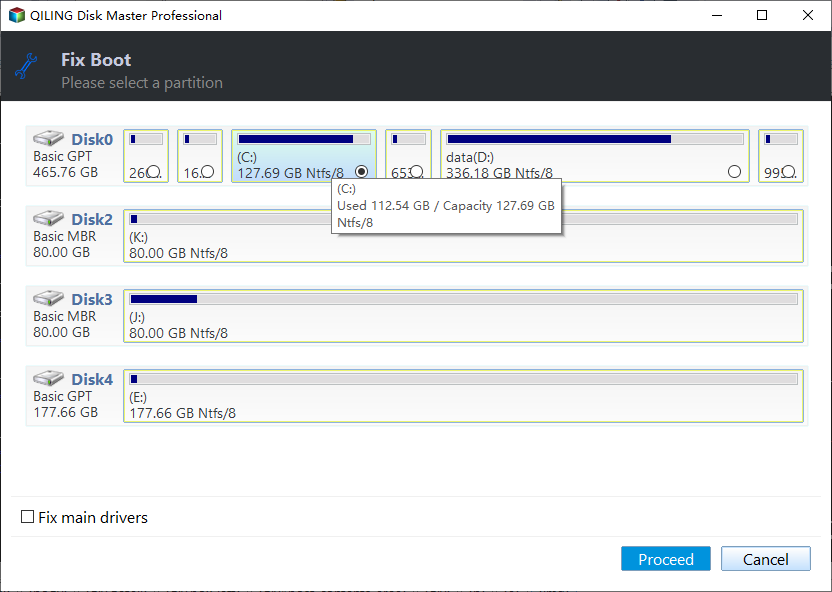
Step 3. Click Proceed and wait for the boot repair to finish. Remove the USB drive and restart the computer.
Function 4. Rebuild MBR only for Legacy BIOS disks
Use this function only when the computer boots in Legacy BIOS mode and the system disk is MBR. Do not use it for a UEFI/GPT boot disk.
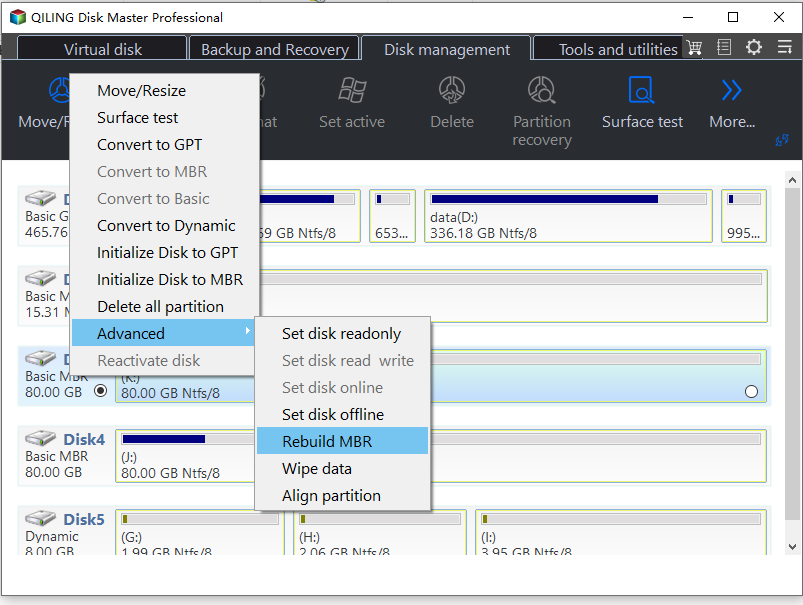
Step 1. Select the system disk, right-click it, and choose Advanced > Rebuild MBR.
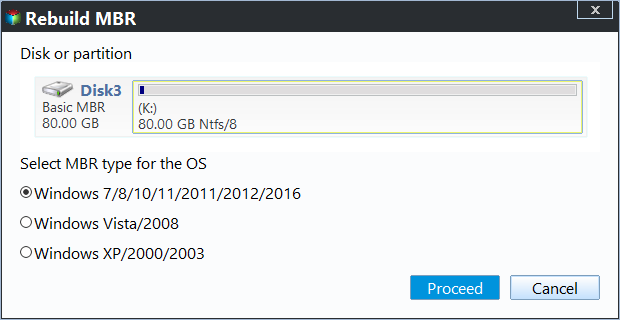
Step 2. Choose the MBR type that matches your Windows version, then click Proceed.
Check the result
Boot Windows twice, check Device Manager for storage-driver errors, and create a backup after the system becomes stable.
Related Articles
-
How to Partition a Dell Hard Drive
Create, resize, and protect disk partitions without touching recovery partitions. -
We Could not Create a New Partition
Fix Windows Setup partition errors with boot-mode and disk-layout checks.
Products
Articles & Tutorials
- Data Recovery
- Data Backup
- File Recovery
- File Backup
- File synchronize
- System Backup and Restore
- Disk and Partition Clone
- Technical articles
- Disk Master Help
- Windows Deleted File and Disk Recovery Tutorials
- Windows File and Data Recovery Tutorials
- More Windows Tutorials for Install, Security, Files, and PC Tips
- Windows Boot, Repair, and Recovery Environment Tutorials
- Windows Backup Tutorials
- Windows Restore Tutorials
- Windows Clone and Migration Tutorials
- Windows Server Backup, Recovery, and Management Tutorials
- Windows Disk, Partition, and Storage Management Tutorials