Fixed: ASUS Recovery Partition Not Working
Scenario
"Hi, I have recently upgraded my ASUS F555LP to windows 10, but it causes me trouble. so I decided to restore the laptop to "out of the box" conditions. Unfortunately, Asus recovery partition F9 not working. It seems that the system doesn't recognize the recovery partition of ASUS anymore.
I've tried some solutions but nothing happen. Is here any solution? I don't know what I have to do. Thanks in advance"
How to fix ASUS recovery partition not working
Many users report that Asus recovery partition or recovery key F9 does not work, but you can resolve the issue by simply moving your mouse.
Create a bootable media with Backtracker
Asus' Backtracker is a tool that allows users to backup their operating system to a USB drive. However, it has limitations, as it only backs up the non-damaged Asus recovery partition and only when the default OS is functioning. Furthermore, it is only compatible with ASUS Notebooks running Windows 8 or Windows 8.1.
Before starting, prepare a USB with at least 16GB of space, insert it into your computer, download and install Backtracker, and then follow the detailed steps below.
Step 1. Open Backtracker and click "Get Started".

Step 2. Click Start under Back up the factory recovery image.

Step 3. Select your USB device from the drop-down menu and click Next.

Step 4. Ensure the information below and click Start to begin the pending operation.

Step 5. To create a bootable USB recovery drive, wait patiently and refrain from using your computer during the operation. Once created, you can use the drive to repair your computer.
Besides using Backtracker, you can also manually create a recovery partition using installation media. This process involves additional steps and details that can be found below.
Create a recovery partition for Asus with installation media
To create a Windows repair disk for Asus, you can either use an installation disk or download a Windows repair disk ISO file from Microsoft. If you don't have an installation disk, you can freely download the ISO file to create a recovery disk for your Asus device.
Step 1. Right-click the ISO file, select "Mount" to burn it to a DVD drive, and then access the drive.
Step 2. Find the install.esd or install.wim file, which is the recovery partition for Asus, and copy it to the C: root, then proceed with the rest of the steps if it's install.esd, or skip to Step 5 if it's install.wim.
Step 3. To convert `install.esd` to `install.wim`, you need to run the following commands with administrator privileges and press Enter in order: `Dism /Export-CaptureDir:C:\Temp /ExportDrive:Z: /CheckIntegrity /Verify /WimFile install.wim`, followed by `Dism /Export-CaptureDir:C:\Temp /ExportDrive:Z: /CheckIntegrity /Verify /WimFile install.
- cd ..
- cd ..
- dism /Get-WimInfo /WimFile:install.esd
- dism /export-image /SourceImageFile:install.esd /SourceIndex:1 /DestinationImageFile:install.wim /Compress:max /CheckIntegrity
step 4. Right-click the ESD2WIM-WIM2ESD command in the ESD2WIM-WIM2ESD-v2 folder and run as administrator. Then type the following commands to export ESD index 1 to install.wim file and hit Enter after each one: esd2wim /esdfile:C:\path\to\Windows10.0.
- c: \install.esd
- 1
Step 5. To make the install.wim files recognized, go to the Command Prompt with admin priority and type the following command: `dism /online /get-wiminfo /wimfile:C:\Path\To\install.wim`.
- reagentc /setosimage /Path /Index
- reagentc /info
- exit
The command `/setosimage /Path /Index` is not used on Windows 10. It is a command from the Windows NT 4.
The unexpected event highlighted the significance of recovery partition, which allows for restoring a computer to its factory settings or previous state. However, if the Asus recovery partition is missing or not functioning, it can lead to complications.
In this article, up to now, I have already taught you two ways to fix Asus recovery partition F9 does not work. However, to be honest, both ways have limitations. The first one can only be used on Windows 8/8.1. The second one is kind of complex for common users. More so, both ways cannot be used on Windows 10.
To fix the Asus recovery partition issue where F9 doesn't work in Windows 7/8/10/11, you can use Qiling Disk Master Professional, which provides an easier solution for this problem.
Create a recovery partition with Qiling Disk Master
Qiling Disk Master Professional is a top-notch backup and restore software that allows you to backup your current system to a recovery partition and restore it in a Windows PE environment. This means you don't need to fiddle with your BIOS settings, as it automatically adds a boot menu to your system. If your computer encounters issues, simply press F11 or A key to access the backup and restore system, which supports all versions of Windows, including XP, Vista, 7, 8, 8.1, 10, 11, and various server editions, both 32-bit and 64-bit.
To avoid issues with Asus recovery partition not working in Windows 7/8/10/11, you need to create a recovery partition using the replacement tool. This involves following detailed steps to ensure the recovery partition is properly created and functional.
Step 1. Download Qiling Disk Master Professional, install and launch it, and then click on the "OneKey System Backup" option.

Step 2. Select a backup method, with the default option being recommended, and also consider scheduling automatic backups on a daily, weekly, or monthly basis.
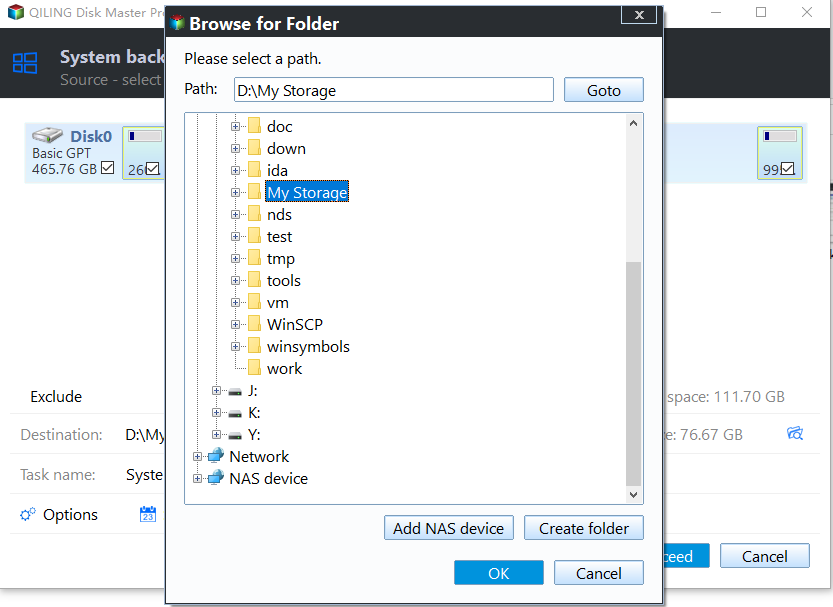
Step 3. Click "Proceed" to confirm and continue, or click "Advanced" to view more details.
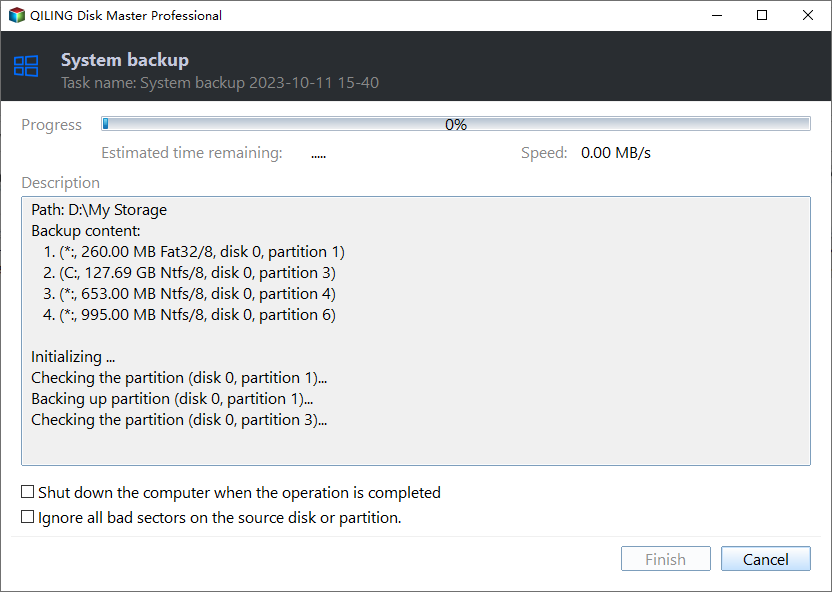
Step 4. Wait patiently until the operation is completed. Click Finish to continue.
Step 5. To check if the Pre OS is working, you can restart your computer and try it, then your computer will go to the following window.

You can also use Qiling Disk Master to create a system image backup, which is a straightforward process, but it may require starting your computer with a bootable media in some cases.
Final words
Asus recovery partition not working can be a frustrating issue, but you have the option to create a recovery partition for your computer. Unfortunately, Asus Backtracker is only compatible with Windows 8/8.1, and using installation media and commands to create a factory recovery partition can be complex, making it inaccessible to some users.
Thus, Qiling Disk Master is a user-friendly party tool that guides you through a step-by-step process with its wizard-like interface, making it easy to complete all tasks. It supports all types of operating systems, and you can simply download and try it out for yourself to see its capabilities.
Related Articles
- Asus One Key System Recovery Reset to Factory Default Settings
You will factory Asus to default settings with Asus One Key System Recovery in 2 steps. And one data lossless method. - How to Make Dell/HP/Lenovo Recovery Partition Bootable
You may want to make the HP/Dell/Lenovo recovery partition bootable in different situations. Here you'll learn how to do it and you can create a recovery boot drive for Windows 10/7 in another way. - How to Transfer Recovery Partition to New Hard Drive
How to move HP/Dell/Lenovo/Toshiba recovery partition to new hard drive? Qiling Disk Master provides you with the easiest way to clone recovery partition to SSD/HDD as well as external hard drive/USB flash drive. - How to Copy Recovery Partition to USB in Windows 10/8/7
How to copy recovery partition to USB in Windows 10/8/7? This guide shows the detailed steps to copy Dell, HP, ASUS, Lenovo, etc. recovery partition to USB or another hard drive. - Best Way to Backup OST File in Outlook 365 [2022]
In this post, we will tell you what is the OST file. We will provide the full guide on how to back up OST files on Windows. You can try Qiling Disk Master to back up and recover your OST files. - How to Backup Outlook Emails to External Hard Drive (2 Ways)
You can learn why backup Outlook emails to external hard drive and 2 methods to achieve the goal, including the easiest one. Each method contains a tutorial. Keep reading for detailed information.