Factory Reset Lenovo Yoga 300/720/710 with 3 Free Ways
Need to factory reset Lenovo Yoga
A Lenovo Yoga factory reset is not always the first solution to try, but it can help when the computer is affected by a virus, system failure, forgotten password, serious error messages, or slow performance. A reset restores Windows or the recovery image to a clean state and gives the laptop a fresh start.
However, factory resetting a Lenovo laptop can erase personal files, installed programs, and customized settings, depending on the method you choose. If you are new to the process or cannot sign in to Windows 10/8/7, it is important to choose the right reset method.
This guide explains three practical ways to factory reset Lenovo Yoga 300/720/710, IdeaPad, and ThinkPad laptops, including methods that can work when you do not know the Windows password.
Before proceeding with the hard reset process, consider the potential data loss. If you have important files on your Lenovo laptop, please create a file backup first. Once the reset starts, recovering deleted files may be difficult and time-consuming.
Way 1: Reset Lenovo Yoga 300 to factory settings with Lenovo OneKey Recovery
Lenovo OneKey Recovery is a built-in recovery tool on many Lenovo laptops. If the recovery partition is still available, you can use the Novo Button to enter the recovery environment and restore your Lenovo Yoga, IdeaPad, or ThinkPad to factory settings.
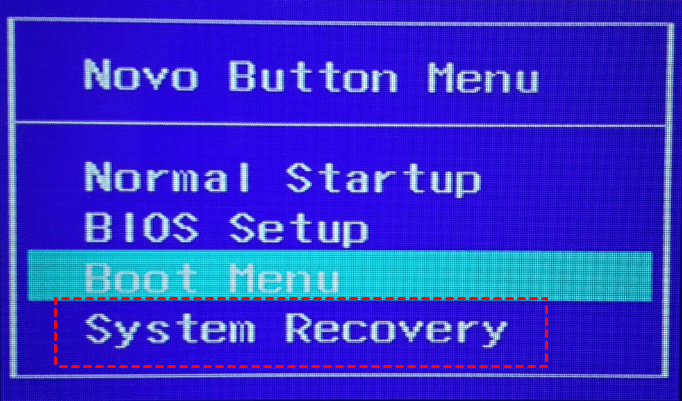
Step 1. Shut down your Lenovo laptop. Press the Novo Button, usually a small button or pinhole near the power button or on the side of the laptop, to open the Novo Button Menu.

Step 2. In the Novo Button Menu, use the arrow keys to select "System Recovery" and press Enter. This opens the recovery window, where you can start restoring the laptop to factory settings.
Step 3. Select "Restore from initial backup". This option restores the laptop by using the original recovery image created by Lenovo.
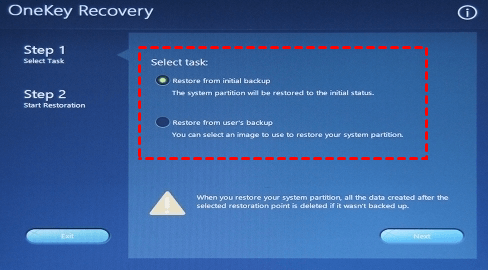
Step 4. Confirm the operation and click "Start" to begin the factory reset. This process may erase installed programs, settings, and personal files on the system drive, so make sure your important data has been backed up.
Lenovo OneKey Recovery is useful for resetting Lenovo laptops, including Yoga 300/720 and IdeaPad 320 models. However, if the recovery partition is missing, damaged, or changed, you may see errors such as "current system cannot support backup" or fail to start recovery. In that case, try the following methods.
Way 2: Hard reset Lenovo Yoga 300/720/710 with Reset this PC
If Windows can still reach the sign-in screen, you can enter Advanced Startup Options by holding the "Shift" key while clicking "Restart". From there, use Reset this PC to reinstall Windows and reset the Lenovo laptop.
If you cannot access Windows because of a forgotten password or startup issue, you can also boot from a Windows setup or repair disk and enter the recovery environment to reset the PC.
Step 1. Boot your Lenovo laptop into Advanced Startup Options from the sign-in screen, Windows recovery environment, setup disk, or repair disk.
Step 2. Choose Troubleshoot > Reset this PC.
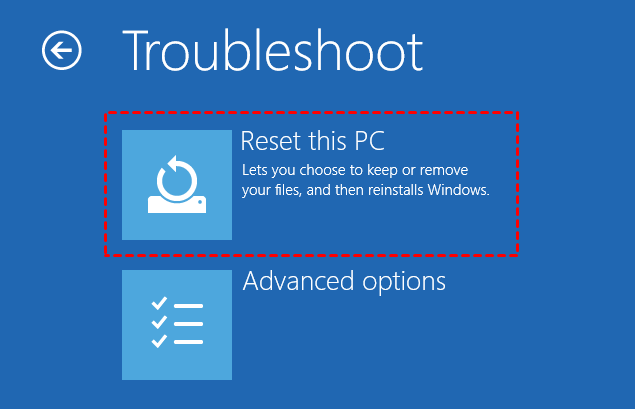
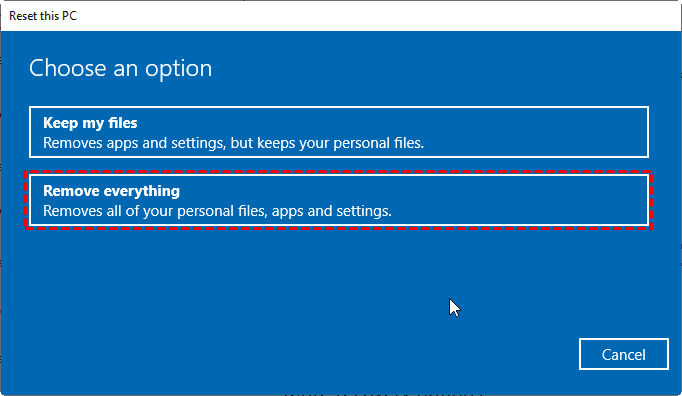
Step 3. In the Reset this PC window, choose either Keep my files or Remove everything. To remove all personal files on the system drive and clear the forgotten user account password, choose Remove everything.
Step 4. Select your Windows system.
Step 5. If your computer has multiple drives, choose whether to reset only the system drive or all drives.
Step 6. Choose the data deletion level. You can remove files quickly or clean the drive more thoroughly if you plan to sell or give away the laptop.
Step 7. Review the reset summary carefully. If everything is correct, confirm the reset and wait until Windows finishes the process.
Way 3: Factory reset Lenovo Yoga with third-party tool
If Lenovo OneKey Recovery is unavailable or Reset this PC does not meet your needs, you can use Qiling Disk Master Professional as a more flexible recovery solution. It can restore a Lenovo Yoga 300/710/720 or other laptop to a previous system image while keeping the recovery process under your control.
This method is especially useful when you have created a system backup in advance, or when you want a recovery option that also works for other laptop brands.
Qiling Disk Master Professional is compatible with Windows 7, Windows 8, Windows 10, and Windows 11. It provides system backup, system recovery, disk clone, and partition management features for Windows-based computers.
Besides system recovery, Qiling Disk Master Professional also lets you resize partitions when you need to free up disk space or adjust the disk layout for better use.
Download it to have a try:
Note: Before using this method to restore Lenovo Yoga 300/720, you need a valid system backup image. If you have not created one yet, you can create a system image with Qiling Disk Master Professional on a working computer first.
Step 1. Launch Qiling Disk Master Professional, click System Recovery.
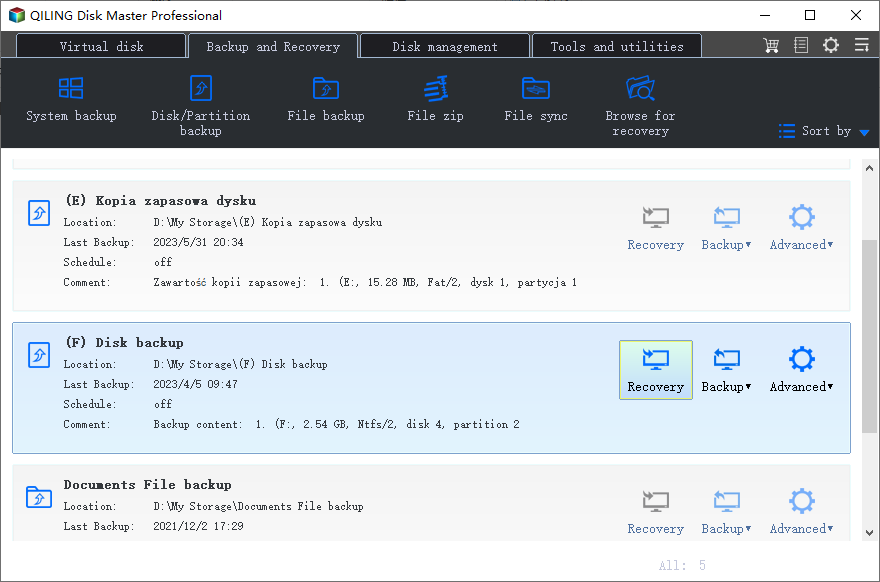
Step 2. Select Restore system by using the image file in Qiling Disk Master partition or Restore system by selecting a system image file, depending on where your backup image is saved. Then click Next.
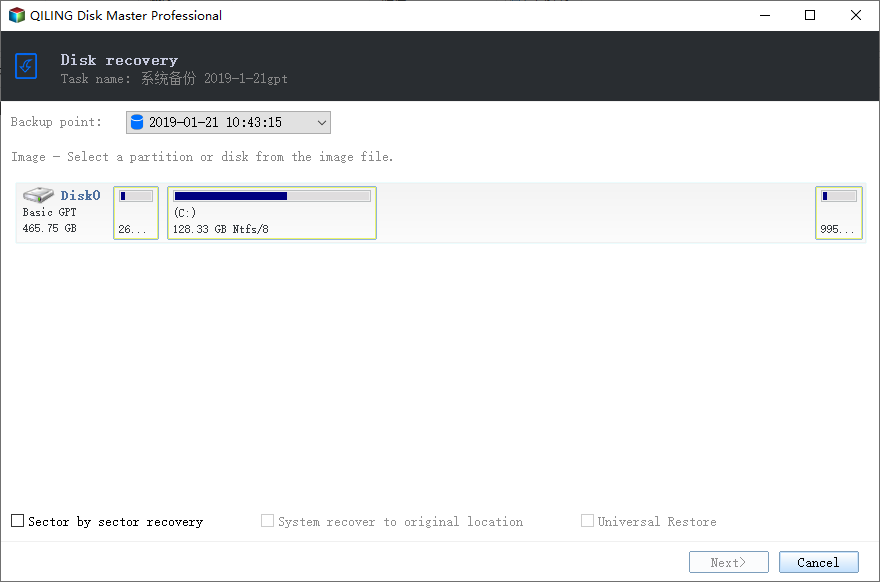
Step 3. Confirm the restore settings and click Proceed. The software will start restoring the selected system image to your Lenovo Yoga.
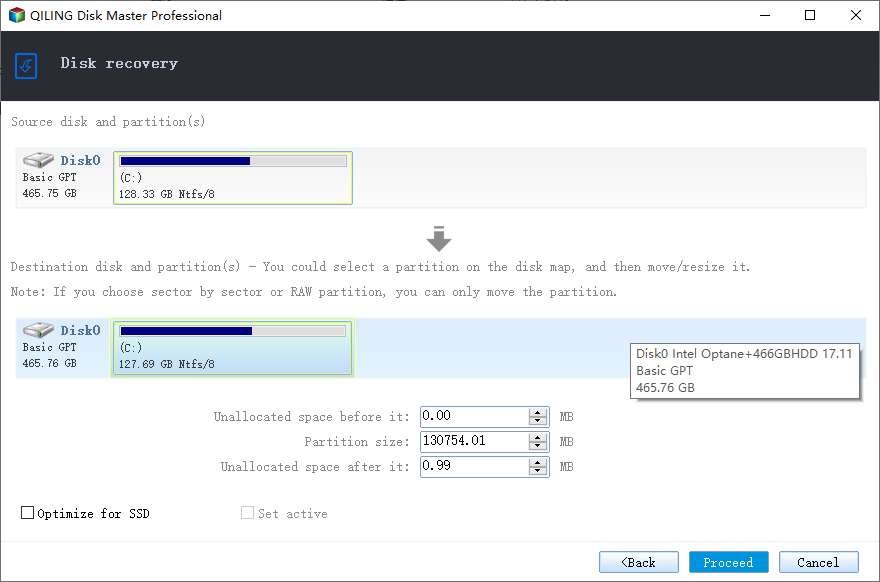
Step 4. When the restoration process is complete, click Finish. Restart the laptop if required, and then use the restored Windows system.
Wrapping things up
Whether you use Lenovo Yoga 300/710/720, ThinkPad, or IdeaPad, you can choose one of the methods above to perform a factory reset or system recovery. Lenovo OneKey Recovery is convenient when the recovery partition is intact, while Reset this PC is useful when you can enter the Windows recovery environment, even without signing in.
Lenovo OneKey Recovery has limitations if the recovery partition or disk layout has been changed. For a more flexible recovery plan, Qiling Disk Master can create and restore system images on Lenovo, Dell, and other branded computers. It is also useful for users who need backup, recovery, and partition tools in one program.
Related Articles
- How to Factory Restore Lenovo ThinkCentre (4 Ways Included)
You may want to factory restore Lenovo ThinkCentre for different reasons. This article will show you 4 ways to restore Lenovo ThinkCentre to factory settings in Windows. - Solved: Lenovo NOVO Button Not Working in Windows 10, 8, 7
This guide explains Solved: Lenovo NOVO Button Not Working in Windows 10, 8, 7 with clear steps, key checks, and practical tips. - Lenovo F11 Not Working Solved: Reactivate F11 Key to Restore System
You will learn how to fix Lenovo F11 not working in Windows 7/8/10/11 and reduce the impact of this issue. - How to Use Lenovo One Key Recovery in Windows 7/8/10
You will learn how to use Lenovo one key recovery to protect system and data on it and recreate partition or image when Lenovo OneKey Recovery not working. - How to Clone Laptop Hard Drive and Operating System
If you're trying to clone a laptop but don't know where to start, there are various cloning software options available. We can help you choose the best one and provide a step-by-step guide on how to perform laptop hard drive cloning. - How-to Guide | Clone NVMe SSD to NVMe SSD
NVMe SSDs offer significant improvements over traditional storage options like SATA SSDs, HDDs, and more. They come in various form factors, including M.2, PCIe Slot, and U.2. This article explores the possibility of cloning data from one NVMe SSD to another.
Products
Articles & Tutorials
- Data Recovery
- Data Backup
- File Recovery
- File Backup
- File synchronize
- System Backup and Restore
- Disk and Partition Clone
- Technical articles
- Disk Master Help
- Windows Deleted File and Disk Recovery Tutorials
- Windows File and Data Recovery Tutorials
- More Windows Tutorials for Install, Security, Files, and PC Tips
- Windows Boot, Repair, and Recovery Environment Tutorials
- Windows Backup Tutorials
- Windows Restore Tutorials
- Windows Clone and Migration Tutorials
- Windows Server Backup, Recovery, and Management Tutorials
- Windows Disk, Partition, and Storage Management Tutorials