Tutorial: Install Windows Server 2008 on USB Drive Step by Step
Foreword
Yes, it's possible to install Windows Server 2008 on a USB flash drive and use it as a bootable installer. To achieve this, you'll need to use the Microsoft's ImageX tool and the Windows Automated Installation Kit (AIK) to create a bootable USB drive. You can follow these steps: First, download and install the AIK. Then, use the ImageX tool to capture the Windows Server 2008 installation image from the DVD. Next, use the Windows PE (Preinstallation Environment) to create a bootable USB drive that contains the captured image. Finally, use the bootable USB drive to install Windows Server 2008 on your computer. Note that you'll need a USB drive with at least 4GB of free space to hold the installation image.
To install Windows Server 2008 without a setup DVD drive, you can create a bootable USB flash drive. This can be done by formatting the USB drive, downloading the Windows Server 2008 installation ISO file, and using a tool like Rufus to create a bootable USB drive from the ISO file. This will allow you to install Windows Server 2008 directly from the USB drive, eliminating the need for a setup DVD drive.
Tutorial: install Server 2008 on USB drive for installing OS
To install Windows Server on a USB flash drive, start by making the drive bootable using Diskpart. This involves running a series of commands within the Diskpart utility to prepare the drive for the installation process.
Requirements:
1. USB Flash Drive (minimum 8 GB).
2. Windows Server 2008 installation file.
Step 1. Insert an empty USB drive to your computer.
Step 2. To start the Command Prompt as an administrator, click the "Start" button, type "cmd" in the search box, right-click on the Command Prompt program, and select the "Run as Administrator" option.
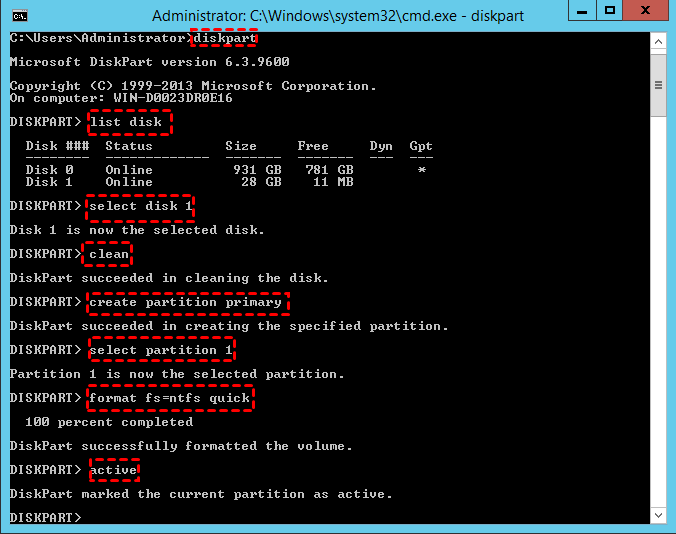
Step 3. In the elevated Command Prompt window, type "diskpart" and press "Enter" to start the DiskPart tool, then type and execute the commands "list disk", "select disk 0", "list partition", "select partition 1", "delete partition override" to delete the partition, and finally "exit" to exit the DiskPart tool.
◆list disk
◆select disk #
◆clean
◆create partition primary
◆select partition 1
◆format fs=ntfs quick If you plan to create a UEFI bootable USB using Diskpart, type "format fs=ntfs quick" instead to format it into NTFS file system.
◆active
Step 4. To prepare the Windows Server 2008 installation for a USB installation, open the installation files and copy them to the USB drive using the command: xcopy d:\*.* /s/e/f e:\. This command copies all the files from the installation directory on the hard drive to the USB drive. The "/s" option is used to copy subdirectories, "/e" is used to copy the entire directory tree, and "/f" is used to force the copy operation.
Note : In the context of Windows, d:\ refers to the drive letter assigned to the Windows installer, which is typically the drive where the operating system is being installed. On the other hand, e:\ is commonly used to refer to a USB flash drive, which is a portable storage device used to transfer files between computers.
Step 5. Finally, write a bootloader to your USB stick using the command: D:\Boot\Bootsect /NT60 E: /force /mbr
Once everything is done, you can boot your computer from this USB drive and install Windows Server 2008 from the USB flash drive.
Attention: To prepare your computer for the installation of a new operating system, you need to change the BIOS settings to prioritize the bootable USB drive. This can usually be done by pressing a specific key on your keyboard, such as F2, F12, or DEL, but the exact key may vary depending on your computer's manufacturer. By putting the USB drive first in the boot order, you'll be able to boot from it and proceed with the installation process.
Bonus tutorials for installing Server 2008 on USB flash drive
To install Windows Server 2008 on a USB drive, you can follow the steps above. Additionally, you may also want to check out tutorials on creating a portable Windows Server on a USB drive and making a bootable Windows Server USB stick for repairing a failed Windows Server installation.
1. Install Windows Server 2008 on USB for a portable Server
You can use a portable Windows Server USB drive to boot your system from any computer or even a new one without reinstallation, thanks to tools like Qiling Disk Master Server. This allows you to install Windows Server 2003, 2008 (R2), 2012 (R2), 2016, 2019, 2022 to a USB drive as a portable Windows Server, as well as install Windows 10/8/7 to a USB drive as a portable Windows.
PS.: Qiling Disk Master Server Demo is available for download.
You will receive a note that the process will wipe data on the selected USB drive, so back up any files you need in advance, then click "Yes".
Attention: If you're planning to install Windows Server on a USB drive, you can use the "create Windows To Go with current system" option, which is a simpler method that doesn't require downloading installation ISO files.
2. Create a bootable Server USB stick for repairing boot issues
If your Windows Server 2008 fails to boot due to a damaged Master Boot Record (MBR) or bad sectors, you can create a bootable USB stick using Qiling Disk Master Server to diagnose and fix bad sectors or rebuild the MBR, avoiding the need to reinstall the entire system from scratch.
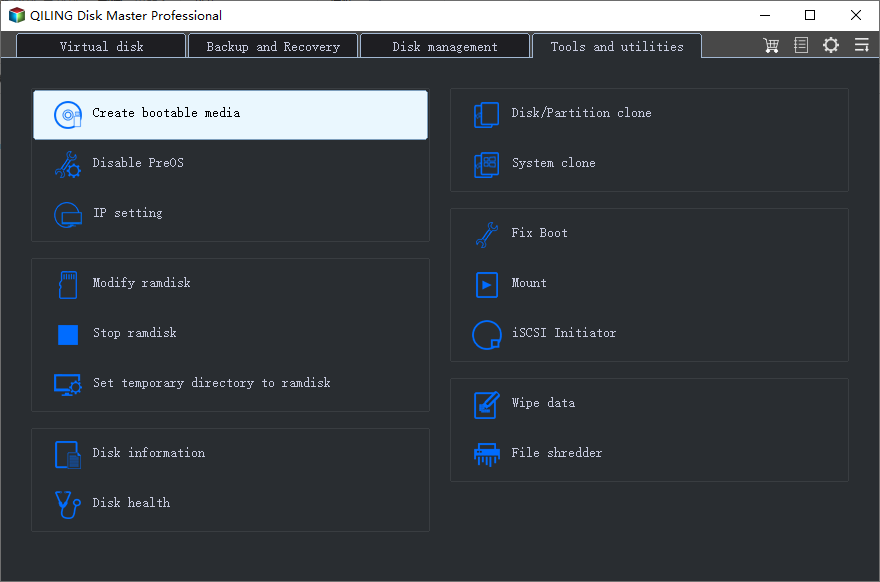
Step 1. To create bootable media using Qiling Disk Master Server on a Windows Server computer, simply plug in an empty USB drive and run the program. From the top toolbar, select "Tools" and then "Make Bootable Media" to initiate the process.
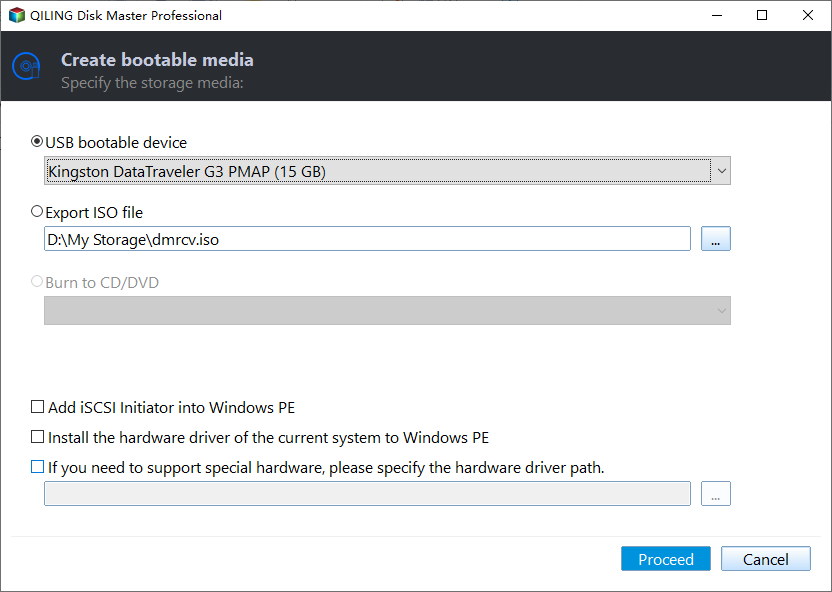
Step 2. Select the target USB drive in the "USB Boot Device" and click "Proceed" to continue.
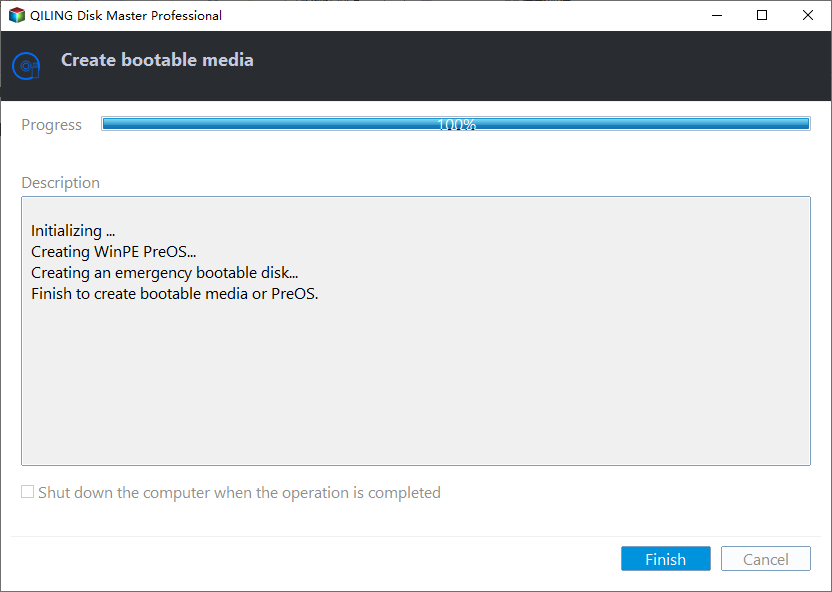
Step 3. Then wait for the process to be completed.
To fix Windows Server boot failure, insert a bootable media into your computer and boot from the USB drive. Once logged in, you will access the main interface of Qiling Disk Master Server.
To check bad sectors on the system drive:
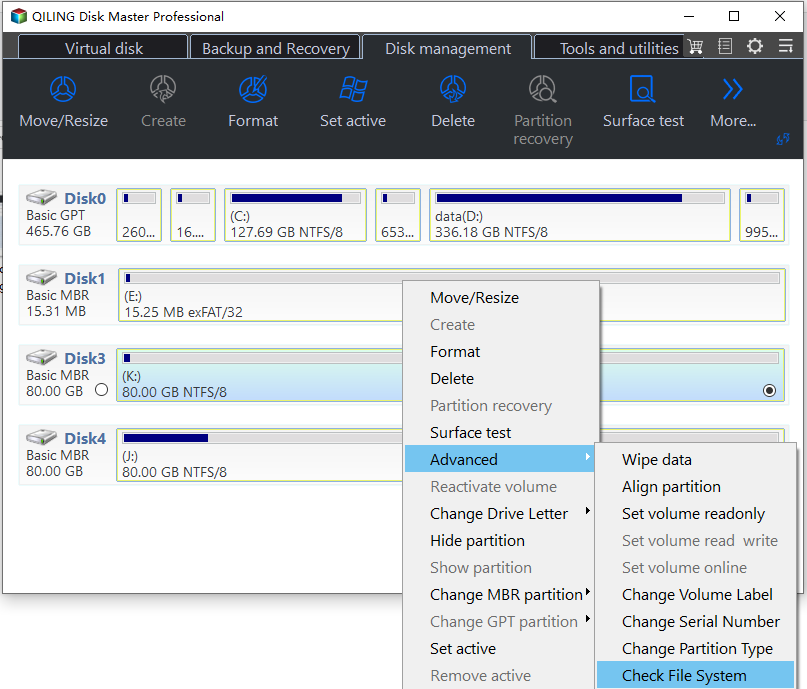
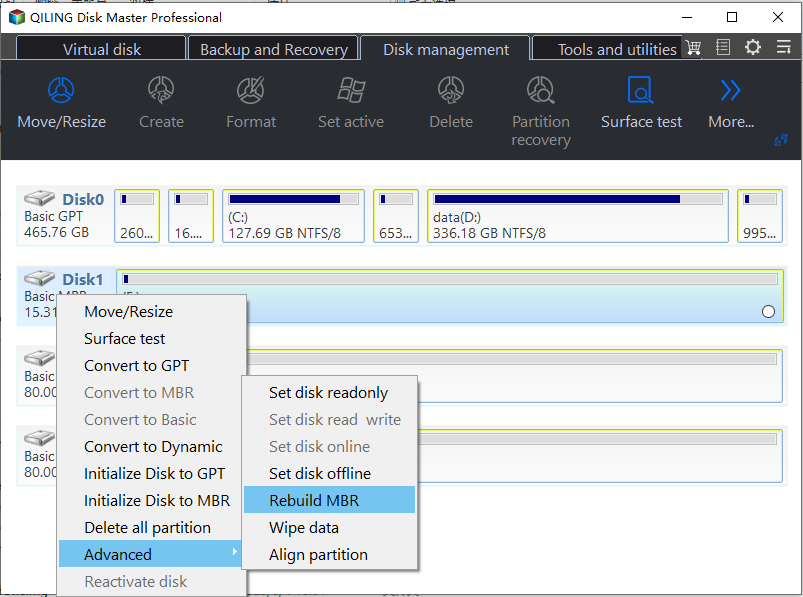
To rebuild MBR on the system disk without loading Windows Server (2008):
Conclusion
This guide provides tutorials on how to install Windows Server 2008 on a USB drive as a portable OS installer, a portable Windows Server, or to create a bootable media to resolve Server boot failures.
The Server partition manager offers a range of features to help manage disk partitions, including cloning Windows Server to SSD or HDD, extending the system drive without rebooting the server, converting disk between MBR and GPT partition style without deleting partitions, and converting dynamic disk to basic without losing data.
Related Articles
- Move Windows Server from HDD to SSD without Reinstalling System
Here comes the best way to move Windows Server 2003, 2008, 2012, 2016, 2019, SBS or Home Server 2011 to SSD and boot the system from successfully. - Best NAS Ransomware Protection | 2 Things You Should Do
Your NAS is probably vulnerable to ransomware virus. Take the NAS ransomware protection actions immediately to protect your NAS from Ransomware. - Adjust Partition Size with Free Partition Software
Adjust partition size with Qiling Disk Master when Extend Volume is greyed out or shrink space is 0 MB. Resize, move, merge, and split partitions to manage disk space effectively. - Best Free Arq Backup Alternative - Qiling Disk Master
Is there any free Arq Backup alternative to backup files to cloud easily? Find the best alternative to Arq Backup for Windows to backup files to Google Drive, OneDrive, etc. - How to Format SD Card in Windows 10, 8, 7?
Format SD card in Windows 10, 8, 7 for your camera, phone, and other digital devices. - How to Quickly Format an SSD in Windows 7/8/10/11 for Free (3 Ways)?
Three effective methods enable you to quickly format an SSD disk to NTFS/FAT32/exFAT in Windows 10/8/7 for free. Format SSD from BIOS, secure erase SSD, clean SSD drive, etc. are involved.