Complete Guide: Synology Drive Sync Multiple Folders
- About Synology Drive
- Unable to Select Multiple Folders to Sync
- How to Sync Multiple Folders Using Synology Drive
- #1. Set Up a Synology Drive Server on the NAS
- #2. Download Synology Drive Client for Windows
- #3. Sync Multiple Folders Via Synology Drive Client
- Easier Way to Sync Multiple Folders to Synology NAS at Once
- To Sum Up
About Synology Drive
Synology Drive Synology Drive helps transform your NAS into a private cloud, allowing you to access and share files from anywhere using the mobile app, desktop client, web browser, or another Synology NAS. It ensures safe sharing with granular permission settings and SSL encryption, protecting your documents.
Synology Drive Client allows for cross-computer continuity, creating a sync task with multiple folders, and automatically synchronizing changes made to files on the computer when connected to the Synology NAS. It also protects data from ransomware attacks or accidental deletion with real-time or scheduled backups of important folders.
Unable to Select Multiple Folders to Sync
You're correct that the DSM 6.0 Help states you can select multiple folders when creating a sync task, but it seems you're unable to do so. This is likely due to the "Single selection mode" being enabled in the DSM 6.0 settings. To fix this, go to Control Panel > File Sharing > Sync, and toggle "Single selection mode" to off. This should allow you to select multiple folders when creating a sync task. Alternatively, you can also long-press on a folder to select it, and then hold the shift key while clicking on another folder to select multiple folders.
Synology Drive's inability to sync multiple folders at once is a frustrating issue for many users. Despite its claim to support syncing multiple folders, users are limited to creating separate sync tasks for each folder, which can be cumbersome and time-consuming.
This workaround is a great solution if you don't know other methods, and an article also provides an easier solution to sync multiple folders with Synology Drive simultaneously. Both ways will be introduced in detail below.
How to Sync Multiple Folders Using Synology Drive
To sync multiple folders using Synology Drive, you need to install the Synology Drive Server package on your Synology NAS, which will enable strong productivity and collaboration capabilities. Then, download the Synology Drive Client for Windows to sync two or more folders to your Synology NAS.
#1. Set Up a Synology Drive Server on the NAS
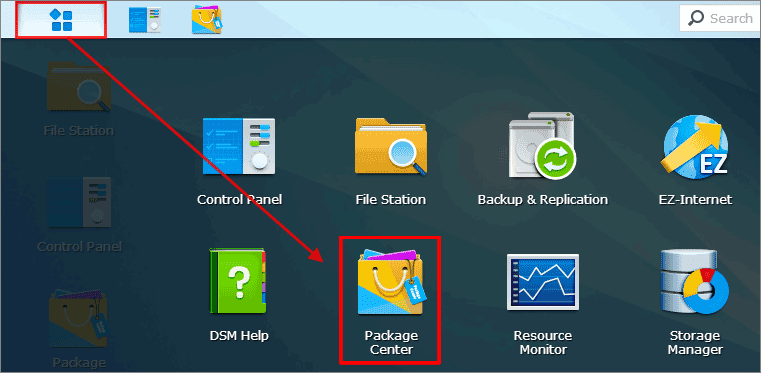
- To use Synology Drive, install the Synology Drive Server package on the NAS from the Package Center app.
- The Synology Drive Server package, along with all its dependencies, needs to be downloaded and installed on the NAS one by one, which may take some time to complete.

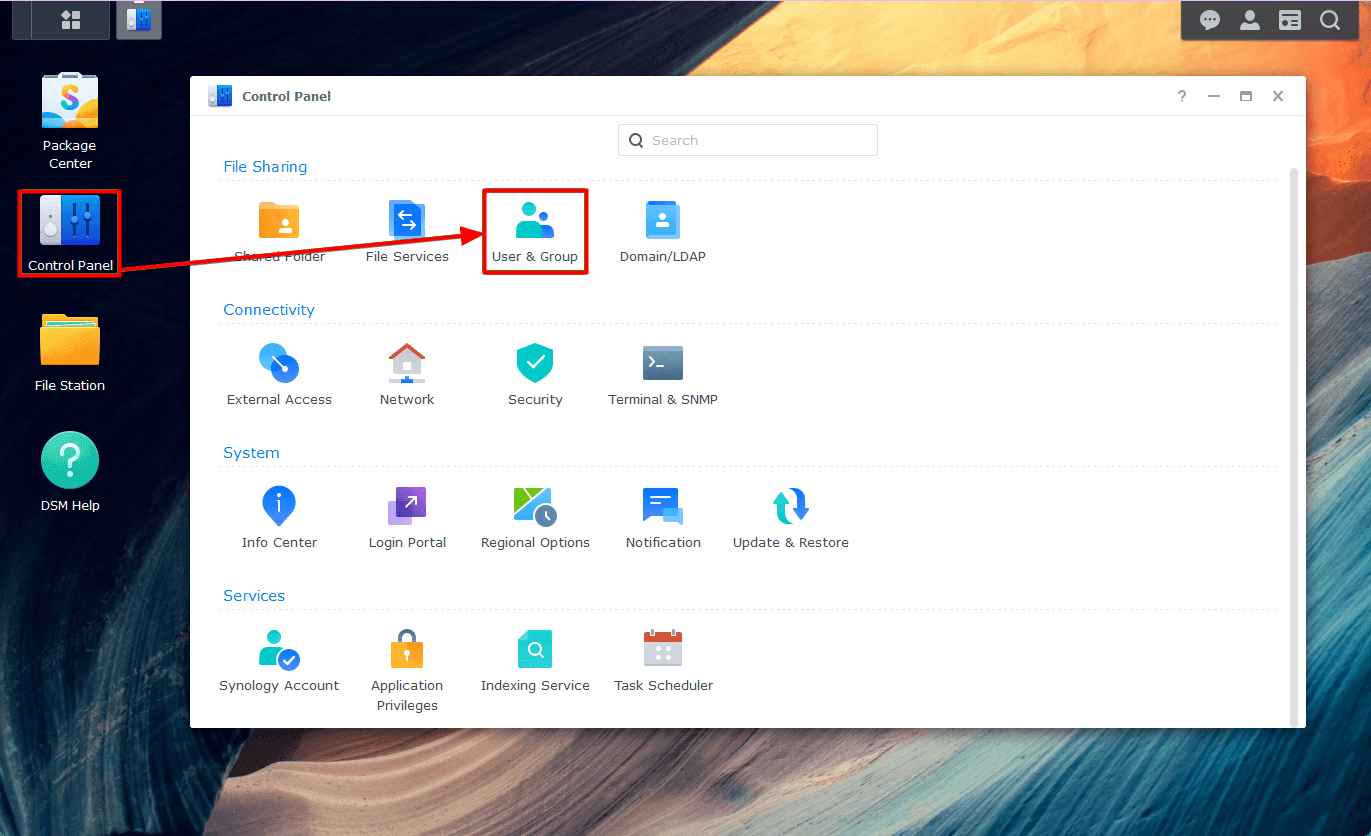
- To enable the user home service on a Synology NAS, navigate to the Control Panel, then select User & Group, and make sure the user home service is enabled for each user who wants to store files and access their home directories on Synology Drive.
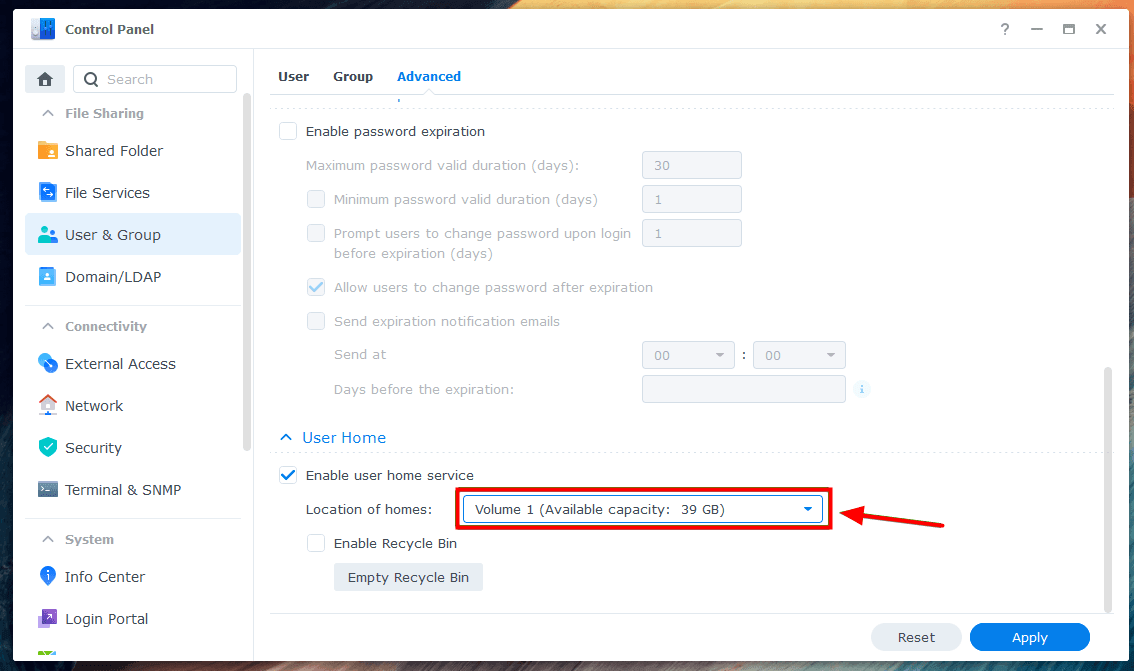
- To enable the user home service, go to the User Home section of the Advanced tab and check the box next to Enable user home service.

- Select the desired volume from the "Location of homes" drop-down menu and click "Apply" to store Synology Drive user files.
#2. Download Synology Drive Client for Windows
After installing Synology Drive Server on your NAS and enabling user home service, you can access Synology Drive from any web browser. To sync multiple folders between your computer and Synology Drive, or back up files from your computer to Synology Drive, you'll need to install the Synology Drive Client app on your computer.
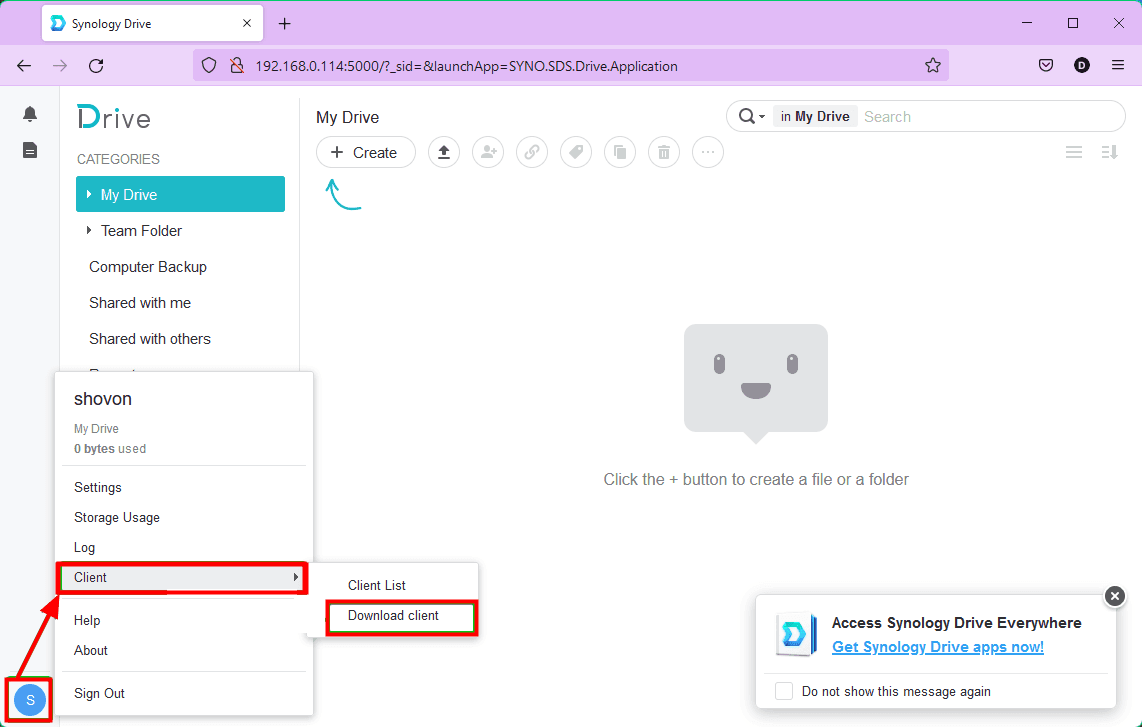
- To access the Synology Drive web app, click on the Synology Drive app from the DSM web interface, which will open the Synology Drive web app in a new browser tab.

- To access the Synology Drive client, log in to your Synology Drive web application and navigate to the "Client" section. From there, click on "Download client" to obtain the Synology Drive Client installer. Follow the prompt to download the client.
#3. Sync Multiple Folders Via Synology Drive Client
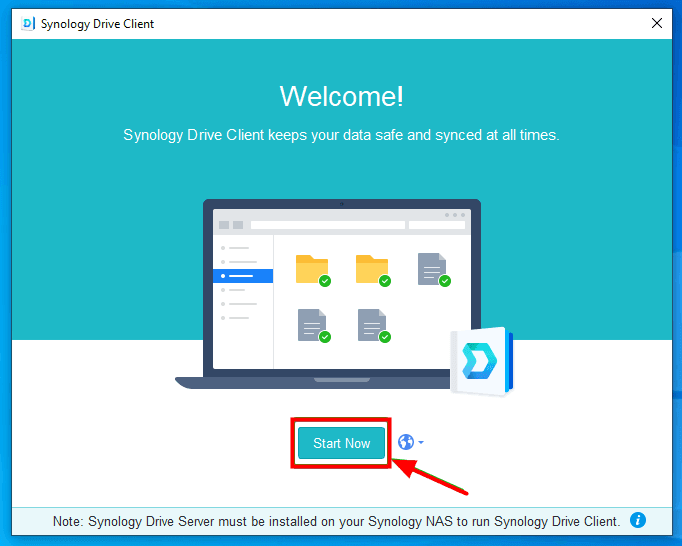
- After the installation is complete, open Synology Drive Client and click Start Now.
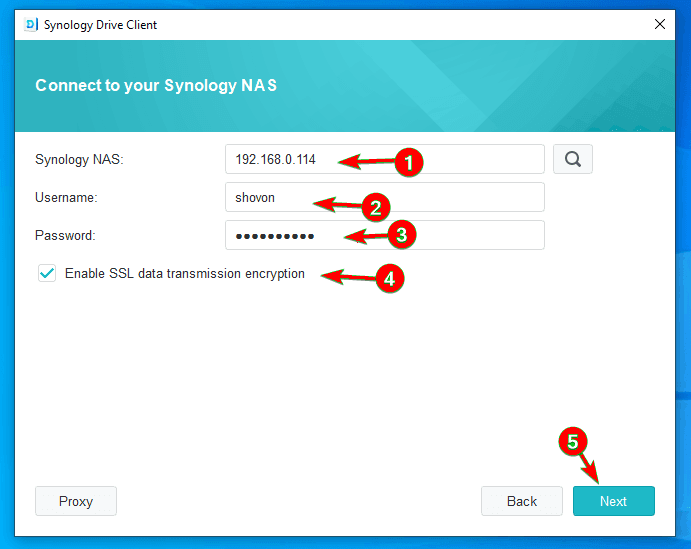
- To access the Synology NAS, enter your username and password, then select the option to enable SSL encryption for secure data transmission. Click "Next" to proceed.
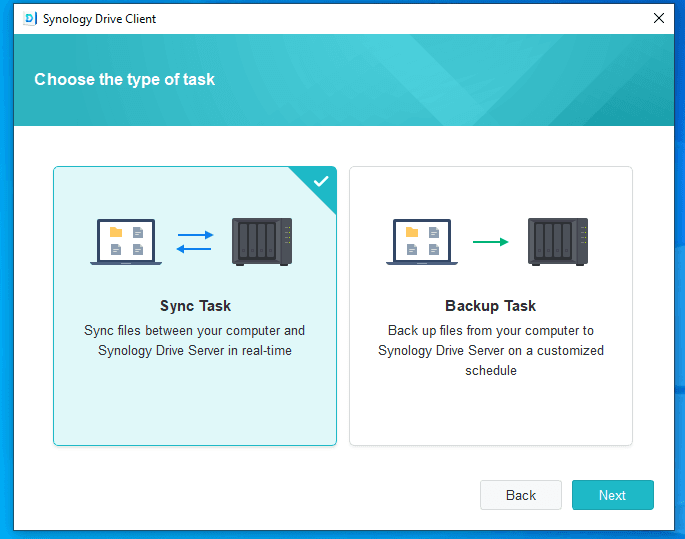
- Synology Drive Client will then ask whether you want to set up a Sync Task or a Backup Task, and you should choose Sync Task to sync multiple folders to Synology.
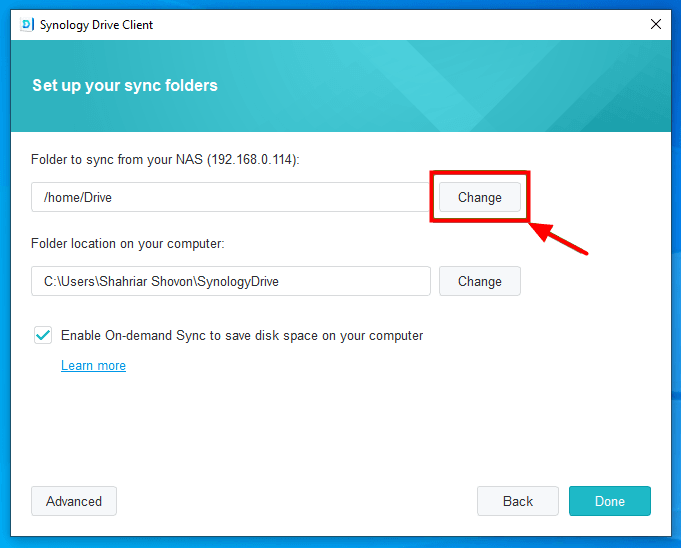
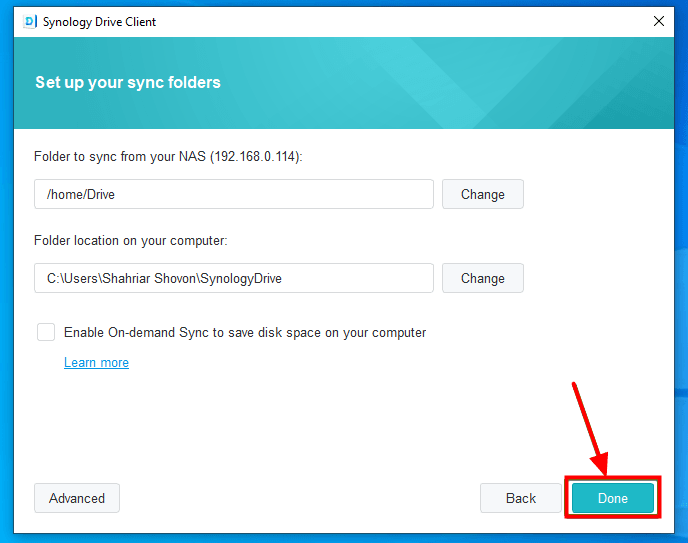
- To set up your sync folders, you can change the default folder on your Synology Drive from /home/Drive to a different folder, or change the folder on your computer that will be synced with your Synology Drive folder, which is C:\Users\\SynologyDrive by default, by clicking on the "Change" button.
- To sync a folder, select it from the list of available folders, which includes those on your Synology Drive and your computer. If you want to sync a new folder, create one in your Synology Drive by clicking the new folder icon.
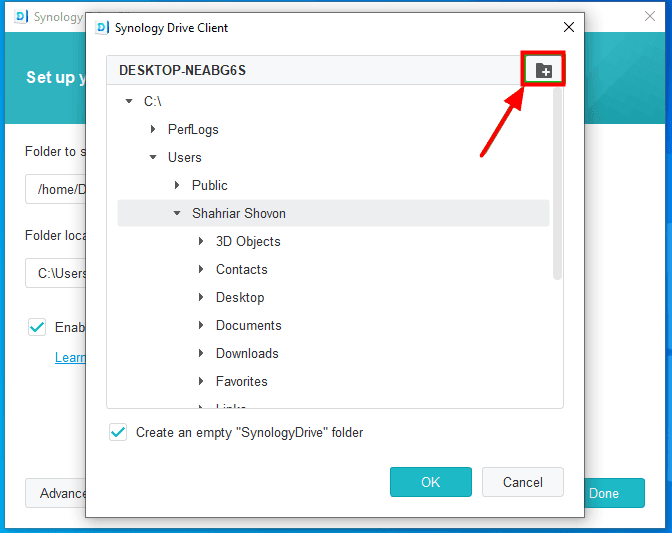
TipWhen selecting a folder location, an empty "SynologyDrive" folder will be created in the chosen computer folder, syncing Synology Drive files with it. To prevent this, uncheck the "Create an empty 'SynologyDrive' folder" checkbox, syncing the selected folder with Synology Drive instead.
- Once you've chosen the folder to sync, you can toggle the "Enable On-demand Sync to save disk space on your computer" checkbox to enable or disable on-demand syncing.
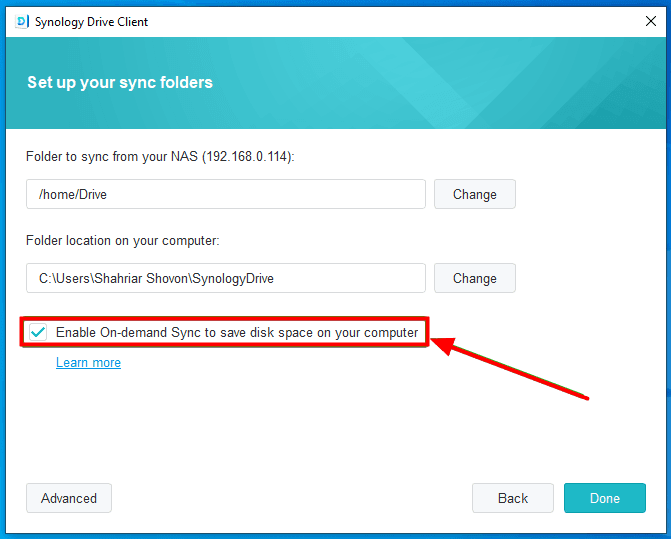
TipOn-demand sync will only download files from the Synology Drive Server to your computer when you access them, saving disk space by not downloading unused files.
- Click on "Advanced" in the lower left corner of the program to configure advanced sync settings.
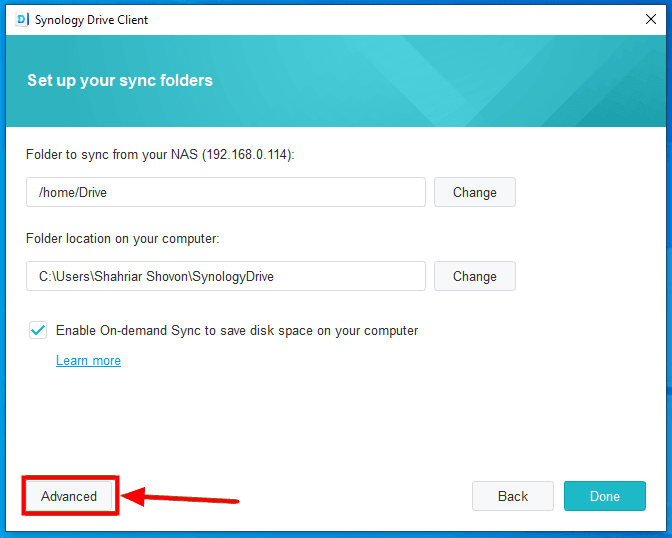
- The sync settings can be customized by adjusting the settings in the three tabs: Folder, File Filter, and Sync Mode, and then clicking Apply to confirm.
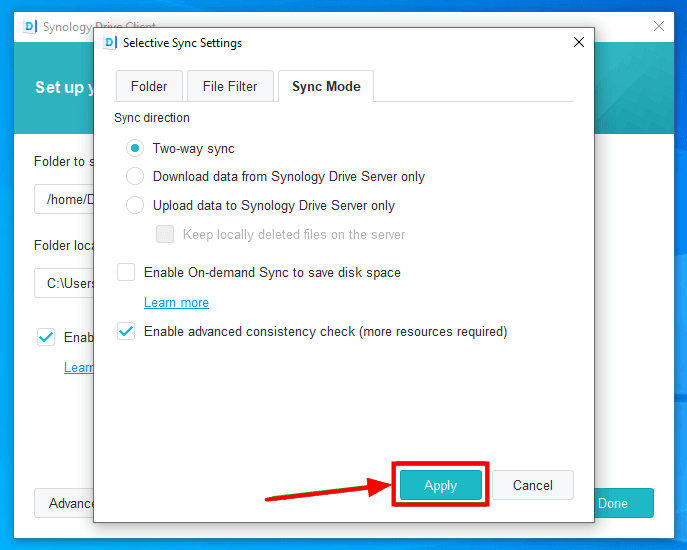
Tips✍: Sync Modes
✡ File sync: Synology bidirectional sync allows new files from your computer to be synced with Synology Drive, and also syncs new files from Synology Drive with your computer.
✡ Download data from Synology Drive Server only: Only files from Synology Drive are synced with the computer, while new files from the computer are not synced with Synology Drive.
✡ Upload data to Synology Drive Server only: Synology Drive only syncs files from your computer, not from the Synology Drive itself.
- Once you're done configuring the Sync Task, click on Done to start syncing folders on Synology.
- To sync multiple folders on Synology Drive, click on "Create" from the "Sync Tasks" section, which will generate a new Sync Task.

Creating multiple tasks to sync multiple folders with a Synology NAS can be a viable solution, but it may also introduce issues you'd rather avoid.
- The process of creating a sync task is a manual process, which can be time-consuming and labor-intensive.
- The "Folder" button is greyed out, making it impossible to create or select a new folder on the NAS. This is likely due to a permissions issue or a configuration problem.
To resolve sync issues between multiple folders, consider using alternative software that can sync multiple folders simultaneously and automatically.
Easier Way to Sync Multiple Folders to Synology NAS at Once
Qiling Disk Master Professional Cobian Backup is a powerful and reliable file sync software that allows you to sync multiple folders simultaneously and run automatically. The process is easy to complete, requiring just a few clicks, and is made simple by the software's intuitive graphical user interface.
◑ It allows you to add multiple folders at once to save time and energy by synchronizing them.
◑ The sync feature offers flexibility with four sync methods to cater to various needs: File Sync, File Sync, File Sync, and File sync. This allows users to choose the best option for their specific requirements.
◑ This software allows you to sync folders not only to Synology NAS, but also to other NAS brands like Buffalo, QNAP, and Netgear, as well as external hard drives, flash drives, cloud storage, and network drives.
◑ Synology NAS allows for NAS to NAS sync ability, enabling easy folder syncing between Synology NAS devices.
◑ It's designed for all Windows PCs, including Windows XP, Vista, 7, 8, 8.1, 10, and 11, both 32-bit and 64-bit versions.
To sync two folders to Synology NAS with File Sync, you can use the Qiling Disk Master Professional. You can download and install a 30-day free trial of the software on your computer to try it out.
The software's backup and sync feature has a 30-day time limit, after which you'll need to upgrade to the full version for continuous data protection and seamless disk upgrades. However, you can currently take advantage of a 10% discount to make the upgrade.
Step 1. Launch Qiling Disk Master, click Backup, then select File Sync.

Tip: You can also choose from other sync methods if you want to sync files on a regular basis, avoid unwanted changes in the destination directory, or sync changes on both sides.
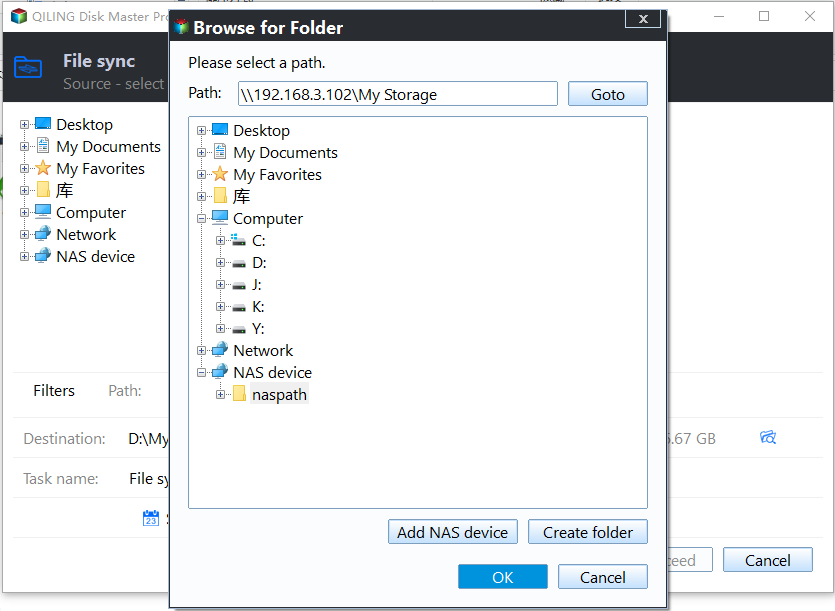
Step 2. Click on the Task Name to give it a name. Then click on the + Folder button to select the folder you want to sync.

Step 3. After adding the first folder, you can still add one or more folders by clicking the browse button. Then, click the inverted triangle symbol in the second box to select Synology NAS, add the network path and select the shared folder to store all the desired folders for syncing.
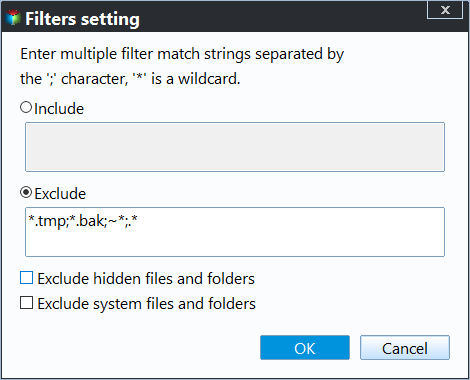
Step 4. To configure the filters, click on the "Filters" button in the lower left corner of the screen. This will allow you to select which files to include or exclude from the source directory, and other options.
Step 5. To automatically sync two folders to a Synology NAS once changes occur to the source folder, click the "Proceed" button. This will initiate the synchronization process.
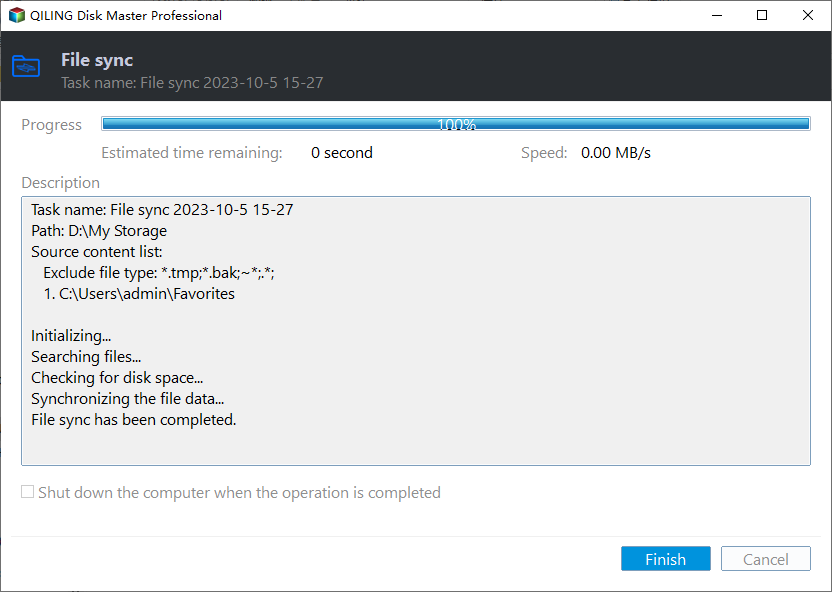
When performing real-When syncing files for the first time, the program will synchronize all files and folders to the Synology NAS. After the initial sync, any subsequent changes will be immediately synced to the destination, ensuring that the files and folders are always up-to-date.
✨ Helpful features you may need
👉 To copy data from one hard drive to another, you can use a disk cloning feature that not only transfers personal data but also clones the operating system, system files, and installed programs.
To Sum Up
Synology Drive allows syncing multiple folders on your computer, but only one folder can be added to a sync task at a time. This contrasts with Qiling's File Sync function, which enables selecting and syncing multiple folders simultaneously, making it a more convenient option.
Qiling Disk Master enables you to perform file sync, file sync, and two-way folder synchronization with just a few clicks. It's especially useful for Synology NAS users, as it allows you to protect and transfer files, making it the best choice for this purpose.
Related Articles
- Synology Sync Folders to External Drive with 4 Steps
This article provides you with two helpful ways to do Synology sync folder to external hard drive in Windows 11, 10, 8, 7. The second way is easier. - Automatically Mirror Folders to Synology NAS | 2 Simple Ways
In this article, you will get 2 simple ways to perform Synology mirror folder automatically. For DSM platform users, try file sync software - Qiling Disk Master. - Fixed: Dropbox Smart Sync Not Working | 6 Solutions
You will find the 6 solutions to fix Dropbox Smart Sync not working issues, like Dropbox Smart Sync online only not working, etc. Repair Dropbox Smart Sync according to the instructions listed below. - Top 3 Free File Transfer Software for PC for Windows 10, 8, 7
In this post, you will get multiple free file transfer software for PC to transfer files to new computers easily in Windows 11, 10, 8, 7. And the thorough usage instructions are in each method. You can check the comparison table and choose one that suits you best! - How to Use Dropbox to Mirror Folders in Windows 10/8/7?
Want to mirror folders to Dropbox for data safety and easy access from different devices? Read this article thoroughly to learn two easy ways. - Fixed: Dropbox Smart Sync Not Working | 6 Solutions
You will find the 6 solutions to fix Dropbox Smart Sync not working issues, like Dropbox Smart Sync online only not working, etc. Repair Dropbox Smart Sync according to the instructions listed below.